
Written byStevenUpdated on Jan 01, 1970
How to Completely Uninstall Photoshop on Windows or macOS?
Approved byGerhard Chou
Before we start: With the free software Donemax AppRemover, you can easily and completely uninstall Photoshop and related data on both Windows and Mac. What's more, you can also use Donemax DMcleaner for Mac to deeply clear junk data on Mac.
PAGE CONTENT:
Adobe Photoshop is a powerful and widely used image editing tool across creative industries. Whether you're a graphic designer, photographer, or just a casual user, you've likely had Photoshop installed at some point. However, there may come a time when you need to uninstall Photoshop—maybe to free up disk space, troubleshoot persistent software issues, or switch to an alternative application.
Uninstalling Photoshop isn't just about dragging it to the trash or clicking "Uninstall." Adobe apps often leave behind a trail of residual files, preferences, caches, and even hidden data. In this article, we will guide you through a complete uninstallation for Photoshop on both Windows and macOS, ensuring nothing is left behind.
Why You Might Want to Completely Uninstall Photoshop
Before diving into the technical steps, here are a few common reasons users choose to uninstall Photoshop entirely:
- Switching to a different photo editing tool
- Freeing up system storage
- Fixing corrupted installation issues
- Cleaning up an old system
- Resolving performance issues
Now, let's break it down by operating system.
Part 1: Completely Uninstall Photoshop on Windows
Method 1: Using Adobe Creative Cloud Desktop App
The safest and most efficient way to uninstall Photoshop is through the Adobe Creative Cloud app, which manages all Adobe installations.
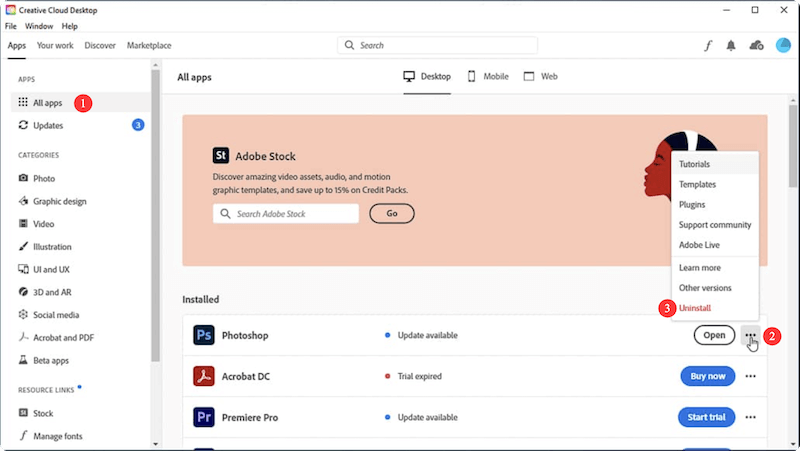
- Open the Adobe Creative Cloud desktop application.
- Go to the "Apps" tab and locate Photoshop under "Installed Apps."
- Click on the three-dot menu (•••) next to Photoshop.
- Select Uninstall from the drop-down menu.
- When prompted, check the box that says "Remove Preferences" to delete personal settings and preferences (optional but recommended).
- Click Uninstall.
This method removes the core application and many associated files, but it doesn't always wipe everything.
Method 2: Using Windows Settings (Control Panel)
If for any reason Creative Cloud isn't functioning properly, you can uninstall Photoshop using Windows' built-in features.
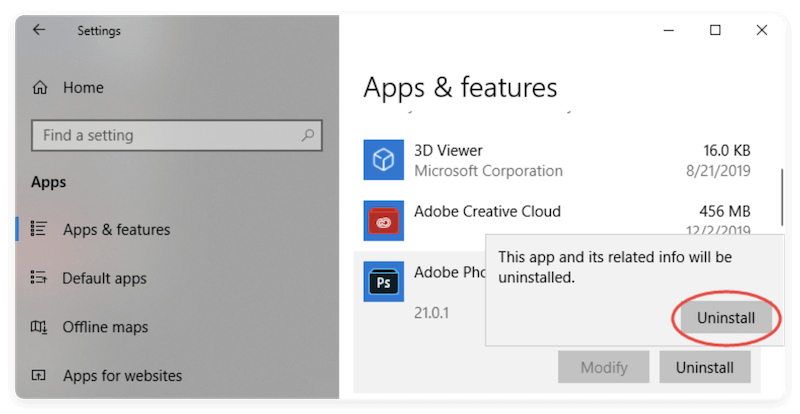
- In order to access Settings, press Windows + I.
- Select Apps & Features or Apps > Installed Apps.
- To find Adobe Photoshop, scroll down.
- Select Uninstall after clicking on it.
- Follow the instructions on the screen to finish the process.
Delete Remaining Files and Folders
After uninstalling Adobe Photoshop using either the Creative Cloud desktop app or Windows Settings, the core program files may be gone, but Photoshop often leaves behind several gigabytes of residual data. These leftovers can include configuration files, cache data, licensing logs, and plugin remnants. Over time, these unnecessary files can clutter your system, take up valuable space, or interfere with future Adobe software installations.
To truly uninstall Photoshop, you'll want to manually remove all related files and folders. Here's a detailed guide to finding and deleting these leftovers.
Step-by-Step Cleanup Instructions:
1. Clear AppData and ProgramData Folders
The AppData and ProgramData folders contain many Photoshop-specific settings, user data, and temporary files.
Access AppData:
- To launch the Run dialog box, press Windows + R.
- Type:
%appdata%
and press Enter. This opens:
C:\Users\[YourUserName]\AppData\Roaming
- Locate the Adobe folder and delete it only if you're sure no other Adobe products are in use.
- Go to:
C:\Users\[YourUserName]\AppData\Local
- Delete the following folders:
- Adobe
- Any folders named Photoshop or com.adobe.photoshop.*
Access ProgramData:
- Open File Explorer.
- Type in the address bar:
C:\ProgramData\
- Locate and delete the Adobe folder or its relevant subfolders like:
- C:\ProgramData\Adobe\SLStore
- C:\ProgramData\Adobe\Adobe Photoshop
📍 Note: If you use other Adobe apps (e.g., Illustrator, Premiere Pro), avoid deleting shared folders such as SLStore unless you're uninstalling all Adobe software.
2. Delete Adobe Installation Directories
Even after uninstalling, Adobe may leave behind installation directories.
- Open File Explorer.
- Check and remove the directories if they exist:
You may also find:
C:\Users\[YourUserName]\Documents\Adobe\
This folder often contains Adobe presets, brushes, or saved workspaces—review it before deleting to avoid removing anything important.
3. Use Windows Search to Hunt Residual Files
To ensure nothing is left:
- Open File Explorer and use the Search bar.
- Search for terms like:
- Photoshop
- Adobe
- .psp, .psw, or .ps* (common Photoshop file formats for settings)
Sort the results by location and carefully inspect before deleting.
📍 Tip: Use the Windows search function to look for folders or files named Photoshop or Adobe and review them before deletion. Be careful not to remove files linked to other Adobe apps if you're still using them.
4. Remove Temp Files (Optional but Recommended)
Photoshop stores a lot of temporary data that may persist even after uninstallation.
- Press Windows + R, type:
%temp%
and press Enter.
- In the temp folder, sort by Date Modified.
- Delete any Adobe-related temp files or folders.
5. Use a Disk Cleanup Utility
To wrap up:
- Type "Disk Cleanup" into the Start menu.
- Launch the tool, select your system drive (usually C:), and check boxes for:
- Temporary files
- System-created Windows error reporting
- Downloaded Program Files
- Click OK to run the cleanup.
📍 Important Tips:
- Create a system restore point before deleting registry entries or core folders.
- Back up your Adobe preferences if you plan to reinstall later.
- Avoid deleting shared Adobe folders if you're still using other Adobe software.
- If unsure, move files to a temporary folder instead of deleting immediately.
Clean Registry Entries (Advanced Users Only)
Cleaning the registry is optional and should only be done if you're comfortable with the Windows Registry Editor. A mistake here could affect your entire system.
- Press Windows + R, type regedit, and press Enter.
- In the Registry Editor, navigate to:
- HKEY_CURRENT_USER\Software\Adobe\Photoshop
- HKEY_LOCAL_MACHINE\SOFTWARE\Adobe\Photoshop
- Right-click and delete the Photoshop registry keys.
- Close the Registry Editor and restart your system.
📍 Caution: Back up your registry before making changes by going to File > Export and saving a copy.
Part 2: Completely Uninstall Photoshop on macOS
Method 1: Using Adobe Creative Cloud Desktop App
Just like Windows, the Creative Cloud app is the cleanest way to uninstall Photoshop on a Mac.
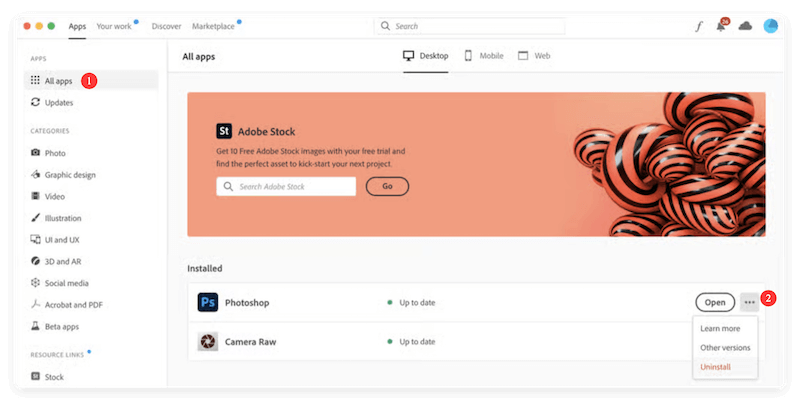
- Open the Adobe Creative Cloud application.
- Click on the Apps tab.
- Find Photoshop in the list of installed applications.
- Click Uninstall.
- Choose the option to Remove Preferences if prompted.
- Let the process complete.
Method 2: Manual Uninstallation via Finder
If you can't access Creative Cloud or Photoshop doesn't appear in the app, you can manually remove it.
- Open Finder.
- Go to the Applications folder.
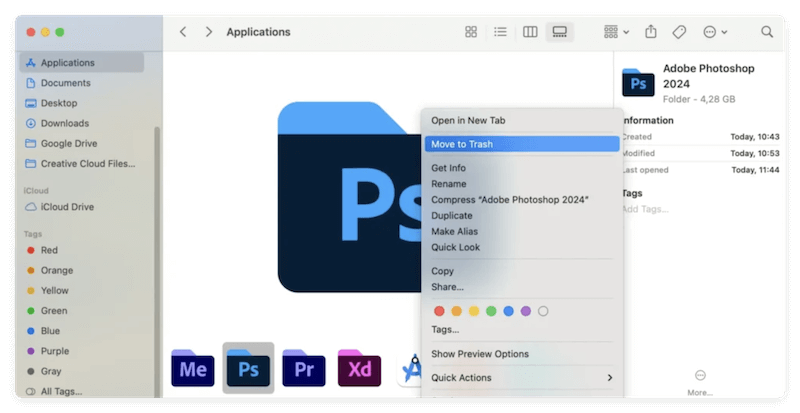
- Locate the Adobe Photoshop app.
- Drag it to the Trash or right-click > Move to Trash.
- Empty the Trash.
Delete Photoshop Residual Files
macOS apps often store files in Library directories. You'll need to manually search and delete these.
- Open Finder.
- To get the Go to Folder dialog, use Command + Shift + G.
- Enter the following paths one by one and delete related files/folders:
- ~/Library/Application Support/Adobe/
- ~/Library/Preferences/com.adobe.Photoshop.plist
- ~/Library/Caches/Adobe Photoshop
- ~/Library/Saved Application State/com.adobe.Photoshop.savedState
- /Library/Application Support/Adobe/ (System-wide library, may need admin rights)
- /Library/Preferences/
📍 Important: Be cautious not to remove files associated with other Adobe programs you still use.
Optional: Use Third-Party Uninstaller Tools
If you want to make sure every trace of Photoshop is gone with minimal effort, third-party tools can help.
For Windows:
- Donemax AppRemover
- Revo Uninstaller
- IObit Uninstaller
These tools scan for leftover files, folders, and registry entries after uninstalling applications.
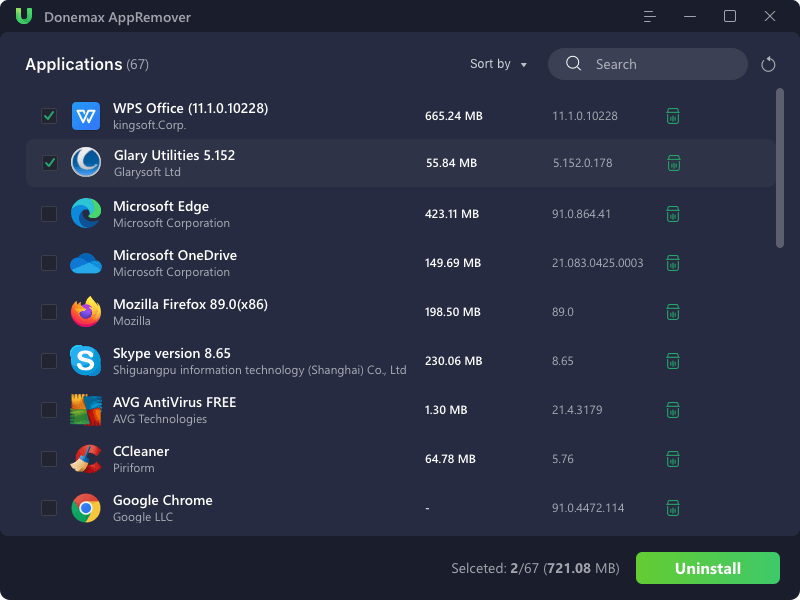
Here we will show you how to remove a program with the software Donemax AppRemover:
- Run the software and select the programs you want to remove, such as Photoshop. Then click the Uninstall button.
![completely uninstall Photoshop]()
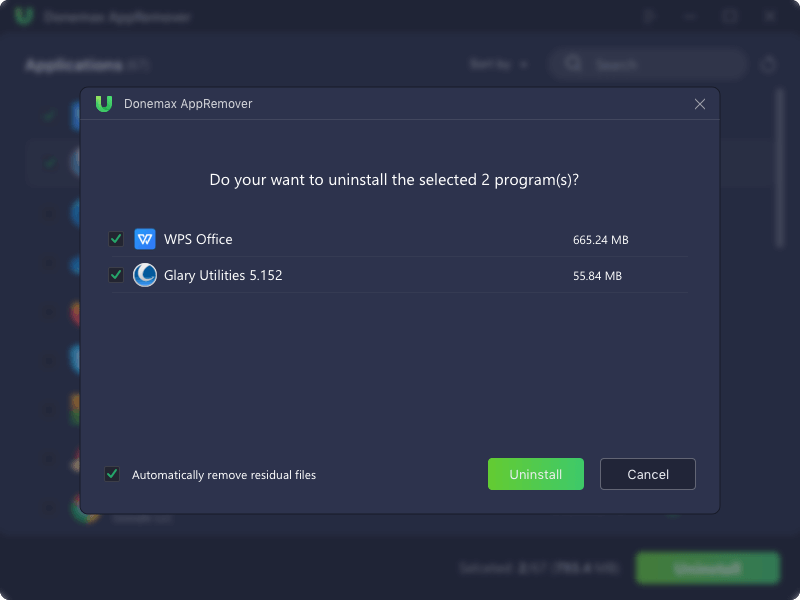
- There will be a popup window and show the programs you selected to remove. Also, ensure to tick "Automatically remove residual files" option. Click Uninstall button to start.
![completely uninstall Photoshop]()
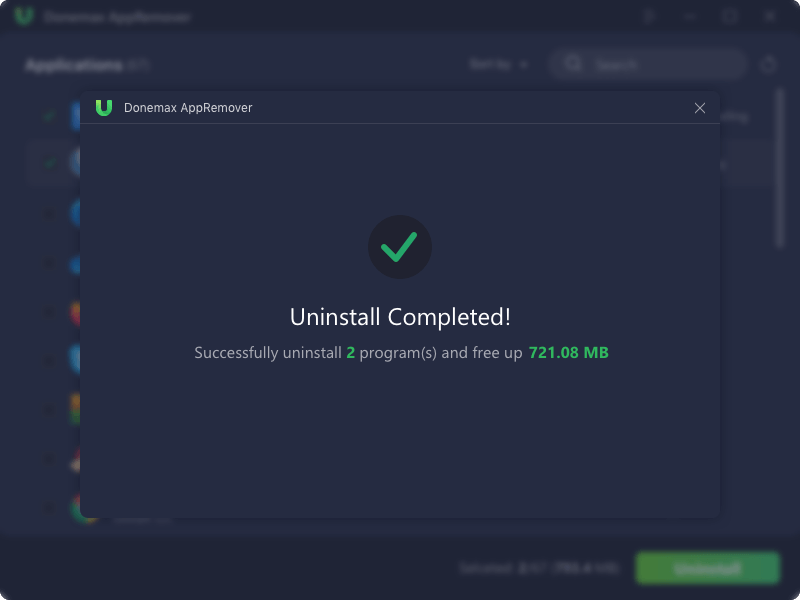
- It will take some time to completely uninstall the selected program(s) and related leftover data.
![completely uninstall Photoshop]()
For macOS:
- AppCleaner (Free and lightweight)
- DMcleaner (Paid, more comprehensive)
These tools automatically find and delete application remnants that would be hard to locate manually.
Reinstalling Photoshop (Optional Step)
If your goal is to perform a clean reinstall to fix issues, follow these tips:
- Make sure all old files, preferences, and registry entries are removed as described above.
- Download the Adobe Creative Cloud desktop app from the official website.
- Sign in and install Photoshop as a fresh copy.
Starting from scratch can often resolve long-standing bugs, crashes, and configuration conflicts.
Conclusion
Completely uninstalling Photoshop on Windows or macOS involves more than just clicking "Uninstall" or dragging the app to the trash. Leftover files can continue to consume disk space, conflict with future installations, or even cause performance issues.
By following the steps outlined in this guide—whether using Creative Cloud, doing it manually, or with the help of uninstaller tools—you can ensure a clean removal of Adobe Photoshop from your system. This not only helps in reclaiming valuable storage but also provides a clean slate for any future installations or transitions to alternative software.
Key Takeaways:
- Use Adobe Creative Cloud for the cleanest uninstall.
- Manually delete folders from AppData on Windows or Library on macOS.
- Registry cleaning (Windows) and .plist removal (macOS) ensure no residual preferences remain.
- Use tools like Donemax AppRemover or DMcleaner for convenience.
- Reinstall from scratch if you're troubleshooting software issues.
Whether you're done with Photoshop or just need a fresh start, now you know exactly how to remove every trace of it—completely and cleanly.

Donemax Free AppRemover
Uninstall unwanted applications and delete all leftovers by only 1-click. 100% safe and free uninstaller for Windows and Mac.
Related Articles
- May 12, 2025How to Upgrade from Windows 10 to Windows 11?
- Nov 11, 2024How to Change Startup Disk on Apple Silicon Mac?
- Feb 03, 2026Windows 11 Data Recovery: Top 5 Proven Methods
- Nov 20, 2024How to Clean Install macOS Catalina?
- Jan 30, 2026How to Create a bootable USB installer for macOS?
- Jul 02, 2025Format 32GB/64GB/128GB/256GB SD Card to ExFAT/FAT32

Contributing Writer
Steven
Steven has been a senior writer & editor of Donemax software since 2020. He's a super nerd and can't imagine the life without a computer. Over 6 years of experience of writing technical solutions and software tesing, he is passionate about providing solutions and tips for Windows and Mac users.

Editor in chief
Gerhard Chou
In order to effectively solve the problems for our customers, every article and troubleshooting solution published on our website has been strictly tested and practiced. Our editors love researching and using computers and testing software, and are willing to help computer users with their problems