
Written byChristinaUpdated on Aug 21, 2023
How to erase your Mac with Disk Utility & What to do if Disk Utility can't Erase a Drive?
Approved byGerhard Chou
Before we start: Disk Utility is a built-in tool that allows you to easily erase disk and partition on your Mac, but the deleted files can be recoverable. To permanently erase files, you can try Donemax Data Eraser.
PAGE CONTENT:
How to erase your Mac by using disk utility?
You can erase and reformat storage devices for use with your Mac using Disk Utility. When you erase a storage device, you delete everything on it. It’s especially useful to erase your Mac hard disk or USB external hard drive when you want to get rid of unwanted files or sell, donate or give away the old mac or storage devices. You can also change the file system if needed by erasing the Mac disk with Disk Utility.
✍️ Tip: Erasing a disk with Disk Utility is irreversible and will delete all data on the disk, please make sure to back up any important data before proceeding and select the correct disk or volume to erase.
Steps to erase your Mac by using disk utility
Step 1. Open Disk Utility by going to "Applications" > "Utilities" > "Disk Utility."
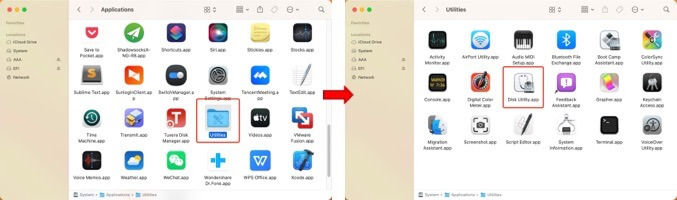
Step 2. Select the disk or volume to erase on your Mac from the sidebar on the left-hand side of the Disk Utility window. All the disks and volumes connected to your Mac will be listed once you launch Disk Utility.
Step 3. Click on the "Erase" tab at the top of the Disk Utility window.

Step 4. Configure the requested details after clicking the Erase option in the toolbar:
- Name: XXX
- Format: APFS or Mac OS Extended (Journaled) is recommended by Disk Utility.
Mac OS Extended (Journaled): It's the default file system of macOS for most Mac users. Compatible with older versions of macOS, it supports large file sizes.
APFS (Apple File System): A default file system for macOS High Sierra and later and optimized for SSDs with better performance and data protection features.
ExFAT: This is a file system compatible with both macOS and Windows OS, making it a good option if you plan to use the disk or partition with both operating systems.
MS-DOS (FAT): This is a file system for both macOS and Windows, but it has limitations in terms of file size and compatibility with macOS features.

Step 5. Click on the "Erase" Button. A confirmation prompt will appear asking if you are sure you want to erase the disk or partition. Click on "Erase" again to confirm.
Step 6. Disk Utility will start erasing the Mac disk according to the options you selected. After the erase process is complete, you can quit Disk Utility.
The time it takes to erase your Mac disk with Disk Utility depends on how much data is on the disk or volume and the erase options you chose. Once the process is complete, you will see a notification indicating that the erase was successful.
What should I do if Disk Utility is unable to erase the hard drive on my Mac?
However, you may be unable to erase a disk on your Mac using Disk Utility for a variety of reasons. This article will go over various methods for erasing Mac hard drives if the Erase button turns gray. It also mentions a data eraser software for Mac that can help you permanently erase data from Mac hard drives to prevent the deleted data to be recovered by a data recovery software or service.
When the Erase button on your Mac turns gray, you cannot erase or format the hard drive. In the case, use the following methods to solve the "Disk Utility Cannot Erase Mac Hard Drive" problem:
Method 1: Erase the Mac hard drive by turning on "Show All Devices."
Instead of the entire hard drive, the Disk Utility app on Mac displays the partitions or volumes on your system. Volumes or partitions are distinct sections of the same parent hard drive that were created to facilitate organized data storage. Follow the steps below to view and erase Mac's hard drive:
Step 1: Open Disk Utility by going to Finder > Application from the Sidebar > Utilities > Disk Utility app.
Step 2: On the top left, select View and then Show All Devices.
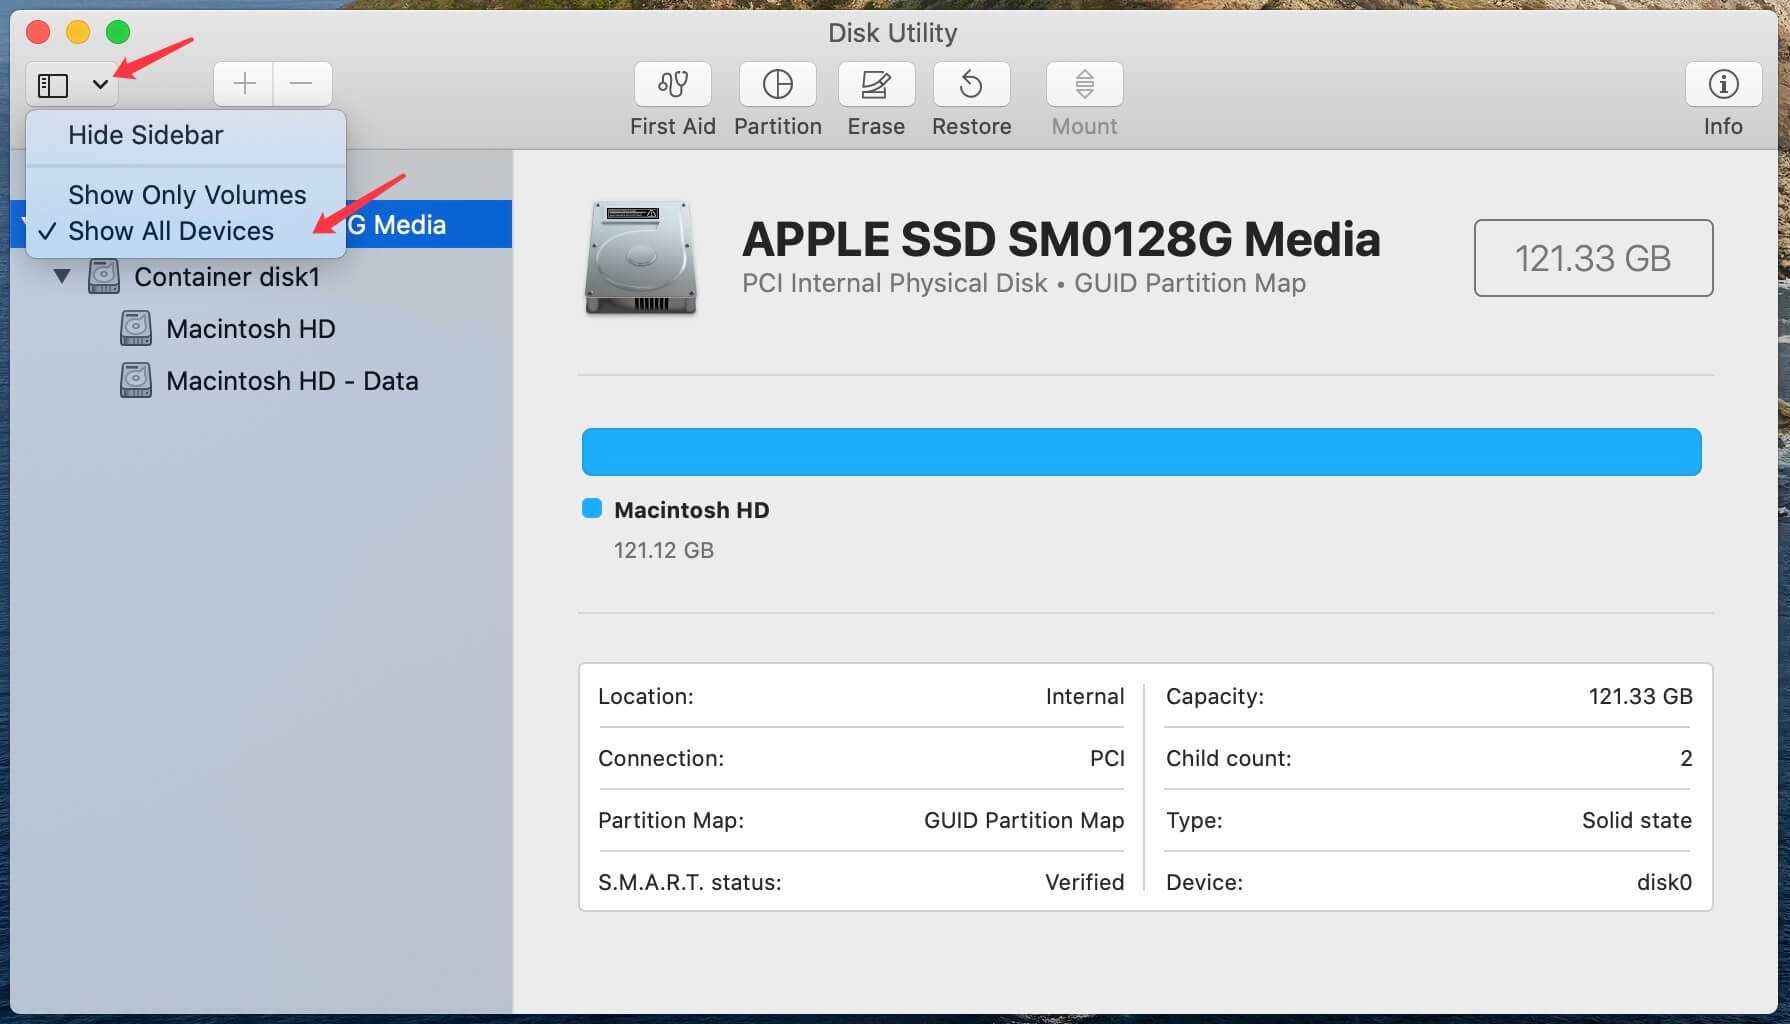
Step 3: Select the parent folder of the drive you want to erase from the list of drives displayed in the Sidebar.
Step 4: Press the Erase button.
✎ Tip: erasing the entire hard drive deletes all data in the drive's folders and subfolders. Try Donemax Data Recovery for Mac in the event of an accidental data loss or wrong operation.
Method 2: Repair Drive Using First Aid Before Erasing
Mac systems include a method for dealing with hard drive glitches. The First Aid option in Disk Utility can repair problems with the hard drive such as corrupt files, slower performance, and so on. First Aid scans the hard drive for existing errors and notifies you if any of the issues discovered cannot be repaired. Here's how to repair and erase your Mac hard drive:
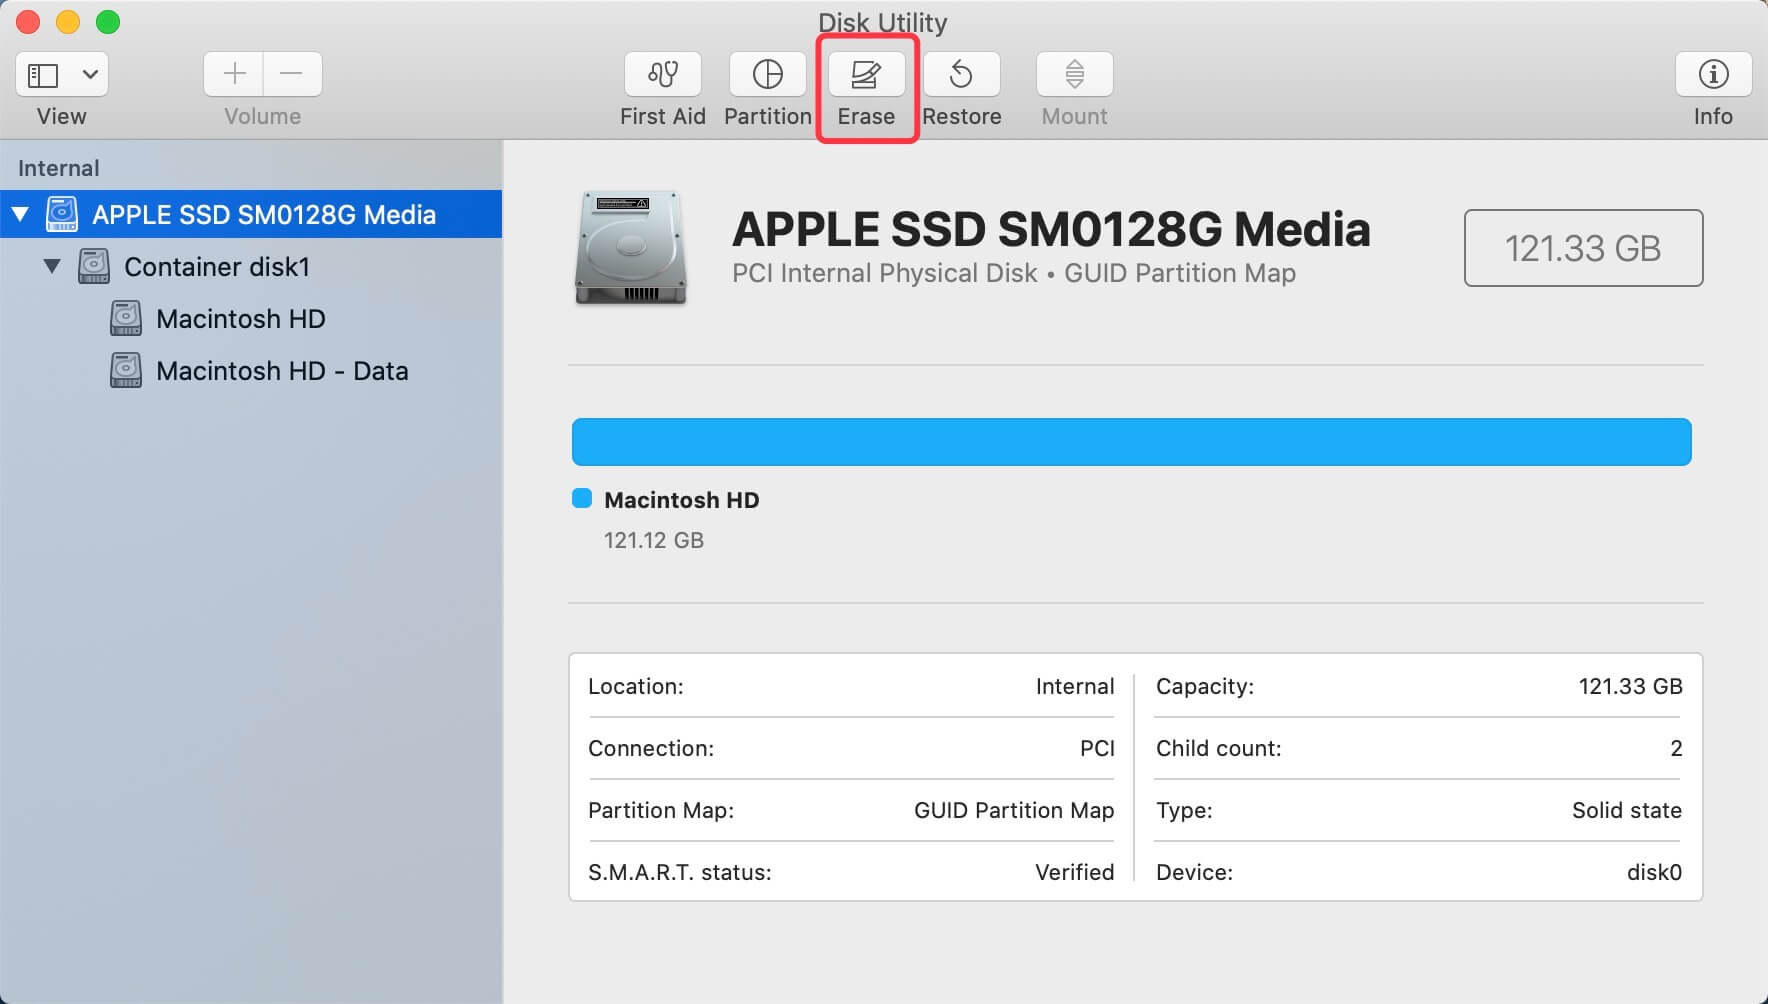
Step 1: From the Application folder, run Disk Utility.
Step 2: Choose the drive you want to erase.
Step 3: At the top of the Disk Utility window, click the First Aid tab.
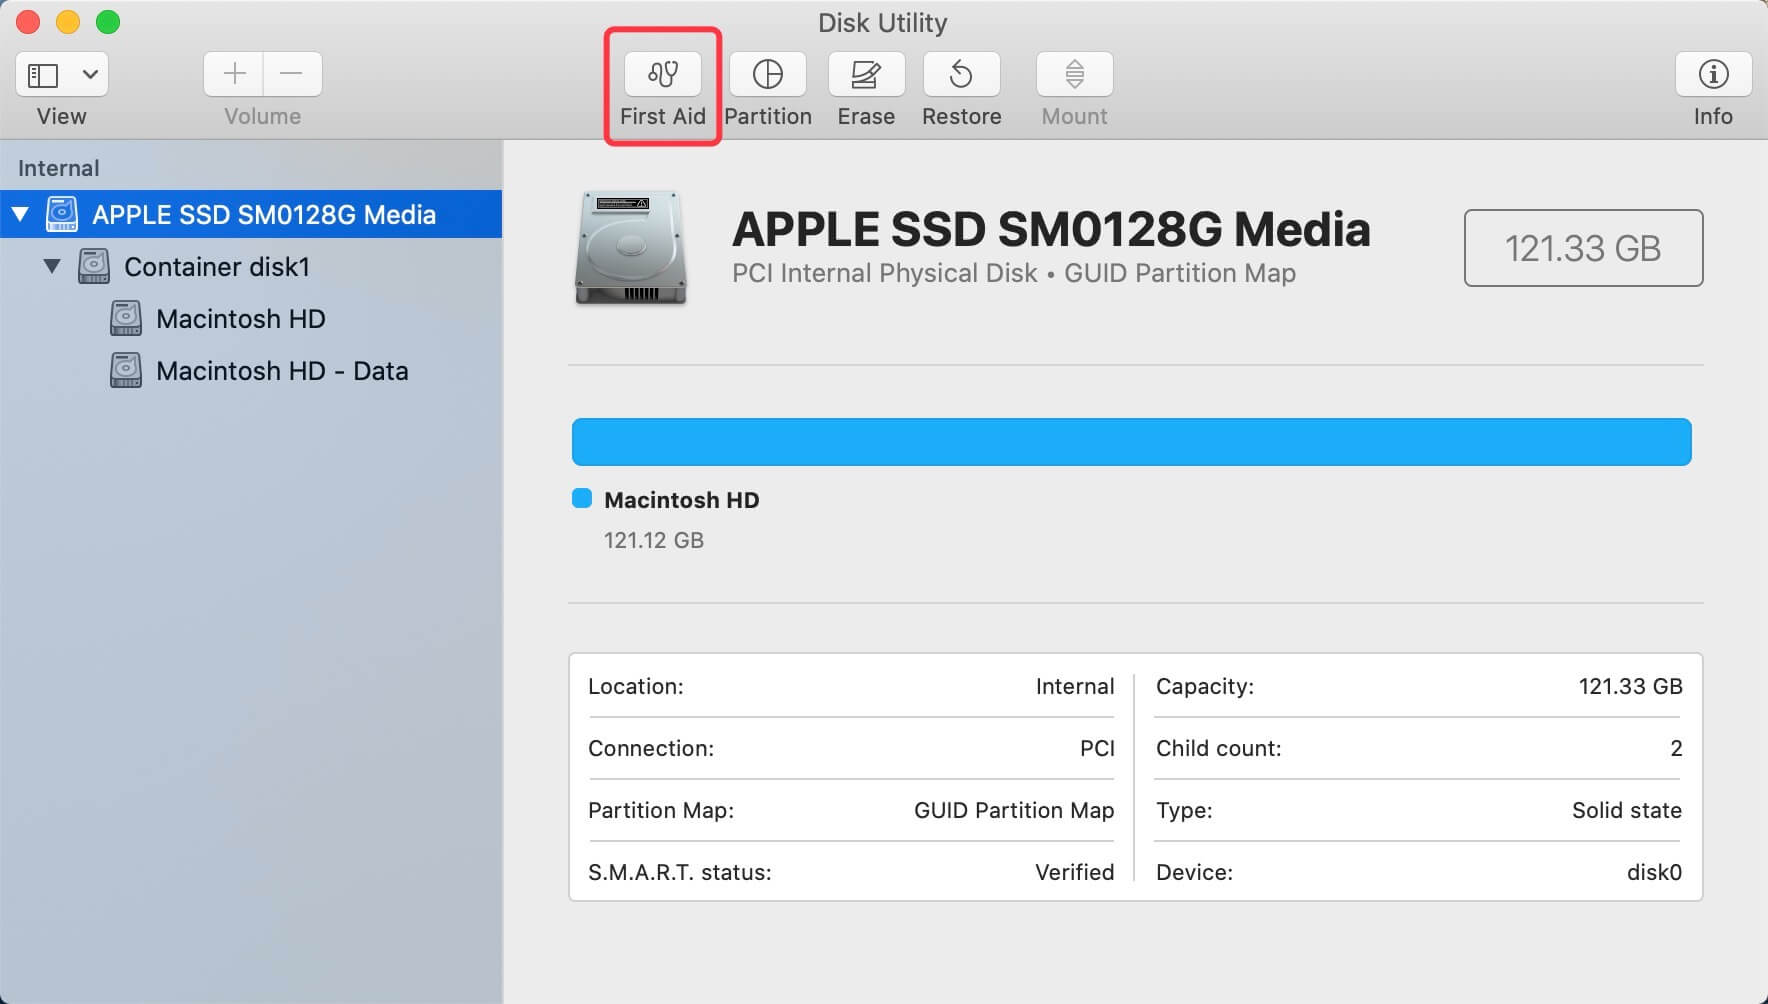
Step 4: Click Run in the confirmation box.
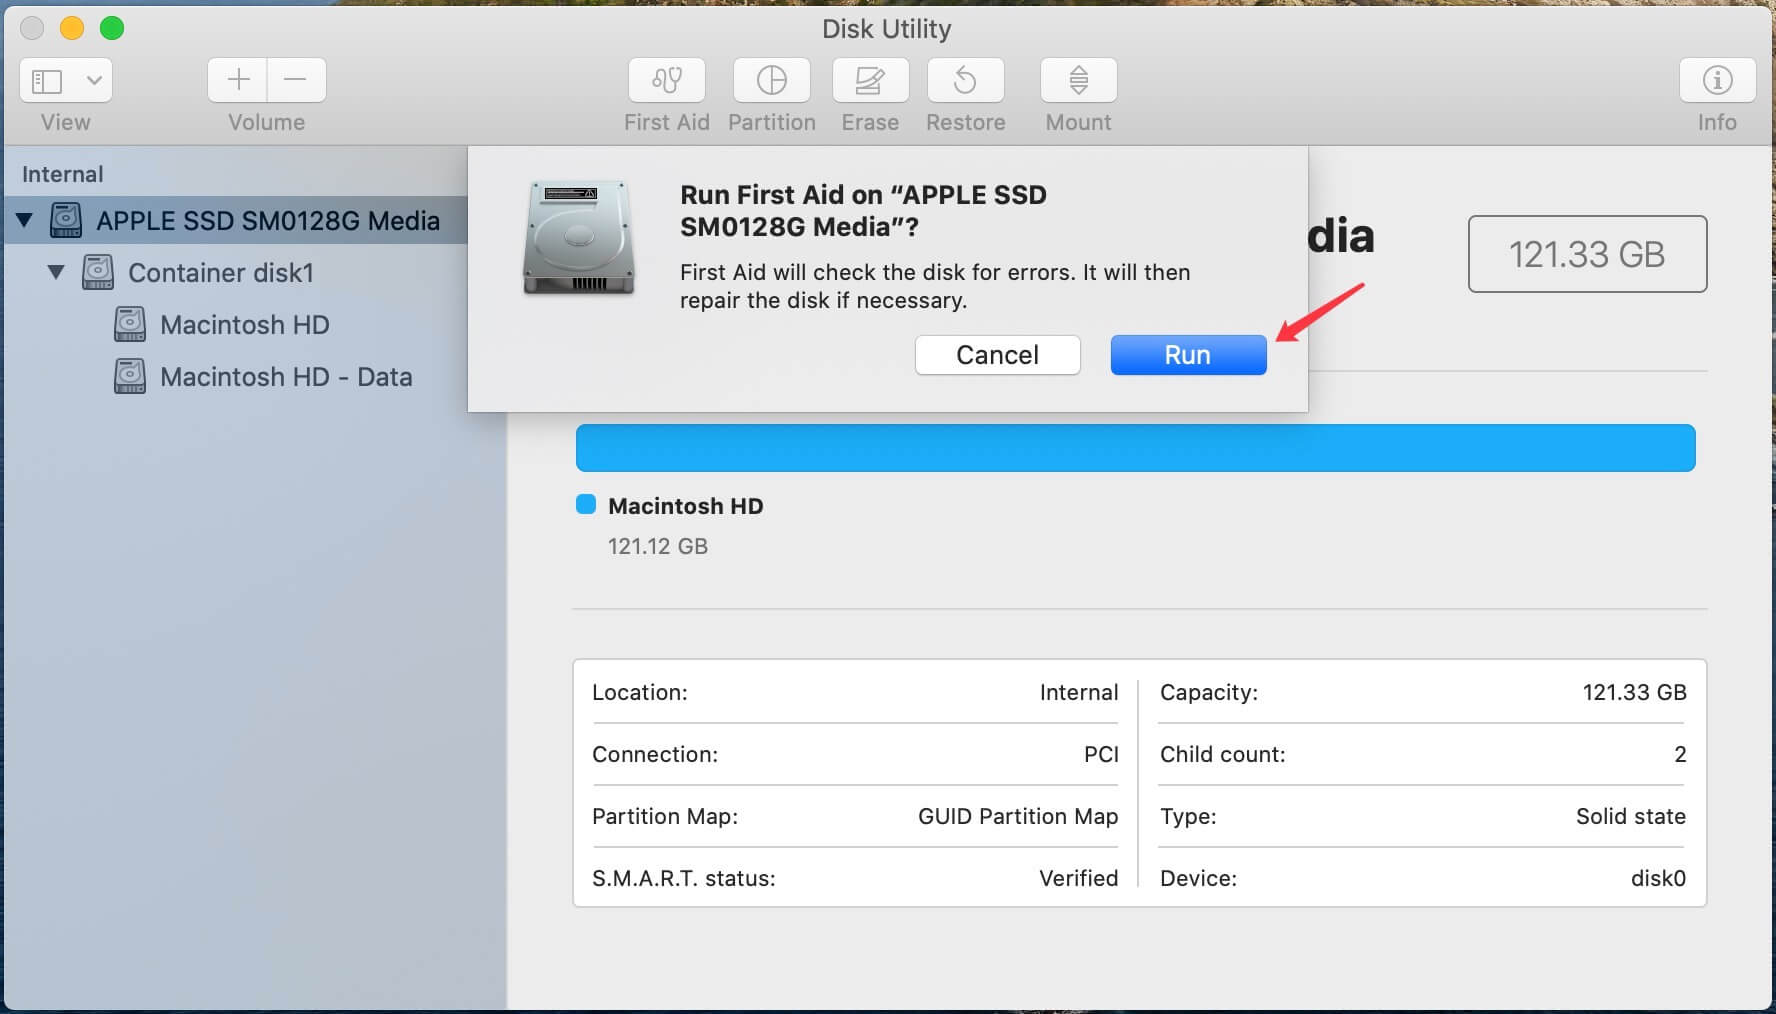
✍️ Note: First Aid's time depends on a variety of factors, including the size of the drive, the number and size of corrupt files, the extent of errors in the drive, and so on.
Once the problem has been resolved, proceed with the steps outlined in the first method to erase the Mac hard drive.
Method 3: Erase Mac Hard Drive Using Recovery Mode
Because the system is using the hard drive, the Disk Utility cannot always erase it. By booting into recovery mode, you allow the hard drive to be used as little as possible. To boot your Mac into macOS Recovery Mode and erase the hard drive, follow the steps below:
Step 1: Restart your computer.
Step 2: As soon as your Mac starts up, press and hold the Command + R keys.
Step 3: Continue to hold the keys down until you see the Apple logo and hear the chime. If asked, select a user you know the password for, then enter their administrator password.
Step 4: The macOS Utilities window will appear. Then select Disk Utility and click Continue.
When the Disk Utility window appears, try to erase the hard drive mentioned above.
Method 4: Use Donemax Data Eraser to erase data.
It is worth noting that the erased files are recoverable by using Disk Utility. If you think above methods are too time-consuming and you want to save time and effort while still achieving permanent deletion without recovery, you can use Donemax Data Eraser for Mac to erase files from Mac hard drive or wipe external hard drive on Mac. It can also delete cookies, traces, and passwords from your Internet browser. Get easy-to-use, easy-to-install data-wiping software that protects your privacy with enhanced, secure data wiping and ensures that no other third-party Mac data recovery software can recover it.
To erase the hard drive, follow the steps below:
Step 1: Decide what to delete. Choose which files, disks, or free space you want to delete. You can also set Erasure Standards by clicking the setting button in the upper right corner.
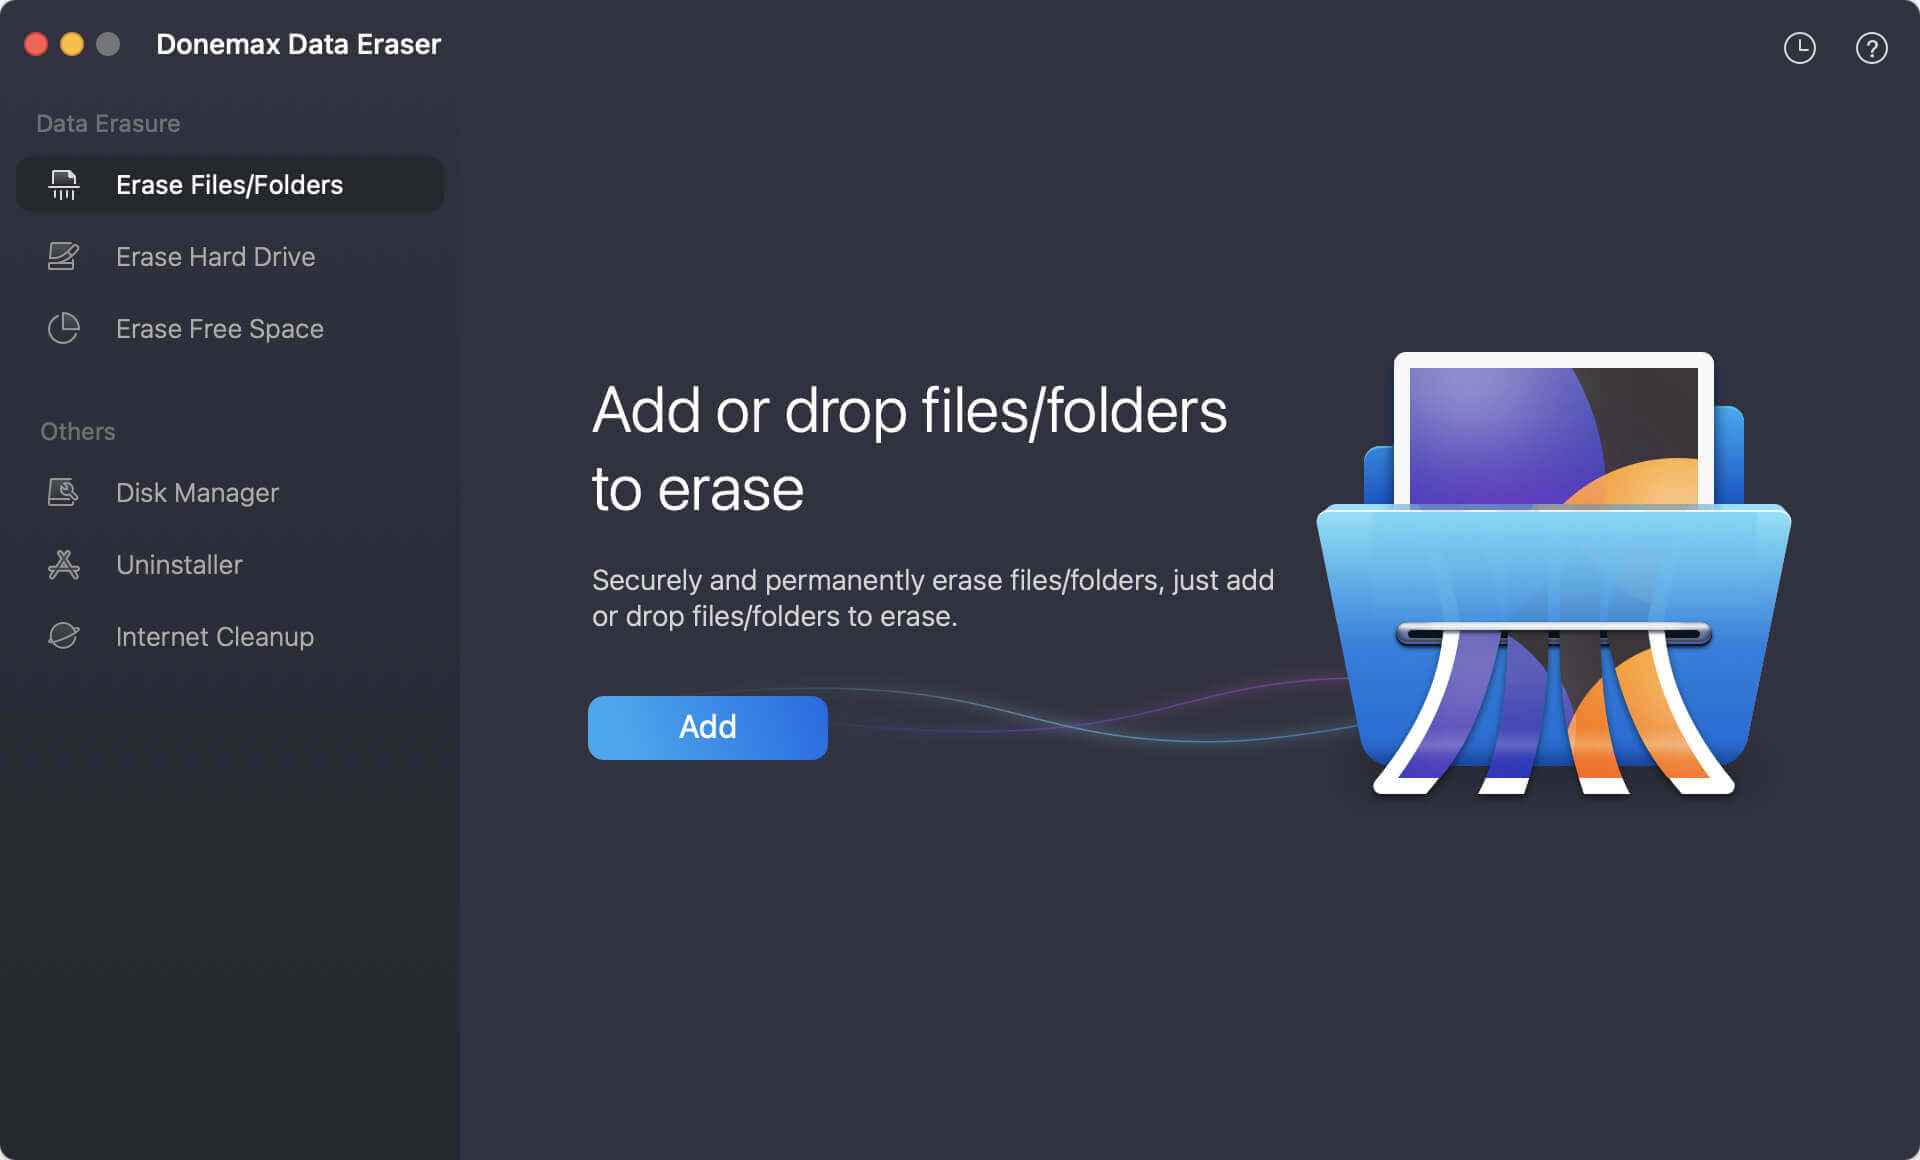
Step 2: Choose Files by adding or dragging and dropping files or folders to be erased.
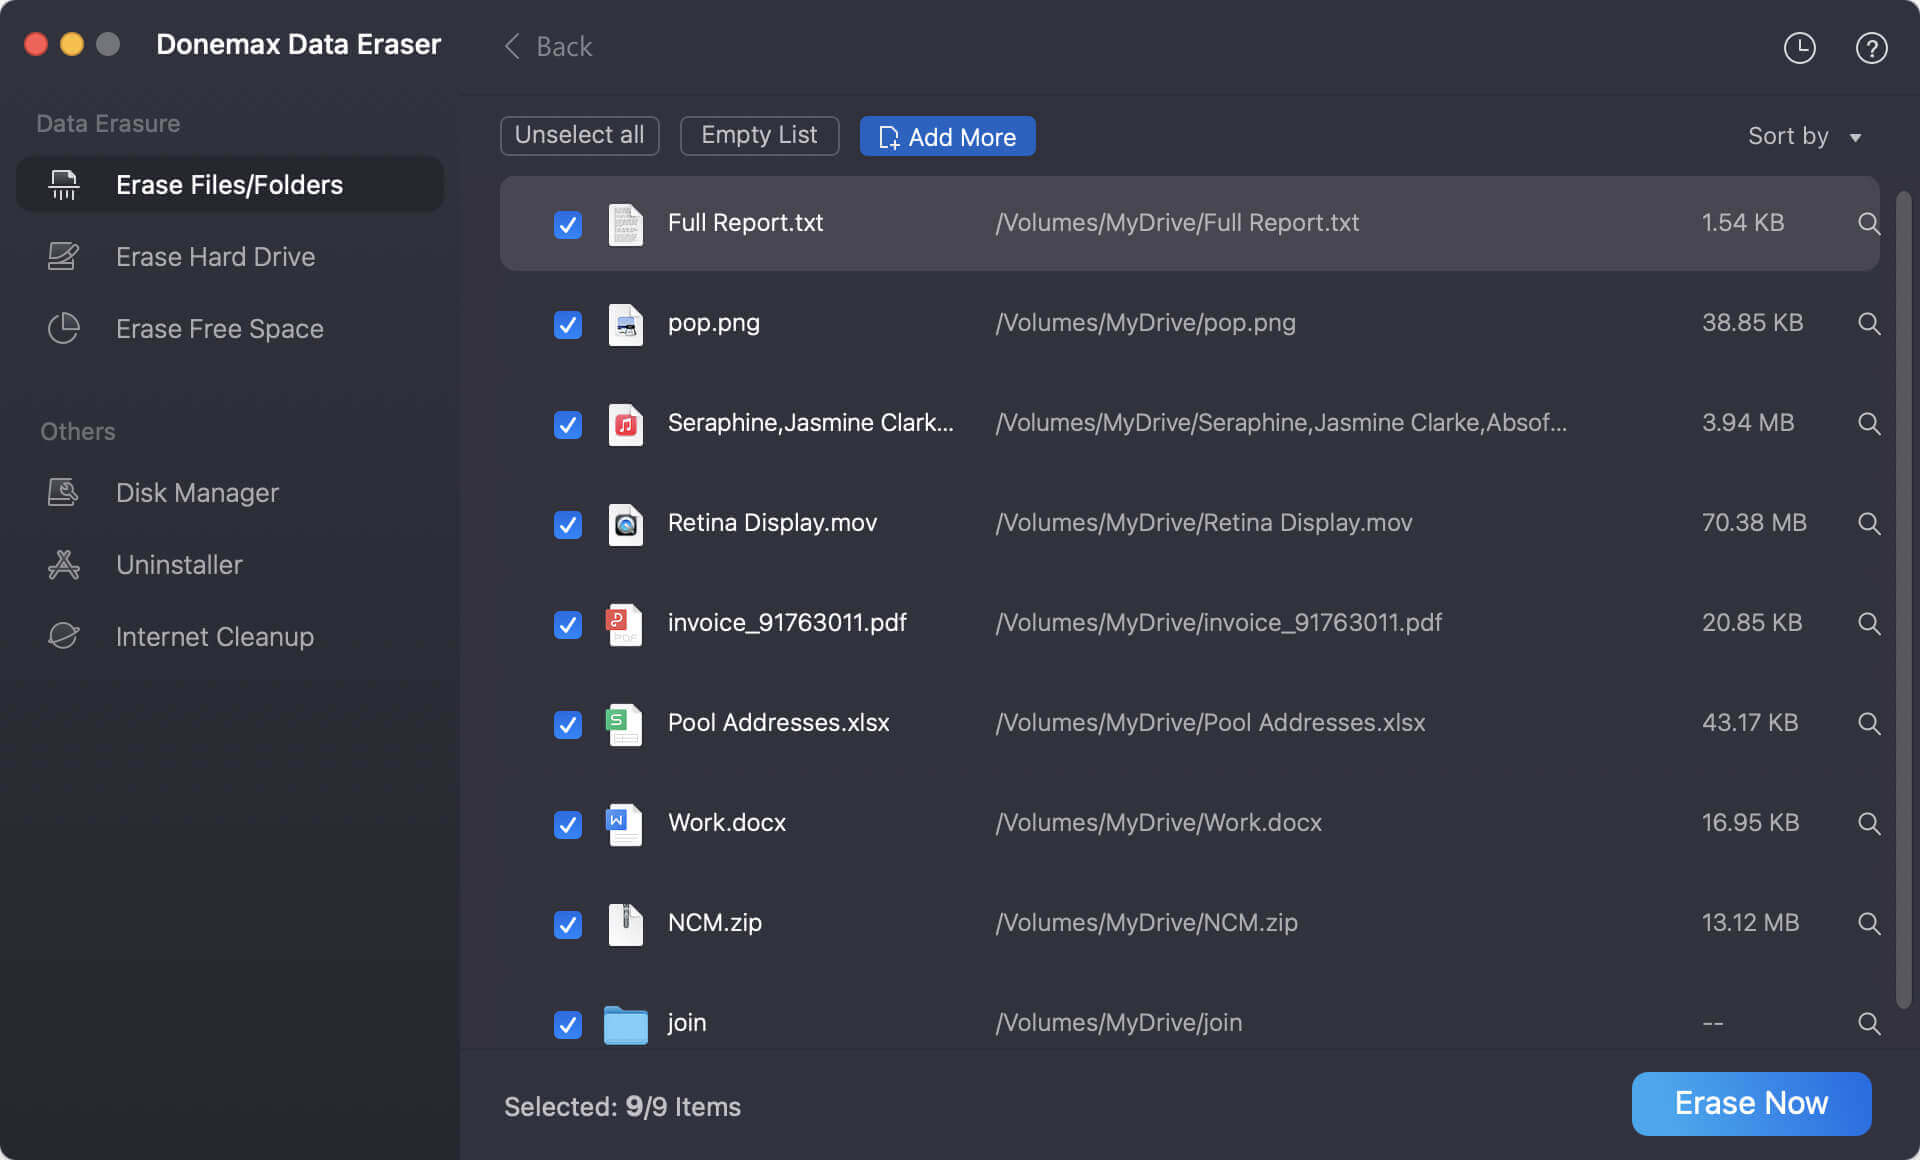
Step 3: Delete when you click "Erase Now," your files will be securely and permanently erased.
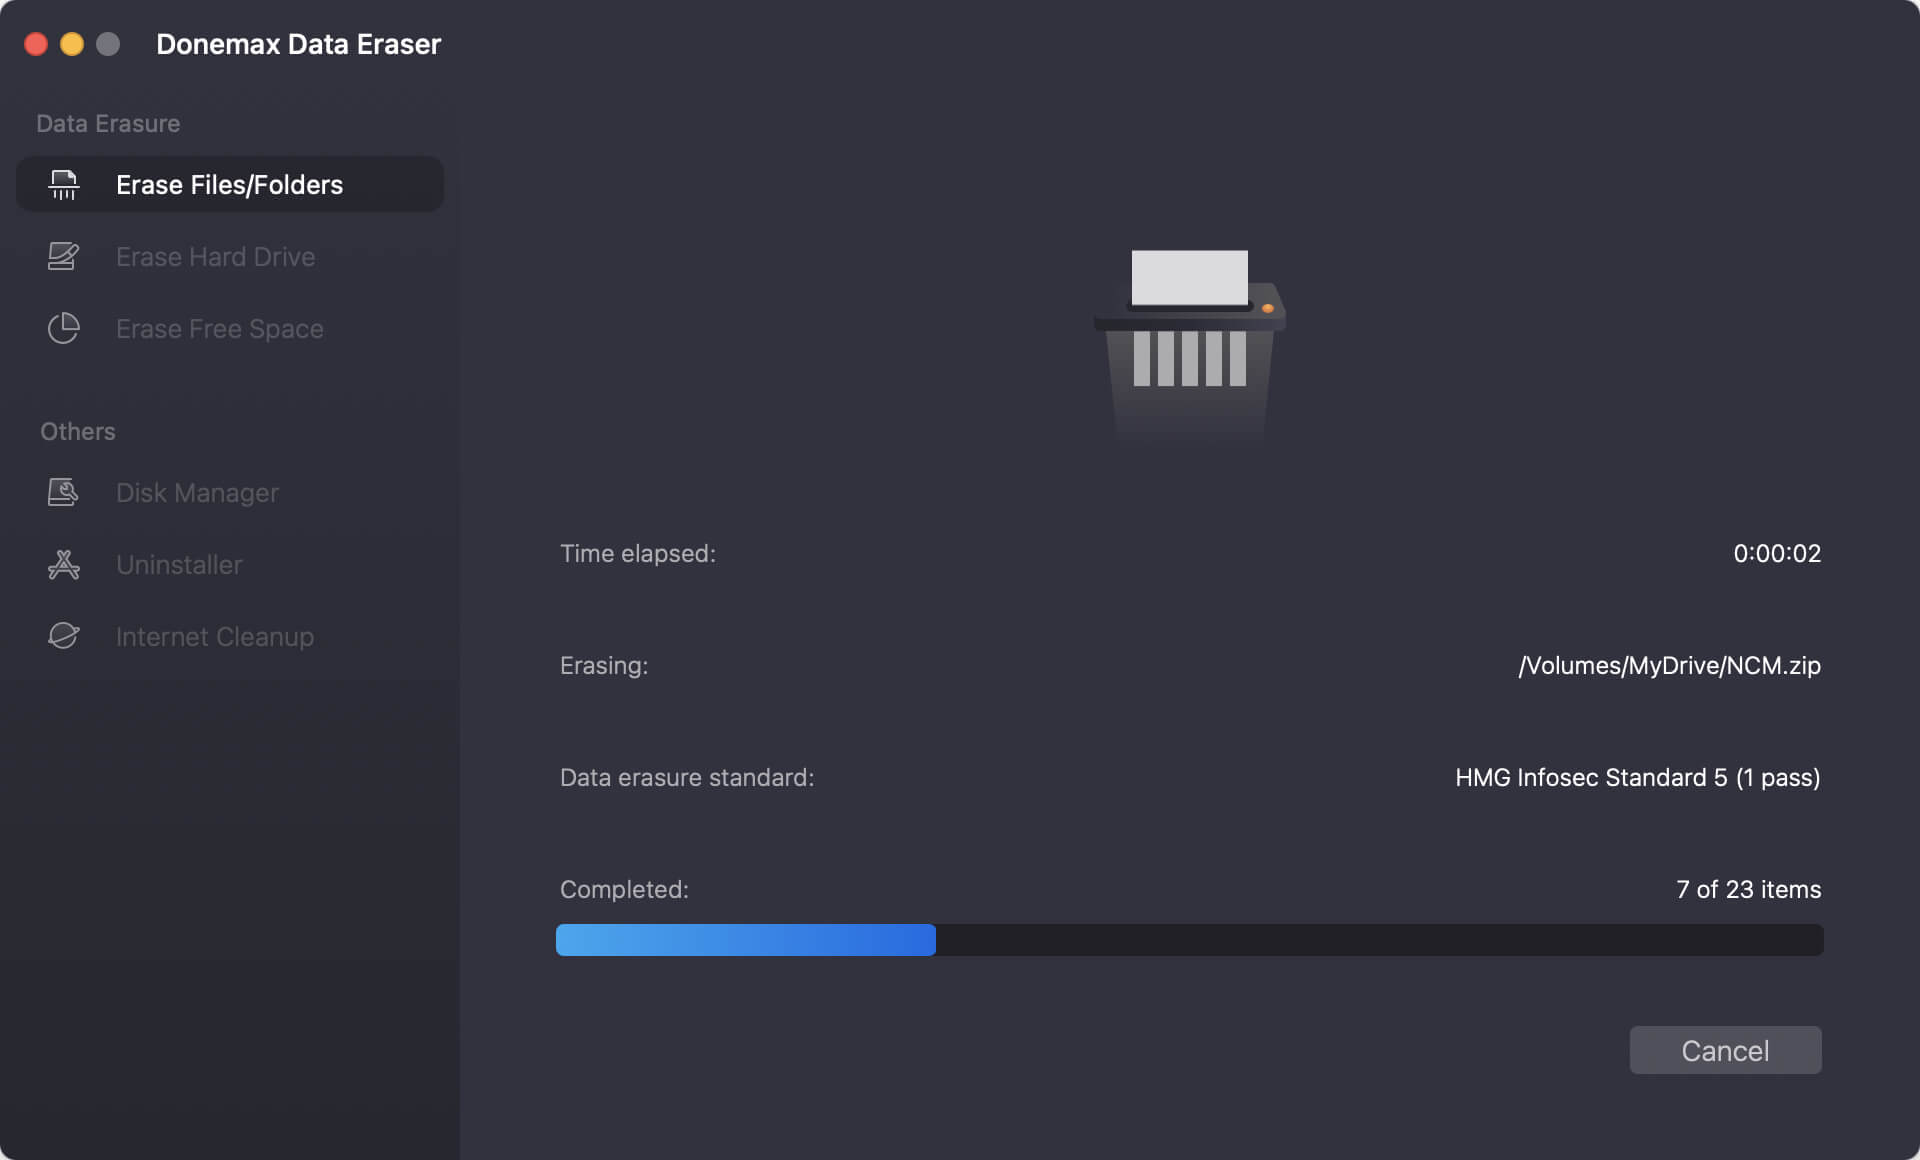
✍️ Note: Donemax Data Eraser for Mac is completely risk-free data erasure software. It will not harm your HDD, SSD, USB flash drive, memory card, or other storage device.
In conclusion
Disk Utility is a free and powerful built-in utility of Mac system to easily erase your Mac hard drive. By following the steps outlined in this article, you can securely erase your Mac's hard drive or external storage devices, even if the Erase button of Disk Utility on your Mac turns gray. Moreover, you can use Donemax Data Eraser for Mac to permanently erase your sensitive data on Mac before selling, donating, or disposing of your Mac/digital device to protect your privacy.
FAQs:
Yes, you can easily wipe your Mac internal or external disk completely by using the macOS Disk Utility. If you are planning to sell your Mac or if it is not working properly, you will need to completely erase the Mac hard drive. And you can also take help of a third-party data eraser software, like Donemax Data Eraser for Mac to erase some particular files/folders or the entire hard drive.
On macOS Ventura, use the following steps to permanently delete files:
- Installing Donemax Data Eraser for Mac after downloading it.
- Open the app and choose "Erase Files" to delete all Mac data.
- Add the files or folders to be deleted.
- Click Erase Now
No, Donemax Data Eraser will completely destroy the data and make sure they cannot be retrieved.
No, erasing data with Disk Utility or Donemax Data Eraser for Mac is secure and safe. That won't cause any damage to the hdd or SSD and affect how long it lasts.
Related Articles
- Aug 18, 2025Factory Reset a MacBook: How to Wipe Everything from a MacBook
- Oct 14, 2025Best Data Erasure Software for iMac
- Aug 21, 2023How to Erase An Intel-based Mac?
- Oct 31, 2025How to Factory Reset an iMac?
- Aug 21, 2023How to Permanently Erase Data from SD Card on Mac?
- Apr 15, 2025Best 8 File Shredder for Mac – Guide 2025

Contributing Writer
Christina
Christina is the senior editor of Donemax software who has worked in the company for 4+ years. She mainly writes the guides and solutions about data erasure, data transferring, data recovery and disk cloning to help users get the most out of their Windows and Mac. She likes to travel, enjoy country music and play games in her spare time.

Editor in chief
Gerhard Chou
In order to effectively solve the problems for our customers, every article and troubleshooting solution published on our website has been strictly tested and practiced. Our editors love researching and using computers and testing software, and are willing to help computer users with their problems