
Written byChristinaUpdated on Apr 27, 2026
How to Factory Reset macOS Sierra (10.12) & Speed Up Your Mac
Approved byGerhard Chou
Before we start: After you factory reset macOS Sierra, you can use Mac disk wipe software. An example is Donemax Data Eraser for Mac. This software wipes the free disk space on your internal disk. It permanently erases all deleted, erased, or lost data. This ensures your private data is gone for good and cannot be recovered.
PAGE CONTENT:
If you're experiencing performance issues with your Mac or planning to sell it, a factory reset may be just what you need. This process restores your Mac to its original settings, erasing all your personal data and installed applications. In this article, we will show you how to factory reset macOS Sierra. In this way, you can do it safely and effectively.
A factory reset is a way to erase your Mac. It returns your Mac to the state it was in when you first bought it. This process can help resolve persistent performance issues, remove unnecessary clutter, or prepare the device for a new user. If you are getting a new Mac, you might want to reset it. If you have a tough problem, a factory reset can help. A fresh start can also be beneficial. Knowing how to factory reset macOS Sierra is important.
Prepare for the Factory Reset on macOS Sierra
Before starting the factory reset, you should take some important steps. This will help protect your data and make the process easier.
1. Make a Backup of Your Important Data
One of the most critical steps before a factory reset is to back up your data. Once you perform the reset, all information stored on your Mac will be permanently deleted. Here are a few backup options to consider:
- Time Machine: This built-in macOS feature makes backing up your entire system easy. Connect an external hard drive, go to System Preferences, and select Time Machine. Follow the prompts to start your backup. (Check how to use Time Machine >>)
- External Drives: You can manually copy important files to an external drive. Simply drag and drop files and folders you want to save.
- Cloud Services: Consider using cloud storage solutions or Dropbox to back up essential files and documents.
- Disk Clone: Mac disk cloning software, like Donemax Disk Clone for Mac, can copy everything from your Mac to an external hard drive. This creates a complete bootable backup.
2. Sign Out of Accounts
To avoid complications after the factory reset, it's important to sign out of all your accounts. This includes:
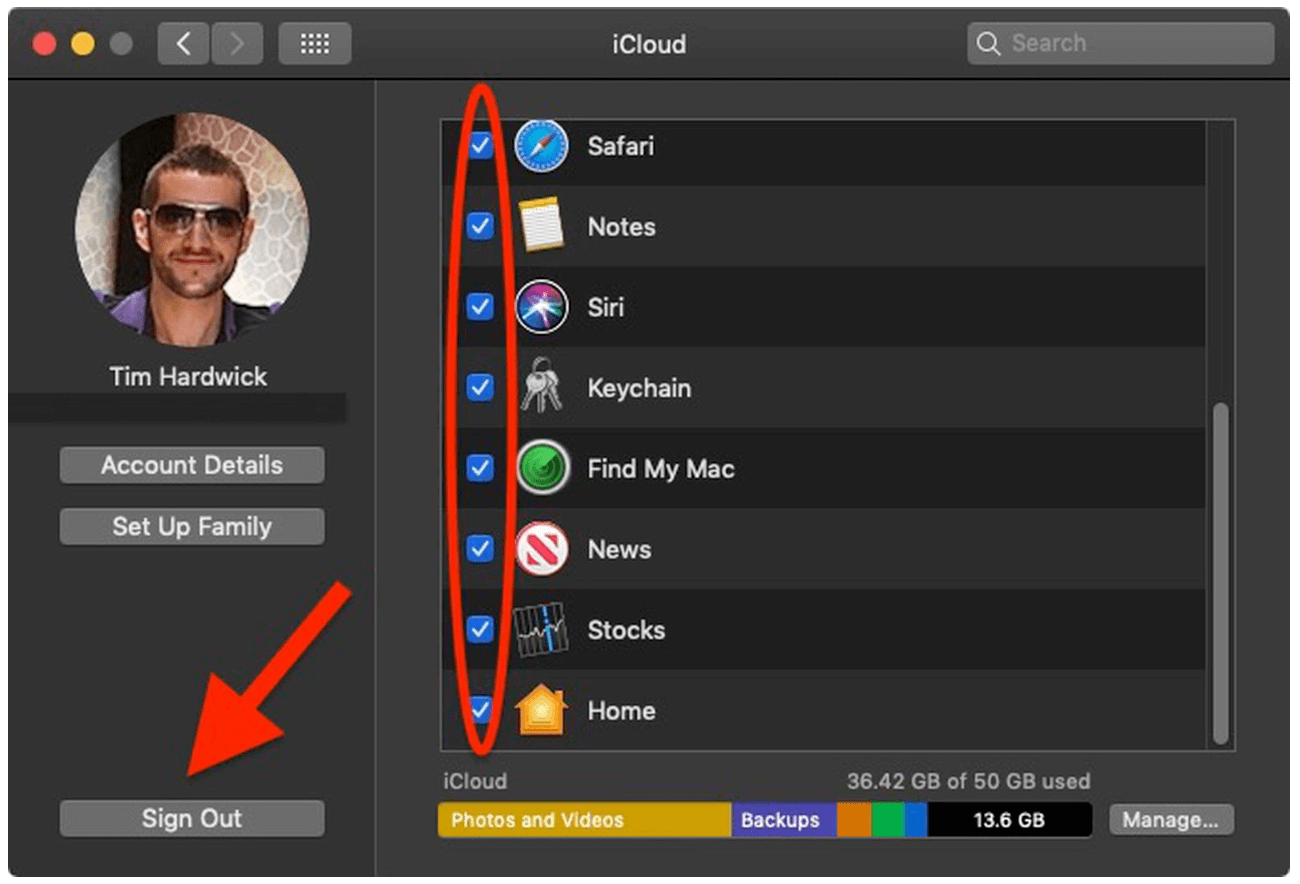
- iCloud: Click on Apple ID in System Preferences, then choose Overview, and finally click Sign Out. Choose whether to keep a copy of your data on this Mac or remove it.
![factory reset macOS Sierra]()
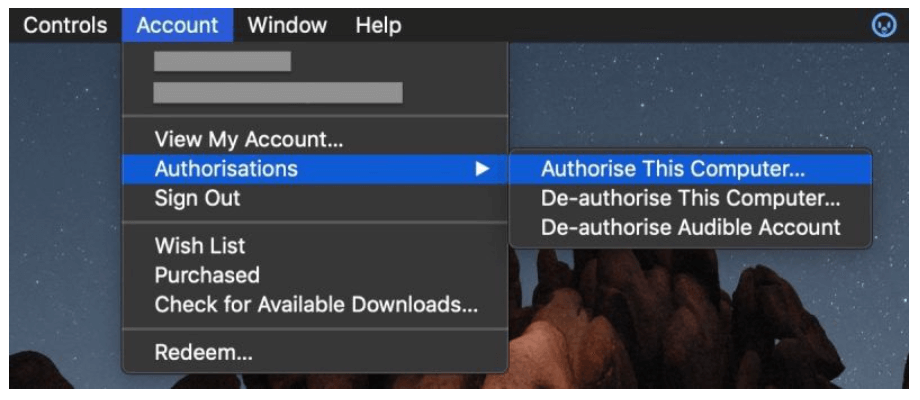
- iTunes: Open iTunes, click Account > Authorizations > De-authorize This Computer.
![factory reset macOS Sierra]()
- Other Accounts: If you have additional accounts, such as third-party apps, make sure to log out of those as well.
3. Ensure You Have a Stable Internet Connection
During the factory reset process, particularly when reinstalling macOS, a stable internet connection is essential. Make sure you're connected to Wi-Fi or Ethernet to avoid interruptions during the download and installation process.
Steps to Factory Reset macOS Sierra
Now that you're prepared, let's dive into the steps for factory resetting your Mac running macOS Sierra.
Step 1. Restart Your Mac in Recovery Mode
The first step in the factory reset process is to restart your Mac in Recovery Mode. This special mode provides access to tools needed for disk management and macOS installation. Here's how to do it:
- Choose Shut Down from the Apple menu in the upper-left corner.
- Press and hold the Command + R keys simultaneously as soon as your Mac turns on to enter Recovery Mode. When you see a spinning globe or the Apple logo, let go of the keys. Your Mac enters Recovery Mode as a result.
Step 2. Use Disk Utility to Erase the Hard Drive
Once in Recovery Mode, you'll need to erase your hard drive. This process will delete all your data, so ensure that your backup is complete.
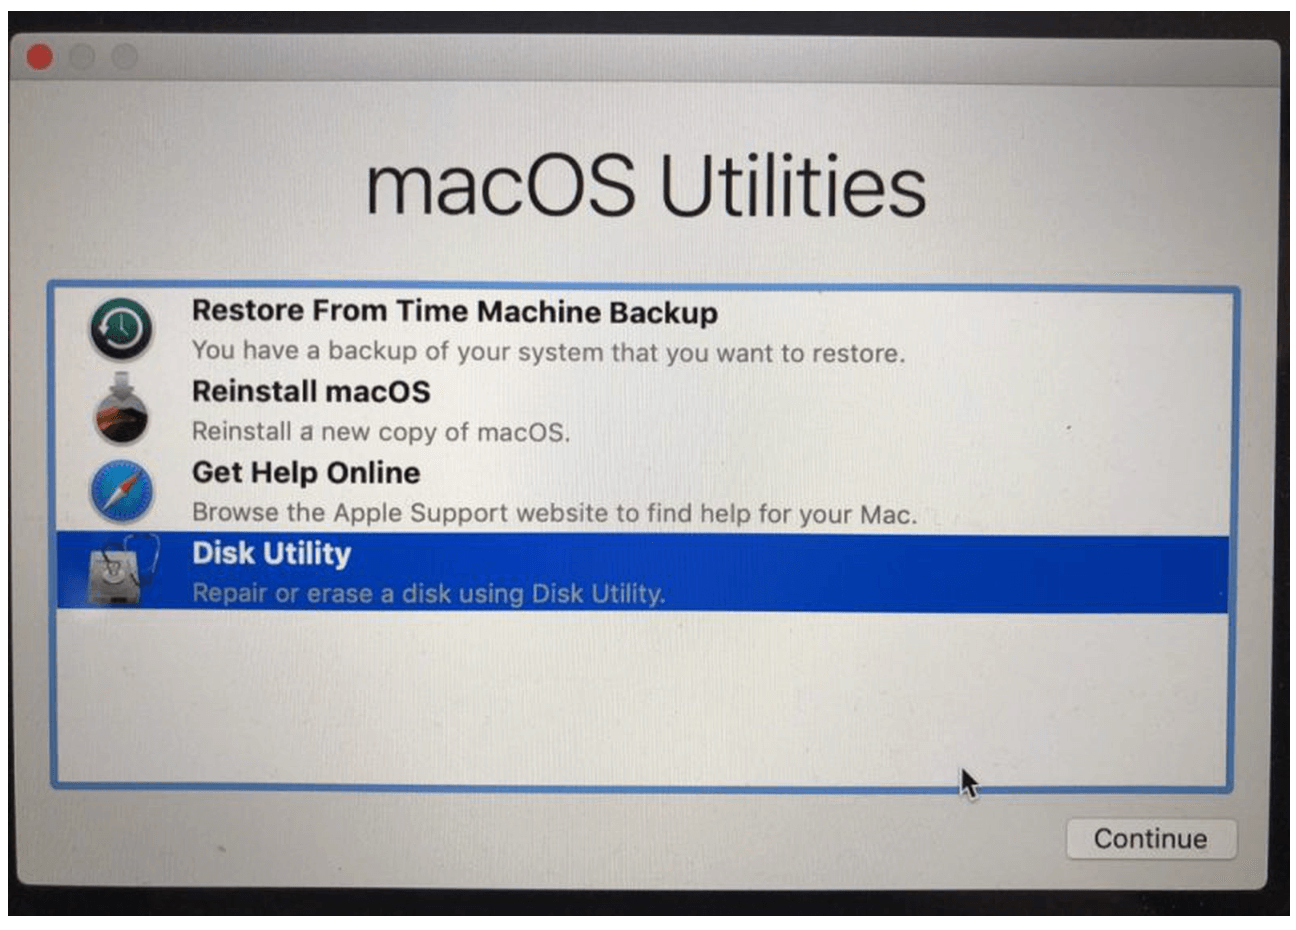
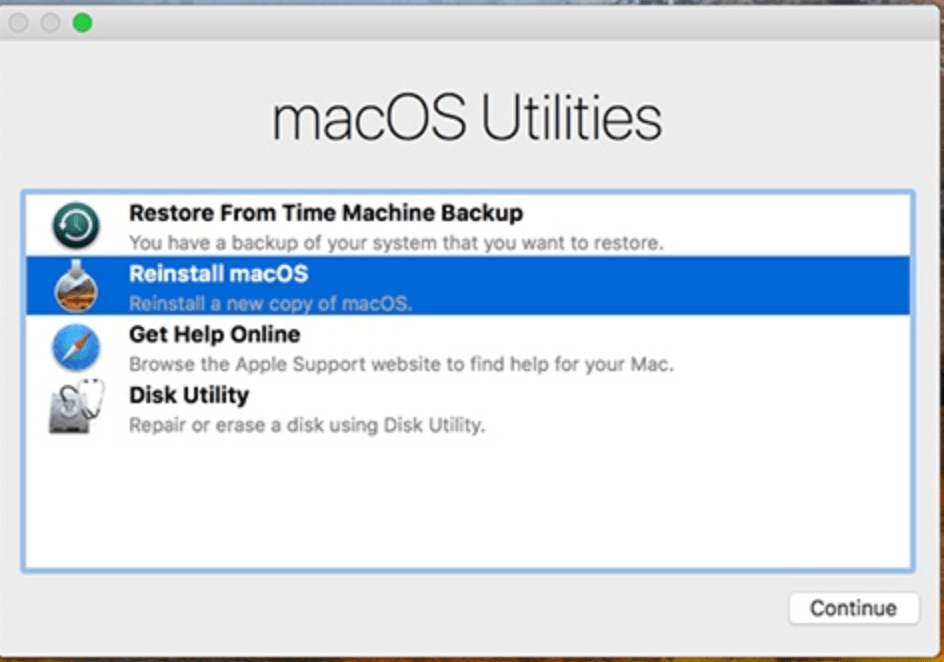
- Launch Disk Utility: Choose Disk Utility from the resulting macOS Utilities window, then click Continue.
![factory reset macOS Sierra]()
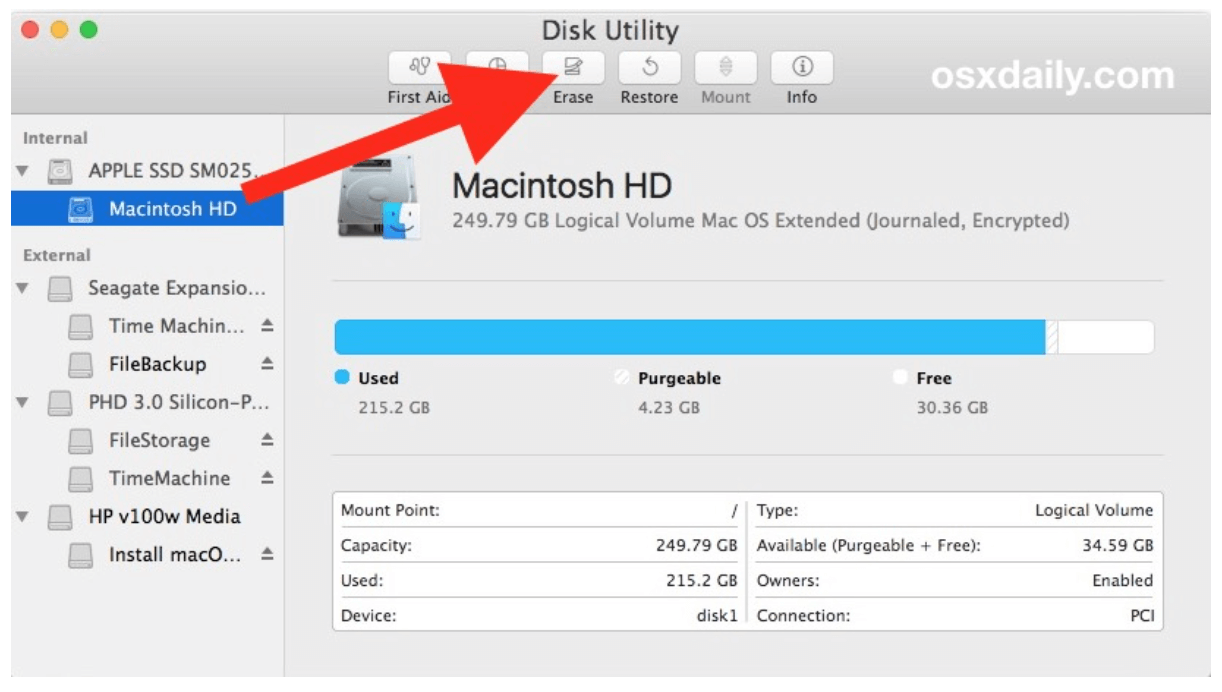
- Choose Your Hard disk: Locate your primary hard disk in the sidebar of Disk Utility. Typically, it is referred to as "Macintosh HD." Choose it.
![factory reset macOS Sierra]()
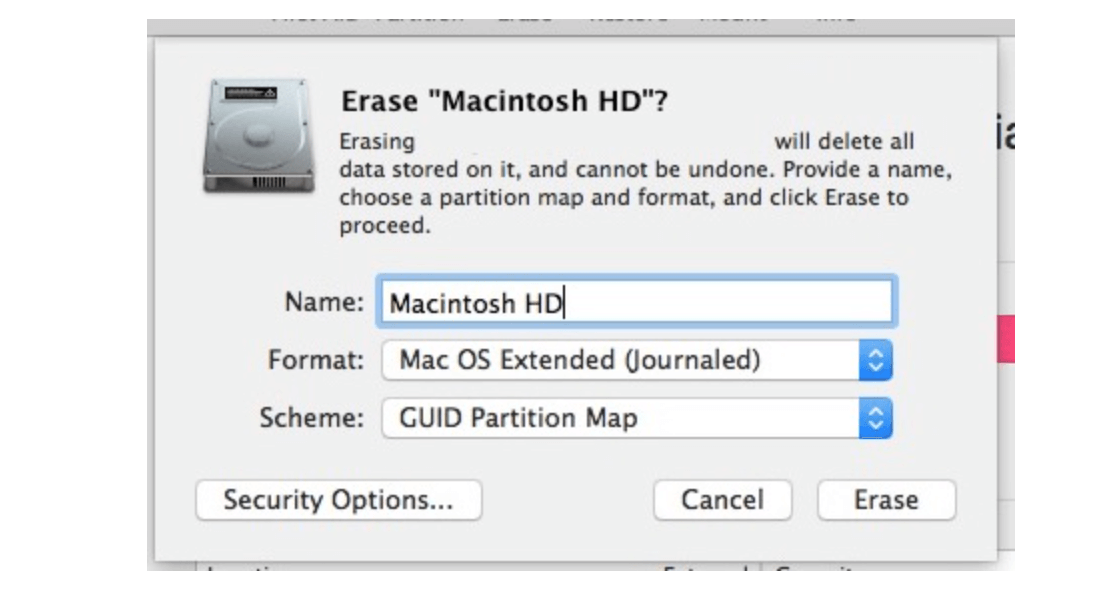
- To delete the hard drive, select the Erase option located at the top of the Disk Utility window. You will be prompted to input details in a dialog box:
• Name: You can name the drive anything you like, but "Macintosh HD" is the default.
• Format: Choose Mac OS Extended (Journaled) as the file system.
• Scheme: Select GUID Partition Map.
![factory reset macOS Sierra]()
- Confirm Erasure: Click Erase to confirm. This process may take a few moments. Once complete, click Done.
- Close Disk Utility: After erasing the hard drive, close Disk Utility to return to the macOS Utilities window.
Step 3. Reinstall macOS Sierra
Now that your hard drive is erased, it's time to reinstall macOS Sierra. This process restores the operating system and prepares your Mac for use. Follow these detailed steps to ensure a smooth reinstallation:
- Select Reinstall macOS: In the macOS Utilities window, locate the option for Reinstall macOS. This option lets you install a new copy of the operating system. Will not keep any old data or settings. Click on Continue to proceed.
![factory reset macOS Sierra]()
- Review License Agreement: After selecting the reinstallation option, you will be presented with the macOS software license agreement. It's important to read this agreement as it outlines the terms and conditions of using macOS. Once you've read it, click Agree to continue.
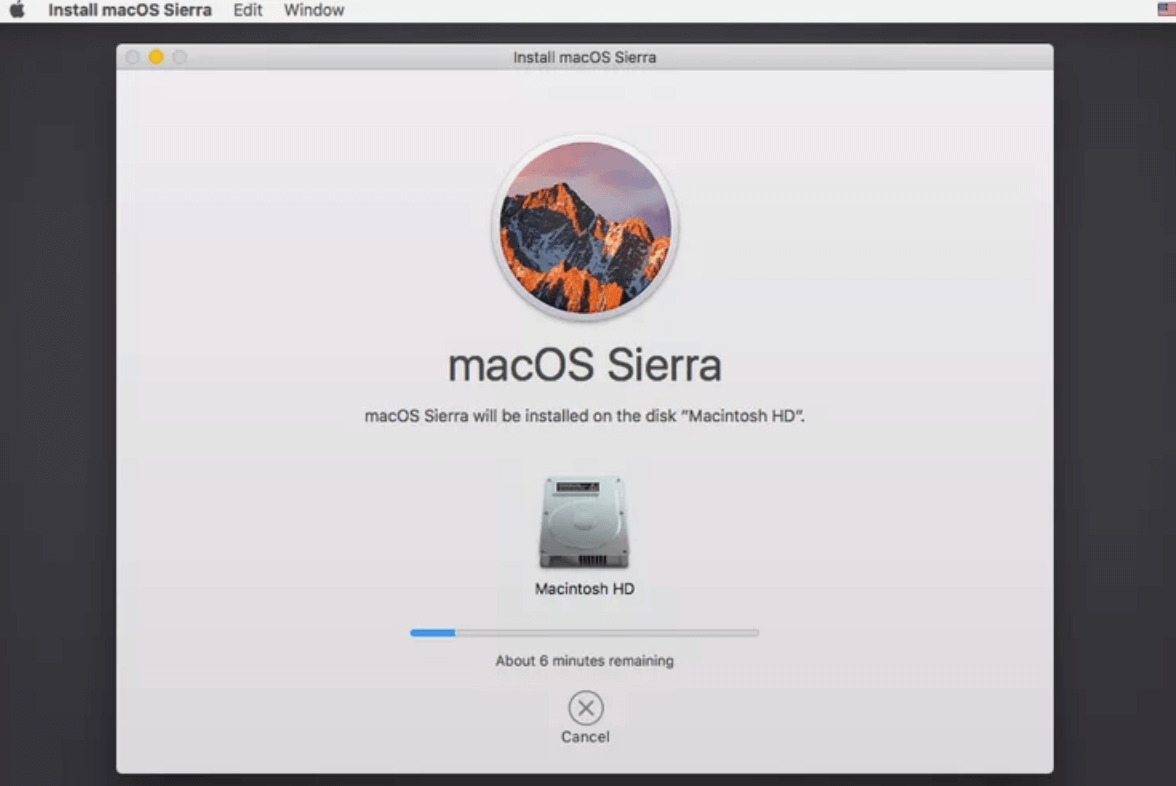
- Choose the Installation Drive: You will be prompted to select the destination for the installation. This should be the hard drive you just erased, typically named "Macintosh HD." If you have multiple drives or partitions, ensure you choose the correct one. Highlight your hard drive and click Install.
- Download macOS Sierra: The reinstallation process requires downloading macOS Sierra from Apple's servers. Depending on your internet speed, this download can take anywhere from several minutes to a couple of hours. During this time, your Mac may appear to freeze or show a progress bar; this is normal. Ensure that your Mac remains plugged into power to prevent interruptions.
![factory reset macOS Sierra]()
- Complete Installation: Once the download is complete, your Mac will automatically restart. The installation process will continue, and you will see a progress bar indicating how much time remains. This stage may take some time as your Mac sets up the operating system.
- Final Setup Prompts: After the installation is complete, your Mac will present you with a series of setup prompts. This includes selecting your preferred language, connecting to Wi-Fi, and configuring settings such as Siri and location services. You can choose to sign in with your Apple ID or skip this step for now if you prefer.
- Creating a User Account: As part of the final setup, you will need to create a new user account. This will be the primary account for accessing your Mac. You'll be asked to enter your full name, account name, and a password. It’s a good practice to choose a strong password that you can remember, as this will protect your account.
- Exploring New Features: Once you've completed the setup, take a moment to explore your freshly installed macOS Sierra. You’ll find that the system runs like new, free from clutter or previous issues. Get to know the new features, like Siri and the improved performance that comes with the latest update.
💡 Note: You can recover the data lost from a factory reset of macOS Sierra. Use Mac data recovery software can help to get it back.
Step 1. Download and install one of the best Mac data recovery software - Donemax Data Recovery on your Mac.
Step 2. Open Donemax Data Recovery for Mac, select the Macintosh HD to start data recovery.

Step 3. Click on Scan button to deeply scan the internal HDD/SSD, it will find all recoverable files.

Step 4. Once the scan is completed, you can preview all recoverable files. Then select the wanted files, click on Recover button to save the files.

Permanently Wipe Sensitive Data on macOS Sierra
Before you sell or donate your Mac, you need to wipe internal drive of macos sierra. In this way, you can permanently erase all sensitive data so that nobody can recover it. Donemax Data Eraser for Mac is a powerful, 100% safe and easy-to-use Mac disk wipe program. It can securely and permanently erase all sensitive data on macOS Sierra or other operating systems.
Step 1. Download and install Donemax Data Eraser for Mac on your Mac.
Donemax Data Eraser for Mac
- Securely and permanently delete/shred data on macOS Sierra.
- Wipe deleted/erased/lost data on macOS Sierra.
- Wipe external hard drive, USB drive, SD card, etc.
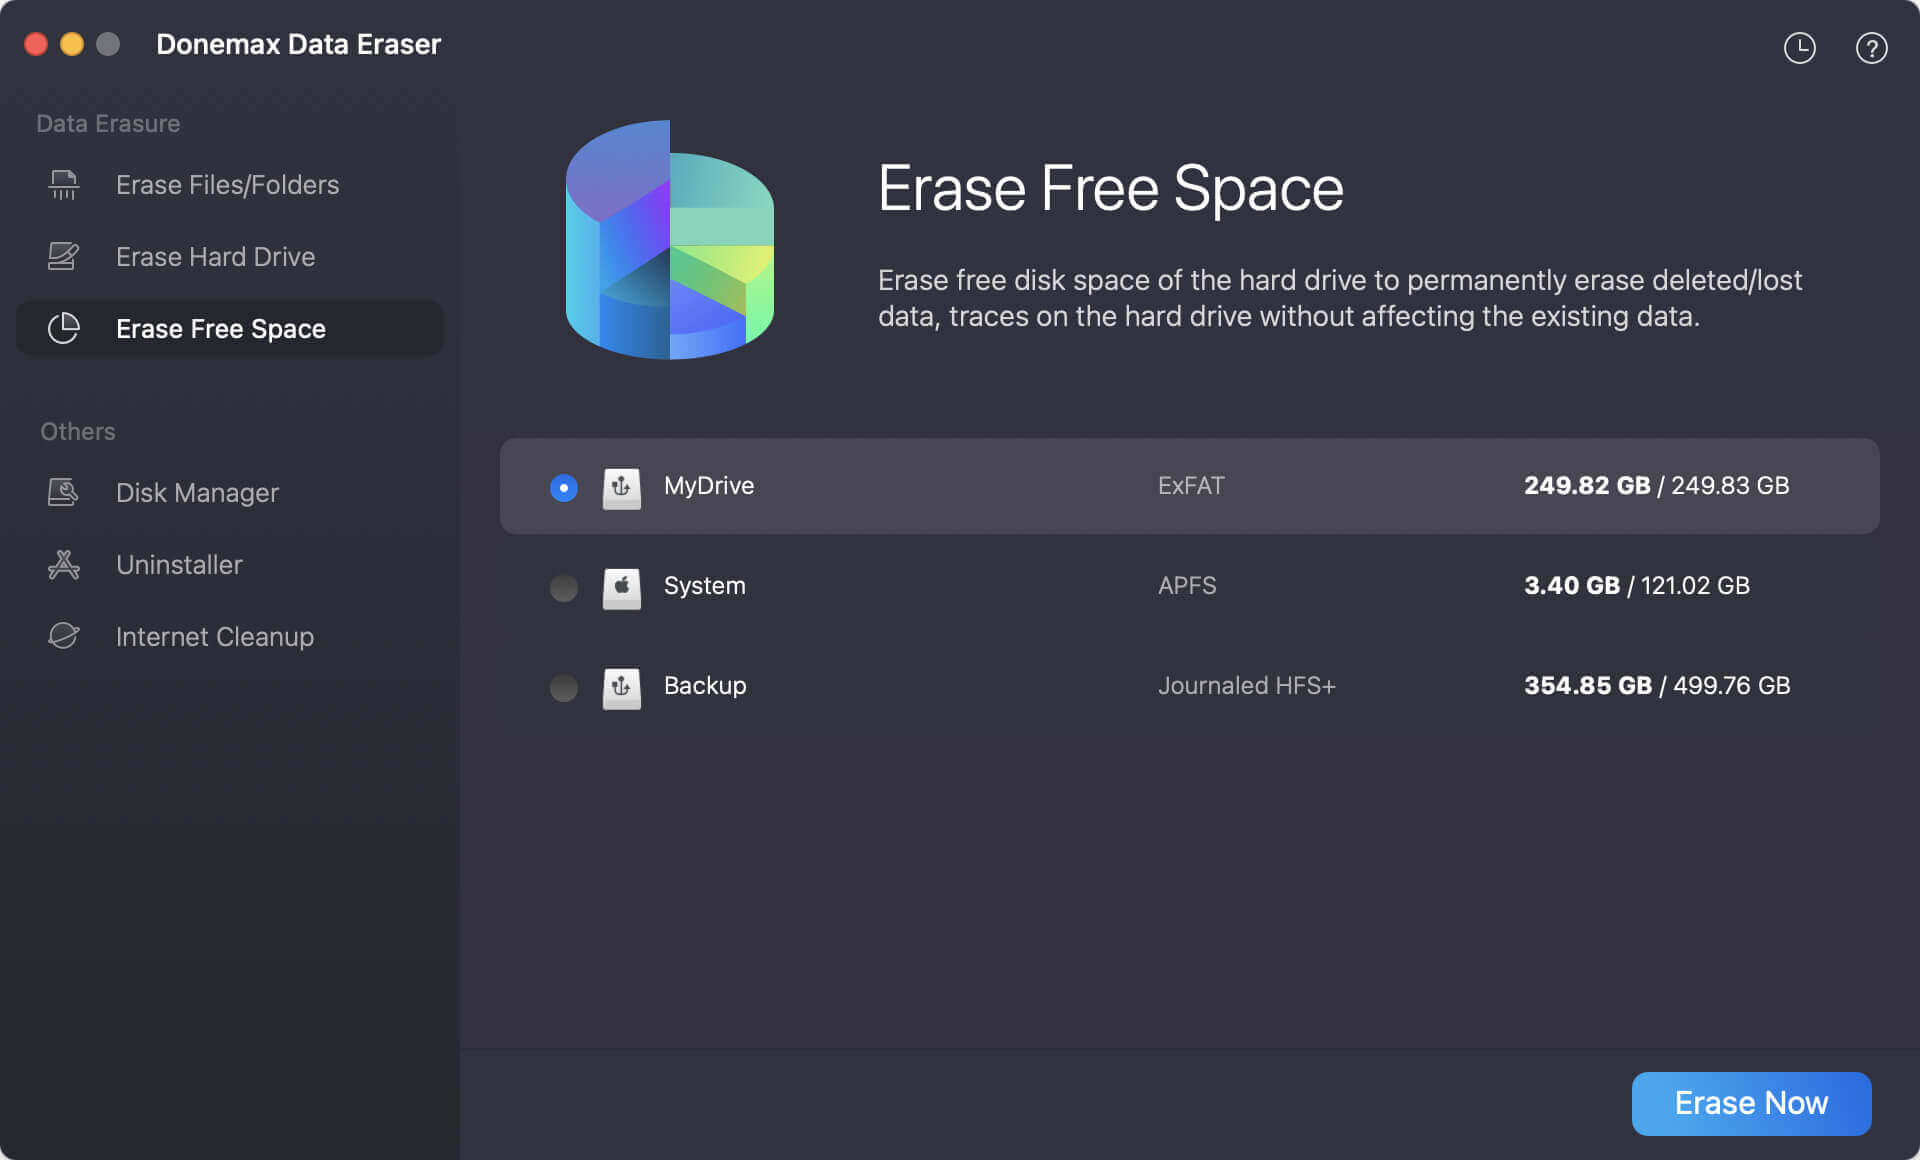
Step 2. Open Donemax Data Eraser for Mac, then choose Erase Free Space mode. Select the internal drive (Macintosh HD), click on Erase Now button. Clearing free disk space on the drive will occur. The process will permanently erase all deleted or lost data, making recovery impossible.
After the Factory Reset on macOS Sierra
Once the installation is complete, your Mac will guide you through the initial setup process.
1. Initial Setup Process
During the initial setup, you'll be asked to:
- Select Your Language: Choose your preferred language.
- Connect to Wi-Fi: If you haven't done so already, connect to your Wi-Fi network.
- Transfer Information: You can transfer data from another Mac, a Time Machine backup, or a Windows PC. To get a fresh start, select Don’t transfer any information now.
- Sign in with Apple ID: You can choose to sign in with your Apple ID now or later. If you skip this step, you can still access many features without it.
- Set Up iCloud and Other Services: If you signed in, you could set up iCloud, Find My Mac, and other services.
- Create a User Account: Follow the prompts to create a user account, including setting a password.
2. Restoring Data
Once your Mac is set up, you can restore your data if you used Time Machine or an external drive:
- Using Time Machine: Connect your Time Machine drive and select the option to restore from a Time Machine backup during setup. Follow the prompts to restore your files.
- Manual Restore: If you backed up files by hand, connect your external drive. Then, copy your files back to their original places on your Mac.
Troubleshooting Common Issues
While the process of factory resetting macOS Sierra is generally straightforward, you may encounter some common issues. Here are solutions to address them.
🟠 Issues Entering Recovery Mode
If your Mac fails to enter Recovery Mode, try the following:
- Ensure you are holding the Command + R keys immediately after turning on your Mac.
- If that doesn't work, try using Option + Command + R. This will start internet recovery mode, which needs an internet connection.
🟠 Problems Erasing the Hard Drive
If you encounter errors while trying to erase your hard drive:
- Ensure that you have selected the correct drive.
- Check if any applications are open that may be using the drive.
- Restart your Mac in Recovery Mode and try again.
🟠 Errors During Reinstallation
If the installation process fails, consider these steps:
- Check your internet connection. A stable connection is crucial for downloading macOS.
- Reboot into Recovery Mode and try reinstalling macOS again.
Conclusion
A factory reset can breathe new life into your Mac, addressing issues and allowing you to start fresh. By following the steps in this article, you can safely reset your macOS Sierra to its factory settings. Remember to back up your data and sign out of your accounts to ensure a smooth process.
A factory reset is a useful tool in your macOS toolkit. You can use it when fixing a problem or getting your Mac ready for a new owner.
Donemax Data Eraser for Mac
100% safe and powerful Mac data erasure program. It offers certified data erasure standards including U.S. Army AR380-19, DoD 5220.22-M ECE to securely and permanently erase data from Mac HDD/SSD and external storage devices, making data recovery impossible.
Related Articles
- Oct 13, 2025Wipe MacBook Data Permanently before You Sell it
- Apr 15, 2025Best 8 File Shredder for Mac – Guide 2025
- Nov 13, 2023How to Permanently Erase Data from Mac Startup Disk?
- May 27, 2025How to Completely Wipe a Hard Drive on Mac?
- Jun 16, 20257 Reliable Mac Disk Wipe Software – Expert Picks
- Oct 13, 2025Permanently Erase Data in APFS File System

Contributing Writer
Christina
Christina is the senior editor of Donemax software who has worked in the company for 4+ years. She mainly writes the guides and solutions about data erasure, data transferring, data recovery and disk cloning to help users get the most out of their Windows and Mac. She likes to travel, enjoy country music and play games in her spare time.

Editor in chief
Gerhard Chou
In order to effectively solve the problems for our customers, every article and troubleshooting solution published on our website has been strictly tested and practiced. Our editors love researching and using computers and testing software, and are willing to help computer users with their problems