
Written byMariaUpdated on May 14, 2025
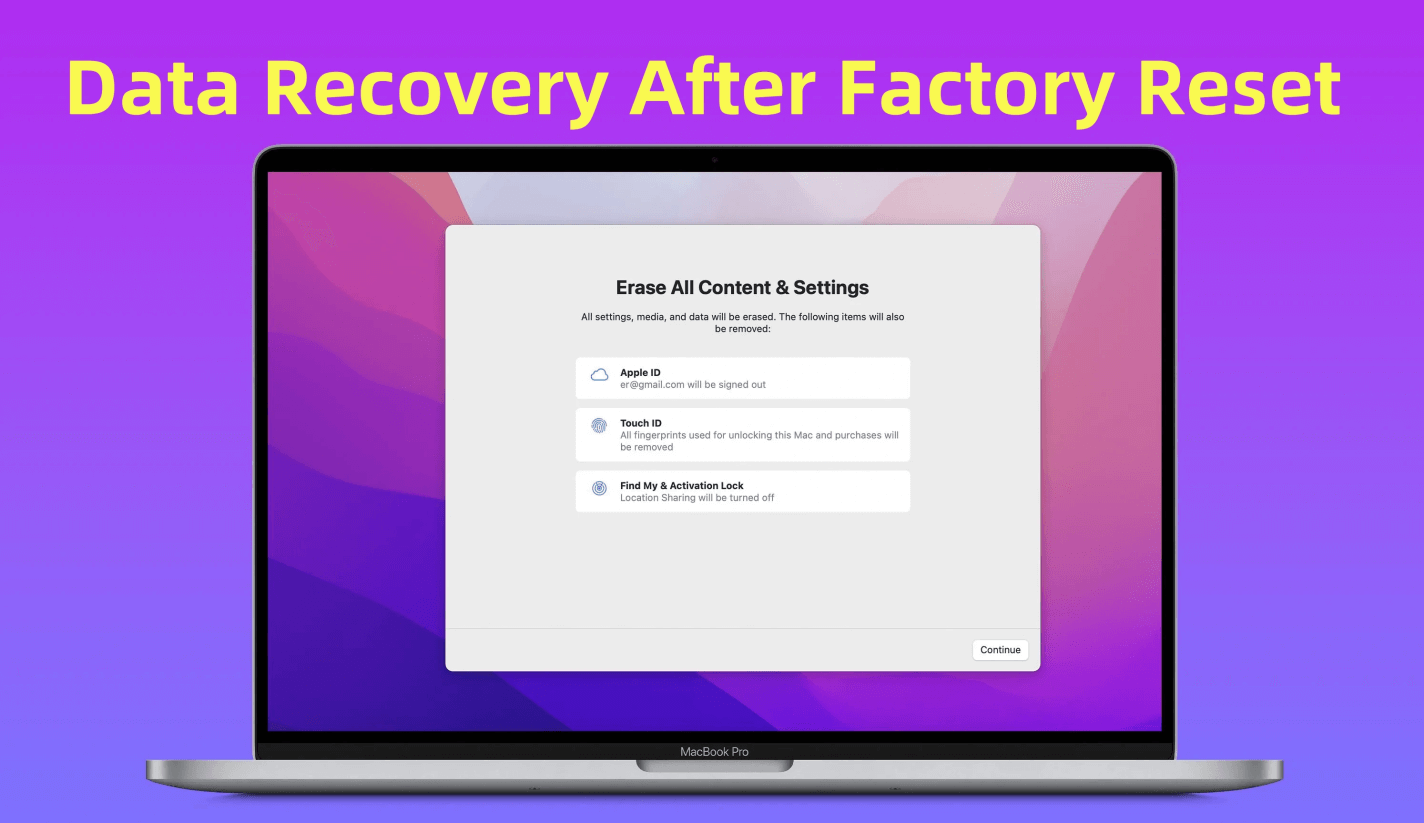
How to Factory Reset a M1 Chip Mac?
Approved byGerhard Chou
Before we start: Factory resetting a M1 Mac means to erase everything from the M1 Mac's internal disk. If you will sell or donate your M1 Mac, you can use data erasure program - such as Donemax Data Eraser for Mac to securely and permanently erase all data from the disk, ensure no data is recoverable.
PAGE CONTENT:
Apple's transition to its own silicon, starting with the M1 chip in 2020, revolutionized Mac performance, power efficiency, and security. But with these improvements came changes in how you perform certain tasks - like factory resetting your Mac. Whether you're experiencing software glitches, preparing to sell your device, or just want a clean slate, performing a factory reset is an effective solution. However, the process for M1 (Apple Silicon) Macs is slightly different from Intel-based Macs.
In this comprehensive guide, we'll walk you through how to factory reset an M1 chip Mac step by step. We'll also cover essential preparations, potential pitfalls, and tips to make the process smooth and successful.

Why Factory Reset an M1 Chip Mac?
There are many reasons why a user might want to factory reset their M1 Mac:
- Performance issues: Over time, even Macs can experience lag or software bugs.
- Preparing to sell or give away: A full reset ensures your personal data is erased.
- Fixing critical errors: Some system errors can be resolved by reinstalling macOS.
- Removing malware: Though rare on macOS, malware can be eradicated with a clean install.
- Starting fresh: Ideal if you want to declutter your system or start anew.
No matter your reason, knowing how to properly reset your M1 Mac is essential for your digital hygiene and device longevity.
Before You Begin: Essential Preparations
Before factory resetting your M1 Mac, follow these essential steps to protect your data and avoid issues later.
1. Backup Your Data
Factory resetting erases everything on your Mac, so it's critical to back up your data beforehand.
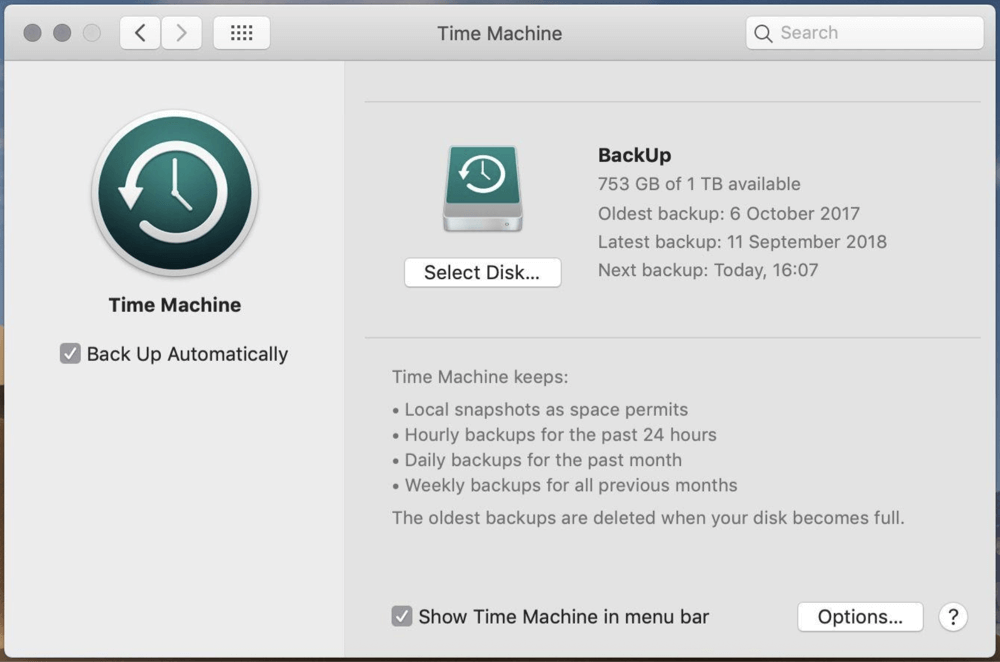
- Use Time Machine:
- Connect an external drive.
- Go to System Settings > General > Time Machine. (or System Preferences > Time Machine)
![factory reset an M1 chip Mac]()
- Click Back Up Now.
- Use iCloud or third-party services:
- Save important documents, photos, and videos to iCloud or services like Google Drive, Dropbox, or OneDrive.
2. Sign Out of Apple Services
To avoid activation lock issues later, sign out of your Apple ID and other Apple services.
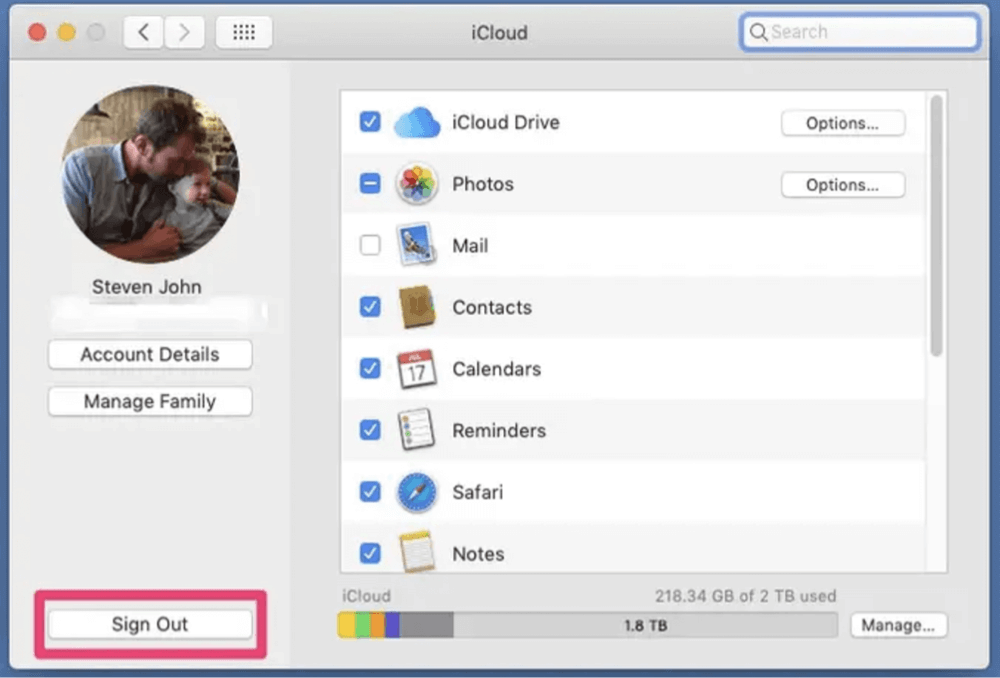
- iCloud:
- Go to System Settings > [your name] > iCloud.
- Scroll down and click Sign Out.
![factory reset an M1 chip Mac]()
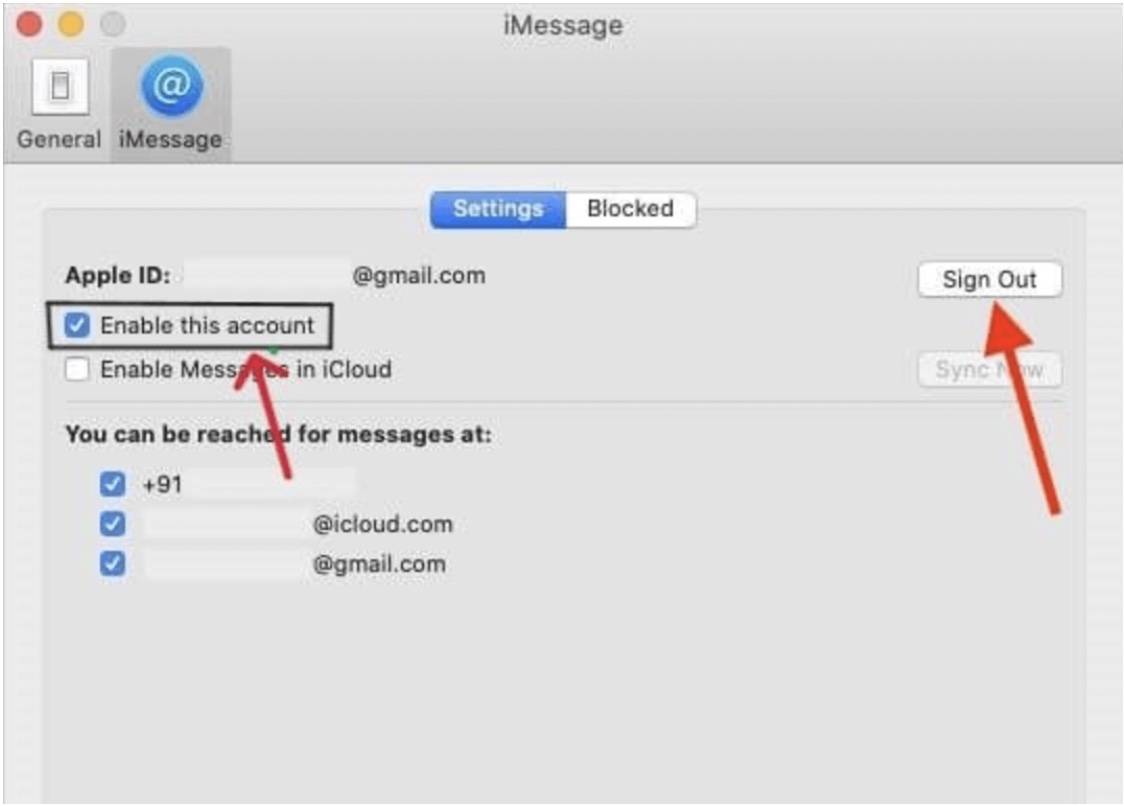
- iMessage:
- Open the Messages app.
- Go to Messages > Settings > iMessage and sign out.
![factory reset an M1 chip Mac]()
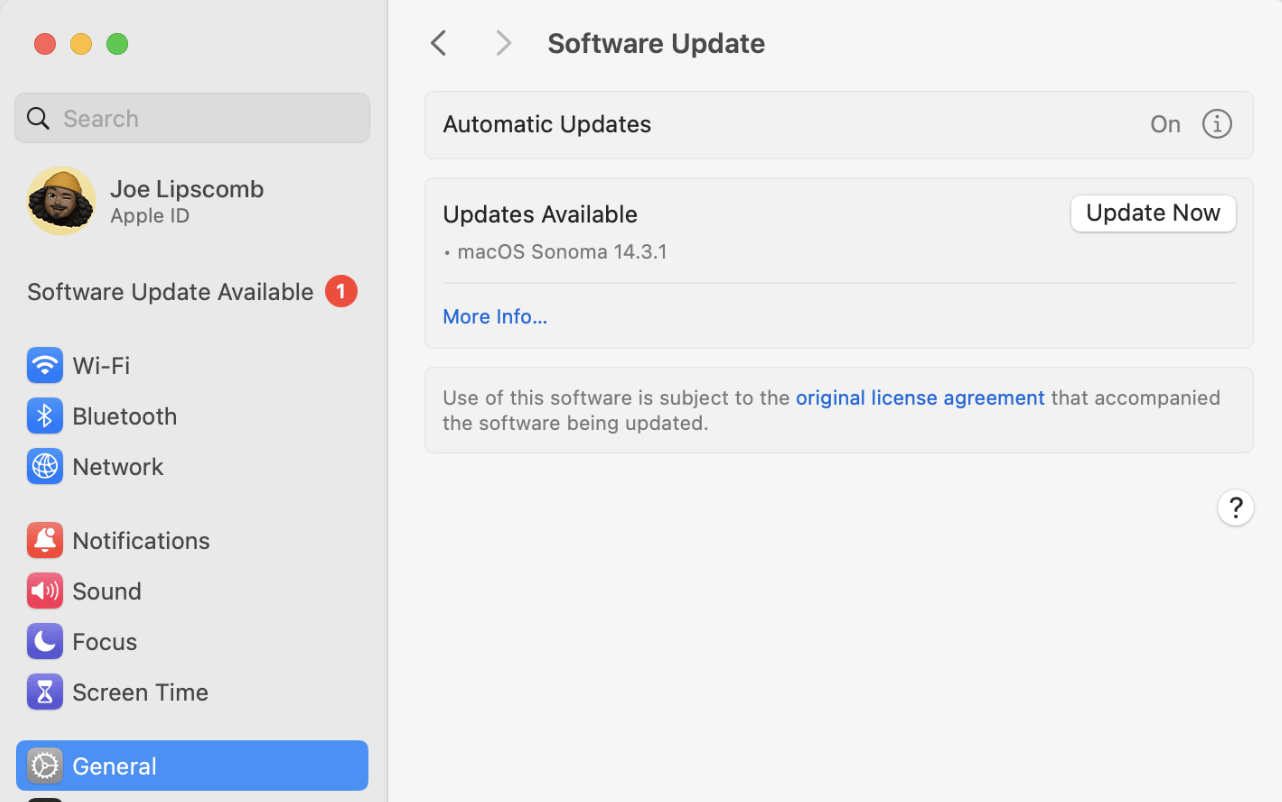
3. Ensure macOS is Up to Date
Although not mandatory, it's wise to run the latest version of macOS to avoid compatibility issues during reinstallation.
- Go to System Settings > General > Software Update to check for updates.
![factory reset an M1 chip Mac]()
4. Keep Your Apple ID Credentials Ready
After reinstalling macOS, you'll need your Apple ID to activate the Mac. Make sure you remember your credentials.
Steps to Factory Reset a M1 Mac
Booting an M1 Mac into macOS Recovery Mode
One of the fundamental differences between Intel-based Macs and Apple Silicon (M1/M2) Macs lies in how you access macOS Recovery - a special environment where you can repair your disk, reinstall macOS, and access tools like Terminal and Disk Utility. On M1 Macs, the key combination used for Intel Macs (Command + R) no longer works. Instead, M1 Macs use a simplified, more secure approach tied to the power button.
Why macOS Recovery Mode is Important
macOS Recovery is essential for performing a factory reset because it allows you to:
- Erase the internal drive
- Reinstall a fresh version of macOS
- Restore from a Time Machine backup (optional)
- Run First Aid or other troubleshooting tools
![factory reset an M1 chip Mac]()
For M1 Macs, this environment is stored directly in the Apple Silicon firmware, offering enhanced security and reliability.
Steps to Access macOS Recovery on an M1 Mac
Follow these steps carefully:
- Shut Down Your Mac
- Click the Apple menu in the top-left corner and select Shut Down.
- Wait for your Mac to completely power off (screen goes black, no fan or keyboard light).
- Press and Hold the Power Button
- On MacBooks, the power button is integrated with Touch ID.
- Press and hold this button until you see "Loading startup options…" on the screen. This can take around 10-15 seconds.
- Important: If you tap the button instead of holding it, your Mac will simply turn on as normal. Keep it pressed!
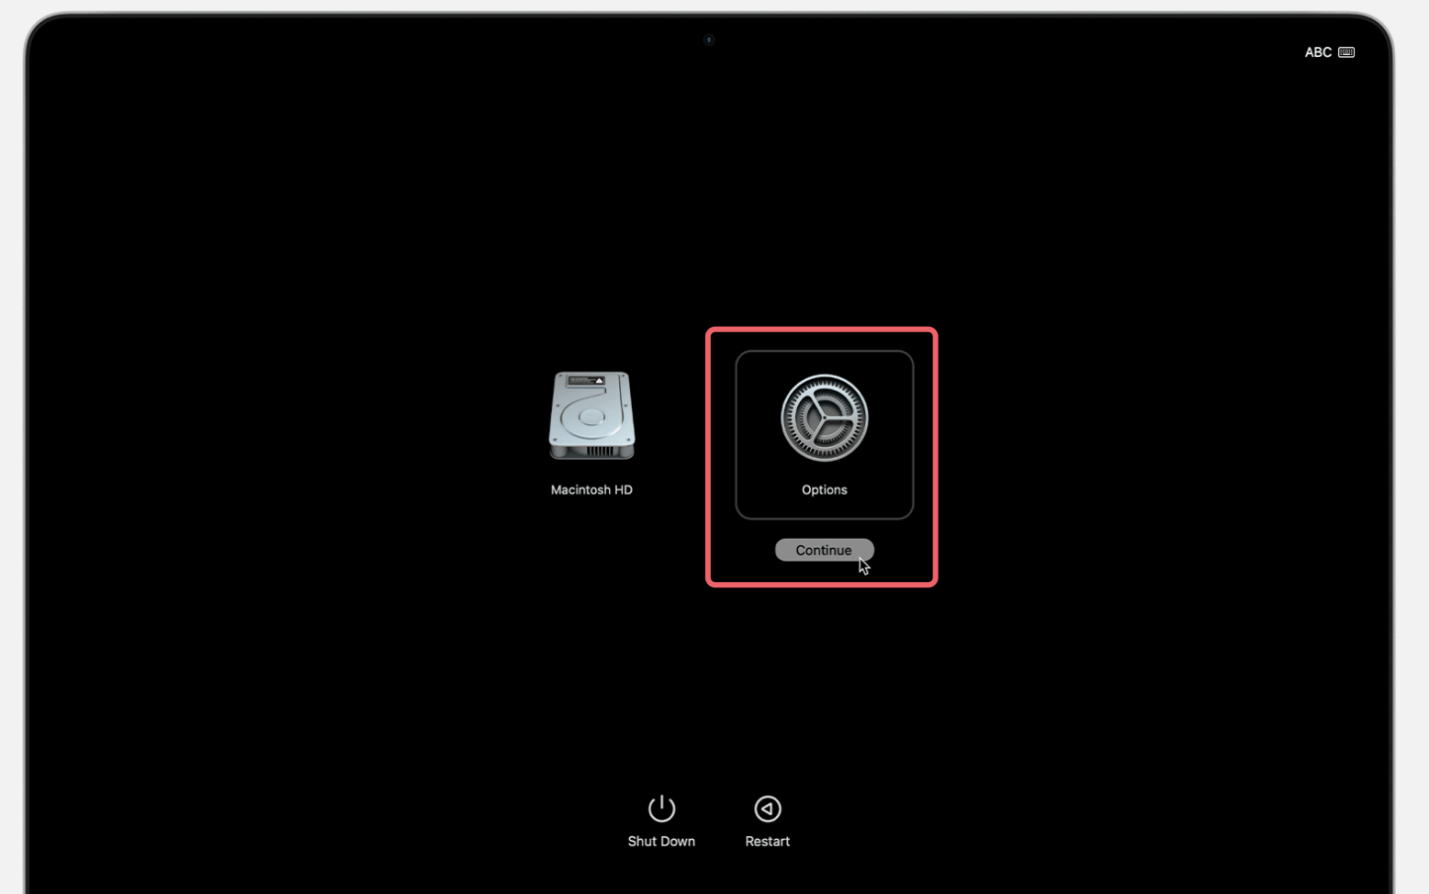
- Enter Recovery
- Once the startup options screen appears, you’ll see:
- An icon for your main startup disk (usually named "Macintosh HD")
- An Options icon with a gear symbol
- Once the startup options screen appears, you’ll see:
- Select Options > Continue
- Click Options, then Continue.
![factory reset an M1 chip Mac]()
- Enter your administrator password if prompted.
- Click Options, then Continue.
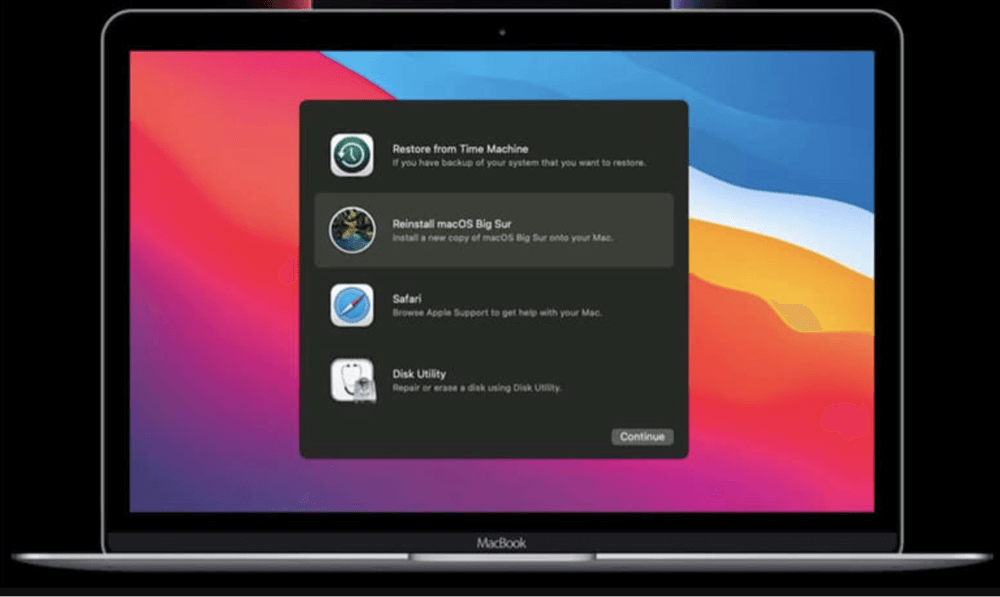
You are now in macOS Recovery. The window that opens will give you several tools:
- Restore from Time Machine
- Reinstall macOS
- Safari (for online help)
- Disk Utility
- Terminal
If your Mac was enrolled in MDM (Mobile Device Management) or a corporate setup, you might also see Startup Security Utility or Erase Mac options.
Troubleshooting Tip: Can't Access Recovery Mode?
If nothing appears after holding the power button:
- Ensure the Mac is charged or connected to power.
- Try using an external display if you're on a Mac mini or Mac Studio.
- Reset the SMC or NVRAM - note that these steps are different or not necessary on M1 Macs.
- As a last resort, you can use Apple Configurator 2 on another Mac to revive or restore the firmware, although this is more complex and used only when your M1 Mac is completely unresponsive.
By successfully entering Recovery Mode, you’re ready to proceed with erasing the disk and reinstalling macOS.
Erasing the Disk Using Disk Utility
Before reinstalling macOS, you must erase your Mac’s internal drive.
Steps to Erase Your Disk:
- From the macOS Utilities window, select Disk Utility.
- In the sidebar, select Macintosh HD (your system volume).
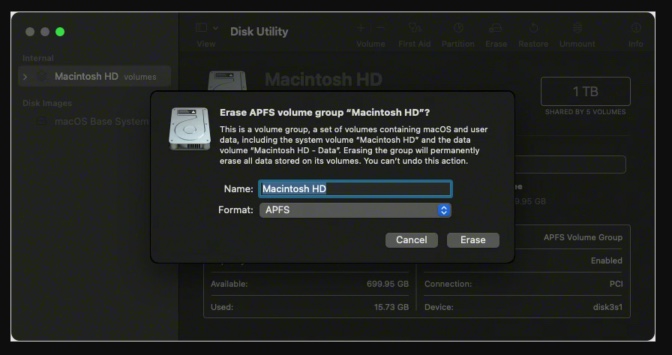
- Click Erase at the top of the window.
- In the dialog box:
- Name: Macintosh HD
- Format: APFS
- Click Erase again to confirm.
![factory reset an M1 chip Mac]()
- If you see an option to Erase Volume Group, click it.
- Wait for the process to complete, then click Done.
Repeat the process for any other internal volumes (like "Macintosh HD - Data") if they remain after the first erase.
Important Note:
Be very careful to select the correct internal disk. Erasing the wrong one can affect connected drives.
Reinstalling macOS on Your M1 Mac
Now that the disk is erased, it's time to reinstall macOS.
Steps to Reinstall macOS:
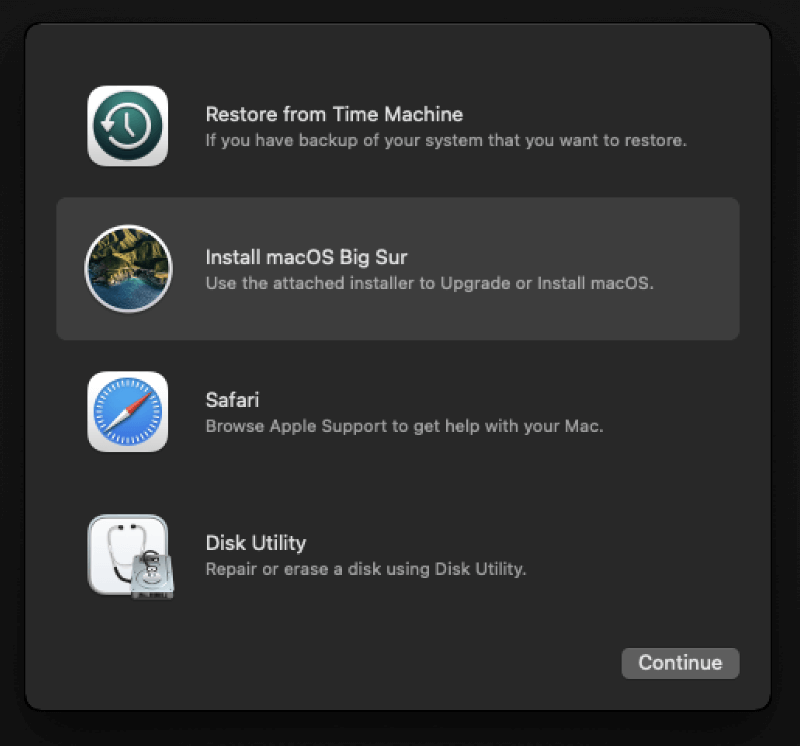
- Return to the macOS Utilities window.
- Select Reinstall macOS Sonoma/Ventura/Monterey/Big Sur (version may vary).
![factory reset an M1 chip Mac]()
- Click Continue and follow the on-screen instructions.
- Select Macintosh HD as the installation destination.
- Click Install.
Your Mac will begin downloading and installing a fresh copy of macOS. This can take anywhere from 20 minutes to over an hour depending on your internet connection.
Once the installation is complete, your Mac will restart and display the Setup Assistant screen.
Post-Reset Options: Set Up or Shut Down
At this point, you have two choices:
1. Set Up As New (For Personal Use)
If you're keeping the Mac, go through the setup process:
- Connect to Wi-Fi
- Sign in with your Apple ID
- Set up user accounts, preferences, etc.
2. Shut Down (For Resale or Transfer)
If you're planning to sell or gift the Mac:
- When you reach the Welcome screen, press and hold the power button and select Shut Down.
- The new user can then set it up as their own.
Troubleshooting M1 Mac Factory Reset Issues
Sometimes, things don't go smoothly. Here’s how to troubleshoot common issues.
1. macOS Recovery Won't Load
- Ensure your Mac is fully shut down before trying to enter Recovery.
- Try again, holding the power button longer.
- Use Internet Recovery: Requires a stable internet connection.
2. Reinstallation Fails or Freezes
- Check your Wi-Fi connection.
- If using a wired keyboard or mouse, try removing other peripherals.
- Try restarting the Mac and reinstalling again.
3. Stuck on Activation Lock
If you forgot to sign out of iCloud, Activation Lock will prevent the next user from accessing the Mac.
- You'll need to re-enter your Apple ID password to unlock the Mac.
- If you no longer have access to the account, you must contact Apple Support with proof of purchase.
4. Using Apple Configurator (Advanced Recovery)
If the Mac is bricked or recovery mode is not working, you can use Apple Configurator on a second Mac to restore firmware.
Requirements:
- A second Mac running macOS 12.4 or later
- Apple Configurator app
- USB-C cable
This process is more technical and generally not required for routine factory resets.
💡 Note: The data which is erased during factory reset is not lost for good and can be recovered by data recovery software.
Recover Lost Data After Factory Reset M1 Mac
Mac data recovery software is able to recover lost data after factory resetting a M1 Mac.
Additional Tips and Considerations
1. Enable FileVault After Setup (Optional)
If security is a concern, you can enable FileVault to encrypt your disk after reinstalling macOS.
- Go to System Settings > Privacy & Security > FileVault.
2. Secure Erase for Extra Safety
If you're selling the Mac and want to prevent any recovery of erased data:
- Use Disk Utility to erase with multiple passes (note: this option is limited on SSDs).
- Alternatively, use a third-party app like CleanMyMac for deeper cleaning (before reset).
3. Recycle or Donate Responsibly
If you're disposing of your Mac:
- Check Apple's trade-in program.
- Donate to an organization that refurbishes electronics.
Wipe All Deleted/Lost Data Permanently Before Selling or Donating the M1 Mac
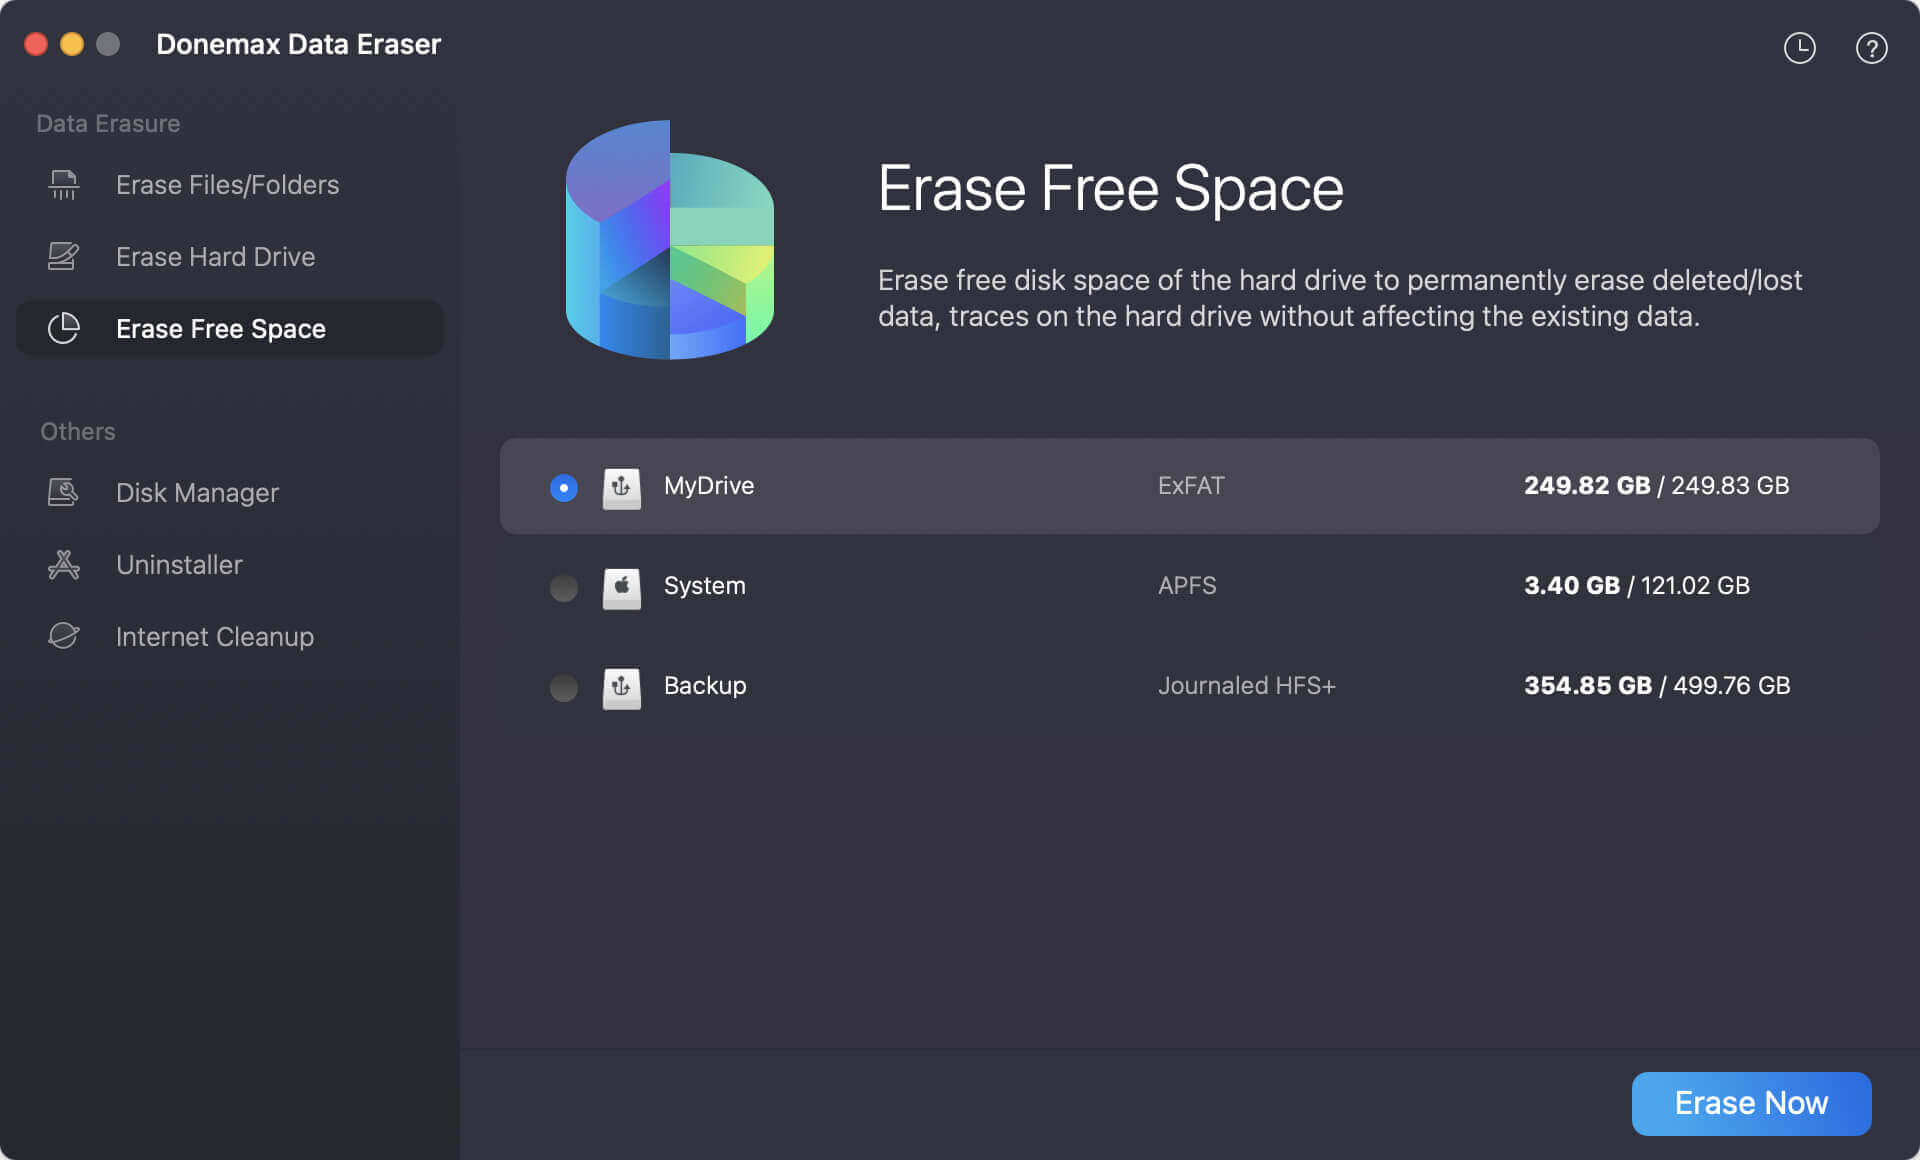
To prevent data recovery, you can use disk wipe software - such as Donemax Data Eraser for Mac to securely wipe free disk space of the M1 Mac. It will securely and completely wipe all deleted/lost data, making data recovery be impossible.
Step 1. Download and install Donemax Data Eraser for Mac on your M1 Mac.
Step 2. Open Donemax Data Eraser for Mac, choose Erase Hard Drive mode.
Step 3. Then select the internal SSD - such as Macintosh HD, click on Erase Now button.
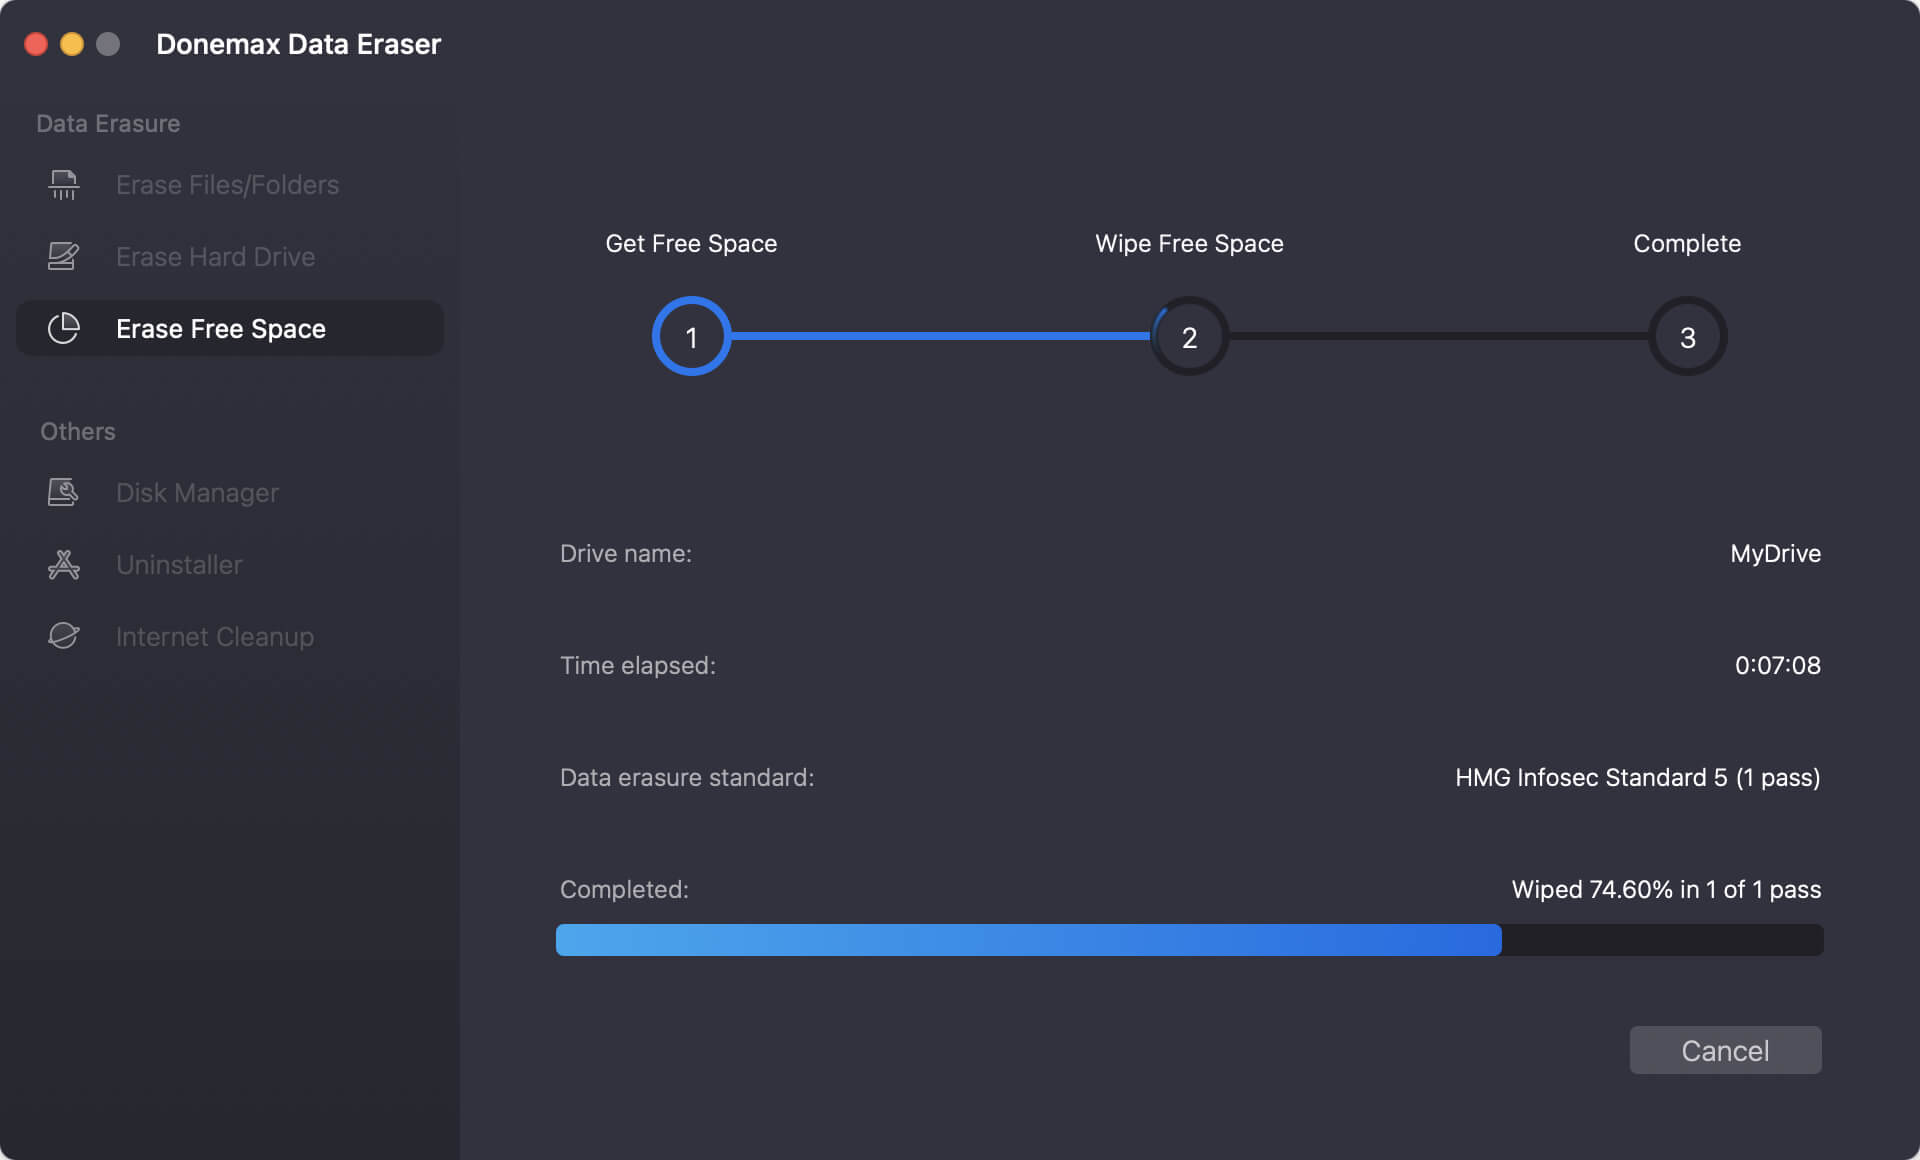
It will securely wipe free disk space of the internal disk and permanently erase all deleted/erased/lost data, no trace left behind.
Conclusion
Factory resetting an M1 chip Mac may seem daunting at first, especially since the Apple Silicon architecture changes how you access recovery tools and erase the system. However, once you understand the steps - backing up your data, signing out of Apple services, erasing the drive through Disk Utility, and reinstalling macOS - the process becomes straightforward.
Whether you're preparing your Mac for resale, trying to resolve a critical issue, or simply starting fresh, this guide provides everything you need to reset your M1 Mac safely and correctly.
Just remember:
- Back up first
- Sign out of all accounts
- Use the Power button method to access Recovery
- Erase correctly and reinstall macOS
- Shut down or set up depending on your goal
Following these steps ensures that your personal data stays protected and that your Mac is ready for its next chapter - whether it's with you or someone else.
Donemax Data Eraser for Mac
100% safe and powerful Mac data erasure program. It offers certified data erasure standards including U.S. Army AR380-19, DoD 5220.22-M ECE to help in securely and permanently erase data from Mac HDD/SSD and external storage device, making data recovery be impossible.
Related Articles
- Dec 03, 2024How to Factory Reset a Mac Without Password?
- Oct 23, 2024Empty or Wipe Trash Bin on Mac: A Complete Guide to Cleaning Your Mac's Storage
- Apr 18, 2025How to Factory Reset an M3-Chip Mac?
- Oct 15, 2025Three Methods to Format Hard Drive on Mac
- Jan 07, 2026Best Data Eraser for macOS Mojave 10.14
- Jan 07, 2026How to Erase Data in macOS Big Sur Permanently?

Contributing Writer
Maria
Maria is one of the senior writers & editors of Donemax who lives and works in Sydney, Australia. She loves PC, Mac and Internet Technology. She has 6 years of writing articles about data recovery on PC/Mac, disk cloning solution, data eraser and computer OS optimization, etc. She is also interested in testing various software and digital products.

Editor in chief
Gerhard Chou
In order to effectively solve the problems for our customers, every article and troubleshooting solution published on our website has been strictly tested and practiced. Our editors love researching and using computers and testing software, and are willing to help computer users with their problems