
Written byLucienUpdated on Jul 11, 2023
5 Methods to Recover Lost Data after Upgrading to macOS Sonoma
Approved byGerhard Chou
Summary: macOS Sonoma is Apple's new big thing, which comes with many great features like fresh screensavers, handy widgets, and a new gaming mode. All these aim to make using your Mac even more enjoyable. But, like all big updates, it may have some problems during or after updating to the coming macOS Sonoma. The biggest issue can be losing data because of surprise glitches or not being compatible with some things.
PAGE CONTENT:
Because of this, it's really important to have strong backup and recovery plans to keep your important data safe on your Mac. In this article, we're going to look at the usual reasons why data gets lost on a Mac. And we'll also share 5 effective ways to recover lost data after upgrading to macOS Sonoma. Now, let's dig in!
4 Potential Causes of macOS Sonoma Data Loss
Upgrading to macOS Sonoma might seem like just a few clicks for us, but it involves many steps. These include backing up before the upgrade, downloading the new system package, unpacking the package, syncing data to your local computer, and more. Any of these steps could cause data loss. And understanding why and where data loss occurs during the process can improve your chances of successful data recovery in macOS Sonoma.
👉Cause 1: Network Problems
During the macOS Sonoma upgrade, network issues can stop your cloud data from syncing successfully with your local system. To avoid this, make sure you have a strong internet connection before and during the upgrade. If this happens, you usually need to resync your data to your Mac. If you've already backed up your data to your computer with Time Machine, you can try recovering it.
👉Cause 2: Software Compatibility Issues
If you're using third-party apps, they might not be compatible with macOS Sonoma. Therefore, after upgrading to the new macOS, it's a good idea to check if these apps have updates specifically for macOS Sonoma. If updates are available, install them. This way, your third-party apps are likely to work properly, allowing them to recognize files on the new system and sync data from the cloud to your Mac.
👉Cause 3: Interruptions During the Upgrade Process
Various factors can interrupt your upgrade to Sonoma, such as your power source getting unplugged and the battery draining quickly. These situations can also lead to data loss and disrupt the upgrade. If this happens, the best approach is to recover the data first before attempting the upgrade again. This is because, typically, when you try to recover data on a new system, the data may have already been fully erased from the hard drive by the system.
👉Cause 4: Hardware Damage
I'm putting this last because usually upgrading to a new Mac system won't cause hardware damage that leads to data loss. But it's not completely impossible. Bad charging and device usage habits can cause this, and it might become apparent during the Mac upgrade. If this happens, it's best to go to a professional Apple computer repair shop for a solution.
Of course, it's also possible that you accidentally deleted some files but thought the data loss was caused by the macOS upgrade. So, it's best to check your Trash folder to see if your lost files are there.
5 Easy Methods to Recover Lost Data After Upgrading macOS Sonoma
Once you understand when the data was lost and the reasons for the loss after Sonoma updating, you can try using the following 5 methods to recover them. Let's take a look at these methods and the specific steps involved.
💡Method 1. Retrieve Lost Data using Time Machine
Time Machine, a built-in macOS feature, can recover data successfully from failed upgrades or installations. However, you must ensure you’ve performed a backup from external storage before upgrading to the new macOS system. With this, you can restore all data at once or restore data for specific apps. Below are the detailed steps:
Step 1: Connect your external hardware device
Make sure the device you have connected has backed up your data using Time Machine and is powered on so that your Mac computer can read the data from it and restore it to your macOS Sonoma computer.
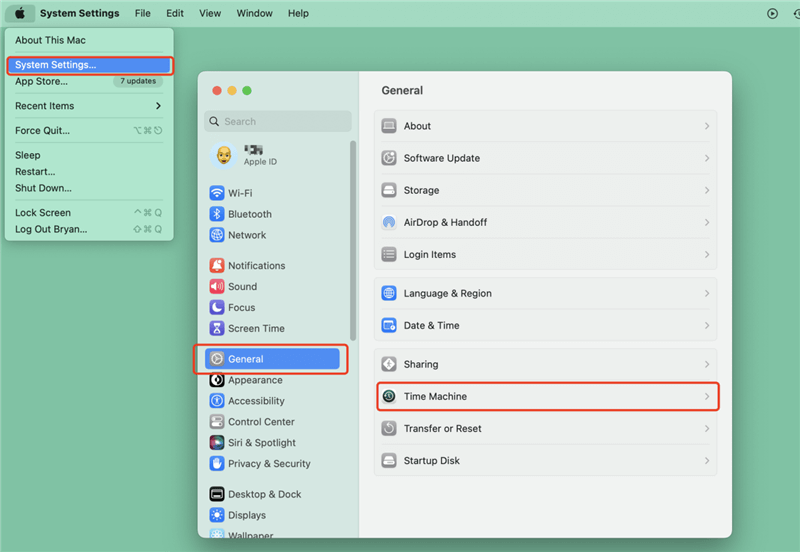
Step 2: Go to System Settings and open Time Machine.
Go to Apple menu > System Settings > General > Time Machine. If you have not set Backup Drive for your Mac, just connect an external hard drive to your Mac and set it as the backup drive for Time Machine.
Step 3: Open Time Machine.
Open Time Machine from the Mac menu bar.

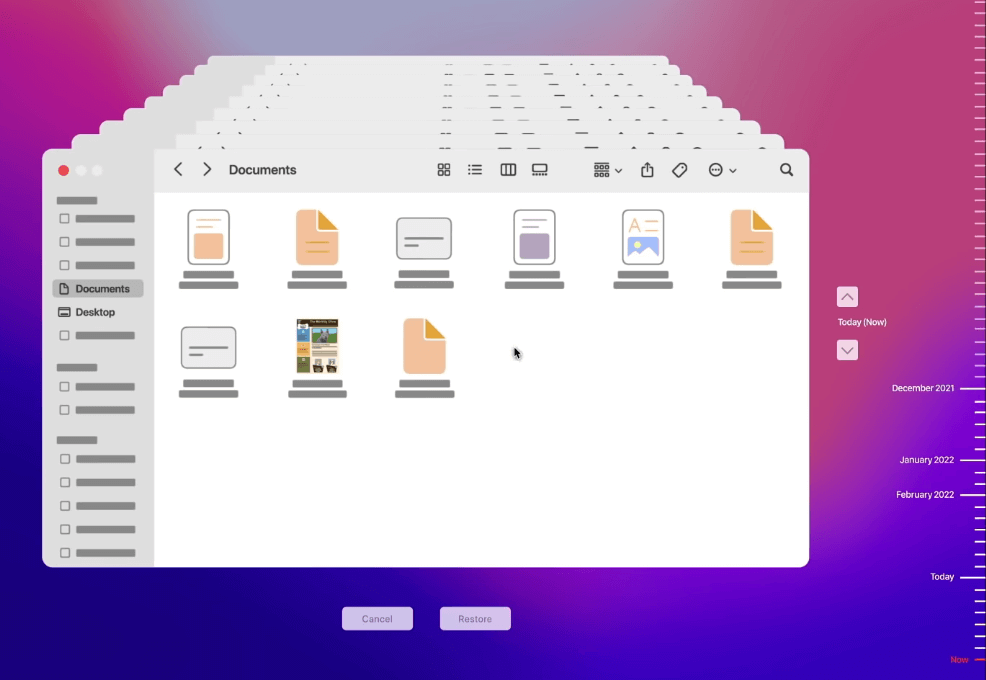
Step 4: Restore data.
Once opened, you can browse through different backup dates and times to locate the appropriate Mac data backup for data retrieving to your macOS Sonoma.
💡Method 2. Get Back Lost Data from iCloud
If you backed up some of your data to iCloud, you could retrieve it by logging into your iCloud account. iCloud serves as a reliable recovery option after a macOS Sonoma upgrade. However, you should ensure that you've turned on the items you want backed up, as well as have a working iCloud account.
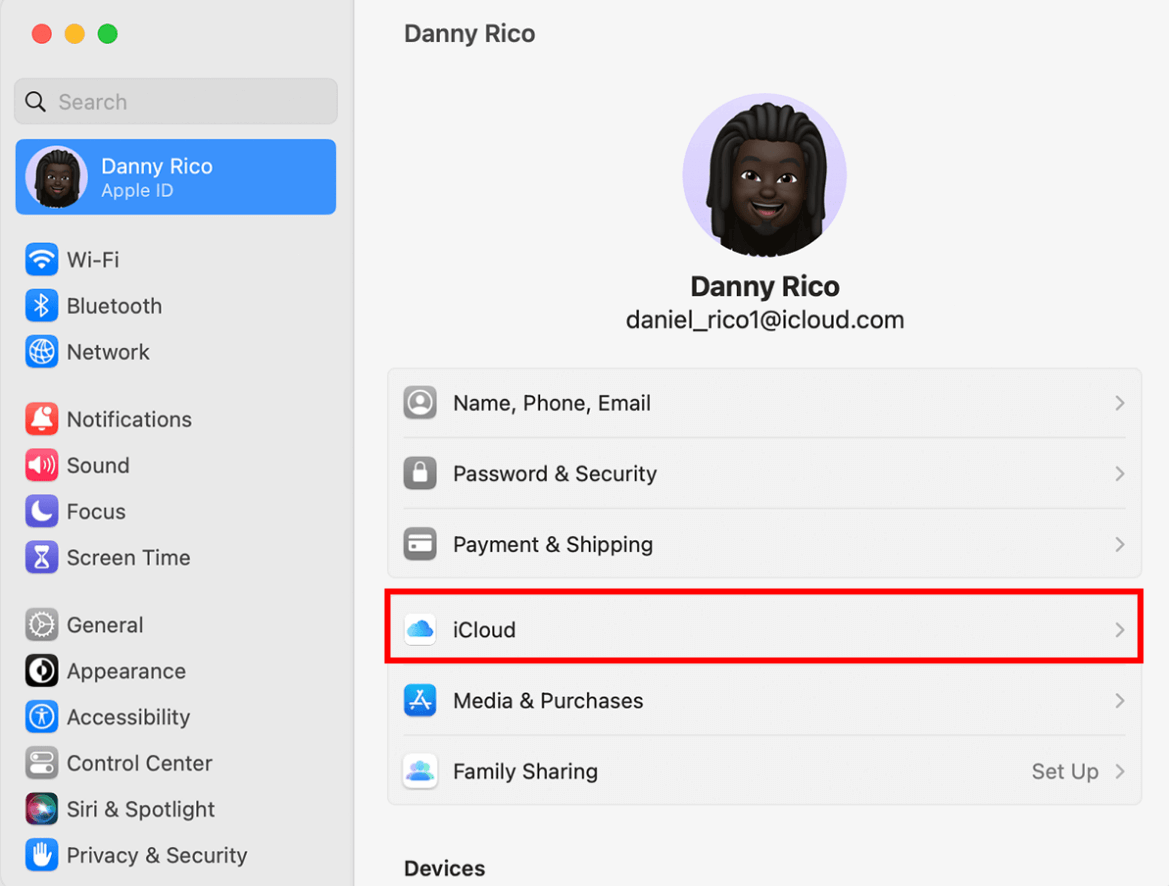
- Step 1: Sign in iCloud on Mac
Choose Apple menu > System Settings, then click Apple ID. Just click iCloud to sign in with your Apple ID and passcode. - Step 2: Choose the services you want synced with iCloud.
Place a check on them. These items may include iCloud Drive, Photos, Mail, Calendar, and Notes, to name a few. - Step 3: Restore your data backed up from iCloud.
Since iCloud occasionally syncs data on your Mac and other devices, you should still see those data appear on your Mac the next time you boot Apple OS. This method is a safeguard feature if an upgrade process fails on your Mac.
Or, you can go to www.icloud.com and log in with your Apple ID. After that, you can access all your missing files there.
💡Method 3. Use Trash to Get Back Lost Data
As we discussed in analyzing the reasons for data loss, it is possible that you accidentally deleted certain files and attributed this to upgrading to macOS Sonoma. Therefore, you can try checking the Mac Trash to see if the files you lost are there. If they are, you can simply drag these files out of the Trash and restore them onto your desktop. If they are not there, then you can proceed to the next method.
- Step 1. Click the Trash icon on your System Tray.
The Trash icon is usually found on the far right of the System Tray. Click on it. - Step 2. Find the Files that you want to Restore.
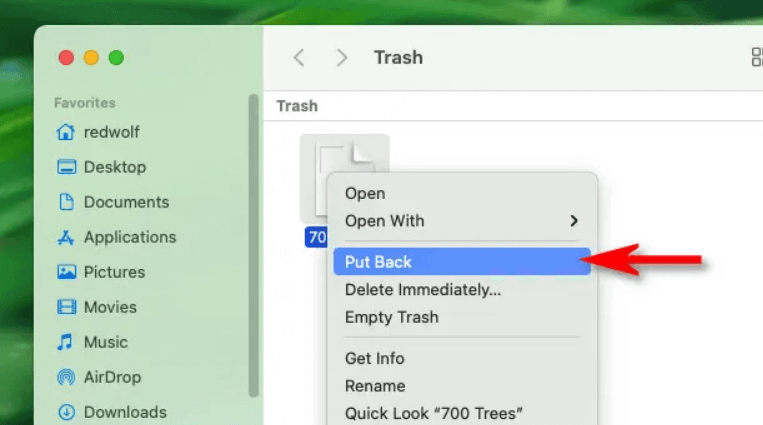
Go through Trash to find your lost file. Alternatively, you can use the Search text entry box on the upper right to make a query. - Step 3. Restore the File.
Please right-click on the file and then select Put Back to restore it to its previous location. Alternatively, you can drag and drop that file to another directory.
💡Method 4. Retrieve Data using Professional Recovery Software
The methods we talked about above need a backup copy of your files. But what if you don't have one? Then, it's time to think about other expert tools. Third-party software designed to recover lost Mac data could be your go-to option, primarily because it's more cost-effective compared to in-person services.
These macOS Sonoma data recovery tools provide a variety of methods to retrieve your data, offering a preview of recoverable files, and allowing you to selectively restore what you want.
Donemax Data Recovery for Mac
- Recover permanently deleted files on macOS Sonoma.
- Recover formatted or erased hard drive on macOS Sonoma.
- Recover corrupted or overwritten data.
Step 1. Select your volume and then do your scan
After downloading the Donemax Data Recovery for Mac, launch it. Next, select Data Recovery, then select the hard drive where you delete or lose the files.

Step 2. Scan the hard drive.
Click on Scan button, then it will deeply scan the hard drive, find all recoverable files.

Step 3. Preview your files and then recover them
Double-click on any file to preview. This process ensures you've picked the correct set of files. Select any number of files you want. When you're satisfied, click Recover. You can save them on any local or even a cloud drive.

💡Method 5. Using Professional Mac Data Recovery Services
If all other methods fail, professional data recovery services may be your last chance to recover data. While these services come at a higher cost, you may have no choice.
Professional data recovery services can solve problems with your internal or external hard drives, USB flash drives, and NAS devices, to name a few. They are more technically equipped than average users to solve these problems.
Recover Deleted Data in macOS Sonoma FAQs
Yes, the deleted files are not lost permanently even you have erased the Trash or Mac hard drive. First of all, you can check your backups to restore the deleted files. If it does not work, download a macOS Sonoma data recovery application to scan the Mac hard drive and find the deleted files.
Using third-party software is one of many solutions to recover deleted files during your macOS Sonoma upgrade. However, you can also use the other methods mentioned above. These are using Time Machine, using iCloud, recovering through Trash, or recovering through professional recovery data services.
As mentioned above, the most reliable way to back up essential data in macOS Sonoma is by using Time Machine. Time Machine backs up your data incrementally through an external hard drive and creates a snapshot. After this, you can quickly restore data at any point in time.
Conclusion
This guide provides a comprehensive overview of methods for recovering lost data following an upgrade. Nevertheless, a robust backup strategy is your best defense against data loss. Therefore, regular backups should be a priority both before and during your transition to the newly released macOS Sonoma.
Despite your best efforts, if you unfortunately lose essential content such as images or files while using macOS Sonoma, you can leverage the knowledge shared in this guide to attempt to recover your lost data. We thank you for your time spent reading this, and we invite you to share your thoughts, suggestions, or any knowledge related to macOS Sonoma in the comment section. Your feedback is highly appreciated and invaluable to us.
Related Articles
- Apr 10, 2025How to Restore Lost Files with Time Machine on macOS Sequoia: Step-by-Step Guide
- Sep 01, 2025How to Recover Deleted Safari Histories on Mac?
- Dec 29, 2025How to Recover Lost Data from Erased SSD on Mac?
- Apr 12, 2024How to Recover Erased Seagate External Hard Drive on Mac?
- Aug 10, 2025Recover Lost Data from SanDisk G-DRIVE on Mac – Complete Guide
- Mar 21, 2025[7 Methods] Recover Deleted Screenshots on Mac: A Comprehensive Guide

Contributing Writer
Lucien
Lucien is a writer and a chief programmer of Donemax software who has worked in the company for 5+ years. He has written much of the content on the site and devotes to providing troubleshooting and solution for Windows and Mac users including disk cloning, data recovery, migration, eraser, error fixes.

Editor in chief
Gerhard Chou
In order to effectively solve the problems for our customers, every article and troubleshooting solution published on our website has been strictly tested and practiced. Our editors love researching and using computers and testing software, and are willing to help computer users with their problems