
Written byMariaUpdated on May 13, 2025
Recover HFS+ Partition Data on Mac: A Complete Guide
Approved byGerhard Chou
Before we start: Is it possible to recover lost data from a HFS+ partition? Yes, with Mac data recovery software - such as Donemax Data Recovery for Mac, you can easily recover deleted, erased or inaccessible data from a HFS+ partition or disk volume. It even can help you repair a corrupted HFS+ partition, reformat HFS+ drive on Mac, etc.
PAGE CONTENT:
The HFS+ file system, also known as Mac OS Extended, has long been the standard file system for macOS users, especially before the introduction of APFS (Apple File System). While it's generally stable, HFS+ partitions can still suffer data loss due to formatting, deletion, corruption, or hardware issues. If you've lost important files from an HFS+ partition on your Mac, don't panic. This guide will walk you through safe, effective methods to recover your data and protect it in the future.
Overview: HFS+ partitions are used in older versions of macOS, Time Machine backups, and many external drives. While modern macOS versions (starting with High Sierra) use APFS by default, HFS+ remains in use on countless systems and devices. Unfortunately, these partitions are vulnerable to several issues that can lead to data loss.
Whether you accidentally erased a partition, encountered a corrupted file system, or suffered a failed macOS update, there are proven steps you can take to recover your lost files. This article covers both manual methods and powerful recovery software tools to help you retrieve data from a damaged or deleted HFS+ partition safely and efficiently.
About HFS+ Partition and Data Loss
What Is HFS+?
HFS+, also known as Mac OS Extended, was introduced by Apple in 1998. It was the default file system for macOS until the release of APFS in 2017. HFS+ supports features like journaling (which helps prevent corruption), hard links, and extended file attributes, making it suitable for a wide range of Mac users.
Common Causes of HFS+ Partition Data Loss
Understanding how and why data loss occurs is essential for determining the best recovery method. The most common reasons for HFS+ partition issues include:
- Accidental deletion or formatting using Disk Utility
- Corrupted partition tables or file systems due to improper shutdowns
- macOS updates or installations that overwrite or unmount HFS+ volumes
- Physical issues like failing drives or bad sectors
- Virus or malware attacks, although rare on macOS
- Disk Utility errors that occur during resizing, partitioning, or repair attempts
Symptoms of Partition Loss
Some signs that your HFS+ partition is lost or damaged include:
- The partition doesn't mount automatically
- Disk Utility shows the drive as "uninitialized" or "unmounted"
- File or folder names appear as gibberish
- macOS prompts you to format the drive when connected
Precautions Before HFS+ Recovery
Prior moving into recovery, it is significant to follow a few precautions:
- Stop using the affected drive immediately. Writing new data may overwrite recoverable files.
- Do not reformat or repartition the disk, even if prompted by macOS.
- Avoid installing recovery software on the same partition you want to recover data from.
- Create a disk image of the drive using Disk Utility or a third-party tool. This allows you to perform recovery from the image instead of the live drive.
By taking these steps, you maximize your chances of successful data recovery without further damaging the partition.
3 Methods to Recover Lost Data from HFS+ Partition on Mac
Method 1: Use Time Machine Backup (If Available) to Restore HFS+ Partition
Time Machine is macOS's built-in backup tool and one of the easiest ways to recover lost data, provided it was set up before the data loss occurred.
How to Restore Files from Time Machine
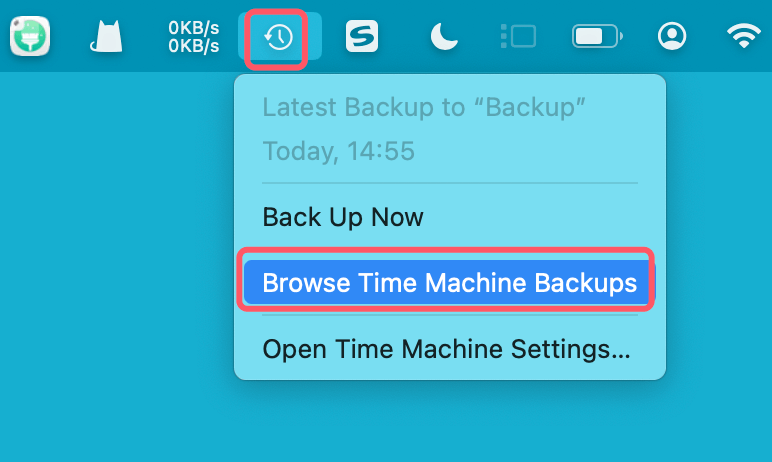
- Attach your Mac to the Time Machine backup drive.
- Access the original folder containing the deleted data.
- Choose "Enter Time Machine" or "Browser Time Machine Backups" after clicking the Time Machine icon in the menu bar.
![Use Time Machine Backup to Restore HFS+ Partition]()
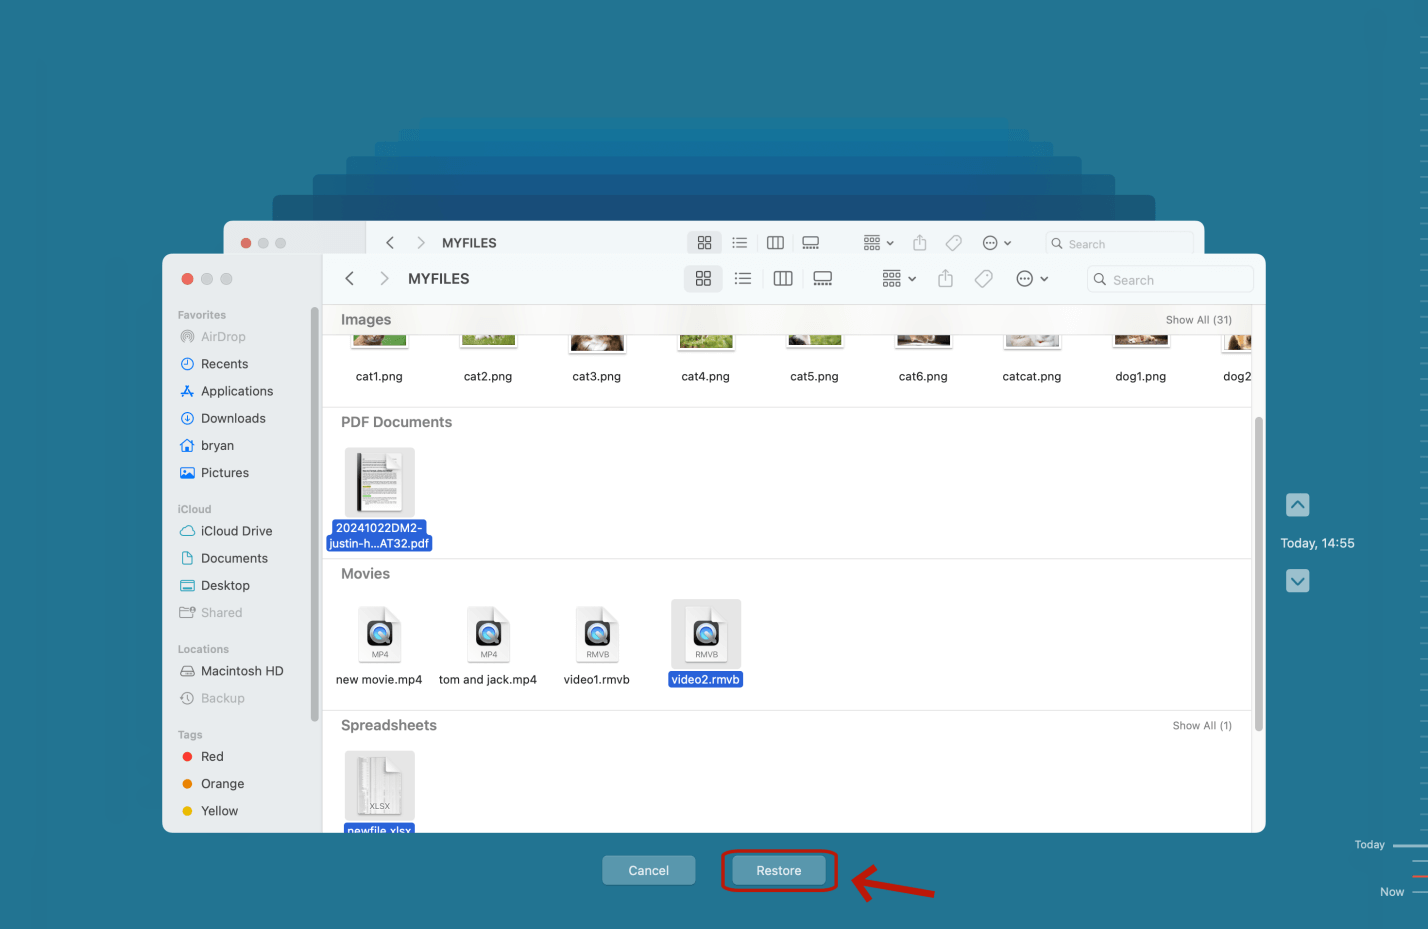
- Navigate the timeline located on the screen's right border.
- Select the version of the folder that contains your missing data.
- To restore files to their original place, click Restore.
![Use Time Machine Backup to Restore HFS+ Partition]()
Limitations
- Only works if Time Machine was set up before the data loss.
- Cannot recover data if the HFS+ partition itself is not included in backups.
If Time Machine isn't an option, you'll need to rely on recovery software or more advanced manual methods.
Method 2: Recover Lost Data from HFS+ Partition Using Mac Data Recovery Software
Data recovery software is often the most effective way to retrieve lost files from an HFS+ partition, especially if the partition is deleted or corrupted but the drive itself is physically intact.
Donemax Data Recovery for Mac is fully compatible of recovering data from APFS, HFS+, ExFAT or FAT32 drives on Mac. If you want to recover lost data from a HFS+ partition on Mac, just try this software:
- Native support for HFS+ partitions
- Deep scanning to recover deleted/formatted files
- Preview capabilities before recovering
- Support for a wide range of file types
Step-by-Step Guide: Recover HFS+ Partition Data Using Software
Step 1. Download and install the reliable Mac data recovery software - Donemax Data Recovery for Mac on your Mac.
Step 2. Open Donemax Data Recovery for Mac. Choose the lost HFS+ partition (if visible) or the entire disk.

Step 3. Click on Scan button to deeply scan the HFS+ partition or entire disk to find all deleted/formatted or inaccessible files.

Step 4. Preview and Recover Files After Scanning:
- Preview Recoverable Files: Use the file tree or search by file type (e.g., images, documents, videos). Preview allows you to confirm file integrity and accuracy.
- Select Files to Recover: Mark files or folders for recovery.
- Choose Recovery Destination: Select a different partition, external drive, or USB stick to save the recovered data. Saving files back to the original partition risks overwriting more data.
- Start Recovery: Click Recover and wait for the process to complete. Depending on the size and number of files, this could take several minutes to hours.

Post-Recovery Recommendations
Once you've recovered your files:
- Back them up immediately using Time Machine or a cloud storage service.
- Run Disk Utility's First Aid on the affected partition to check and repair any structural damage.
- Consider reformatting the drive to prevent future corruption - after backing up all data, of course.
Troubleshooting Tips
- Partition not showing up in software: Try scanning the entire disk instead of a specific partition.
- Scan is too slow or stuck: Use a powered USB hub for external drives, or restart the scan using a deep scan mode.
- Recovered files won't open: Try previewing other versions or formats; file corruption may have occurred due to partial overwriting.
Method 3: Terminal-Based Recovery for Advanced Users
Advanced users with knowledge of command-line tools can try macOS Terminal to attempt disk repair and mount lost partitions.
Using diskutil and fsck_hfs
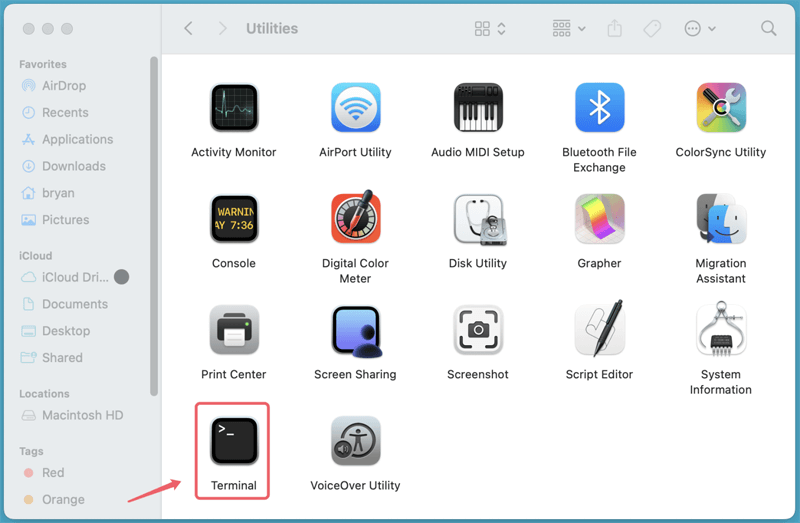
- Open Terminal from Utilities via Applications.
![Open Terminal from Utilities via Applications]()
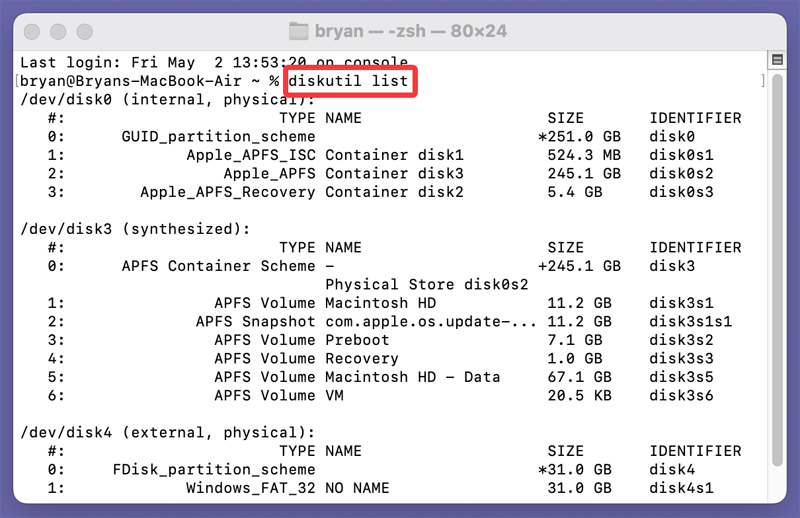
- Run the following command to list all disks and partitions:
diskutil list
![Using diskutil and fsck_hfs]()
Identify your lost HFS+ partition by size or label.
- Try repairing it using:
sudo fsck_hfs -fy /dev/diskXsY
Replace diskXsY with the actual identifier (e.g., disk1s2).
- If successful, remount the partition with:
sudo diskutil mount /dev/diskXsY
Caution
- These commands can further corrupt the partition if used improperly.
- Only recommended if you’re familiar with disk structures and Terminal usage.
- Always work from a disk image if possible.
When Professional Help is Needed
Sometimes, software and command-line tools aren't enough. If your HFS+ drive has suffered physical damage, or if software fails to recognize the partition at all, it's time to consider professional recovery.
Signs You Need Professional Recovery Services
- The drive makes clicking or grinding noises
- Disk Utility shows the disk as unreadable or uninitialized
- The recovery software fails to detect any recoverable files
What Professional Labs Do
Data recovery professionals use cleanroom environments and specialized tools to:
- Replace damaged internal components
- Read raw data sectors
- Rebuild corrupted partition structures
- Extract and reconstruct files even from fragmented partitions
Tips to Prevent Future Data Loss on Mac HFS+ Partition
Prevention is always better than recovery. Here are practical steps to avoid losing data from HFS+ or any partition:
- Enable Time Machine and back up regularly.
- Avoid force shutdowns, especially during file operations.
- Always eject external drives safely.
- Use SMART monitoring tools (like DriveDx or SMART Utility) to detect early signs of drive failure.
- Store important data in multiple locations (cloud + local backups).
- Avoid experimenting with partition tools unless you fully understand the process.
Conclusion
Losing access to an HFS+ partition on your Mac can be stressful, especially when critical files are involved. Fortunately, macOS offers multiple solutions for recovering lost data - from Time Machine backups and third-party recovery tools to command-line repairs and professional services.
The key to a successful recovery is speed and caution: avoid writing new data to the drive, choose the right tool for your experience level, and seek professional help if signs of physical damage appear.
No matter the cause of the HFS+ partition failure, there is hope. By following the steps outlined in this guide, you can recover your valuable files and take steps to protect them against future loss.
Donemax Data Recovery for Mac
Donemax Data Recovery for Mac is one of the best Mac data recovery software. It is easy-to-use and can help in recovering deleted, formatted, inaccessible or lost data from Mac HDD/SSD, external disk, USB drive, SD card, camera or other storage devices.
Related Articles
- Jan 01, 1970How to Recover Deleted PDF File on Mac?
- Oct 27, 2025How to Recover Lost Data on M5 Chip Mac?
- Nov 13, 2024How to Recover Lost Data from Apple M4 Chip Mac [4 Methods]
- Mar 21, 2025[8 Methods] Recover Missing or Disappeared Files from an External Hard Drive on Mac
- Nov 18, 2024How to Recover Lost Data After Reinstalling macOS? [4 Methods]
- Sep 01, 2025How to Recover Deleted Safari Histories on Mac?

Contributing Writer
Maria
Maria is one of the senior writers & editors of Donemax who lives and works in Sydney, Australia. She loves PC, Mac and Internet Technology. She has 6 years of writing articles about data recovery on PC/Mac, disk cloning solution, data eraser and computer OS optimization, etc. She is also interested in testing various software and digital products.

Editor in chief
Gerhard Chou
In order to effectively solve the problems for our customers, every article and troubleshooting solution published on our website has been strictly tested and practiced. Our editors love researching and using computers and testing software, and are willing to help computer users with their problems