
Written byStevenUpdated on Jul 07, 2025
How to Downgrade from macOS Tahoe 26 without Losing Data?
Approved byGerhard Chou
Before we start: Downgrading from macOS Tahoe 26 is necessary when you encounter issues. Before you downgrade the macOS, ensure to back up data first. You can use Time Machine to back up data or use Donemax Disk Clone for Mac to clone macOS.
PAGE CONTENT:
macOS Tahoe 26 introduces a host of new features, performance improvements, and security enhancements. However, not every user finds it suitable for their needs. Compatibility issues with critical applications, increased system requirements, or simply personal preference may push users to revert to an earlier version like macOS Sequoia or Sonoma. If you're facing problems after updating, downgrading might be your best option.
In this guide, we'll walk you through how to safely downgrade from macOS Tahoe 26 without losing data. The process includes backing up your files, erasing the current system, reinstalling an older macOS version, and restoring your data effectively.
Why You Might Want to Downgrade from macOS Tahoe 26?
While macOS updates are designed to enhance the user experience, not every update is right for everyone. Here are common reasons why users consider downgrading from macOS Tahoe 26:
- App Compatibility: Some legacy apps may not yet be updated to support Tahoe 26.
- Performance Issues: Older Mac models may slow down or overheat.
- Interface Changes: New UI changes can be jarring and decrease workflow efficiency.
- Bugs and Glitches: Early versions of macOS often come with bugs that are later patched.
- Hardware Conflicts: Certain peripherals might stop working correctly after the update.
Whatever your reason, the downgrade process can be smooth if done carefully.
What to Consider before Downgrading from macOS Tahoe 26?
Before you begin, it's crucial to weigh the implications:
- System Features: You'll lose access to new features exclusive to Tahoe 26.
- Security Updates: Downgrading means forgoing the latest security patches.
- App Behavior: Apps designed for newer systems may not work well on older ones.
- Compatibility of Data: Some files modified or created on Tahoe 26 may not open properly in older macOS versions.
Make sure you understand these trade-offs and have a strong reason for downgrading.
Steps to downgrade from macOS Tahoe 26
Step 1. Backup Your Data Safely
Downgrading involves erasing your current system, so backing up macOS Tahoe 26 is absolutely essential.
1. Use Time Machine
Time Machine is Apple's built-in backup utility. It lets you restore your entire system or specific files.
- Connect an external hard drive with enough space.
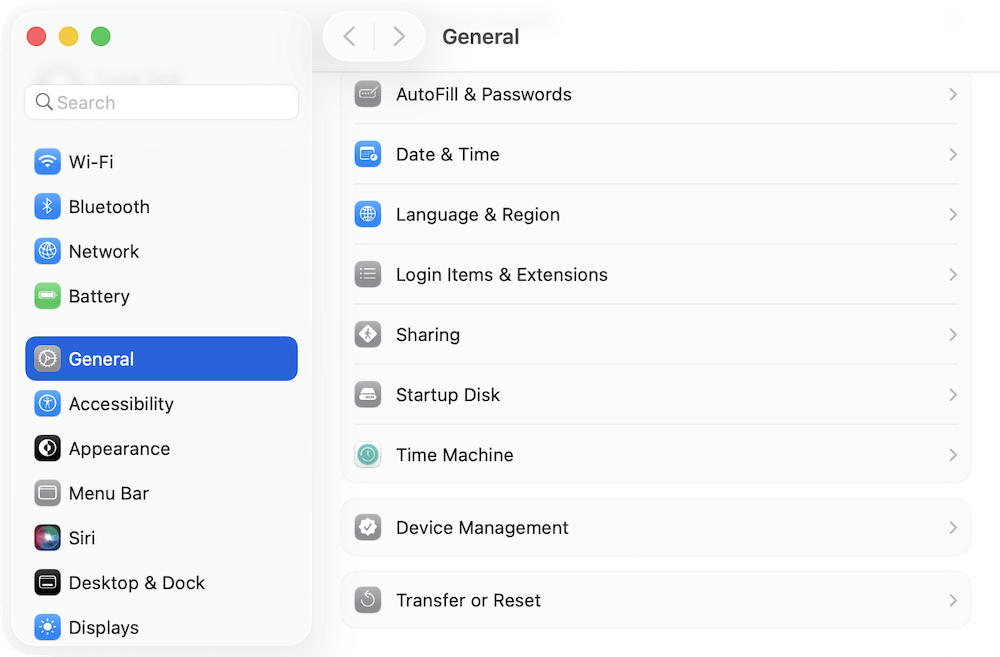
- Open System Settings > General > Time Machine.
![downgrade from macOS Tahoe 26]()
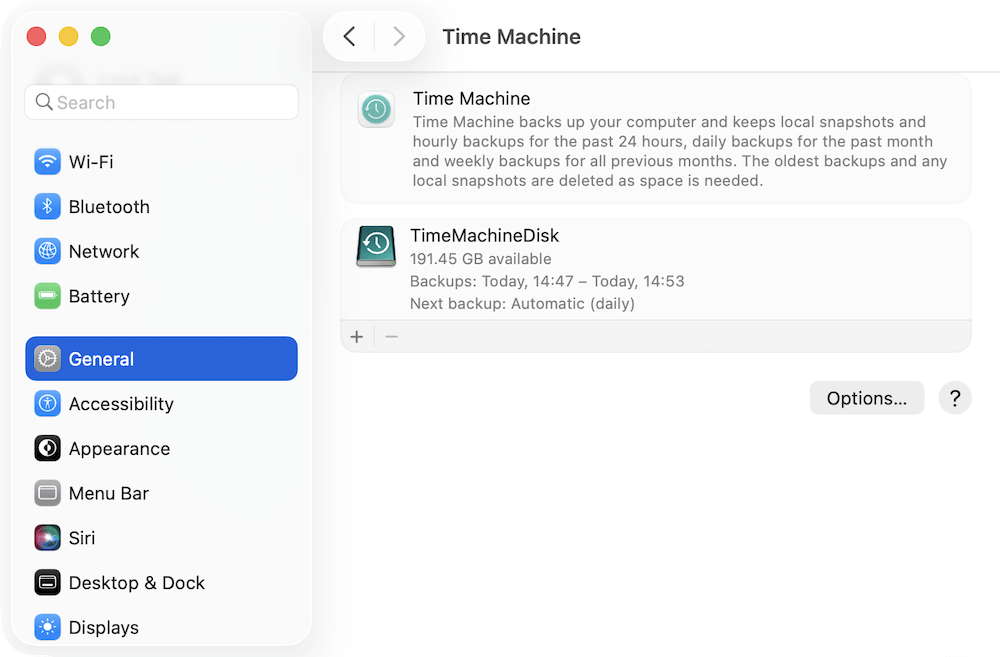
- Select the drive and start a backup.
- Wait for the process to complete before proceeding.
![downgrade from macOS Tahoe 26]()
2. Alternative Backup Methods
You can also use:
- iCloud Drive for essential files and documents.
- Third-party tools like Donemax Disk Clone for Mac.
- Manual backup to an external drive for photos, videos, documents, and app data.
Ensure that everything important is backed up—from files and folders to your Photos library and iTunes data.
Step 2. Prepare for the Downgrade
You can't just install an older macOS version over a newer one. You need to erase the current system and perform a clean install.
1. Choose the Right macOS Version
Decide which version you want to downgrade to. Most users revert to the version they used before upgrading.
Popular choices:
- macOS Sequoia (15)
- macOS Sonoma (14)
- macOS Ventura (13)
2. Download the macOS Installer
You'll need the full installer for the version you want. Here's how:
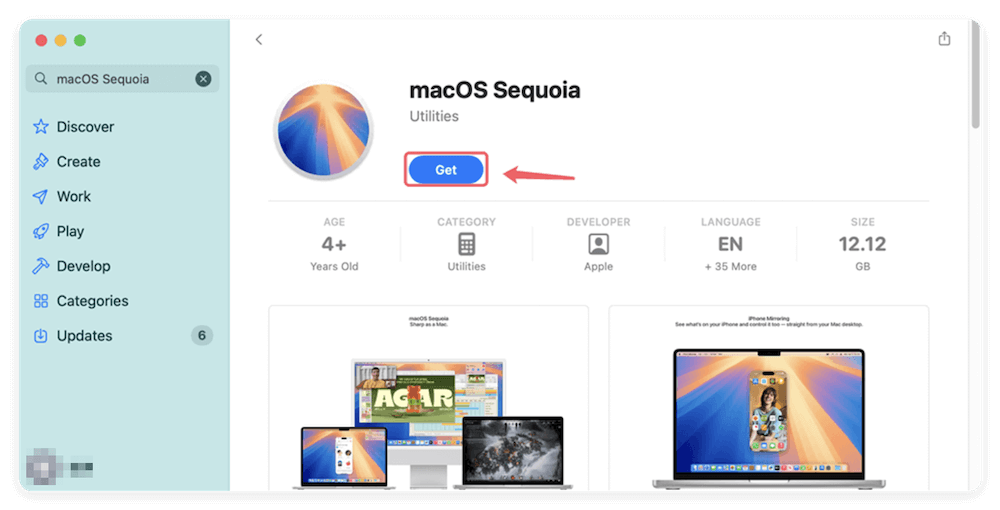
- Visit Apple's official macOS download page.
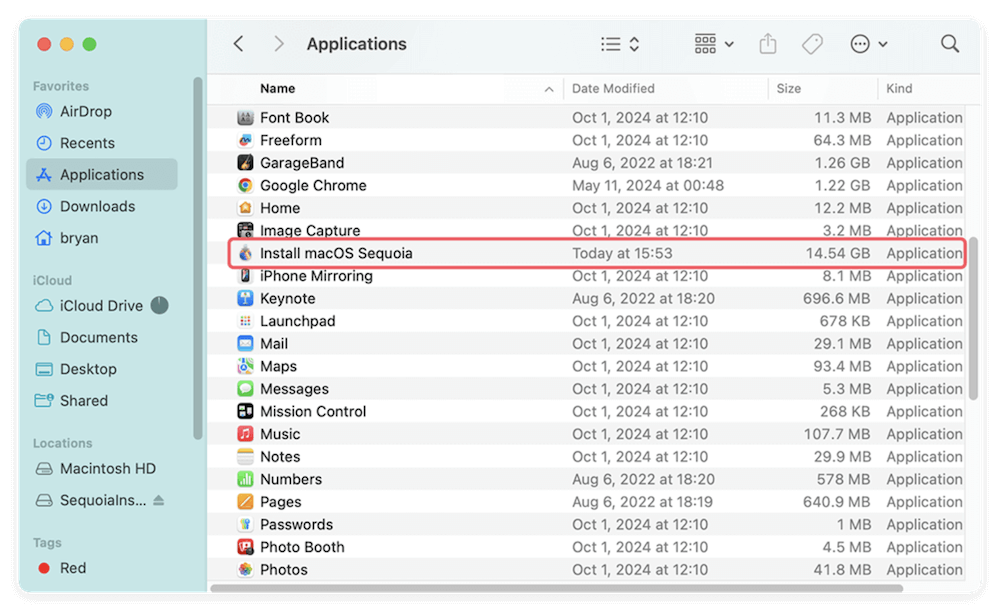
- Download the installer for an old version, like macOS Sequoia.
![downgrade from macOS Tahoe 26]()
- It will appear in your Applications folder as "Install macOS [Version]".
![downgrade from macOS Tahoe 26]()
3. Create a Bootable USB Installer
You'll use this to install the older macOS.
What You Need:
- 16GB or larger USB drive
- macOS installer in your Applications folder
How To Create It:
- 1. Format the USB as Mac OS Extended (Journaled) using Disk Utility.
![downgrade from macOS Tahoe 26]()
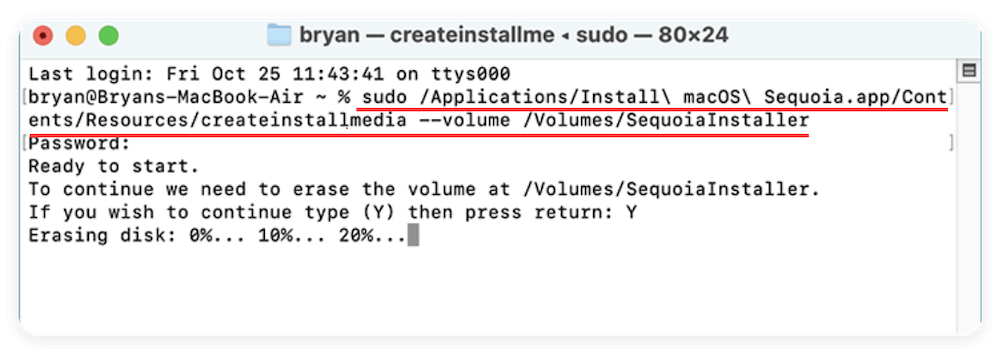
- 2. Open Terminal and run the appropriate command. For example, for macOS Sequoia (Replace SequoiaInstaller with the name of your USB drive):
sudo /Applications/Install\ macOS\ Sequoia.app/Contents/Resources/createinstallmedia --volume /Volumes/SequoiaInstaller
- 3. Enter your password and wait for the process to finish.
![downgrade from macOS Tahoe 26]()

You can also use Donemax Disk Clone for Mac to make a bootable USB installer for macOS. Run the software and change to Make Installer. Select a version of macOS from the drop-down list. Choose an empty USB drive and click Create a macOS installer.

Step 3. Erase macOS Tahoe 26
Now it's time to wipe your current macOS installation.
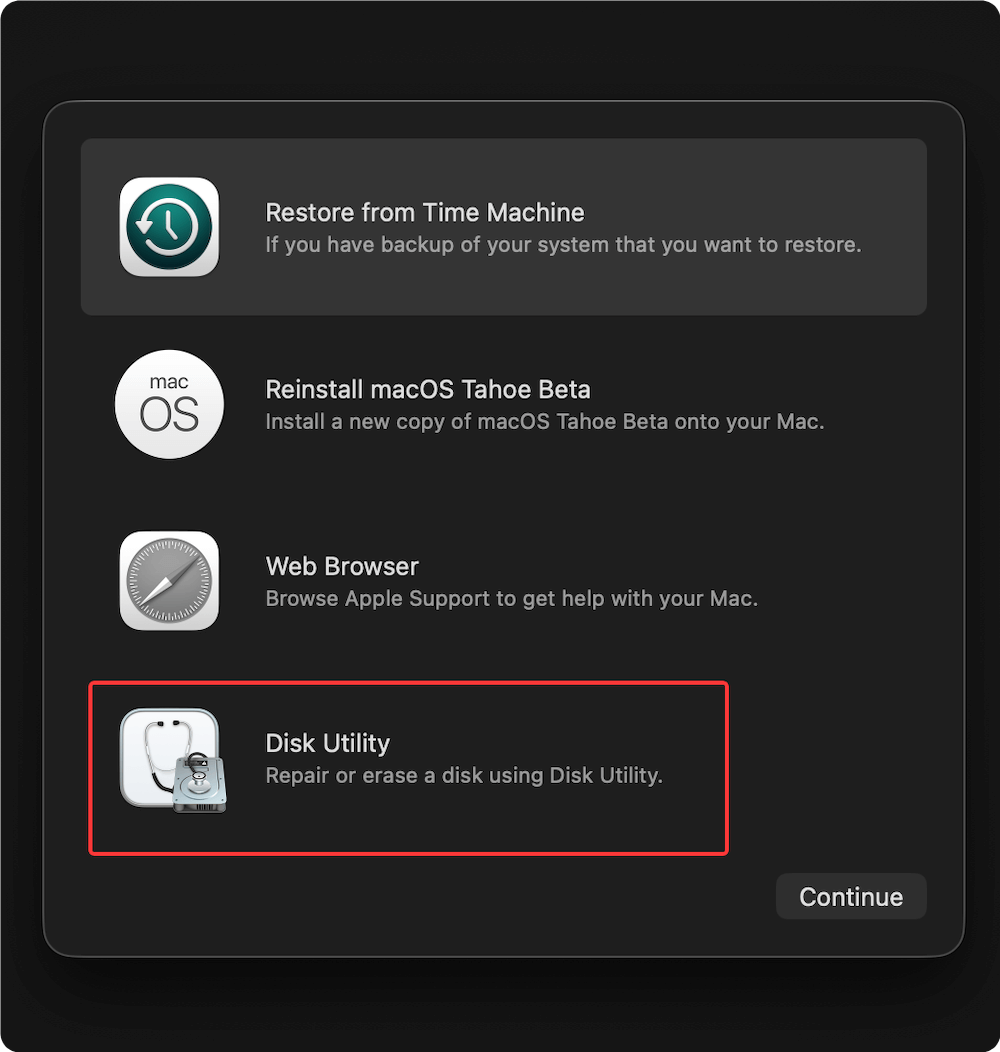
- Restart your Mac and immediately hold down Power button to enter macOS Recovery.
- From the utilities window, select Disk Utility.
![downgrade from macOS Tahoe 26]()
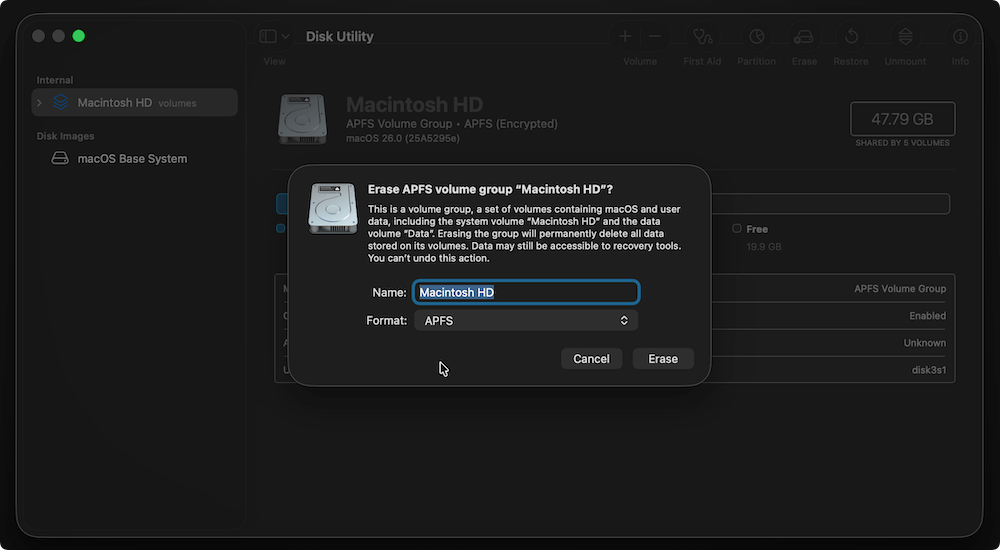
- Select your internal disk (usually labeled "Macintosh HD").
- Click Erase, choose:
- Name: Macintosh HD
- Format: APFS (for newer macOS) or Mac OS Extended (for older systems)
![downgrade from macOS Tahoe 26]()
- Confirm and wait for the erase to complete.
📍 Important: Ensure that you don't erase your Time Machine or external backup drive.
Step 4. Install the Older macOS Version
1. Boot from the USB Installer
- Insert the bootable USB drive.
- Restart your Mac and hold Power button until you see startup options.
- Select the USB drive from the startup options.
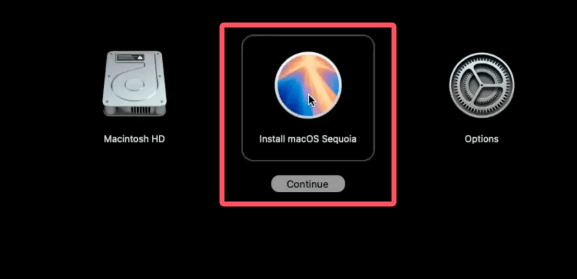
2. Install macOS
- Follow the on-screen prompts to install the older macOS.
- Select the freshly erased internal drive (Macintosh HD).
- Complete the setup process once installation is done.
Step 5. Restore Your Data Without Losing Anything
After successfully installing your desired macOS version, the next—and arguably most critical—step is restoring your data without corruption, duplication, or loss. Depending on your backup method and what you want to restore (everything or just key files), there are a few proven approaches.
1. Restore from Time Machine Backup
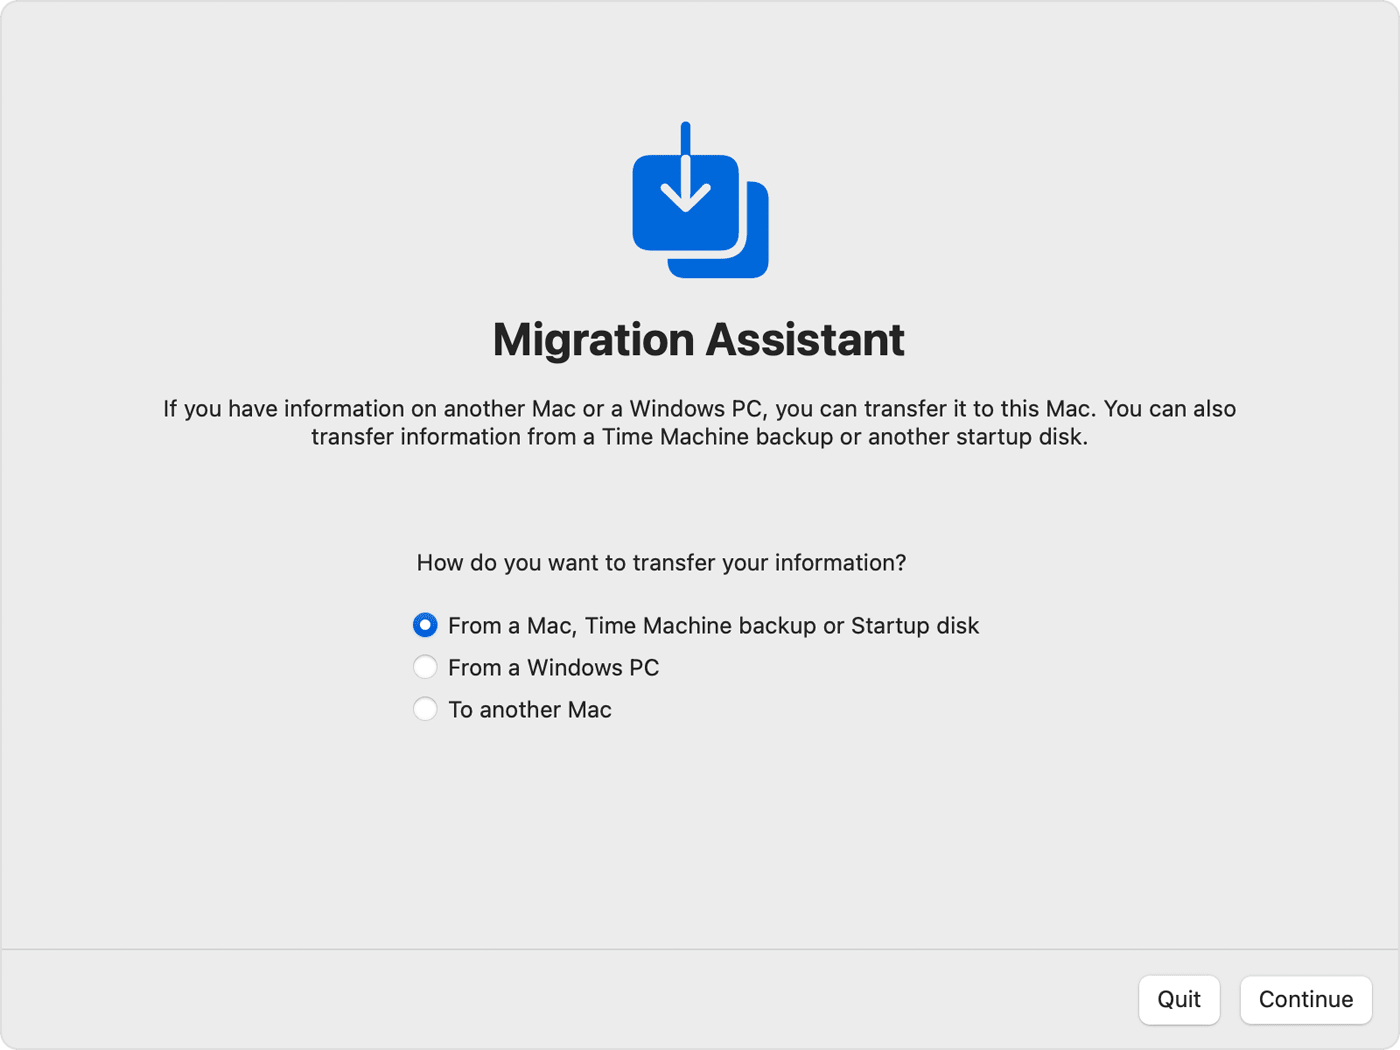
- During macOS setup, you'll be prompted: "Do you want to transfer information?"
- Choose "From a Time Machine backup" and select the backup you made before downgrading.
![downgrade from macOS Tahoe 26]()
- You can restore:
- Entire system
- User accounts
- Applications
- Individual files
Note: Only restore data created before upgrading to Tahoe 26, or you risk file incompatibility.
2. Restore Files Manually
If you used iCloud or external backup:
- Sign into your iCloud account to sync files.
- Manually copy files from your external drive to appropriate folders.
- Reinstall apps manually to avoid bringing over corrupt settings.
This approach gives you more control and minimizes risk of compatibility issues.
3. Reinstall Applications
Restoring apps can be done in three ways:
- Mac App Store: Sign in and redownload from the "Purchased" section.
- Third-Party Installers: Visit developer websites to download the correct versions for your macOS.
- Backup Restoration: If you used Time Machine or another backup tool, you can restore apps directly—but make sure they're compatible with the older macOS.
Reinstalling apps from scratch is often the cleanest method, especially if the versions used under Tahoe 26 were beta or incompatible with older systems.
4. Verify and Reorganize Your Data
After restoration:
- Double-check that all critical files (documents, projects, media, emails) are present and functioning.
- Test your apps to confirm they open and run without issues.
- Reconfigure settings such as desktop preferences, Dock layout, network configurations, and login items.
If anything is missing:
- Recheck the backup drives or iCloud.
- If you used Time Machine, you can open the Time Machine browser and look for the missing file in snapshots.
Bonus: What Not to Restore
To maintain system stability, avoid restoring:
- System preferences files from newer macOS versions.
- Kernel extensions (kexts) or driver files tailored for macOS Tahoe 26.
- Cache or log files from your old Library folder.
These files may cause errors or kernel panics on older macOS versions.
Tips after Downgrading macOS Tahoe 26
Now that you're back on an older macOS version, follow these tips to optimize your system:
1. Check for Updates
- Go to System Settings > Software Update.
- Install the latest patches for your current version to maintain security.
2. Reinstall and Test Apps
- Download apps from the App Store or trusted sources again.
- Test each one to ensure compatibility with the downgraded system.
3. Disable Auto Updates
To prevent accidental re-upgrades:
- Go to System Settings > General > Software Update.
- Disable automatic updates and notifications.
4. Reset Preferences
Some preferences and settings from Tahoe 26 may not translate well. It's a good idea to reset:
- System settings
- Finder preferences
- Login items
Troubleshooting macOS Tahoe 26 Downgrade Issues
Downgrading isn't always seamless. Here are common issues and how to fix them:
1. "macOS Could Not Be Installed" Error
- Make sure your Mac supports the version you're installing.
- Double-check the bootable USB and macOS installer.
2. Time Machine Restore Fails
- Use Migration Assistant from Utilities folder after setup.
- Try restoring specific files instead of the full system.
3. Wi-Fi or Bluetooth Not Working
- Reset NVRAM: Reboot and hold Option + Command + P + R.
- Reset SMC (for Intel Macs): Shut down, then follow your Mac model's reset instructions.
4. Missing Files or Apps
- Double-check backup locations.
- Contact Apple Support if critical data is missing.
Conclusion
Downgrading from macOS Tahoe 26 doesn't have to be risky or frustrating. By carefully backing up your data, creating a reliable macOS installer, and selectively restoring your files, you can safely return to a previous version that better fits your workflow or hardware capabilities.
If done correctly, you'll retain all your important data while regaining the stability and performance you had before upgrading. Whether for compatibility, performance, or personal comfort, this guide ensures your downgrade journey is secure and stress-free.
Donemax Disk Clone for Mac
An award-winning disk cloning program to help Mac users clone HDD/SSD/external device. It also can create full bootable clone backup for Macs.
Related Articles
- Jan 29, 2026Simple Ways to Clone Encrypted Hard Drive on Mac
- Jul 18, 2025How to Clone Disk on Mac Pro?
- Jun 16, 2023How to Clone Mac Hard Drive to External SSD? 2 Methods to Try
- Jul 29, 2025Create DMG Disk Image on Mac [Apple Silicon Supported]
- Mar 24, 2024How to Move Data from iMac to Mac Studio?
- Jan 20, 2026Easy Ways to Back up Mac Startup Disk

Contributing Writer
Steven
Steven has been a senior writer & editor of Donemax software since 2020. He's a super nerd and can't imagine the life without a computer. Over 6 years of experience of writing technical solutions and software tesing, he is passionate about providing solutions and tips for Windows and Mac users.

Editor in chief
Gerhard Chou
In order to effectively solve the problems for our customers, every article and troubleshooting solution published on our website has been strictly tested and practiced. Our editors love researching and using computers and testing software, and are willing to help computer users with their problems