
Written byMariaUpdated on May 07, 2025
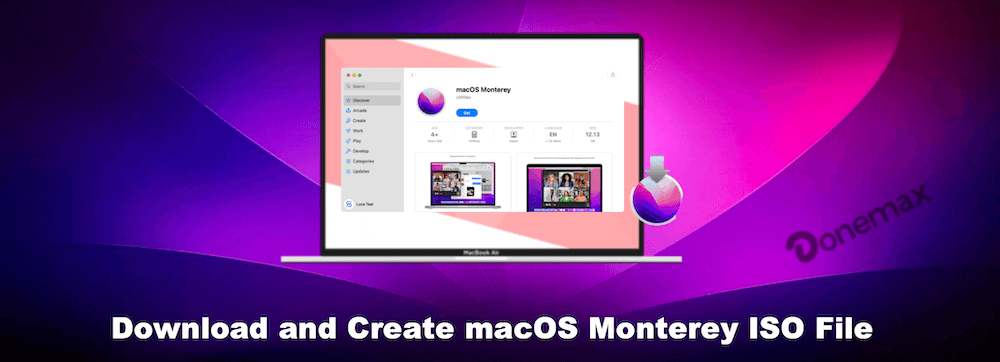
Download and Create macOS Monterey ISO File and Use It
Approved byGerhard Chou
PAGE CONTENT:
macOS Monterey is one of the most popular operating systems for Mac users. It brings new features, performance improvements, and enhanced security. For those who need to install or reinstall macOS Monterey, creating a bootable ISO file offers a great way to make the process smoother, whether you plan to install it on your Mac, use it on a virtual machine, or simply create a backup.
In this article, we'll walk you through the steps to download macOS Monterey, create an ISO file from the installation file, and show you how to use it effectively.
What is a macOS Monterey ISO File?
An ISO file is a disk image that contains the entire contents of an optical disc, such as a CD, DVD, or in this case, a macOS installation disk. In simpler terms, it is a file that mimics the content of a physical installation disk, allowing you to install macOS Monterey without needing a physical disc. The ISO file can be used for various purposes, including:
- Creating bootable drives: You can use the ISO to create a bootable USB drive that allows you to install macOS Monterey on a new machine or repair an existing installation.
- Virtual machines: The ISO is useful for creating virtual environments where you can run macOS Monterey on non-Mac hardware.
- Reinstallation or updates: You can use the ISO file to reinstall macOS on a Mac that may not be able to download the operating system from the App Store directly.
System Requirements
Before downloading and creating a macOS Monterey ISO file, you need to make sure your system meets the following minimum requirements:
Hardware Requirements:
- A Mac running macOS Sierra (10.12) or later. If you are using a Mac, it should be compatible with macOS Monterey (released in October 2021). Supported devices include Macs from 2015 and later.
- Storage space: You need at least 16 GB of free space for the installation files and ISO creation process.
- A USB flash drive or external storage (if creating a bootable drive): For a bootable drive, a USB drive with at least 16 GB of capacity is recommended.
Software Requirements:
- macOS Sierra or later: A Mac running macOS Sierra or later to run the necessary commands and software to create the ISO file.
- Terminal (pre-installed on macOS): The built-in command-line tool is essential for creating an ISO from the macOS installer.
- App Store access (for downloading the macOS Monterey installer): You will need to be logged into the App Store to download macOS Monterey.
Downloading macOS Monterey
Before you can create a macOS Monterey ISO file, you first need to download the macOS Monterey installer. There are several ways to do this, but we will focus on the official method provided by Apple.
Step 1: Access the App Store
macOS Monterey can be downloaded directly from the App Store. Here's how:
- Open the App Store on your Mac.
- In the search bar, type macOS Monterey and press enter.
- The macOS Monterey installation page will appear. Click on Get to download the installer.

Alternatively, if you can't find macOS Monterey in the App Store, you can go to the official Apple support page, which provides a direct link to the macOS Monterey download.
Step 2: Wait for the Download to Complete
The download may take some time depending on your internet speed. Once the download is finished, the macOS Monterey installer will automatically launch. You don't need to run it immediately, as we'll be using it to create the ISO file.
Creating a macOS Monterey ISO File
Now that you have the installer downloaded, it's time to create the ISO file. This step involves using the Terminal, a powerful command-line tool built into macOS, to generate the ISO image.
Step 1. Make a temporary volume (.dmg) to hold the installer ISO file.
hdiutil create -o /tmp/Monterey -size 15000m -volname Monterey -layout SPUD -fs HFS+J
Step 2. Mount the temporary volume that was just made.
hdiutil attach /tmp/Monterey.dmg -noverify -mountpoint /Volumes/Monterey
Step 3. Copy the downloaded macOS Monterey installation media to the temporary volume.
sudo /Applications/Install\ macOS\ Monterey.app/Contents/Resources/createinstallmedia --volume /Volumes/Monterey --nointeraction
Step 4. Unmount the temporary volume after coping the installation media to it.
hdiutil eject -force /Volumes/Install\ macOS\ Monterey
Step 5. Convert the *.dmg image to a *.cdr file with the following command.
hdiutil convert /tmp/Monterey.dmg -format UDTO -o ~/Desktop/Monterey
Step 6. Rename the *.cdr file to the target *.iso file for macOS Monterey installation.
mv ~/Desktop/Monterey.cdr ~/Desktop/Monterey.iso
Wait for the command to finish executing. Once done, you'll have an ISO file. This file is now ready for use in creating bootable drives, running virtual machines, or other uses.
Step 7. Cleanup the temporary volume and disk image
rm -f /tmp/Monterey.dmg
sudo rm -rf /Applications/Install\ macOS\ Monterey.app
Using the macOS Monterey ISO File
Now that you've successfully created the macOS Monterey ISO file, there are several ways to use it. We'll cover how to install macOS Monterey on a virtual machine and how to create a bootable USB drive.
Option 1: Install macOS Monterey on a Virtual Machine
One of the most useful ways to use the macOS Monterey ISO file is by installing it on a virtual machine (VM). Popular virtualization software like VMware and VirtualBox can run macOS on non-Mac hardware, which is useful for testing, development, and other purposes.
VMware Instructions:
- Install VMware Workstation or VMware Fusion on your computer.
- Create a new virtual machine and choose macOS as the operating system.
- When prompted to select the installation media, choose the ISO file you created earlier.
- Follow the on-screen instructions to install macOS Monterey within the virtual machine.
VirtualBox Instructions:
- Install VirtualBox on your system.
- Create a new VM, setting the OS type to macOS.
- Attach the macOS Monterey ISO as a virtual CD/DVD in the VM settings.
- Start the virtual machine and proceed with the installation.
Option 2: Create a Bootable USB Drive with the ISO File
Another useful application for the macOS Monterey ISO is creating a bootable USB drive. This can be handy for installing macOS Monterey on a new Mac, performing repairs, or troubleshooting issues. Here's how to create the bootable drive:
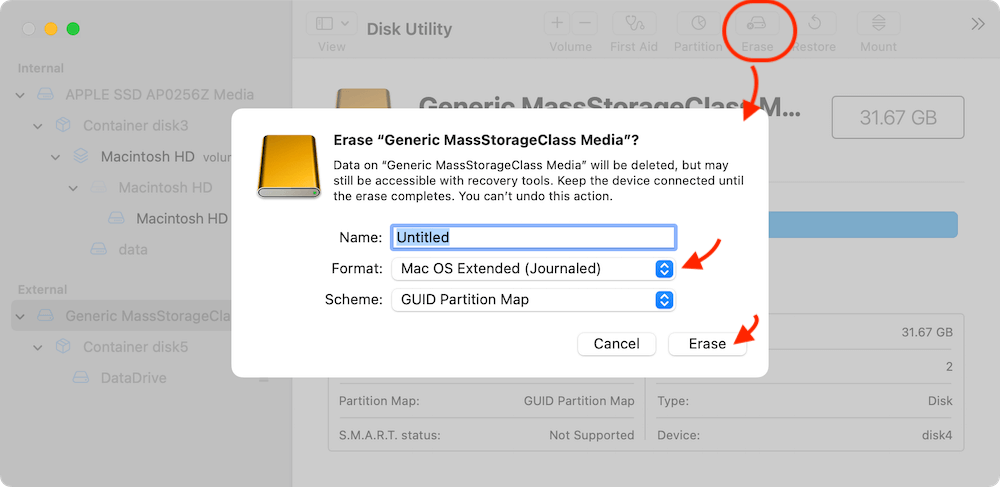
- Plug in a USB drive (16 GB or larger) to your Mac.
- Open Disk Utility and format the USB drive as Mac OS Extended (Journaled) with a GUID Partition Map.
![create macOS Monterey ISO file]()
- Open Terminal and run the following command:
sudo dd if=/path/to/Monterey.iso of=/dev/diskX bs=1m
(Replace diskX with the identifier of your USB drive; you can find it in Disk Utility.)
- Wait for the process to finish. Once done, the USB drive will be bootable, and you can use it to install macOS Monterey on your Mac or other compatible systems.
Option 3: Installing macOS Monterey on a Non-Mac Device
While it's technically possible to install macOS on non-Mac hardware (a process often referred to as creating a "Hackintosh"), it's not officially supported by Apple and requires additional steps and tools. We won't go into detail here, but if you're interested in this process, there are online communities and guides that can help you.
Troubleshooting Common Issues
While the process of creating a macOS Monterey ISO file is relatively straightforward, you may encounter some issues. Here are a few common problems and how to resolve them:
Issue 1: The macOS Installer Won't Download
If the macOS Monterey installer doesn't download from the App Store, try restarting your Mac or checking your internet connection. You can also use a direct download link from the Apple support page to get the installer.
Issue 2: ISO File Creation Fails
If the ISO creation process fails, check the following:
- Ensure that the macOS Monterey installer is in the correct location.
- Double-check your Terminal commands for typos or errors.
- Make sure your Mac has enough free storage to complete the process.
Issue 3: Bootable USB Drive Not Recognized
If the bootable USB drive isn't being recognized, ensure it's formatted correctly (as Mac OS Extended (Journaled)) and that you've used the correct Terminal commands. You can also try booting into Startup Disk settings on your Mac and selecting the USB drive as the startup disk.
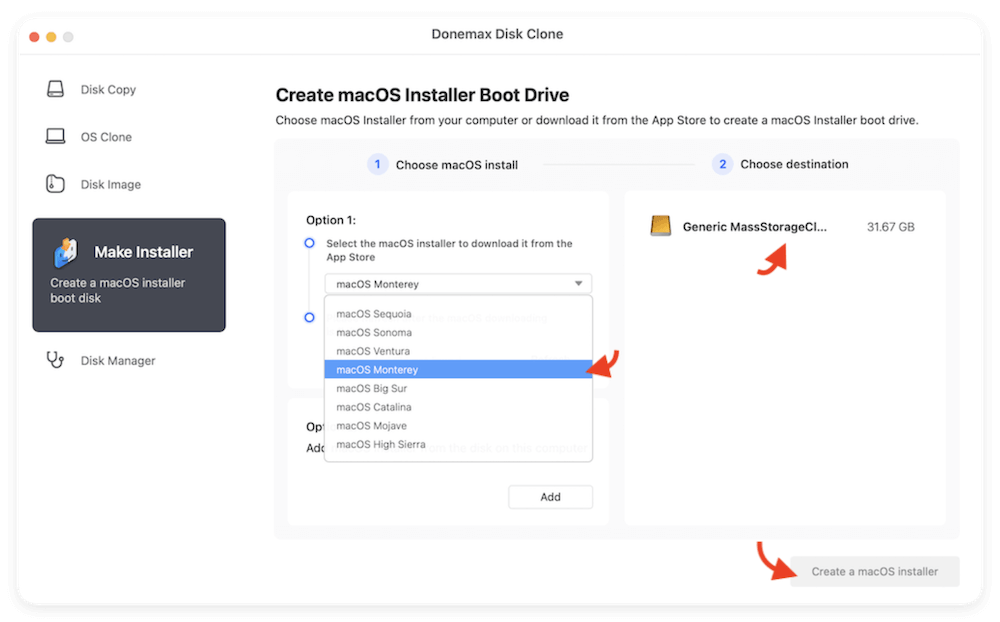
Create Bootable Installer for macOS Monterey with Donemax Disk Clone
With the software Donemax Disk Clone, you can easily make a bootable installer for macOS Monterey. It offers straightforward steps to do the job easily:
Step 1. Download and install the software on your Mac.
Step 2. Run the software and select the option Make Installer. Select "macOS Monterey" from the drop-down list to download the installation file.
Step 3. After the macOS Monterey installation file is downloaded, select a USB drive with enough space. Click the button Create a macOS installer. The software will then start to make a bootable USB installer on the selected USB drive.
Conclusion
Creating a macOS Monterey ISO file and using it for installation, virtual machines, or creating bootable drives can be incredibly helpful for a variety of tasks. By following the steps outlined in this article, you should be able to easily download macOS Monterey, create an ISO file, and use it to meet your needs.
Whether you're installing macOS on a new machine, running it in a virtual machine for testing, or creating a bootable USB drive for repairs, the ISO file is a versatile tool. Make sure to follow the steps carefully, and you'll be ready to work with macOS Monterey in no time!
Donemax Disk Clone for Mac
An award-winning disk cloning program to help Mac users clone HDD/SSD/external device. It also can create full bootable clone backup for Macs.
Related Articles
- Jan 01, 1970How to Clone NTFS Hard Drive on Mac?
- Jun 15, 2023How to Clone macOS Ventura to An External Hard Drive?
- Mar 11, 2024How to Clone Mac Hard Drive to Samsung Portable SSD X5?
- Apr 06, 2025How to Create a Bootable Clone for MacBook Pro? [M1/M2/M3/M4 Supported]
- Jul 25, 2025Clone Mac Hard Drive Using Disk Utility
- Aug 08, 2025How to Restore Mac from A Backup?

Contributing Writer
Maria
Maria is one of the senior writers & editors of Donemax who lives and works in Sydney, Australia. She loves PC, Mac and Internet Technology. She has 6 years of writing articles about data recovery on PC/Mac, disk cloning solution, data eraser and computer OS optimization, etc. She is also interested in testing various software and digital products.

Editor in chief
Gerhard Chou
In order to effectively solve the problems for our customers, every article and troubleshooting solution published on our website has been strictly tested and practiced. Our editors love researching and using computers and testing software, and are willing to help computer users with their problems