
Written byStevenUpdated on Mar 24, 2024
How to Move Data from iMac to Mac Studio?
Approved byGerhard Chou
PAGE CONTENT:
Moving from your reliable iMac to the powerful Mac Studio is like entering a world full of endless potential. It's like moving from your old, comfortable home to a brand-new, high-tech, smart home with all the bells and whistles. But before you can enjoy your new Mac Studio's high speed, you must ensure your digital life moves smoothly. Do not be afraid!
Using this guide, you can walk through the steps and ensure that your important pictures, files, and favorite apps make the move without any problems. Let's change your digital workspace without trouble because getting your new Mac Studio should be as fun as opening a tech-filled present!
Preparing for the Transition:
Make sure you have a solid safety net in place before you start the process of transferring data. After you have connected an external hard drive to your iMac, you should start a backup using Time Machine. Because of this, you can rest assured that your files, programs, and settings will be stored safely and thoroughly.
You also can use a disk cloning app to clone everything of the iMac to the external HDD or SSD and create a full bootable clone backup.

Create A Backup for iMac
You can download Donemax Disk Clone for Mac and use it to create a full bootable clone backup for your iMac.
Best 5 Methods to Move Data from iMac to Mac Studio
👉Method 1. Using disk cloning software
You can clone all data from the iMac to an external hard drive, then connect the external hard drive to your new Mac studio, restore files from the external hard drive to your Mac Studio. It is a 100% safe and reliable way to migrate data from old iMac to a new Mac studio computer.
Step 1. Download and install Donemax Disk Clone for Mac on your iMac, then connect an external hard drive (SSD is highly recommended) to your iMac.
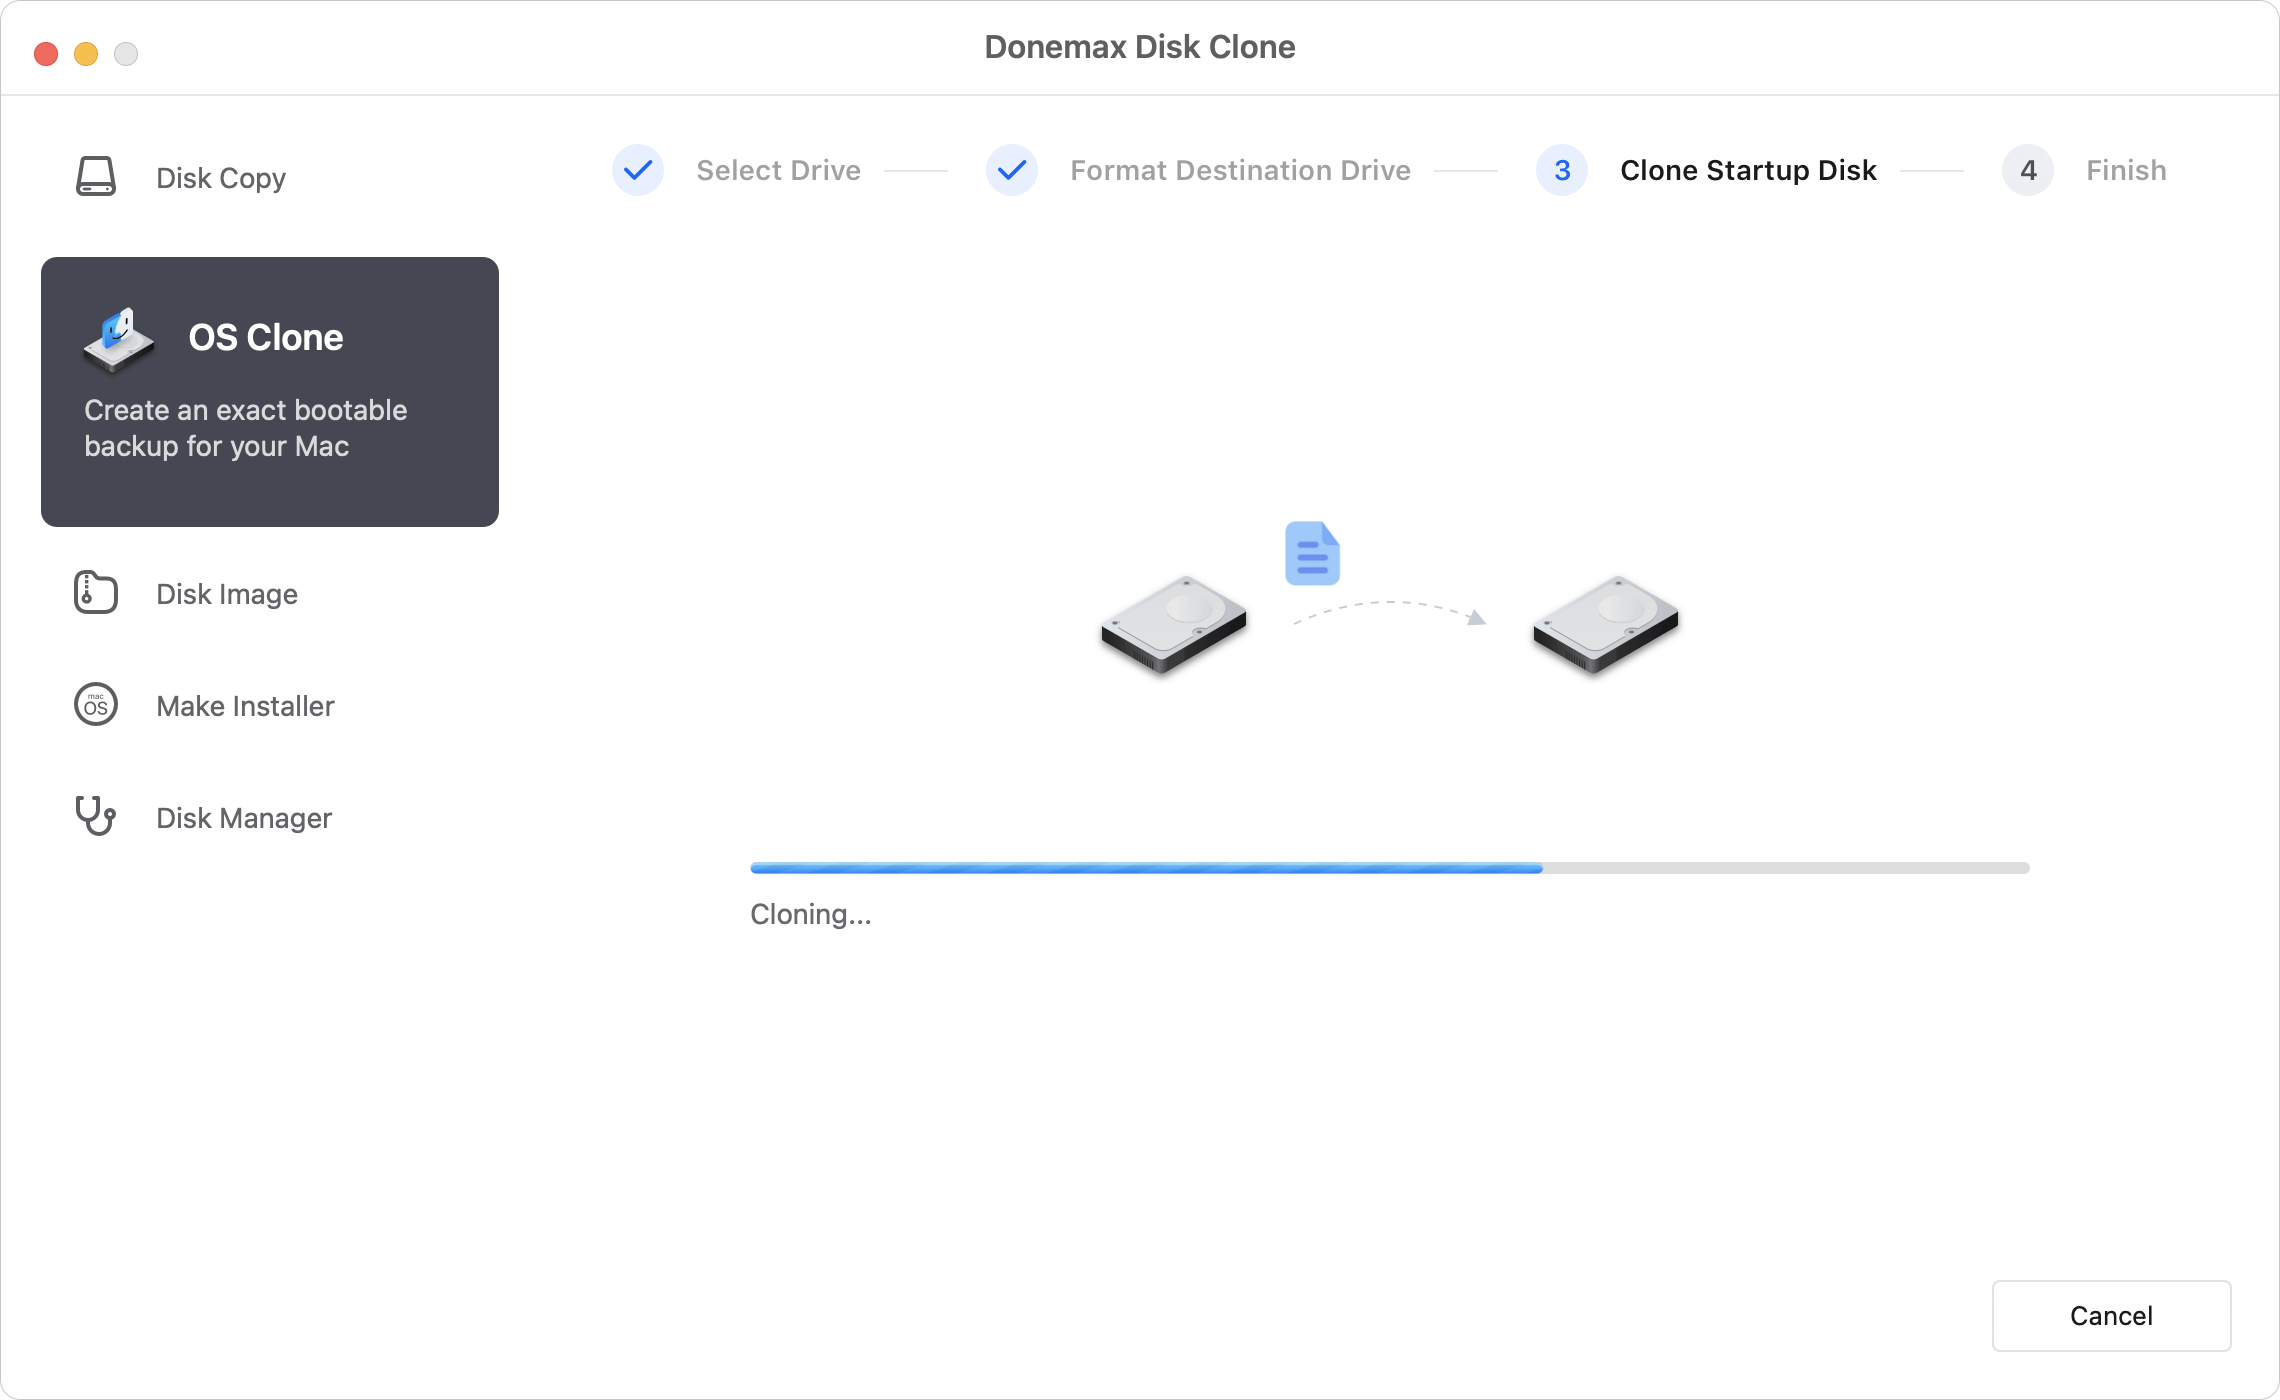
Step 2. Open Donemax Disk Clone for Mac, then choose OS Clone mode. Select the external hard drive as the destination drive.

Step 3. Click on Clone Now button to clone everything from the iMac to the external hard drive. Once the process gets finished, remove the external hard drive from your iMac.
Step 4. Connect the external hard drive to Mac Studio, then open external hard drive, find the files you need and restore them to your Mac Studio. You also can use the external hard drive as a startup drive on the Mac Studio.
👉Method 2. Using Migration Assistant
The Migration Assistant is a powerful built-in software that makes transferring data, applications, and settings from one Mac computer to another easier. You should select the Migration Assistant during the initial setup of your Mac Studio and then follow the basic instructions that will appear on your screen after connecting both hardware devices.
Step 1. Update software on both iMac and Mac Studio computers. Make sure that both desktops have Wi-Fi turned on and are near each other. If you installed antivirus software, firewall software, or VPN software, turn that software off until you're done.
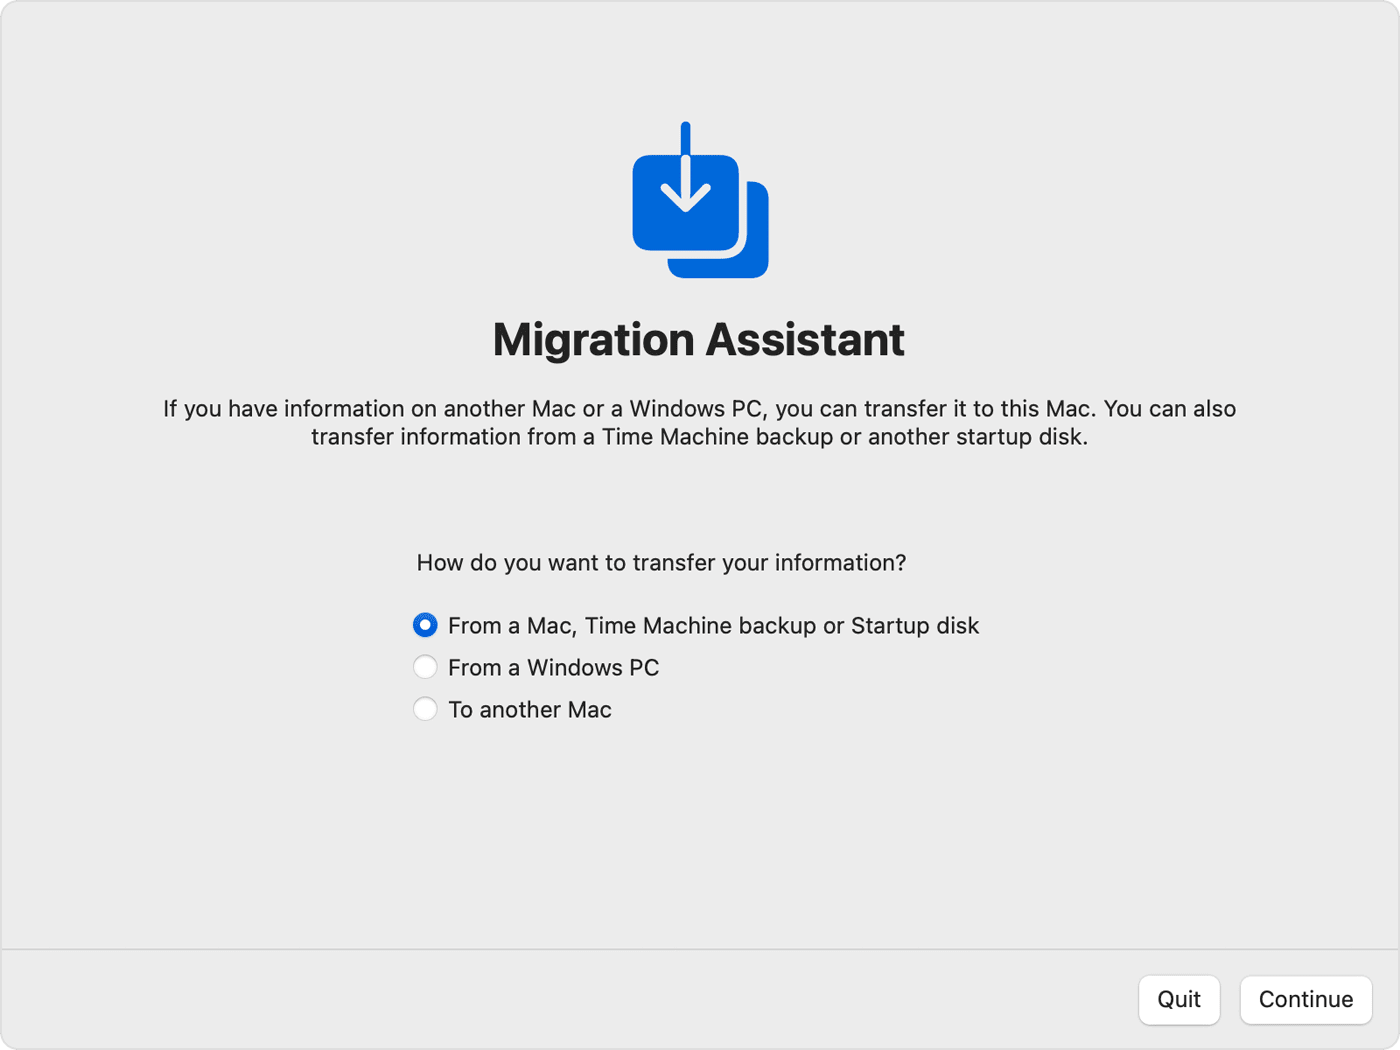
Step 2. On Mac Studio, go to Applications > Utilities > Migration Assistant and open this app. It will ask how you want to transfer your information, select the option to transfer From a Mac, Time Machine backup, or startup disk. Then click Continue.
Step 3. On iMac, open Migration Assistant, click Continue. When asked how you want to transfer your information, select the option to transfer to another Mac. Then click Continue.
Step 4. On your Mac Studio, when asked select a Mac, just select the iMac, then click Continue.
Step 5. If you see a security code on your iMac, make sure that it's the same code shown on your new Mac Studio. Then click Continue.
Step 6. On your Mac Studio, Migration Assistant now catalogs all of the content on your iMac, and calculates how much storage space is used by your apps, user accounts, files, folders, and settings. This can take a few minutes. When ready, select the information to transfer.
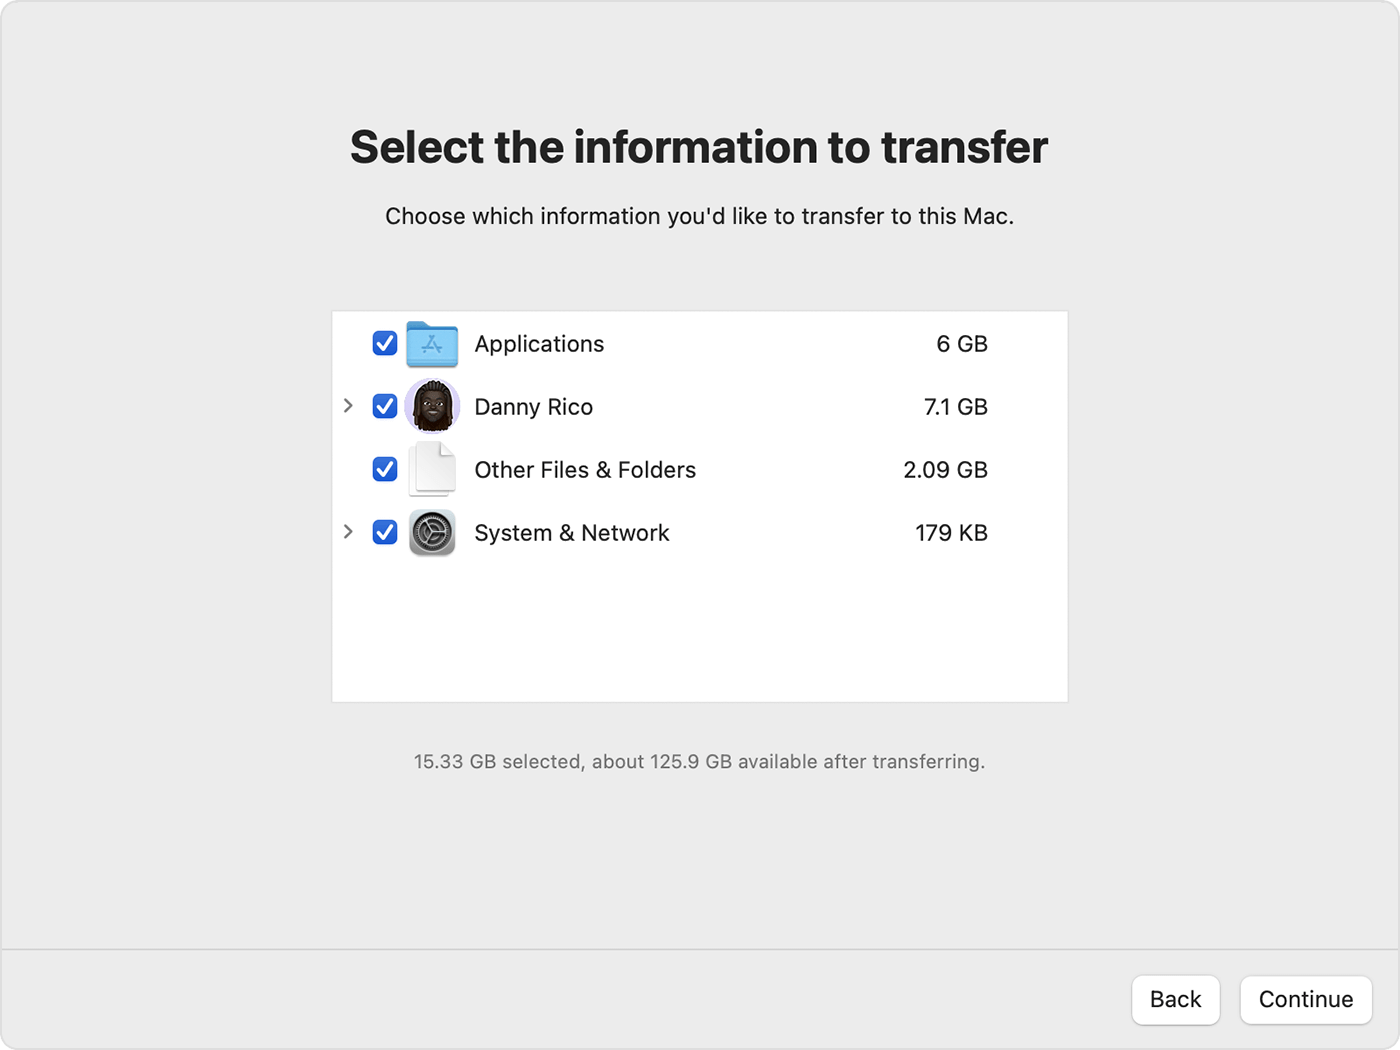
Then follow the wizard to transfer data from the iMac to the Mac Studio. After Migration Assistant is done, quit Migration Assistant on both iMac and Mac Studio computers, then log in to the migrated account on your new Mac to see its files.
👉Method 3. Migration via Thunderbolt
When it comes to customers who are equipped with devices that are capable of Thunderbolt, a direct connection provides a transfer experience that is both quick and efficient. Use a Thunderbolt cable to connect your iMac and Mac Studio. After that, transform the iMac into Target Disk Mode and transfer files easily. It will ensure a speedy and secure migration.
👉Method 4. Using Cloud-Based Services
A seamless and wireless transfer experience can be achieved by utilizing cloud services such as iCloud, Google Drive, or Dropbox, which offer the ease of cloud computing. We offer a flexible and cutting-edge solution to the problem of data migration by allowing you to upload your files from your iMac to the cloud and then quickly sync them to your Mac Studio by using the cloud app that corresponds to your iMac.
👉Method 5. Using External Storage
By manually copying your data to an external HDD/SSD or USB flash drive, you can satisfy the needs of individuals who favor a more concrete option. Establish a connection between the external storage device and your Mac Studio, which will enable a transfer process that is both flexible and straightforward. This strategy provides a hands-on approach, which guarantees that you will have control over the movement of each file and folder.
Post-Migration Steps:
1. Software Updates:
Ensuring that your computer runs the most recent version is necessary to get the most out of your Mac Studio. Perform a thorough check for and installation of any available software updates. It will ensure access to the most recent features, upgrades, and security enhancements, creating a firm basis for your new computing experience.
2. Application Compatibility:
Check to see if the applications you use on your Mac Studio are compatible. Certain applications may need to be updated to run without issues with the new hardware and macOS version. Completing this stage is essential to keep the workflow running smoothly and guarantee that your preferred tools are ready for use on the upgraded device.
3. System Preferences/Settings:
By examining and modifying system preferences/system setting, you can fine-tune your Mac Studio to ensure it is tailored to your specific workflow and personal preferences. Your overall user experience will be improved, and your computing environment will be aligned with your routines and preferences, all thanks to this phase, which allows you to customize your device to meet your requirements.
4. Organize Files:
Utilize the transition to your advantage to transfer your files and effectively organize them on your Mac Studio. A well-organized digital workspace is beneficial to efficiency since it simplifies finding certain items and streamlines your productivity and processes. Taking the time to organize and classify your files will result in a workplace devoid of clutter and optimal for productivity.
Conclusion:
Apple makes tools and technologies that are easy to use, so moving data from an iMac to a Mac Studio is a simple process. The most important thing is to carefully plan and carry out your choice, whether you use Disk Clone Solution, Migration Assistant, a Thunderbolt link, cloud-based services, or external storage. You can switch without problems and get the most out of your new Mac Studio by doing what this piece says. Enjoy your new device's extra power, speed, and features while keeping the important files and settings safe.
Related Articles
- Jun 22, 2024How to Clone Mac Data to LaCie External Hard Drive?
- Nov 19, 2024How to Create a Bootable Clone for macOS Monterey? [Step-by-step Guide]
- Aug 06, 2025Disk Clone for Mac mini with Apple Silicon M2/M2 Pro Chip
- Feb 05, 2026How to Clone Memory Card on Mac?
- Feb 17, 2025How to Clone macOS Sequoia to an External Hard Drive (Bootable Clone)?
- Jul 28, 2025Best Carbon Copy Cloner Alternative for Mac Disk Cloning

Contributing Writer
Steven
Steven has been a senior writer & editor of Donemax software since 2020. He's a super nerd and can't imagine the life without a computer. Over 6 years of experience of writing technical solutions and software tesing, he is passionate about providing solutions and tips for Windows and Mac users.

Editor in chief
Gerhard Chou
In order to effectively solve the problems for our customers, every article and troubleshooting solution published on our website has been strictly tested and practiced. Our editors love researching and using computers and testing software, and are willing to help computer users with their problems