
Written byLucienUpdated on Apr 07, 2024
How to Clone Mac Data To WD My Passport External Hard Drive?
Approved byGerhard Chou
PAGE CONTENT:
In this digital world, where pictures, documents, and memories are kept on Mac computers, it is very important to keep them safe. Consider what would happen if something unexpected happened to your favorite pictures, important papers, or files you value. In this case, having a reliable backup option is very important. The WD My Passport is a handy external hard drive that is made to keep your important files safe.
In this guide, we'll look at the steps you need to take to clone your Mac data to the WD My Passport external hard drive. You can ensure your files are safe by following simple and easy steps. Let's start the process of keeping your digital goods safe!
Before Cloning Mac Data to WD Passport
1. Choosing the Right WD My Passport Model
We first need to choose the right WD My Passport model to start the cloning process. These portable drives come in a range of features for different users. It is very important to pick a model with enough storage space for all your files. Also, ensuring it works with your Mac's running system is very important for a smooth integration.
2. Getting WD My Passport Ready for Data Cloning
After getting the right WD My Passport type, the next step is to get the external drive ready to copy data. This planning includes several steps that will make sure the cloning process goes smoothly and without any problems:
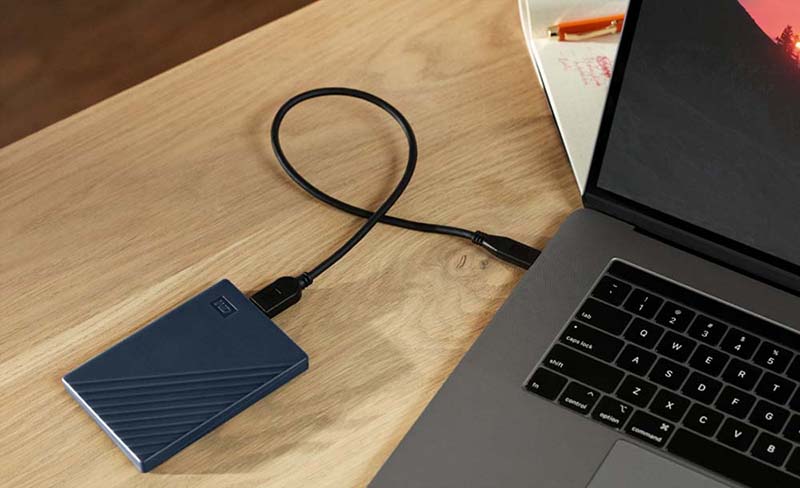
- Connection to Mac: To make a stable link between your Mac and WD My Passport, use the USB or Thunderbolt cable that came with it. A safe link is very important for the cloning process to work.
- Setting up WD My Passport: On your Mac, open Disk Utility and pick WD My Passport. Choose the right file system. For cross-platform support, exFAT is often the best choice, if you want to create a bootable clone backup for your Mac, select APFS (macOS 10.13 or later) or Mac OS Extended (for old macOS versions). This step formats the external drive so it is ready to receive the copied data.
- Backup Existing Data: As a safety step, copy all the information on WD My Passport. This step ensuring no data is lost accidentally during the cloning process.
- Choose the Right Cloning Software: Mac users can choose from several third-party copy tools, each with its features. In this guide, we will show you how to clone Mac data to a WD My Passport external hard drive with Disk Utility, Time Machine and third-part Mac clone software.
Three Methods to Clone Mac Data to A WD My Passport Drive
👍Method 1. Use Disk Utility
From here, let's look at how to use Disk Utility to copy your Mac files to WD My Passport step by step:
Step 1. To find and open Disk Utility, go to Applications > Utilities.

Step 2. Choose the internal drive of your Mac as the source in Disk Utility and WD My Passport as the target. Be careful to pick the right drives so you don't accidentally lose info.
Step 3. Click to select the WD My Passport, then click on Restore button.

Step 4. When you click the "Restore," Disk Utility will ask you to confirm what you want to do. Select Restore from your Mac startup disk, such as Macintosh HD. Then click on Restore button to copy data from your Mac to the WD My Passport external hard drive.

How long the cloning process takes depends on how much data is sent. Monitor Disk Utility's progress bar to see when the job is done.
Once the copy is done, checking the WD My Passport is very important to ensure the copied information is correct. Check files and folders randomly to ensure they match what's on your Mac's internal drive.
👍Method 2. Use Time Machine
To keep an up-to-date copy of your Mac data on WD My Passport, you might want to set up regular backups through Time Machine, which is part of macOS:
Step 1. Connect the WD My Passport to the Mac, your Mac will ask you if you want to use this drive as the Time Machine backup drive. Click Options and choose Set up.

Click Set Up Disk to set the WD My Passport as the backup drive.

Then right-click the drive and choose Back Up to "WDMyPassport" Now to start to back up the Mac to the WD My Passport drive.

👍Method 3. Use disk cloning software
Mac disk cloning software can help you clone the entire Mac hard drive to an external hard drive and create a bootable clone backup.
Step 1. Download and install the most powerful Mac cloning software - Donemax Disk Clone for Mac, and connect the WD My Passport to your Mac.
Step 2. Open Donemax Disk Clone for Mac, then choose OS Clone mode. This mode will clone everything from your Mac to the WD My Passport external hard drive and create a full bootable clone backup.
Step 3. The Mac internal HDD or SSD is selected as the source drive, you only need to select the WD My Passport as the destination drive.

Step 4. Click on Clone Now button to clone all data including operating system, settings, apps, user files and other data from the Mac to the external WD My Passport drive.

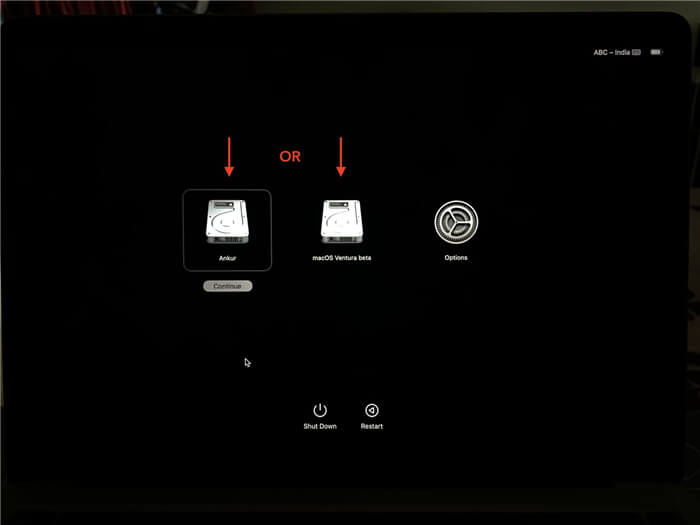
How to Change Startup Disk on Mac
Use the bootable clone disk as the startup disk for your Mac, boot into macOS Recovery mode, then start the Mac from your WD My Passport external hard drive.
After the cloning and backup are done, it is very important to safely eject the WD My Passport to keep the data from getting damaged. Right-click on your screen's WD My Passport icon and choose "Eject" before taking the external drive out of the computer.
Conclusion:
Cloning your Mac data to a WD My Passport works well and is reliable for safekeeping your important files and programs. If you use portable drives and back up your data regularly, your data will be safe even if something bad happens. Following the steps in this guide, you can easily copy your Mac's data to WD My Passport and set up a strong backup system to protect your data. To keep your data safe and easy to reach, don't forget to keep up with your backups and update them as needed.
Cloning Mac Disk to WD My Passport FAQs
1. How to move data from a Mac to a WD My Passport drive?
Here are three methods to help you migrate data from your Mac to a WD My Passport external hard drive:
- Restore data from Mac to WD My Passport with Disk Utility.
- Back up Mac data to WD My Passport with Time Machine.
- Clone all data from the Mac to the WD My Passport with Donemax Disk Clone for Mac.
2. How to create a bootable clone for Mac with WD My Passport drive?
Disk cloning software can help you securely create bootable clone backups for Mac.
- Connect the WD My Passport drive to your Mac.
- Download and install Donemax Disk Clone for Mac, open it.
- Choose OS Clone mode.
- Select the WD My Passport drive as the destination drive.
- Click on Clone Now button to clone all data from the Mac to the WD My Passport drive.
3. How to set the WD My Passport drive as the startup disk on a Mac?
After creating the bootable clone on the WD My Passport drive. Just restart the Mac, press and hold the Power button until you see Loading startup options.
Select the WD My Passport as the startup disk, restart the Mac.
Related Articles
- Nov 02, 2023How to Create a Bootable USB Installer for MacOS Sonoma?
- Jul 14, 2023How to Transfer Data Between Mac and Windows PC?
- Jul 29, 2025Create DMG Disk Image on Mac [Apple Silicon Supported]
- Jun 03, 2026How to Migrate Data from Old Mac to M5 Mac via Disk Clone?
- Jul 17, 2025Best Mac Cloning Software for Disk Replacement and Backup
- Jul 09, 2025How to Use Time Machine on macOS Tahoe 26?

Contributing Writer
Lucien
Lucien is a writer and a chief programmer of Donemax software who has worked in the company for 5+ years. He has written much of the content on the site and devotes to providing troubleshooting and solution for Windows and Mac users including disk cloning, data recovery, migration, eraser, error fixes.

Editor in chief
Gerhard Chou
In order to effectively solve the problems for our customers, every article and troubleshooting solution published on our website has been strictly tested and practiced. Our editors love researching and using computers and testing software, and are willing to help computer users with their problems