
Written byMariaUpdated on Jul 27, 2025
How to Connect an SD Card to Mac?
Approved byGerhard Chou
PAGE CONTENT:
Whether you're a photographer, filmmaker, or someone who needs to transfer data between devices, SD cards are a compact and reliable storage medium. If you're using a Mac - whether it's a MacBook Air, MacBook Pro, iMac, or Mac Mini - you may find yourself wondering how to connect an SD card to your Mac machine, especially since newer models vary in terms of ports and built-in support. This guide offers a detailed breakdown of how to connect and use SD cards with any Mac.
Secure Digital (SD) cards are widely used in digital cameras, smartphones, drones, and even Raspberry Pi computers. Their small size and fast read/write speeds make them a favorite for portable storage. However, connecting an SD card to a Mac depends on the model and year of your device. This article explains the different methods of connecting an SD card to a Mac, including using built-in slots, external readers, or adapters, along with troubleshooting steps and best practices.
Check If Your Mac Has an SD Card Slot
Before buying an adapter or external reader, check if your Mac already has an SD card slot. Apple has included and removed SD card readers across various Mac models throughout the years.
Mac Models With Built-in SD/SDXC Card Slots
- MacBook Pro (14-inch and 16-inch, 2021 and later)
Includes a built-in SDXC card reader on the right side.
- MacBook Pro (Mid-2012 to Early 2015)
These models also feature built-in SDXC card slots.
- iMac (21.5-inch and 27-inch models)
iMacs from 2010 to 2020 often have an SD card slot located on the back near the USB ports.
Supported SD Card Types
- SD (Secure Digital) – up to 2 GB
- SDHC (High Capacity) – up to 32 GB
- SDXC (Extended Capacity) – up to 2 TB
If your SD card is microSD or miniSD, you'll need an SD card adapter (usually comes with the card) to convert it to standard SD size.
If Your Mac Doesn't Have a Built-in SD Card Slot
If your Mac doesn't have an SD slot, such as in the case of newer MacBook Air or Mac Mini (M1/M2/M3/M4) models, you'll need an external card reader.
1. Use a USB-C to SD Card Adapter
Apple and many third-party vendors offer USB-C to SD card adapters that plug directly into a Mac's USB-C port.
How to Use:
- Plug the USB-C adapter into your Mac.
- Insert the SD card into the adapter.
- Open Finder and locate the SD card under "Locations."
Recommended USB-C Adapters:
- Apple USB-C to SD Card Reader
- Anker USB-C SD Card Reader
- SanDisk Extreme Pro USB-C Card Reader
Make sure the adapter supports USB 3.0 or higher for faster data transfer, especially if you're working with 4K video or large RAW images.
2. Use a USB-A SD Card Reader via USB-C Hub
Some SD card readers use USB-A instead of USB-C. If you already have such a reader, you can use it with a USB-C hub that includes legacy USB-A ports.
Steps:
- Connect the USB-C hub to your Mac.
- Plug your USB-A SD card reader into the hub.
- Insert the SD card and check Finder for access.
Bonus Tip: Some multiport USB-C hubs include SD and microSD slots, HDMI, and multiple USB ports - ideal for MacBook users who need expanded connectivity.
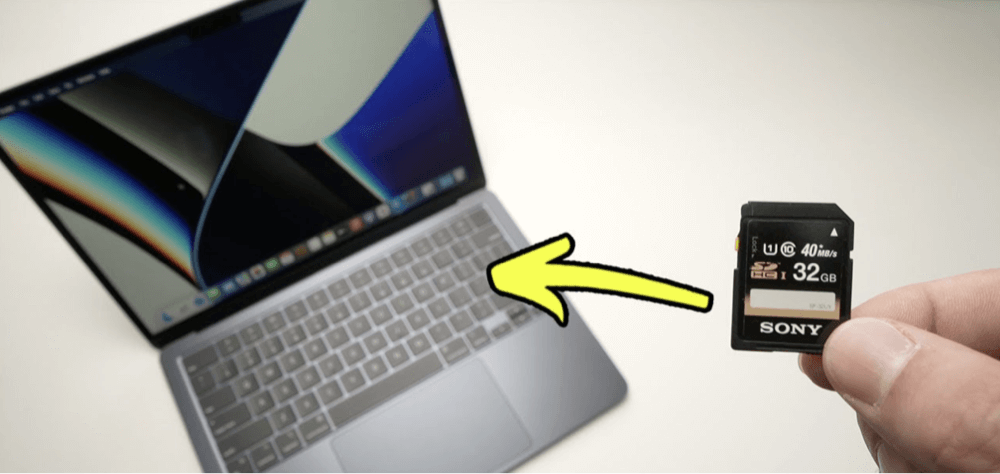
3. Insert and Access the SD Card
Once your SD card is connected - either directly or through an adapter - it should appear in Finder under the "Locations" sidebar.
Step-by-Step:
- Insert the SD card into the slot or adapter.
- Open Finder.
- Look under Locations for the card's label (e.g., "NO NAME" or "Untitled").
![connect an SD card to your Mac machine]()
- Double-click to open and view files.
- Drag and drop files as needed between your Mac and the SD card.
Supported File Systems:
- FAT32 / exFAT – most compatible with macOS and Windows.
- APFS / HFS+ – readable only by macOS unless additional drivers are used.
- NTFS – read-only by default on macOS.
If your card is unreadable or shows as blank, it might be formatted with a file system that macOS doesn't support or recognize properly.
Troubleshooting: SD Card Not Showing Up on Mac
Even after connecting your SD card properly, you might find it doesn't appear in Finder, Disk Utility, or on the Desktop. This can be frustrating, especially when you're trying to access important photos, documents, or video files. The good news is that most SD card issues on macOS are fixable. Here’s a more detailed guide on diagnosing and resolving common problems.
1. Check Physical Connections
- Reinsert the card.
- Try another SD card.
- Test another adapter or hub.
2. Restart Your Mac
Sometimes a simple reboot resolves detection issues.
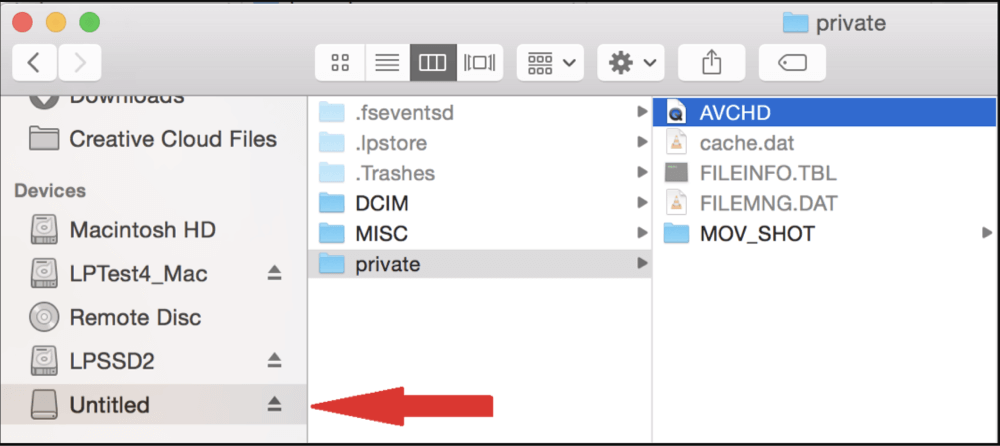
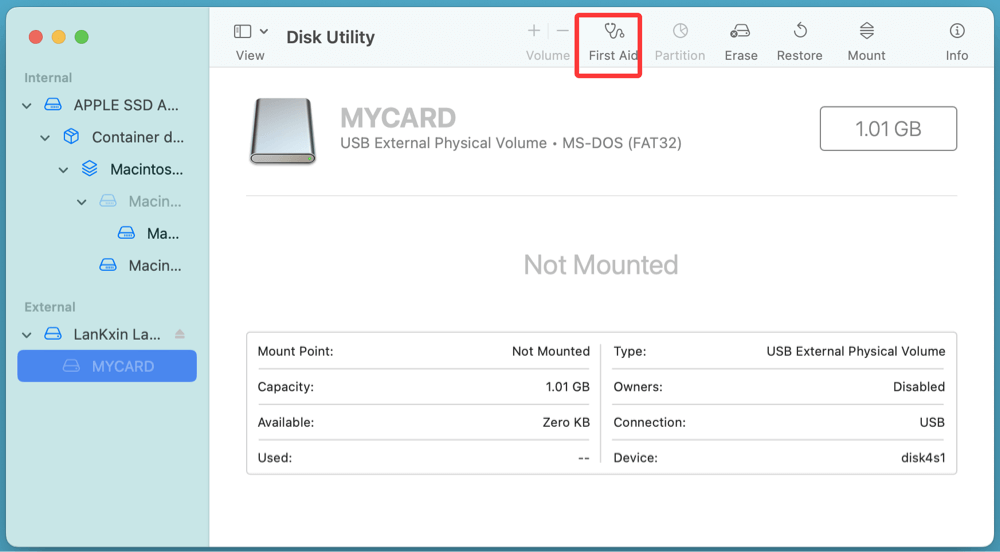
3. Use Disk Utility
- Open Disk Utility from Utilities via Applications.
- Look for the SD card in the left sidebar.
- If found but not mounted, select it and click Mount.
![connect an SD card to your Mac machine]()
- If the card shows as unformatted or corrupt, run First Aid to attempt repairs.
![connect an SD card to your Mac machine]()
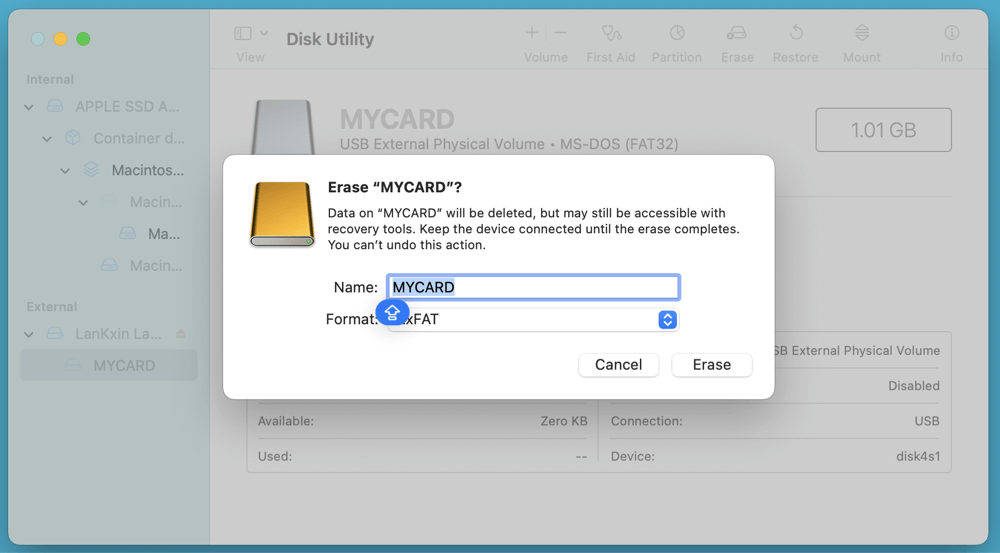
4. Reformat the Card (if needed)
Warning: Formatting will erase all data on the card.
If the card is unreadable or corrupted:
- Open Disk Utility.
- Select the SD card.
- Click Erase.
- Choose format: ExFAT (for cross-platform) or APFS (for Mac-only).
- Click Erase again to confirm.
![connect an SD card to your Mac machine]()
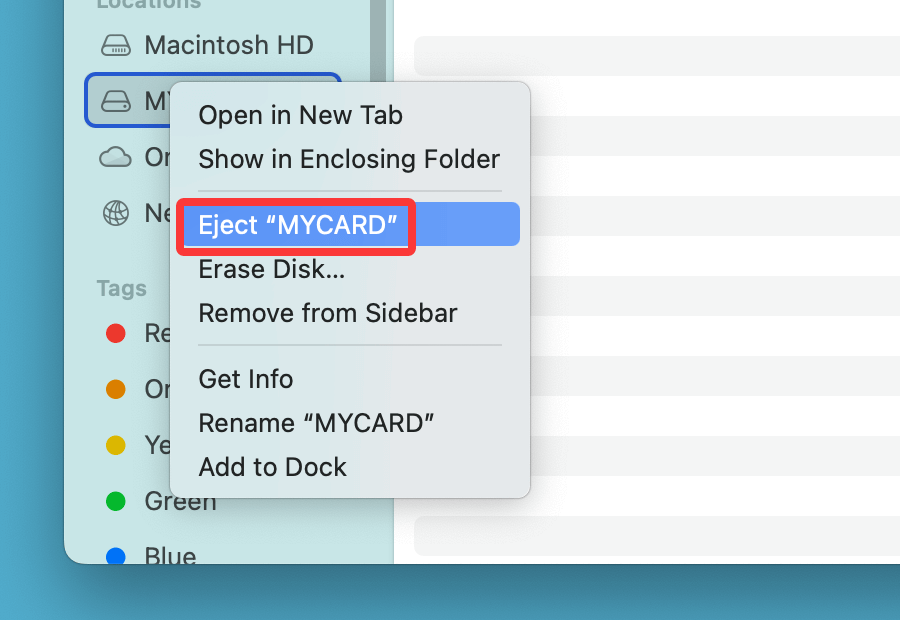
5. Ejecting the SD Card Safely
It's critical to eject your SD card properly before physically removing it to avoid data corruption.
How to Eject Safely:
- Open Finder and click the eject icon next to the SD card.
- Right-click on the card icon on the desktop and choose Eject.
![connect an SD card to your Mac machine]()
- Wait until the card disappears from Finder/Desktop before removal.
Tips for Using SD Cards on Mac
1. Choose the Right Format
- Use exFAT if you plan to use the SD card on both macOS and Windows.
- APFS or Mac OS Extended (Journaled) are best for macOS-exclusive use.
2. Use High-Quality Cards and Adapters
- Stick to trusted brands like SanDisk, Lexar, and Samsung.
- Avoid cheap, no-name adapters that might cause data issues.
3. Backup Before Editing
- Always back up photos or videos before making changes directly on the card.
- Use Photos, Image Capture, or Preview for secure importing.
4. Handle with Care
- Do not force the card in/out.
- Use a card case for storage.
- Avoid exposing it to static electricity or moisture.
5. Enable Finder Sidebar
If you don’t see the card under "Locations":
- Open Finder.
- Go to Finder > Settings > Sidebar.
- Make sure External disks is checked.
FAQs About Connecting SD Card to Mac
1. Can I use a microSD card with my Mac?
Yes. You'll need a microSD to SD adapter, which usually comes with the microSD card. Once adapted, follow the same connection methods.
2. How do I format an SD card on a Mac?
Use Disk Utility:
- Select the card.
- Click Erase.
- Choose format (exFAT recommended).
- Click Erase again.
3. Why is my SD card read-only on Mac?
- It might be formatted as NTFS, which macOS can't write to by default.
- Check if the SD card's physical lock switch is turned on.
- Reformat the card or use third-party NTFS drivers - such as Donemax NTFS for macOS.
4. My SD card is showing 0 bytes. What should I do?
This may indicate corruption or hardware failure:
- Run First Aid via Disk Utility.
- Try the card in another device.
- Use data recovery software if files are important.
5. How to recover lost data from an SD card on Mac?
Mac data recovery software - such as Donemax Data Recovery for Mac can recover lost data from unmounted or formatted SD card on Mac.
Download and install Donemax Data Recovery for Mac.
Open Donemax Data Recovery for Mac, select the SD card to start data recovery.

Click on Scan button to deeply scan the SD card and find all recoverable files.

Preview and recover files including images and videos after scanning.

Conclusion
Connecting an SD card to a Mac is straightforward once you know your device's capabilities. Whether you're using a built-in SD slot, a USB-C adapter, or a multiport hub, the process takes just minutes. Proper handling, safe ejection, and using the right file format will ensure smooth data transfers and long SD card life.
If your Mac doesn't recognize the SD card, troubleshooting through Disk Utility or using a different adapter can resolve most issues. For photographers, students, or professionals, mastering this process is essential for efficient file management.
By following this guide, you can confidently connect, access, manage, and safely eject SD cards on any Mac model.
Donemax Data Recovery for Mac
Donemax Data Recovery for Mac is one of the best Mac data recovery software. It is easy-to-use and can help in recovering deleted, formatted, inaccessible or lost data from Mac HDD/SSD, external disk, USB drive, SD card, camera or other storage devices.
Related Articles
- Dec 21, 2024How to Delete Old Time Machine Backups?
- Oct 14, 2024Fix Error Code 100006 on Mac: A Complete Guide to Solving the Issue
- Nov 20, 2024How to Make a Bootable USB Installer for macOS Big Sur?
- Jul 20, 2024How to Repair Unreadable USB Flash Drive on Mac Without Losing Data?
- May 28, 2025How to Take a Screenshot on Mac?
- May 22, 2026How to Use SD Card on Mac – A Complete Guide

Contributing Writer
Maria
Maria is one of the senior writers & editors of Donemax who lives and works in Sydney, Australia. She loves PC, Mac and Internet Technology. She has 6 years of writing articles about data recovery on PC/Mac, disk cloning solution, data eraser and computer OS optimization, etc. She is also interested in testing various software and digital products.

Editor in chief
Gerhard Chou
In order to effectively solve the problems for our customers, every article and troubleshooting solution published on our website has been strictly tested and practiced. Our editors love researching and using computers and testing software, and are willing to help computer users with their problems