Written byMariaUpdated on Jun 06, 2025
Reformat External Hard Drive on Windows or Mac Without Losing Data
Approved byGerhard Chou
Before we start: Reformatting an external hard drive erases everything stored on the drive. Make a backup before you reformat the external hard drive. If you've lost data due to reformatting the external hard drive and don't have a backup, just use data recovery program - such as Donemax Data Recovery to unformat the drive & get all erased/lost data back.
PAGE CONTENT:
Reformatting an external hard drive can resolve performance issues, fix file system errors, or simply prepare it for use with a different operating system. However, the process usually comes with one major concern: data loss. Many users hesitate to proceed with formatting because it typically erases everything on the drive. Fortunately, there's a safe way to reformat your external hard drive on Windows or Mac without losing data - and this guide will walk you through it step-by-step.
Can You Reformat Without Losing Data?
Let's clarify this upfront: reformatting a drive will delete all data stored on it. However, this doesn't mean you're doomed to lose your files. The key to preserving your data lies in backing it up beforehand and restoring it afterward.
In essence, the process involves three core steps:
- Backup your files to another safe location.
- Reformat the external drive using Windows or Mac utilities.
- Restore your files back onto the freshly formatted drive.
If you forgot to back up your files and had formatted the external hard drive, data loss is certain and inevitable. At this point, you'd better perform data recovery as soon as possible to avoid permanent data loss.
How to Reformat an External Hard Drive Without Losing Data?
By following these steps, you ensure that your data remains intact throughout the reformatting process.
Step 1: Back Up the Data from Your External Hard Drive
Before making any changes to your external hard drive, backup is crucial. Skipping this step could lead to permanent data loss.
Option 1: Manual Copy
- Connect your external hard drive to your PC.
- Open File Explorer (Windows) or Finder (Mac).
- Select all files and folders.
- Copy them to:
- Another external drive
- Your internal hard drive (if space allows)
- A cloud storage solution
Option 2: Use Backup Software
If your data is large or you want automation:
- Windows: Use File History or third-party tools like Donemax Disk Clone, True Image.
- Mac: Use Time Machine to back up to another external drive.
💡 Tips:
- Double-check that all important files are copied.
- Use checksum tools if you're concerned about data integrity.
- Organize the backup in folders for easy restoration later.
Step 2: Choose the Right File System Format
When you format a drive, you'll be prompted to choose a file system. The format you choose determines compatibility, performance, and features like file size limits or encryption.
Recommendation:
- Choose exFAT if you plan to use the drive on both Windows and Mac.
- Choose NTFS if you only use Windows and need features like file compression or encryption.
- Choose APFS or Mac OS Extended if the drive is strictly for use with Mac systems.
Step 3: Reformat the External Hard Drive on Windows
Here's how to reformat your external hard drive safely on Windows 11, 10, 8, or 7:
Step-by-Step Guide:
- Connect the external hard drive to your PC.
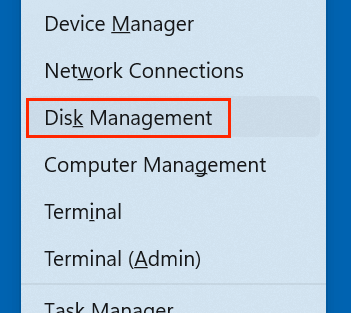
- Press Windows + X and select Disk Management.
![reformat your external hard drive on Windows or Mac without losing data]()
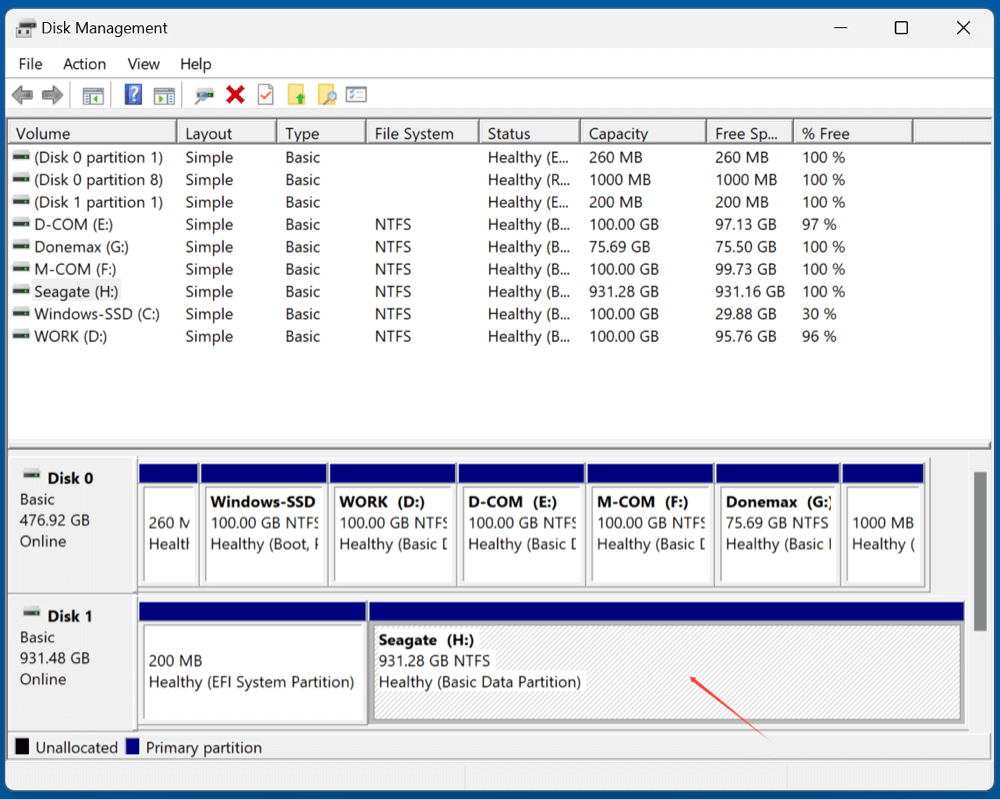
- Locate your external drive in the list.
![reformat your external hard drive on Windows or Mac without losing data]()
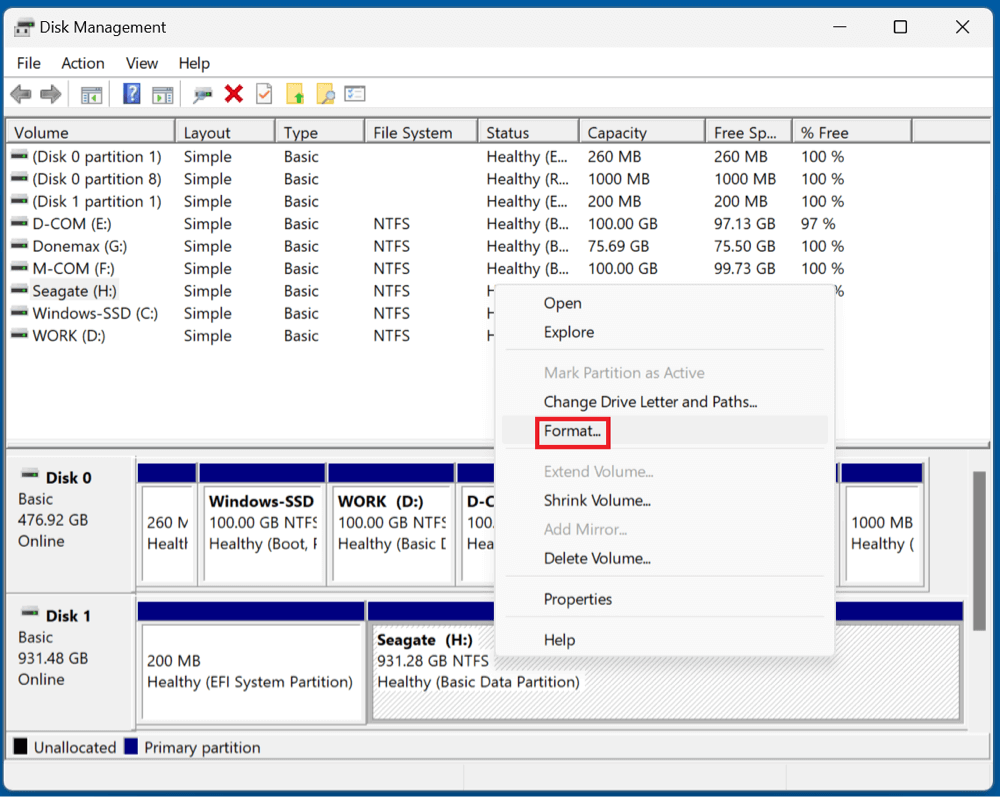
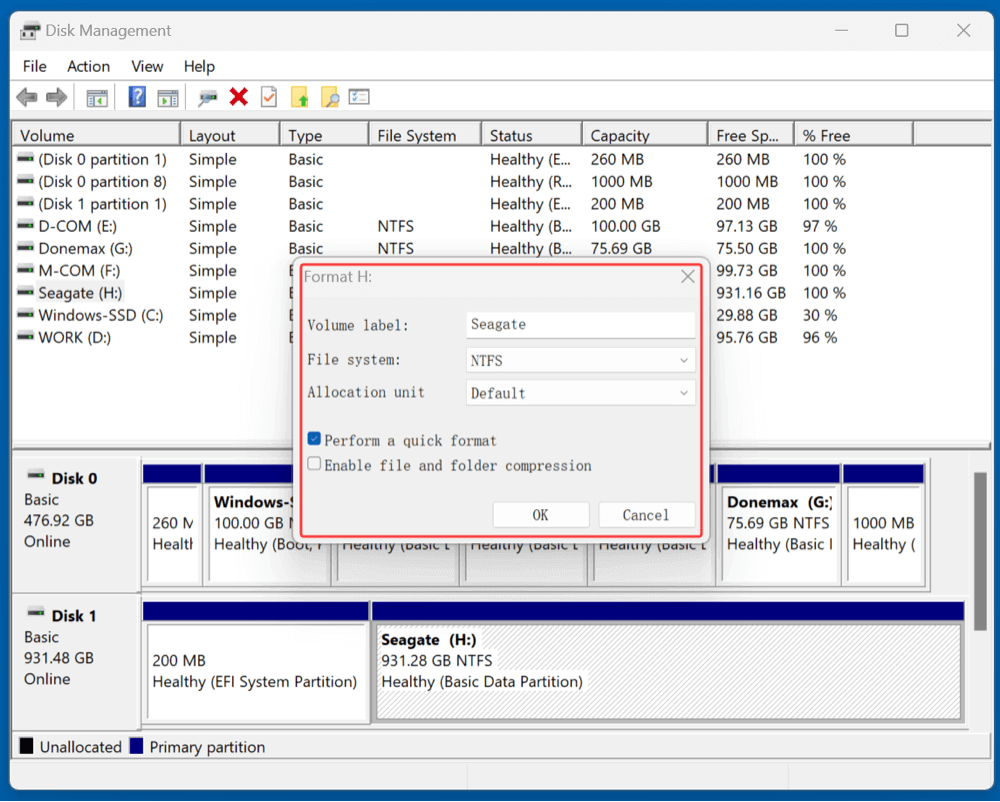
- Right-click on the drive's partition and choose Format.
![reformat your external hard drive on Windows or Mac without losing data]()
- In the dialog box:
- Enter a volume label (drive name).
- Choose File System (e.g., exFAT, NTFS).
- Select Default for Allocation Unit Size.
- Uncheck "Perform a quick format" for a deeper clean (optional).
![reformat your external hard drive on Windows or Mac without losing data]()
- Click OK and confirm the warning about data loss.
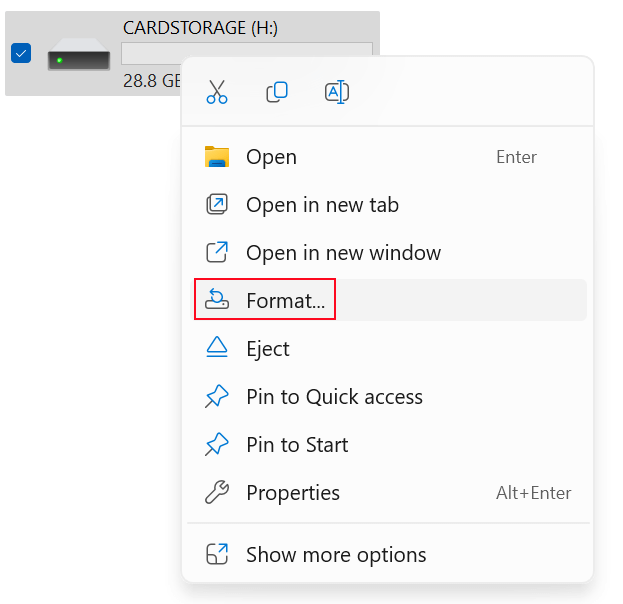
Alternative: Using File Explorer
- Open File Explorer and right-click the drive.
- Click Format.
![reformat your external hard drive on Windows or Mac without losing data]()
- Select the desired options and click Start.
![reformat your external hard drive on Windows or Mac without losing data]()

💡 Note: The Disk Management method gives more control, especially if you need to delete and recreate partitions.
Step 4: Reformat the External Hard Drive on Mac
If you're using a Mac, here's how to reformat your external hard drive:
Step-by-Step Guide:
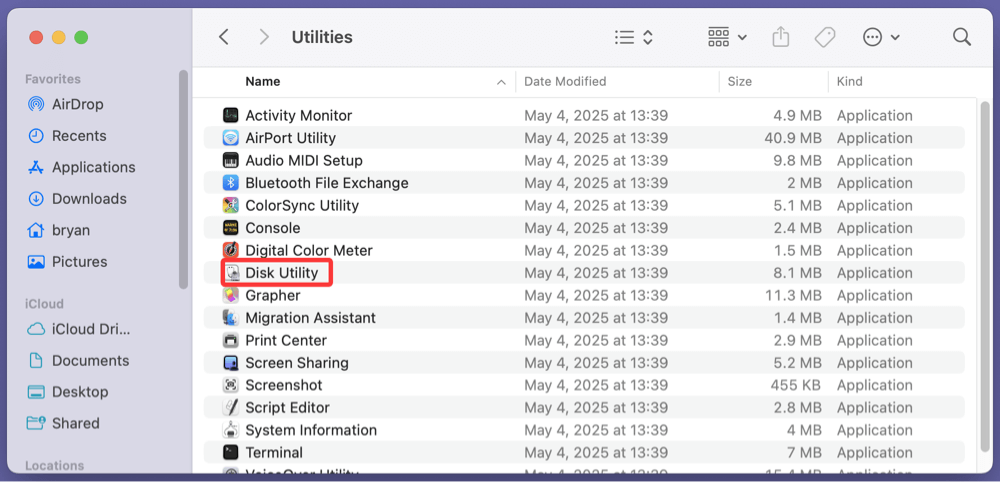
- Attach your Mac to the drive.
- Open Disk Utility: Go to Applications > Utilities > Disk Utility, open Disk Utility.
![reformat your external hard drive on Windows or Mac without losing data]()
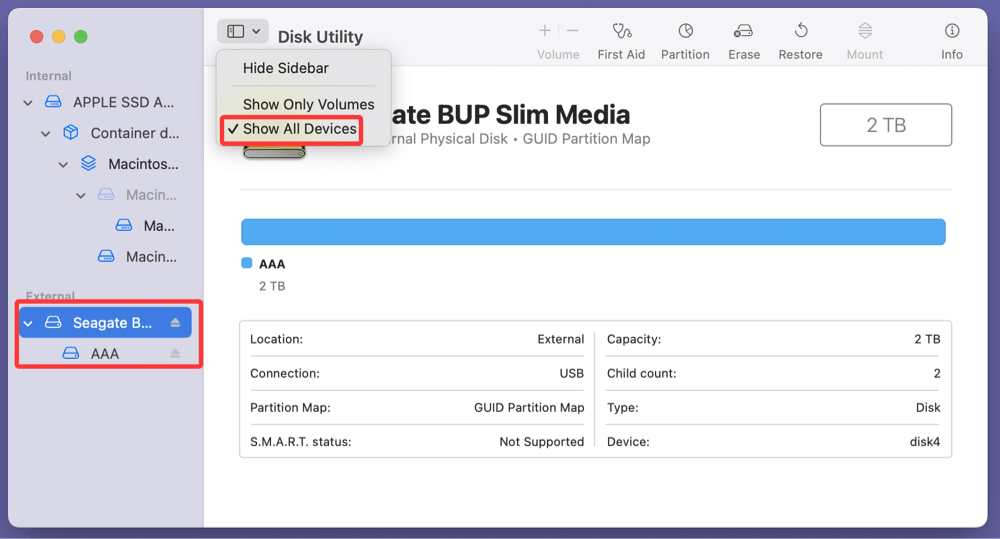
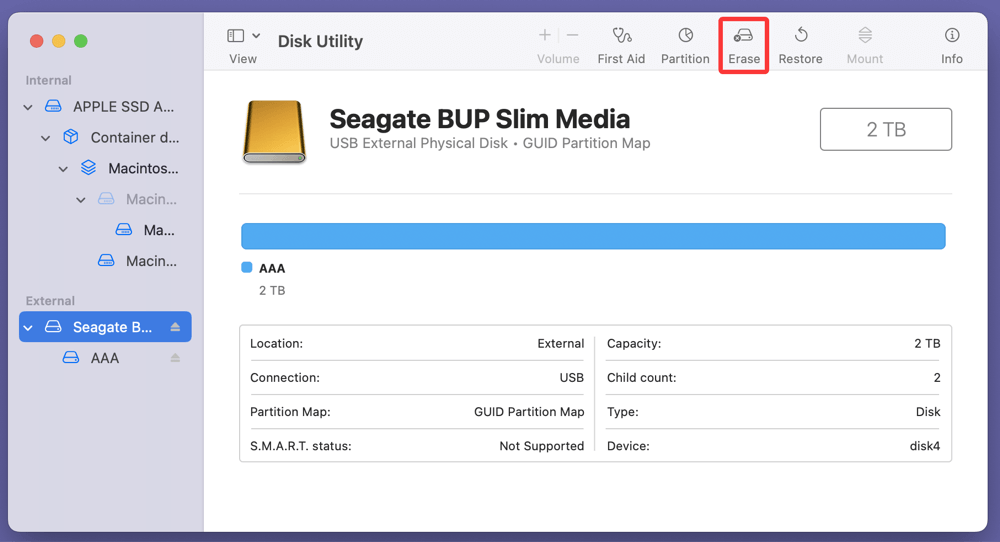
- In the left sidebar, select your external hard drive (not the volume).
![reformat your external hard drive on Windows or Mac without losing data]()
- Click the Erase button at the top.
![reformat your external hard drive on Windows or Mac without losing data]()
- In the popup:
- Name your drive.
- Choose a format (e.g., APFS, exFAT, Mac OS Extended).
- Choose GUID Partition Map as the scheme.
- Click Erase to begin formatting.
![reformat your external hard drive on Windows or Mac without losing data]()
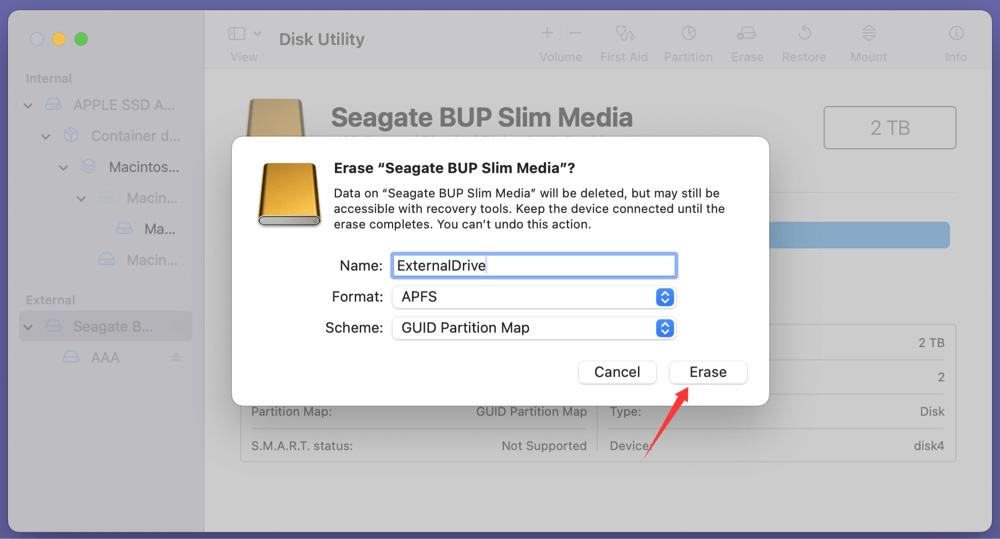
💡 Note: Erase will delete all content, so make sure your backup is safe.
Step 5: Restore Your Files to the Reformatted Drive
Once you've successfully reformatted your external hard drive, the final and most rewarding step is to put your data back where it belongs. Whether you're restoring from a manual backup or a full system image, this stage is where you bring your drive back to life - without any of the old problems and clutter that may have prompted you to format it in the first place.
1. Manual Restoration (File-by-File)
This is the most straightforward method, especially if you backed up your files manually.
How to Do It:
- Locate Your Backup: This could be another external drive, a specific folder on your internal disk, or even a cloud storage location.
- Connect or Open the Backup: If it's another physical drive, plug it in. If it's in the cloud, make sure you're signed in and synced.
- Drag and Drop: Simply select the backed-up files and folders and copy them to the freshly formatted external hard drive.
- Preserve Structure: If you had a specific folder structure (e.g., Documents, Media, Projects), recreate that same hierarchy to stay organized.
- Verify the Data: Open a few documents, media files, and folders to make sure everything has been restored correctly and is accessible.
Example:
Imagine your original external drive had a project folder for a client that contained designs, invoices, and meeting notes. After restoring, open some of these files to ensure they are intact and that formatting (in Word, Excel, or design tools) hasn't been lost or corrupted in the process.
2. Using Backup Software for Restoration
If you used dedicated backup software like Time Machine, Acronis True Image, you can restore your files even more efficiently, with options like version control and partial recovery.
Time Machine on macOS:
- Reconnect your Time Machine backup drive.
- Open Time Machine from the menu bar or System Settings.
- Browse through snapshots of your system to locate files.
- Click Restore to send them back to the newly formatted external drive.
Acronis (Windows):
- Launch the software and go to the Restore tab.
- Choose the appropriate backup image file.
- Select specific files/folders or restore the entire backup.
- Set the destination to your reformatted external drive.
- Click Proceed and monitor the process.
Advantages:
- Recovers all metadata (timestamps, permissions, etc.).
- Supports restoring specific versions of files.
- Often faster and more automated than manual copying.
3. Cloud Backup Restoration
If you uploaded your backup to services like Google Drive, OneDrive, Dropbox, or iCloud, you can restore directly from the cloud.
Steps:
- Sign in to your cloud account.
- Navigate to your backup folder.
- Select all files and click Download or drag them to the external hard drive.
- Make sure the internet connection is stable, especially when transferring large files.
Pro Tips:
- Use a download manager to avoid interruption.
- Verify available space on the external drive before initiating a large transfer.
- Be patient - cloud downloads can take time depending on your internet speed.
Organizing the Restored Data
After restoration, it's worth spending a few minutes to organize your drive for better long-term usability:
- Create category-based folders: e.g., Work, Personal, Media, Archives.
- Use naming conventions: "Invoices_2025_ClientName" is clearer than "File1.docx".
- Remove duplicate or obsolete files: This helps reduce clutter and confusion later.
Consider installing a file management tool like:
- WinMerge or Duplicate Cleaner (Windows)
- DMcleaner (Mac) – excellent for spotting duplicate files
- Everything (Windows) – a fast indexing tool for file search
Optional: Repartitioning Without Formatting
In some rare cases, repartitioning your external drive can help you create new partitions without erasing data on existing ones.
On Windows:
- To make the current partition smaller, use Disk Management.
- The unallocated space should be divided into a new partition.
- As desired, format the new partition.
On Mac:
- Use Disk Utility > Partition to add or resize volumes.
⚠️ Warning: Repartitioning carries some risk. Always back up before trying this. If you mistakenly delete a partition, data recovery becomes complex.
What If You Forgot to Back Up Before Formatting? [Data Recovery Method]
If you've already formatted your external hard drive without backing up - don't panic. You may still recover your data using specialized data recovery software, especially if the formatting was a quick format.
Donemax Data Recovery offers easy solution to unformat an external hard drive and get the lost data back.
Step 1. Download and install Donemax Data Recovery on the computer and connect the external hard drive to the same computer.
Step 2. Open Donemax Data Recovery and select the formatted external hard drive.

Step 3. Click on Scan button. Donemax Data Recovery will deeply scan the drive and find all deleted/formatted/lost files.

Step 4. After scanning, you can preview all recoverable files. Then select the wanted files, click on Recover button to save them.

💡 Note: Success depends on whether the data has been overwritten.
Conclusion
Reformatting your external hard drive on Windows or Mac doesn't have to mean losing valuable data. With proper preparation, the process can be smooth, safe, and even beneficial. Whether you're looking to fix file system errors, improve compatibility, or start fresh, the key is to back up your files first, format carefully, and restore your data afterward.
By following this guide, you can confidently reformat your external hard drive without the fear of losing your files - no matter which operating system you use.
Donemax Data Recovery
One of the best data recovery programs to recover deleted, formatted or lost data from PC, Mac, HDD, SSD, USB drive, SD card, camera, RAID, Sever or other storage devices.
Related Articles
- Jun 13, 2025macOS Tahoe 26: Everything You Should Know and Install it
- Aug 10, 2025Windows 10 End of Support, What to Do?
- May 26, 2024How to Add Pictures for Mac Background?
- Nov 13, 2024Apple M3 Chip vs. M4 Chip: A Comprehensive Comparison
- Jun 26, 2026Update to Windows 11 26H2: A Complete Step-by-Step Guide
- Jul 11, 2025How to Use an USB Drive on Mac?

Contributing Writer
Maria
Maria is one of the senior writers & editors of Donemax who lives and works in Sydney, Australia. She loves PC, Mac and Internet Technology. She has 6 years of writing articles about data recovery on PC/Mac, disk cloning solution, data eraser and computer OS optimization, etc. She is also interested in testing various software and digital products.

Editor in chief
Gerhard Chou
In order to effectively solve the problems for our customers, every article and troubleshooting solution published on our website has been strictly tested and practiced. Our editors love researching and using computers and testing software, and are willing to help computer users with their problems
Hot Donemax Products

Clone hard drive with advanced clone technology or create bootable clone for Windows/Mac OS.

Completely and easily recover deleted, formatted, hidden or lost files from hard drive and external storage device.

Certified data erasure software - permanently erase data before selling or donating your disk or any digital device.