Written byStevenUpdated on May 06, 2025
How to Bypass Recycle Bin When Deleting Files on Windows PC?
Approved byGerhard Chou
Before we start: Using keyboard shortcuts, modifying Recycle Bin settings, using Command Prompt or PowerShell can help you easily delete files without putting them into Recycle Bin. Third-party software Donemax Data Eraser can not only delete but also shred the files permanently.
PAGE CONTENT:
The Recycle Bin is a well-known safety net for Windows users, providing an opportunity to recover accidentally deleted files. However, there are scenarios where bypassing the Recycle Bin becomes necessary. Whether for reasons of efficiency, disk space management, or securely removing sensitive files, understanding how to permanently delete files is essential. In this article, we will explore the various methods to bypass the Recycle Bin when deleting files on Windows PC, offering detailed instructions for each approach, and discuss their implications, advantages, and limitations.
Why Bypass the Recycle Bin on Windows PC?
The default behavior of the Recycle Bin is to temporarily hold deleted files, making recovery possible until you manually empty it. While this feature is helpful for most users, there are specific circumstances where bypassing the Recycle Bin is preferred:
- Sensitive Data Handling: If you are dealing with sensitive information, permanently deleting files ensures they are not easily recoverable.
- Disk Space Management: By avoiding temporary storage in the Recycle Bin, you can free up disk space immediately.
- Efficiency: For power users, bypassing the Recycle Bin streamlines file deletion processes, particularly for bulk operations.
It is important to approach these methods with caution. Accidentally deleting critical files without a backup can lead to data loss.
Methods to Bypass the Recycle Bin on Windows PC
There are multiple ways to bypass the Recycle Bin in Windows, each suited for different levels of technical proficiency and specific use cases.
1. Using Keyboard Shortcuts
The simplest method involves using a built-in keyboard shortcut:
- Steps:
- Select the file or folder you wish to delete.
- Press Shift + Delete on your keyboard.
![bypass Recycle Bin when deleting files on Windows PC]()
- Confirm the deletion in the pop-up dialog box.
- Advantages:
- Quick and easy to execute.
- No changes to system settings or additional software required.
- Disadvantages:
- No way to recover files once deleted unless you use third-party recovery tools.
2. Modifying Recycle Bin Settings
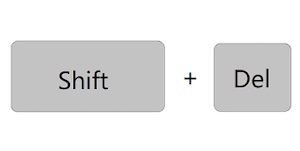
Windows allows users to customize the behavior of the Recycle Bin for each drive. By disabling the Recycle Bin for a specific drive, files deleted from that drive will bypass it entirely.
- Steps:
- Right-click on the Recycle Bin icon on your desktop and select Properties.
![bypass Recycle Bin when deleting files on Windows PC]()
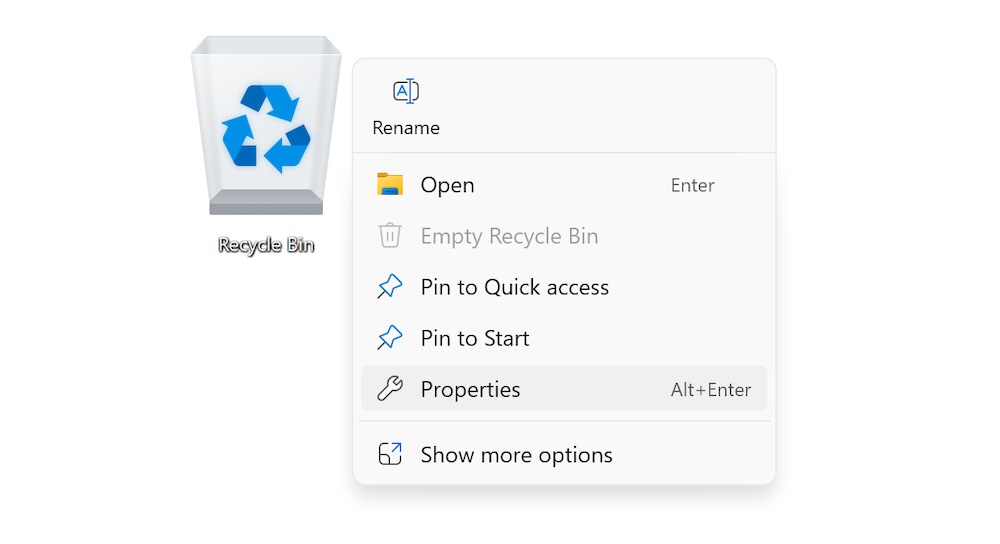
- Choose the drive for which you want to change the settings.
- Select the option "Don't move files to the Recycle Bin. Remove files immediately when deleted."
![bypass Recycle Bin when deleting files on Windows PC]()
- Click Apply and then OK.
- Right-click on the Recycle Bin icon on your desktop and select Properties.
- Advantages:
- Customizable for specific drives.
- No need for repeated manual actions.
- Disadvantages:
- Affects all deletions on the selected drive.
- Requires careful handling to avoid accidental data loss.
3. Using Command Prompt
The Command Prompt is a powerful and versatile tool built into the Windows operating system. It allows users to execute commands directly, providing precise control over file and system operations. When it comes to bypassing the Recycle Bin, the Command Prompt can permanently delete files without routing them through the standard deletion process. This method is particularly useful for advanced users or scenarios involving batch deletions.
Understanding the Command Prompt
The Command Prompt operates through text-based commands, providing a direct interface to the file system. Unlike the graphical user interface (GUI), it does not require clicks or menu navigation, making it faster and more efficient for certain tasks. However, this power comes with responsibility, as incorrect commands can result in unintended deletions or system modifications.
Steps to Permanently Delete Files with Command Prompt
Follow these steps carefully to delete files permanently without involving the Recycle Bin:
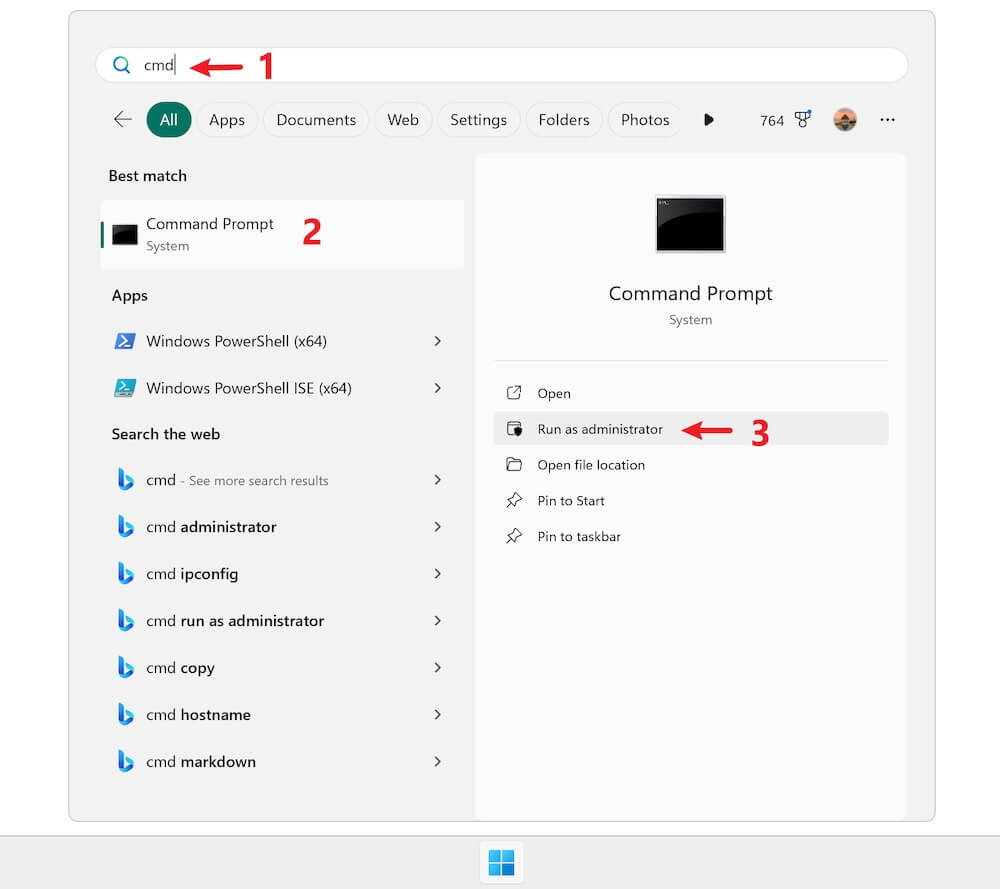
- Open the Command Prompt:
- Type cmd in the Windows Start menu search bar.
- Right-click on the Command Prompt result and select Run as administrator to ensure you have the necessary permissions.
![bypass Recycle Bin when deleting files on Windows PC]()
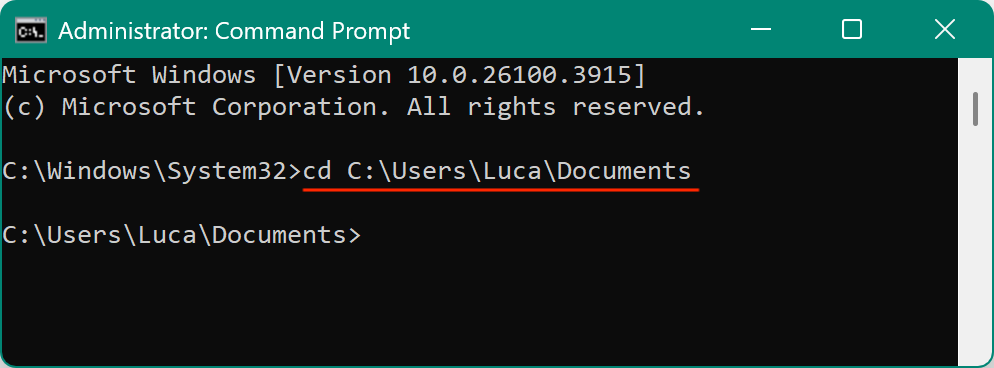
- Navigate to the File's Directory:
- Use the cd (change directory) command to move to the folder containing the file. For example:
cd C:\Users\YourUsername\Documents
- Replace YourUsername with your Windows username and adjust the file path accordingly.
![bypass Recycle Bin when deleting files on Windows PC]()
- Use the cd (change directory) command to move to the folder containing the file. For example:
- Use the del Command:
- To delete a specific file, use the del command followed by the file name and path. For example:
del "examplefile.txt"
![bypass Recycle Bin when deleting files on Windows PC]()
- If the file is read-only or requires special permissions, use the /f switch to force deletion:
del /f "examplefile.txt"
- To suppress confirmation prompts, add the /q switch:
del /f /q "examplefile.txt"
- To delete a specific file, use the del command followed by the file name and path. For example:
- Verify the Deletion:
- After running the command, the file will be permanently deleted. Double-check the folder to ensure it is no longer present.

Deleting Multiple Files
Command Prompt is particularly useful for deleting multiple files in one operation. You can use wildcards (* and ?) to target specific groups of files.
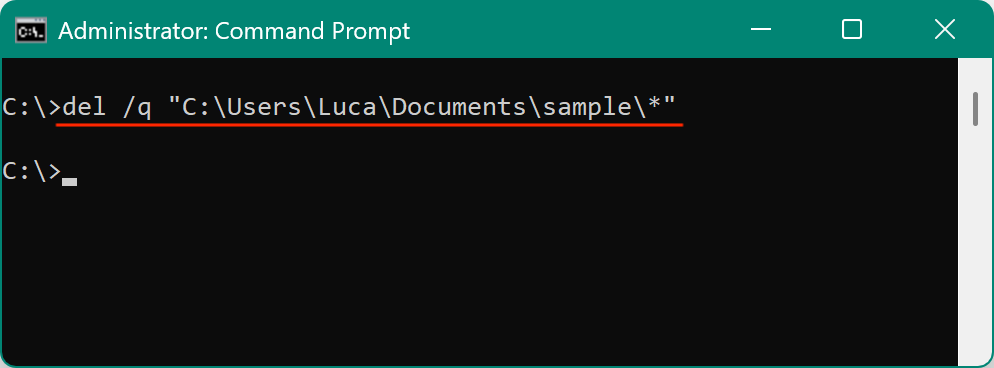
- Delete All Files in a Folder:
del /q "C:\path\to\folder\*"
![bypass Recycle Bin when deleting files on Windows PC]()
This command deletes all files in the specified folder without prompting for confirmation.
- Delete Files with Specific Extensions:
del /q "C:\path\to\folder\*.txt"
This deletes all .txt files in the specified folder.
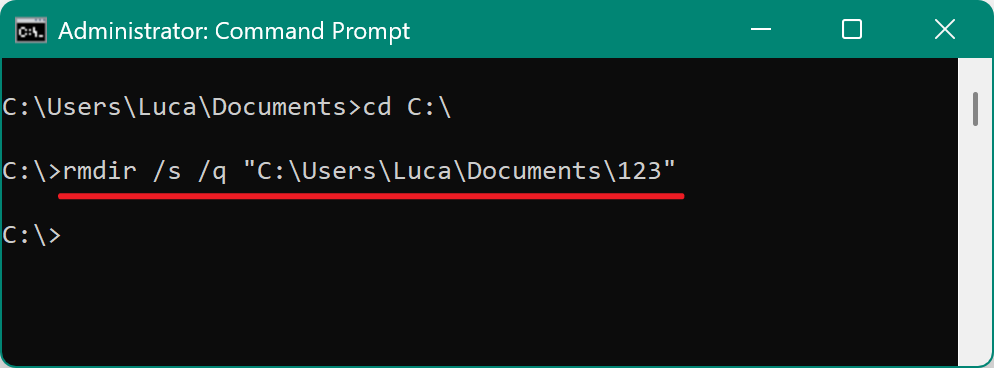
Deleting Entire Folders
If you need to delete an entire folder and its contents permanently, the rmdir (remove directory) command is the best option.
- Basic Folder Deletion:
rmdir /s /q "C:\path\to\folder"
- /s: Deletes the folder and all its contents.
- /q: Suppresses confirmation prompts.
📒 Important Note: Ensure you double-check the folder path before executing this command, as it cannot be undone.
Best Practices for Using Command Prompt
- Double-Check File Paths:
- Mistyped paths can lead to the deletion of unintended files or folders. Always review your command before pressing Enter.
- Use Confirmation Prompts When Learning:
- Initially, avoid using the /q switch to ensure you have an opportunity to confirm each deletion.
- Practice on Non-Critical Files:
- Familiarize yourself with commands by practicing on test files in a non-critical directory.
- Backup Important Data:
- Even with careful execution, mistakes can happen. Keep backups of critical files to avoid permanent loss.
Advantages of Using Command Prompt
- Efficiency: Faster than GUI methods, especially for bulk deletions.
- Precision: Allows exact targeting of files and folders.
- Versatility: Supports wildcards for batch operations and offers various switches for customization.
Disadvantages of Using Command Prompt
- Complexity: Requires knowledge of commands and syntax.
- Risk of Errors: Mistakes can lead to accidental data loss, particularly with powerful commands like del and rmdir.
- Lack of Visual Feedback: Unlike GUI methods, Command Prompt does not show a preview or confirmation screen.
4. Employing PowerShell Scripts
For more advanced users, PowerShell offers robust options for bypassing the Recycle Bin with scripts and commands.
- Steps:
- Open PowerShell with administrative privileges.
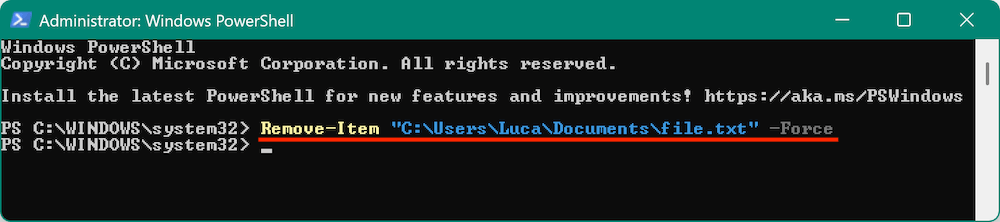
- Use the Remove-Item cmdlet to delete files. For example:
Remove-Item "C:\path\to\file.txt" -Force
![bypass Recycle Bin when deleting files on Windows PC]()
- For bulk deletions, create a script with multiple file paths.
- Advantages:
- Powerful automation capabilities.
- Suitable for complex tasks and IT professionals.
- Disadvantages:
- Steeper learning curve.
- Potential for accidental deletions if commands are misused.
5. Using Third-Party Software
With the above methods, it's able to remove the files without sending to Recycle Bin on Windows PC. However, it's not enough in some cases as the deleted files are still recoverable with professional data recovery software. If you wanted to delete some sensitive or confidential files and ensure the files cannot be recovered in any way, then you need to use third-party file shredder tools to permanently erase the files.
Several third-party tools specialize in permanent file deletion, often providing additional features like secure file shredding to avoid data recovery.
Popular Tools:
- Donemax Data Eraser: Offers advanced file shredding algorithms with an intuitive interface.
- CCleaner: Includes a secure delete option for sensitive files.
Steps to shred files/folders (Use Donemax Data Eraser):
1. Download and install the Donemax Data Eraser on your Windows PC.
Donemax Data Eraser
- Securely deleted files permanently from Windows PC or Mac.
- Shred the files and ensure the files are unrecoverable.
- Three modes to shred files or wipe drive with ease.
2. To shred files and bypass Recycle Bin on Windows PC, you can select the Erase Files mode.
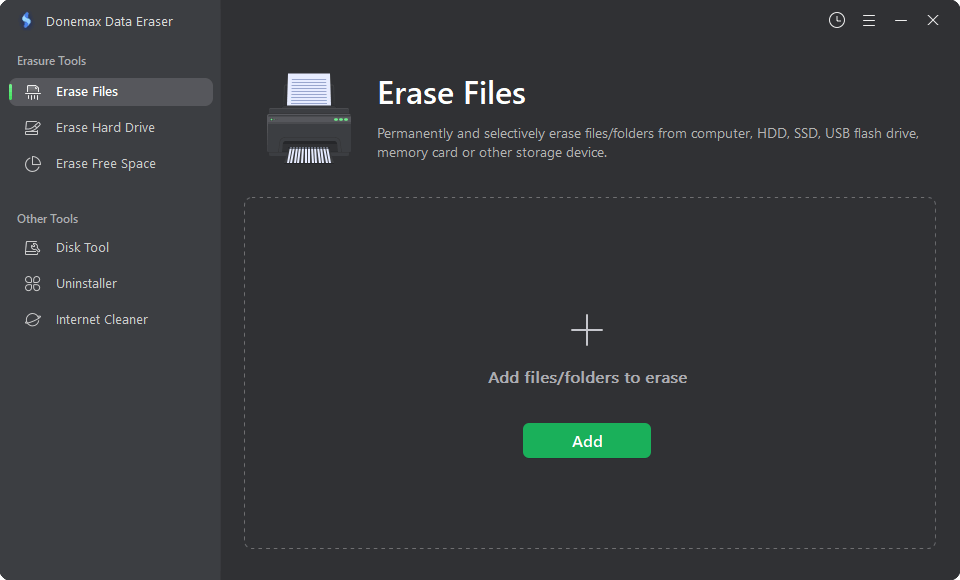
3. Select the files or folders you want to delete.
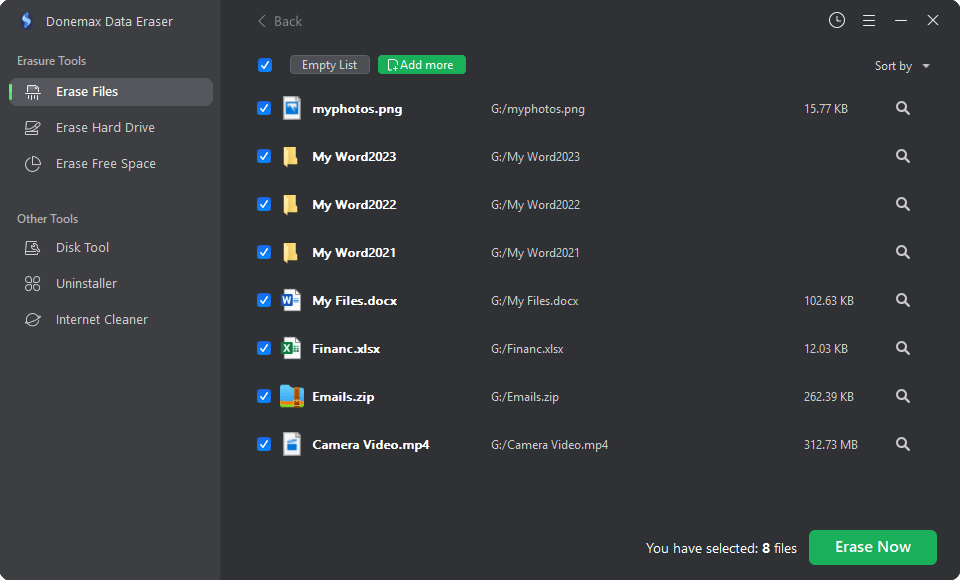
4. Confirm to delete the selected files/folders.

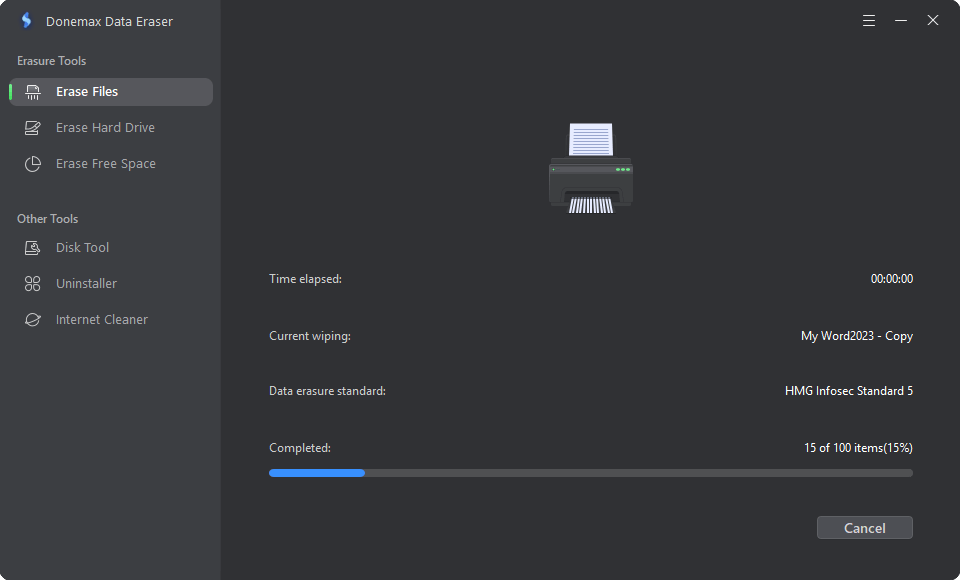
5. Start to shred the data. The software's secure delete feature will permanently remove the files and ensure the deleted files/folders are no longer recoverable.
Advantages:
- User-friendly interfaces.
- Enhanced security for sensitive data.
Disadvantages:
- May require purchase or subscriptions.
- Reliance on external developers for updates and security.
Pros and Cons of Each Method
Each approach to bypassing the Recycle Bin has unique benefits and drawbacks:
- Keyboard Shortcuts:
- Pros: Quick, simple, no additional tools required.
- Cons: Limited control, no recovery options.
- Recycle Bin Settings:
- Pros: System-wide configuration, persistent behavior.
- Cons: Permanent for the configured drive, risk of accidental deletions.
- Command Prompt:
- Pros: Precise, suitable for advanced users.
- Cons: Complex, prone to errors.
- PowerShell:
- Pros: Customizable, supports automation.
- Cons: Requires technical expertise.
- Third-Party Software:
- Pros: Feature-rich, secure deletion.
- Cons: Additional cost, dependency on third-party tools.
Troubleshooting Common Issues when Deleting Files
- Files Not Deleting Permanently:
- Check permissions and file attributes. Use administrative privileges or commands to force deletion.
- Accidental Deletions:
- Attempt recovery using third-party recovery tools, provided the data has not been overwritten.
- Software Conflicts:
- Ensure compatibility between third-party tools and your operating system. Update software regularly.
Security Considerations and Best Practices for File Deletion
Bypassing the Recycle Bin has implications for both data security and accidental deletions:
- Sensitive Data:
- Ensure that deleted files are not recoverable by unauthorized users. Use tools with secure deletion capabilities, which overwrite file data multiple times.
- Unauthorized Deletions:
- Set up user restrictions and permissions to prevent unauthorized deletions. Use audit logs to monitor file activities.
- Backup Regularly:
- Maintain backups of critical files to avoid unintended data loss.
- Verify Before Deleting:
- Double-check file contents and ensure you have selected the correct files for deletion.
Conclusion
Bypassing the Recycle Bin is a useful technique when handled responsibly. Whether you choose a simple keyboard shortcut, modify Recycle Bin settings, explore advanced methods like Command Prompt and PowerShell, or use third-party data eraser software, each approach has its place depending on your needs and technical expertise. Always weigh the benefits of efficiency and security against the risk of data loss, and adopt best practices to protect your important files.
Donemax Data Eraser
One of the best data erasure programs for permanently erase data from PC, Mac, HDD, SSD, USB drive, digital camera and other devices. Once the data is erased, it is lost for good, cannot be recovered by any method.
Related Articles
- Jan 26, 2024How to Wipe Free Disk Space of A SSD?
- Oct 16, 2023How to Make Data Recovery Be Impossible?
- Jul 07, 2026How to Reset Windows 7 to Factory Settings (3 Easy Methods)
- May 17, 20242025 Best USB Drive Data Wipe Software
- May 06, 2024How to Factory Reset Gopro HERO12 Black Before Selling or Donating It?
- Jul 01, 2026Best File Systems for External Drives: How to Format & Partition

Contributing Writer
Steven
Steven has been a senior writer & editor of Donemax software since 2020. He's a super nerd and can't imagine the life without a computer. Over 6 years of experience of writing technical solutions and software tesing, he is passionate about providing solutions and tips for Windows and Mac users.

Editor in chief
Gerhard Chou
In order to effectively solve the problems for our customers, every article and troubleshooting solution published on our website has been strictly tested and practiced. Our editors love researching and using computers and testing software, and are willing to help computer users with their problems