
Written byStevenUpdated on Feb 05, 2024
How to Wipe A Lexar Portable SSD?
Approved byGerhard Chou
Hi, I have a 1TB Lexar SL660 portable SSD and want to resell it on eBay. But, after formatting the SSD, the lost data still can be found by Recuva. Even reformat it three times, some of the lost files still can be recovered. Is there any way to completely wipe all data from the Lexar SSD?
- Lucien
PAGE CONTENT:
Hey there, and welcome to the world of Lexar Portable SSDs! Lexar has a storage option for everyone, from tech fans to creative professionals to people who need a reliable way to keep their stuff. These sleek, small devices are the best way to store your info quickly and carry it around. Things happen, and you may need to permanently delete old files from your Lexar SSD. Do not be scared!
This guide will show you how to wipe your Lexar Portable SSD before you sell or donate it in a few easy steps. Imagine starting over with your trusted storage friend. Are you ready to start the process of safely deleting data? Let's get started!
How to Reformat Lexar Portable SSD?
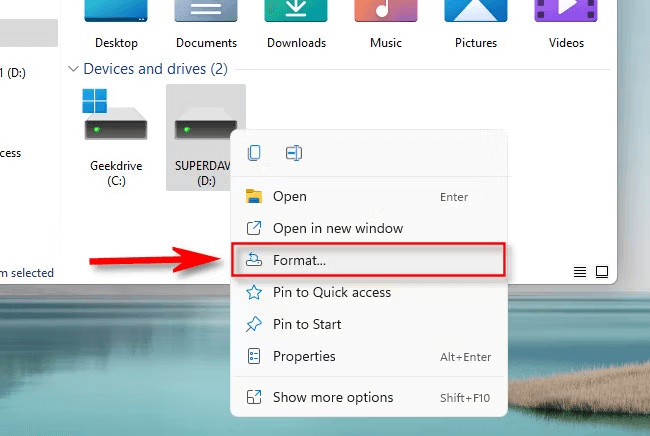
On a Windows PC, just connect the Lexar portable SSD to your computer. Open This PC, right-click the SSD, choose Format. Select a file system, then click on Start button. It will reformat the Lexar portable SSD.
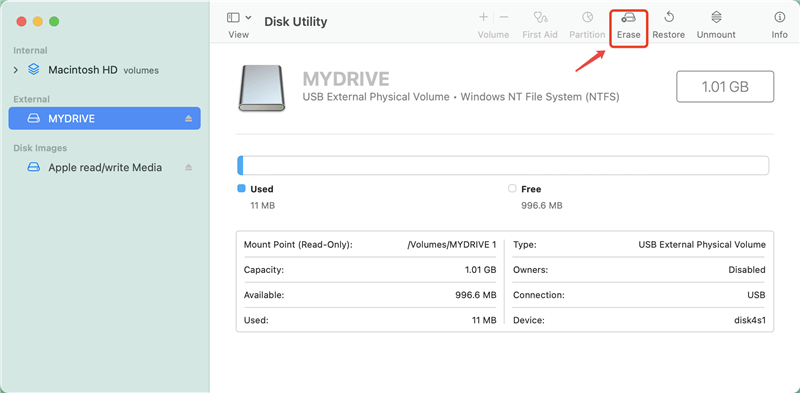
Using Disk Utility on a Mac to format your Lexar SSD is simple. First, plug the Lexar portable SSD into your Mac. Go to "Applications" > "Utilities" and open Disk Utility.
On the left tab, you should see your Lexar portable SSD. Press the "Erase" button after clicking on the card. Pick the format you want to use: "ExFAT" for interaction with other systems or "Mac OS Extended (Journaled)" "APFS" for use only on a Mac. You can give it a name and choose the partition plan if you want to. Once you know your choice, click "Erase" to start the editing. When the process is done, carefully remove the Lexar portable SSD from your Mac.
Note: No matter how you reformat the Lexar portable SSD, the erased data stored on the SSD is not lost forever and can be recovered by data recovery software.
Recover deleted/formatted from Lexar portable SSD
teDownload free data recovery software to recover deleted, formatted or lost data from Lexar portable SSD.
Wipe Lexar Portable SSD with Secure Data Erasure Tool
Step 1. Back Up Your Data.
It's essential to back up any critical data on your Lexar Portable SSD before you start the wiping process. This step ensures you won't lose any critical data while the device is being wiped. You can move your files to a safe place like the cloud, a portable hard drive, or anything else you choose.
Remember once the data stored on the Lexar Portable SSD is wiped by the data erasure tool, the data is gone forever, can’t be recovered by any method.
Step 2. Choose the Right Wiping Tool.
Choosing the right wiping tool is crucial for a safe and effective process. Different kinds of apps can be used to wipe SSDs, each with its features. One suggested tool is the Donemax Data Eraser software, known for how well it erases SSDs safely.
This data erasure software offers certified data erasure standards to securely and permanently erase data from PC, Mac, HDD, SSD, USB flash drive, memory card, digital camera, etc. It ensures permanently erase the target data, making data recovery be impossible.
Step 3. Download and Install Donemax Data Eraser.
Click the download button to download the Windows version or Mac version of Donemax Data Eraser. After downloading the Donemax Data Eraser, install it on your computer.
Step 4. Select the Lexar Portable SSD.
Connect the Lexar Portable SSD to your computer. Then open Donemax Data Eraser on your computer, it will recognize the Lexar Portable SSD automatically. Choose Erase Hard Drive mode, then select the Lexar Portable SSD.

Step 5. Wipe the Lexar Portable SSD.
Erase Hard Drive mode will securely and permanently erase all data from the Lexar Portable SSD. After selecting the Lexar Portable SSD, click on Erase Now button to wipe the Lexar Portable SSD.
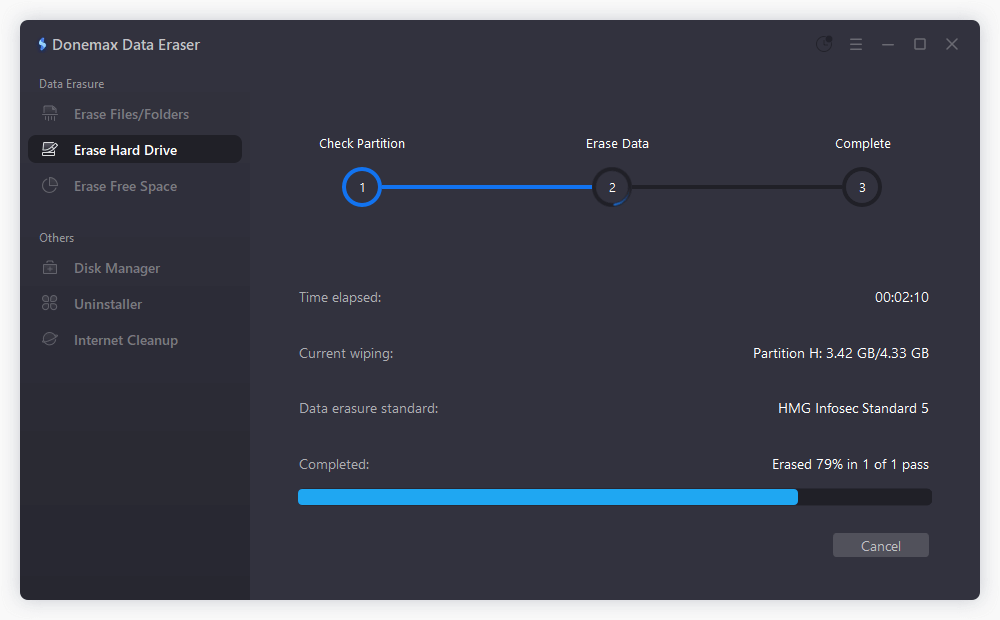
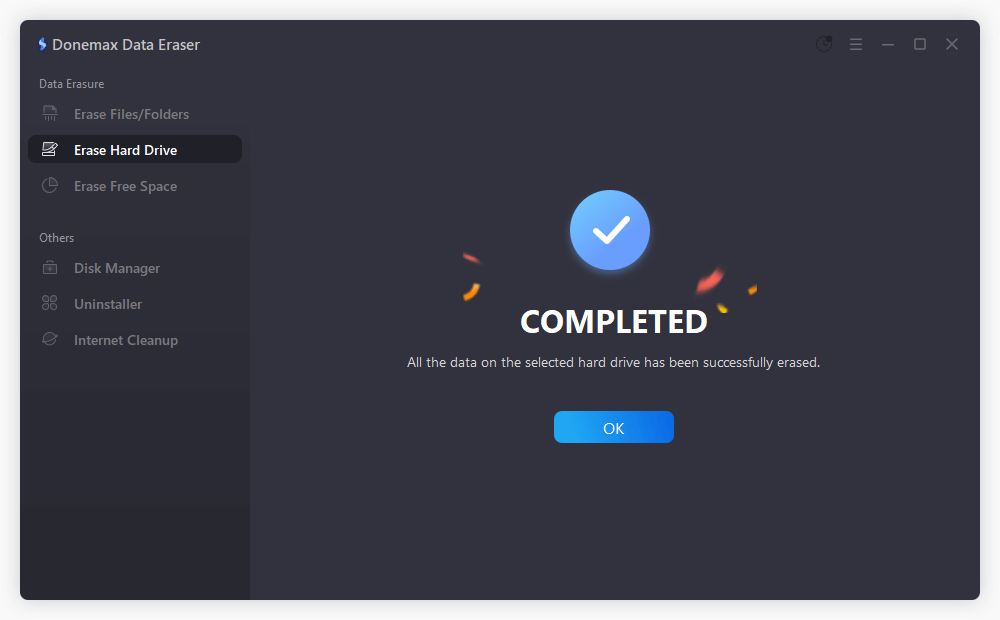
Step 6. Wait for the Process to Complete.
It could take a while for the secure erase process to finish, based on how fast and how big your Lexar Portable SSD is. Wait a little while and let the software finish the job. You'll get a message when it's done that the deletion went through successfully.
Now, all data stored on the Lexar Portable SSD is erased permanently, no way to recover the erased data. This powerful data erasure software also supports to wipe Seagate external hard drive, erase WD disk, wipe Samsung portable SSD, wipe Toshiba external hard drive, etc.
Conclusion:
Wiping a Lexar Portable SSD is essential to keeping your info safe and private. If you follow these steps and use reputable software like Donemax Data Eraser, you can be sure your data will be erased for good, avoiding any possible security risks. Always make a copy of your data, pick the right tool for wiping, and carefully follow each step for a quick and easy process. This guide shows you how to safely wipe your Lexar Portable SSD, whether you want to use it for something else or keep private data safe.
Before you sell, donate or dispose of your Lexar Portable SSD, just open Donemax Data Eraser, and choose Erase Hard Drive mode to securely wipe the Lexar Portable SSD. All data including existing data, deleted/lost data on the Lexar Portable SSD will be erased permanently, can’t be recovered by any method.
Related Articles
- Mar 05, 2026How to Wipe A Hard Drive on Windows 11/10/8/8.1/7?
- May 26, 2024Wipe Old Hard Drive After Cloning It to SSD
- Jun 09, 2023Best Solution to Permanently Delete Files in Windows 8/8.1
- Jun 09, 2025About 'Reset This PC': How to Use 'Reset This PC' to Factory Reset a Computer
- May 22, 2025Format a USB Drive to FAT32 on Windows 11 / 10 / 8 / 7
- Apr 27, 2026Which Data Erasure Software Actually Works? We Put 6 Tools to the Test

Contributing Writer
Steven
Steven has been a senior writer & editor of Donemax software since 2020. He's a super nerd and can't imagine the life without a computer. Over 6 years of experience of writing technical solutions and software tesing, he is passionate about providing solutions and tips for Windows and Mac users.

Editor in chief
Gerhard Chou
In order to effectively solve the problems for our customers, every article and troubleshooting solution published on our website has been strictly tested and practiced. Our editors love researching and using computers and testing software, and are willing to help computer users with their problems