
Written byChristinaUpdated on May 10, 2025
How to Wipe Sabrent Rocket External SSD?
Approved byGerhard Chou
Before we start: Donemax Data Eraser is a reliable SSD wipe software. It can securely wipe a Sabrent Rocket external SSD on Windows or macOS. Once the data is erased by Donemax Data Eraser, the data is lost for good, can't be recovered by any method.
PAGE CONTENT:
The Sabrent Rocket series of external SSDs offers high-speed performance and reliable storage for gamers, creatives, and professionals alike. However, there comes a time when wiping your SSD becomes necessary - whether you're preparing it for resale, troubleshooting errors, improving performance, or ensuring complete data privacy. This guide provides an in-depth look into how to securely and effectively wipe a Sabrent Rocket external SSD on both Windows and macOS platforms.
What Does It Mean to Wipe an SSD?
Before diving into methods, it's important to clarify the terminology:
- Formatting generally refers to removing the file system or recreating it so the drive can be reused. However, quick formatting only removes file pointers - the data remains recoverable.
- Full formatting scans for bad sectors and removes data pointers, but still doesn't guarantee unrecoverable deletion.
- Secure wiping refers to overwriting existing data, sometimes multiple times, to prevent any chance of recovery.
If you're concerned about sensitive data (e.g., tax documents, client files), wiping — not just formatting - is the safer route.
Why You Might Need to Wipe a Sabrent Rocket SSD?
There are several common reasons you may want to wipe your Sabrent Rocket external SSD:
- Selling or donating the drive: Prevent identity theft or unauthorized data recovery.
- Fixing file system errors or corruption: A clean wipe can remove malware or bad sectors.
- Changing file systems: Reformatting from NTFS to exFAT, APFS, etc.
- Performance improvement: SSDs can benefit from a fresh start if data clutter or software bugs slow them down.
Backup Before Wiping
Wiping a drive is permanent. Once data is erased - especially with secure wiping tools - it cannot be recovered. Be sure to:
- Connect the Sabrent SSD to your computer.
- Copy important files to another storage device or cloud service.
- Double-check everything before proceeding.
Ensure the SSD is Recognized by the System
Before wiping, make sure your Sabrent Rocket SSD is correctly recognized:
On Windows:
- Open File Explorer → Check for the external drive under "This PC"
- Or open Disk Management: Right-click Start → Disk Management
On macOS:
- Open Finder → Check under Devices
- Or use Disk Utility: Applications → Utilities → Disk Utility
If your SSD is not showing up, try changing the USB port, using a different cable, or checking compatibility.
Methods to Wipe a Sabrent Rocket SSD
Method 1: Wipe Sabrent Rocket SSD on Windows Using Built-In Tools
Wiping your Sabrent Rocket SSD on a Windows machine can be accomplished using built-in utilities like Disk Management, Command Prompt (DiskPart), or File Explorer. Each method serves different levels of technical comfort and wiping thoroughness. Here's a more detailed breakdown:
Option 1: Using Disk Management – Beginner-Friendly
Disk Management is a graphical tool that allows you to manage disks and partitions without needing to type any commands. This method is ideal for users who want to perform a basic format or prepare the drive for reuse but don't require military-grade data sanitization.
Steps:
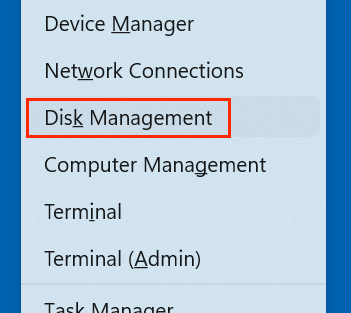
- Open Disk Management:
- Select Disk Management with a right-click on the Start menu.
- Alternatively, choose Disk Management by pressing Win + X.
![wipe a Sabrent Rocket external SSD]()
- Identify the Sabrent SSD:
- Look for the disk based on storage capacity and drive label.
- Be cautious not to select your internal system disk.
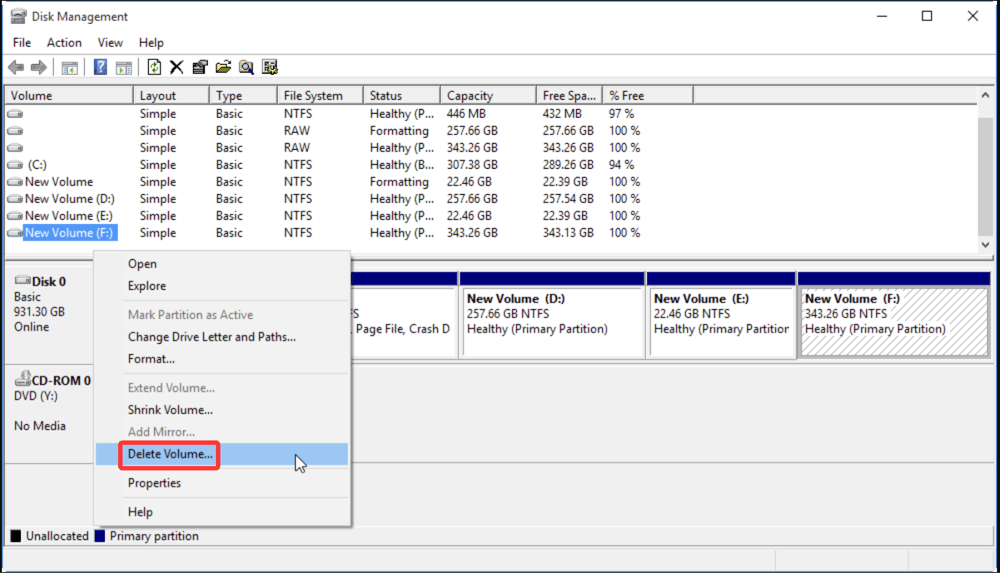
- Delete the Volume (Optional but Recommended):
- Right-click on the volume under your SSD and choose Delete Volume to remove existing partitions.
![wipe a Sabrent Rocket external SSD]()
- This clears the partition structure, useful if you plan to reformat from scratch.
- Right-click on the volume under your SSD and choose Delete Volume to remove existing partitions.
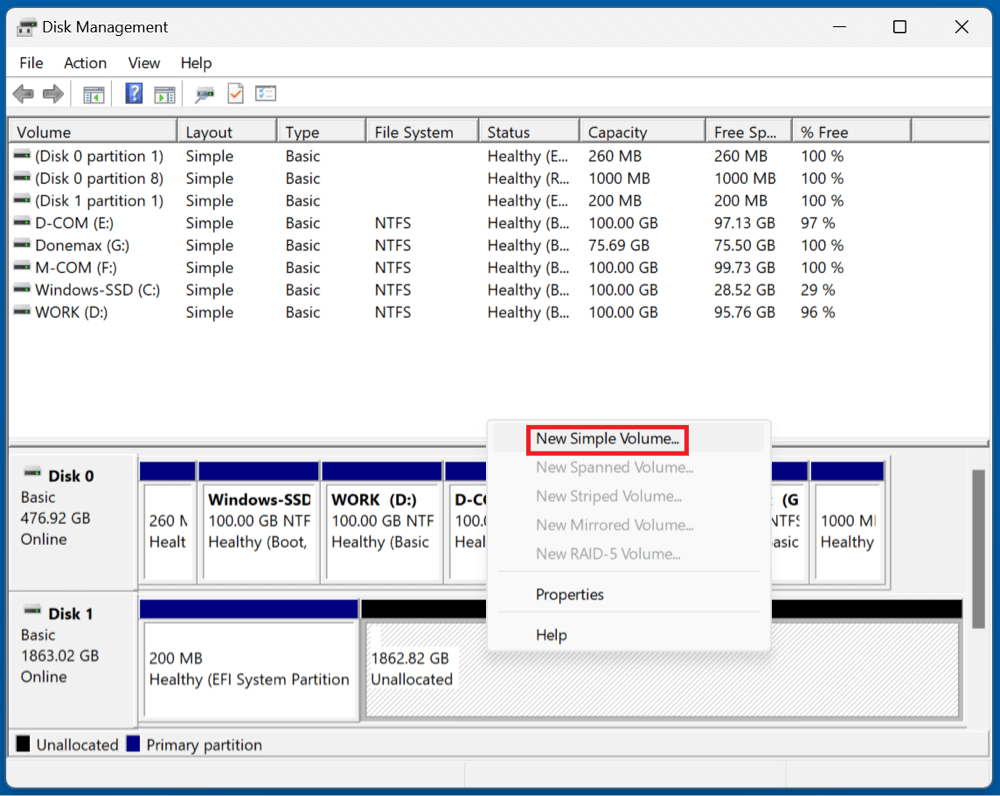
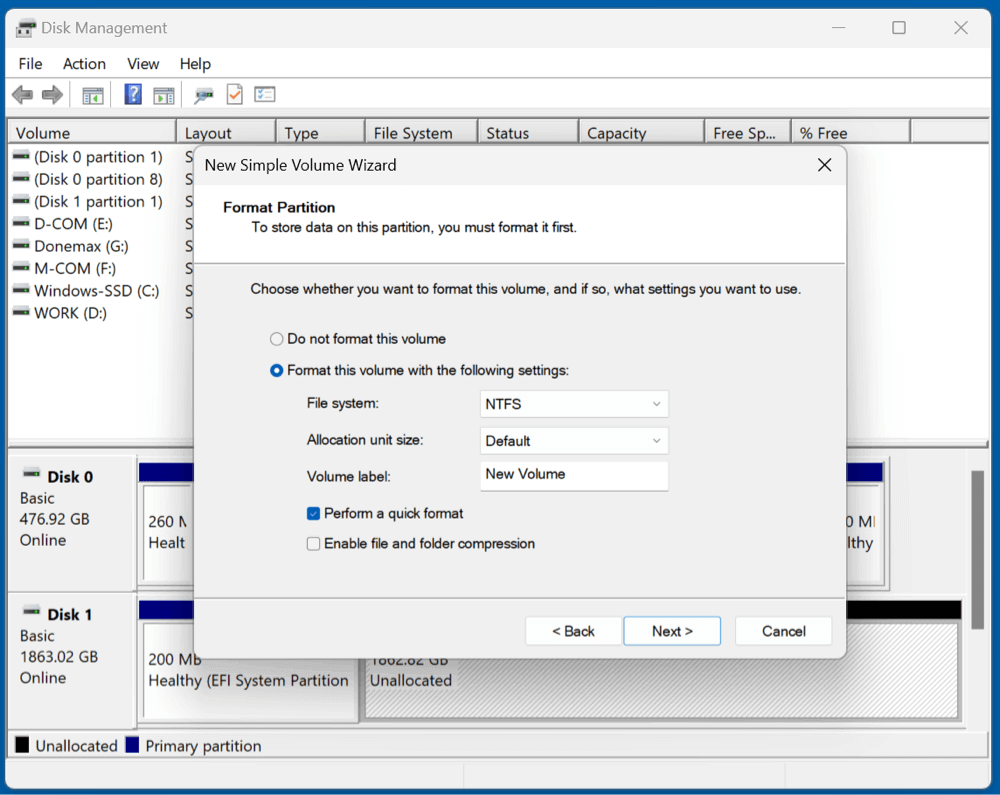
- Create a New Volume and Format:
- Select New Simple Volume by right-clicking on the unallocated space.
- Choose size, assign a drive letter, and select file system (e.g., exFAT for cross-platform use).
![wipe a Sabrent Rocket external SSD]()
- Uncheck "Perform a quick format" if you want a slower but slightly more thorough erase.
![wipe a Sabrent Rocket external SSD]()
- Finish Setup:
- Follow the wizard to complete the process.
- Your SSD is now ready for use with a clean file system.
💡 Tip: Disk Management doesn't perform secure wipes. Deleted files may still be recoverable with forensic tools. For sensitive data, use a secure erase method described below.
Option 2: Using Command Prompt (DiskPart) – More Thorough and Powerful
DiskPart allows more precise control over your disks via command-line input. It’s particularly useful for cleaning hidden partitions, overcoming errors, or preparing a drive for OS installation or resale.
Steps:
- Open Command Prompt with Admin Rights:
- Look through the Start menu for cmd.
- Choose Run as administrator with a right-click.
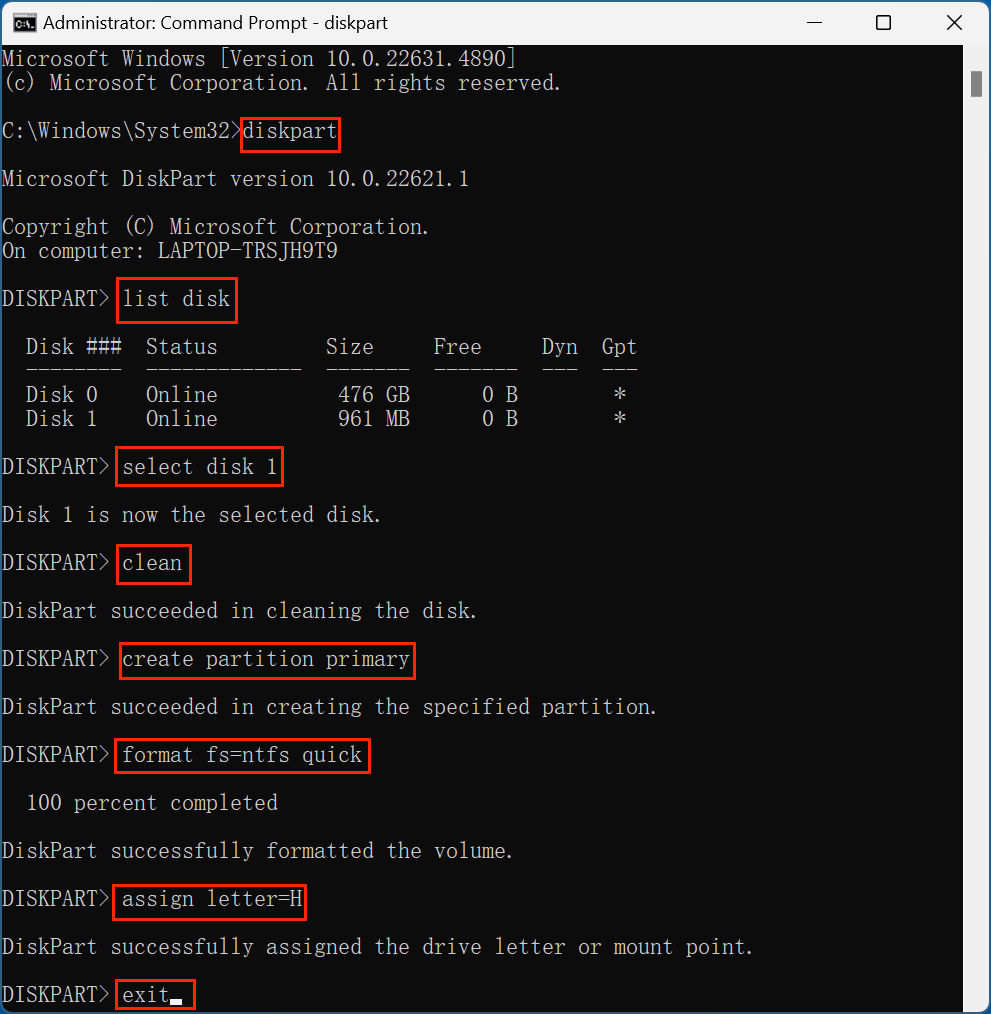
- Launch DiskPart:
- Type: diskpart and press Enter.
- List Available Disks:
- Type: list disk
- Identify your Sabrent Rocket SSD by its size (e.g., Disk 2 - 1000 GB).
- Select the SSD:
- Type: select disk X (replace X with your disk number).
- Clean the Disk:
- For a quick wipe (removes partition and file system info): clean
- For a full, secure wipe (writes zeroes to every sector): clean all
💡 Important Note:
- clean all is irreversible and time-consuming (may take hours depending on SSD size).
- It is more secure than clean and helps prevent data recovery.
- Recreate Partition (Optional):
- After wiping, type:
create partition primary
format fs=NTFS quick
assign
exit - This makes the SSD usable again with a new file system.
![wipe a Sabrent Rocket external SSD]()
- After wiping, type:
Option 3: Format via File Explorer – Quick and Simple
This method is best for casual users who just need to quickly wipe the drive for reuse, not necessarily to securely erase the data.
Steps:
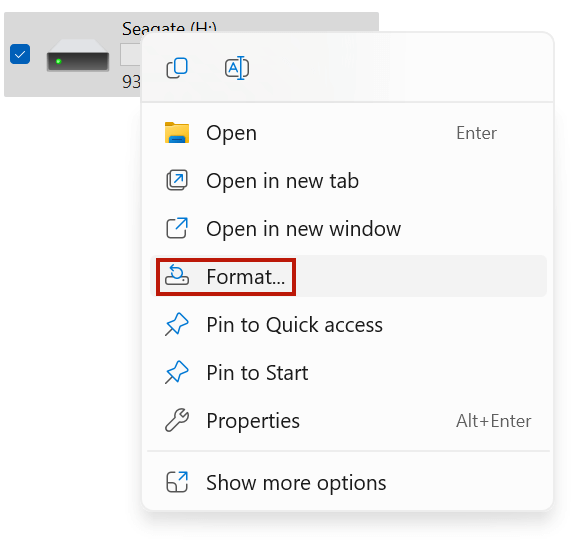
- Open File Explorer and locate your Sabrent Rocket SSD under "This PC."
- Right-click the drive and select Format.
![wipe a Sabrent Rocket external SSD]()
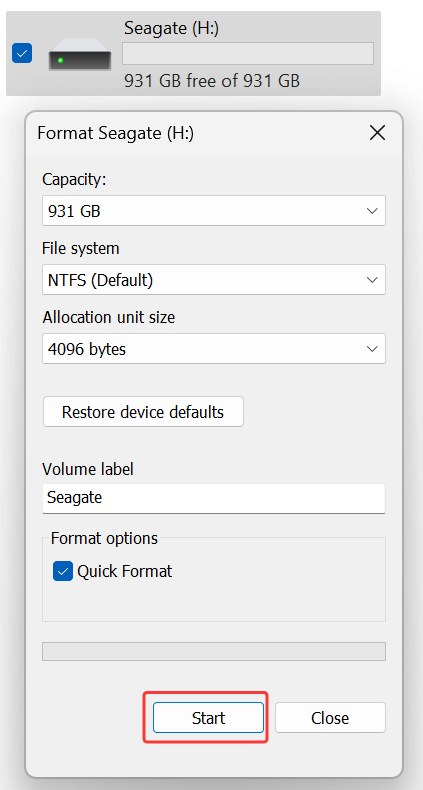
- Choose Settings:
- File system: exFAT (cross-platform) or NTFS (Windows only)
- Allocation unit size: Leave as default
- Volume label: Optional (e.g., "Sabrent Wiped")
- Uncheck "Quick Format" for a deeper erase
![wipe a Sabrent Rocket external SSD]()
- Click Start and confirm when prompted.
💡 Reminder: Even with quick format unchecked, this method does not overwrite old data securely.
Method 2: Wipe Sabrent Rocket SSD on macOS
Option 1: Using Disk Utility
Disk Utility offers a GUI-based method:
- Open Disk Utility via Spotlight or Applications > Utilities.
- Select your Sabrent Rocket SSD from the left panel.
- Click Erase at the top.
- Choose a name, format (APFS, exFAT, etc.), and scheme (GUID).
- Click Erase to begin.
To overwrite existing data:
- Click Security Options before erasing and select the number of overwrite passes.
- More passes = more secure but slower.
![wipe a Sabrent Rocket external SSD]()

Option 2: Use Terminal for Advanced Users
For a secure erase:
- Launch Terminal.
- Type diskutil list and note your Sabrent SSD identifier (e.g., disk2).
- Type:
diskutil secureErase 1 /dev/diskX
Replace diskX with your disk identifier and 1 with a security level:
- 0 = Single-pass erase (fast)
- 1 = US DoD 7-pass erase (very secure)
Alternative: Using dd command:
sudo dd if=/dev/zero of=/dev/diskX bs=1m
This overwrites the disk with zeros.
Be extremely cautious — choosing the wrong disk could wipe your main drive.
Method 3: Use Third-Party Tools for Secure Wiping
Sometimes built-in tools are limited. Third-party wiping software offers advanced options like multi-pass overwriting, verification, and encryption removal.
Donemax Data Eraser is a powerful disk wipe program. It can securely wipe a Sabrent Rocket SSD on Windows or macOS.
Step 1. Download and install Donemax Data Eraser on your computer.
Step 2. Open Donemax Data Eraser, choose Erase Hard Drive mode. Then select the Sabrent Rocket SSD, click on Erase Now button.
It will securely and permanently wipe all data from the Sabrent Rocket SSD.

Best Practices After Wiping Your Sabrent Rocket SSD
Once you've wiped the Sabrent Rocket SSD:
▪️ Reinitialize and Format
If needed for reuse, reformat the drive:
- Windows: Right-click in Disk Management → New Simple Volume
- macOS: Use Disk Utility → Erase → Assign file system
▪️ Run Diagnostic
Use Sabrent's Rocket Control Panel or third-party utilities (e.g., CrystalDiskInfo, Blackmagic Disk Speed Test) to ensure SSD health and performance.
▪️ Properly Eject Drive
Always eject your drive safely before unplugging to prevent corruption.
Troubleshooting Common Issues
▪️ Drive Not Showing Up
- Try different USB ports or another system.
- Update USB or Thunderbolt drivers.
- Use Device Manager (Windows) or System Report > USB (macOS) to confirm connection.
▪️ Disk Is Read-Only
This may occur due to:
- File system incompatibility
- Drive lock by third-party security
- macOS T2 chip restrictions (for internal drives)
Use diskpart or diskutil to reinitialize the disk.
▪️ Errors During Disk Erase
- Close any programs using the SSD.
- Boot into Safe Mode (or Recovery Mode on Mac) and retry.
- Disable antivirus or disk encryption tools temporarily.
Conclusion
Wiping a Sabrent Rocket external SSD is a straightforward process, but the method you choose depends on your goals: quick reformatting for reuse, or thorough data sanitization for security. Windows and macOS offer native tools to format and wipe drives, but for sensitive data, third-party software (such as Donemax Data Eraser) provides the highest level of erasure compliance.
Always remember to back up your data, double-check the drive selection, and use the right file system depending on your platform. With the right precautions, you can securely wipe your Sabrent Rocket SSD and reuse or dispose of it with confidence.
Donemax Data Eraser
One of the best data erasure programs for permanently erase data from PC, Mac, HDD, SSD, USB drive, digital camera and other devices. Once the data is erased, it is lost for good, cannot be recovered by any method.
Related Articles
- Feb 28, 2026Best 5 Data Erasure Software for Windows in 2026
- Mar 04, 2025Best Data Removal Tool or Data Cleaning Tool
- May 22, 2025Format a USB Drive to FAT32 on Windows 11 / 10 / 8 / 7
- Apr 27, 2026Which Data Erasure Software Actually Works? We Put 6 Tools to the Test
- Feb 09, 2024Download Ontrack Erasure Program Alternative for Windows and macOS
- Feb 18, 2024How to Factory Reset Windows XP?

Contributing Writer
Christina
Christina is the senior editor of Donemax software who has worked in the company for 4+ years. She mainly writes the guides and solutions about data erasure, data transferring, data recovery and disk cloning to help users get the most out of their Windows and Mac. She likes to travel, enjoy country music and play games in her spare time.

Editor in chief
Gerhard Chou
In order to effectively solve the problems for our customers, every article and troubleshooting solution published on our website has been strictly tested and practiced. Our editors love researching and using computers and testing software, and are willing to help computer users with their problems