
Written byMariaUpdated on May 08, 2026
Format a BitLocker Drive Using CMD With or Without Recovery Key
Approved byGerhard Chou
Before we start: This guide provides step-by-step instructions for securely reformatting a BitLocker-encrypted drive using Command Prompt. If you plan to sell, donate, or dispose of your drive, we recommend using data erasure software like Donemax Data Eraser to permanently wipe the disk and ensure your data is 100% unrecoverable.
PAGE CONTENT:
BitLocker encryption is a powerful feature built into Windows to help protect data by encrypting entire drives. While this feature offers robust security, there may be times when you need to format a BitLocker-encrypted drive - whether you're repurposing the drive, troubleshooting errors, or simply clearing it for a fresh start. The good news is that formatting a BitLocker drive using Command Prompt (CMD) is not only possible but also efficient for those comfortable with command-line operations.
In this guide, we'll walk you through the detailed steps to format a BitLocker drive using CMD, including how to unlock it, remove encryption if necessary, and troubleshoot any formatting errors.
Why Format a BitLocker Encrypted Drive?
There are several legitimate reasons why someone may choose to format a BitLocker-protected drive:
- You forgot the password or lost access to the device and want to wipe the drive clean.
- Repurposing or selling the drive and you want to securely erase all contents.
- BitLocker errors or corruption make the drive unreadable or unusable.
- The drive is infected with malware and needs to be wiped and reformatted.
Before jumping into formatting, it's crucial to understand that formatting will delete everything on the drive. If there is any recoverable data, you should attempt to back it up or decrypt the drive first.
Prerequisites Before Formatting the BitLocker Drive Using CMD
Before proceeding to format a BitLocker-encrypted drive using CMD, you should meet a few conditions:
1. Run CMD as Administrator - You'll need elevated privileges to execute drive management and BitLocker commands. Choose Run as administrator after right-clicking on the Start menu and searching for Command Prompt.
2. Back Up Important Data - If possible, back up all critical files from the drive before formatting. Once the drive is formatted, recovery becomes extremely difficult - especially with encryption in place.
3. Identify the Drive Letter - Make sure you know the correct drive letter assigned to your BitLocker drive (e.g., D:, E:). You can find this easily using File Explorer or by running diskpart and then list volume.
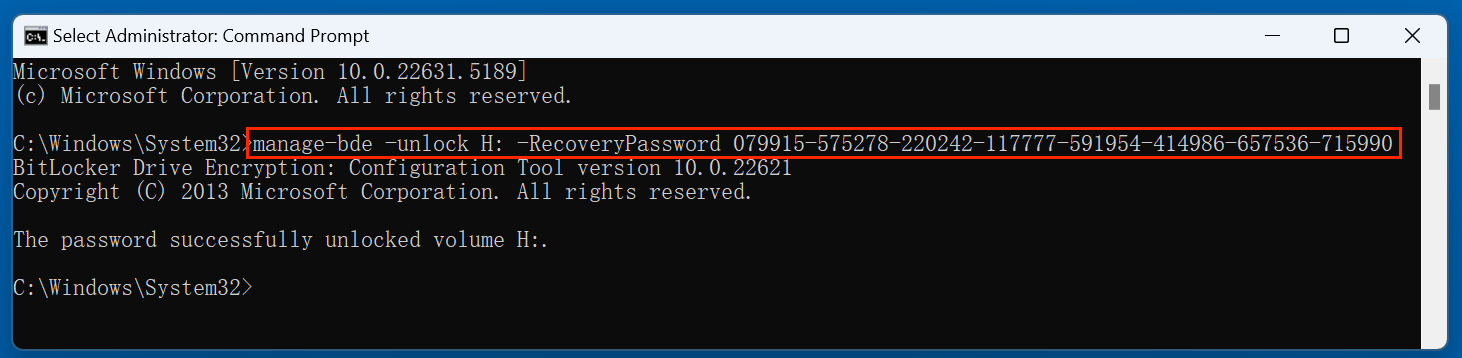
4. Unlock the BitLocker Drive - CMD can only format a drive if it's either unlocked or decrypted. How to Unlock a BitLocker Drive via CMD? You'll need the BitLocker recovery key or password.
- Launch the Command Prompt in Administrator mode.
- Type the below command and hit Enter:
manage-bde -unlock H: -RecoveryPassword YOUR-RECOVERY-KEY
Replace H: with the actual drive letter and YOUR-RECOVERY-KEY with the 48-digit recovery key. For example:
![format a BitLocker drive using CMD]()
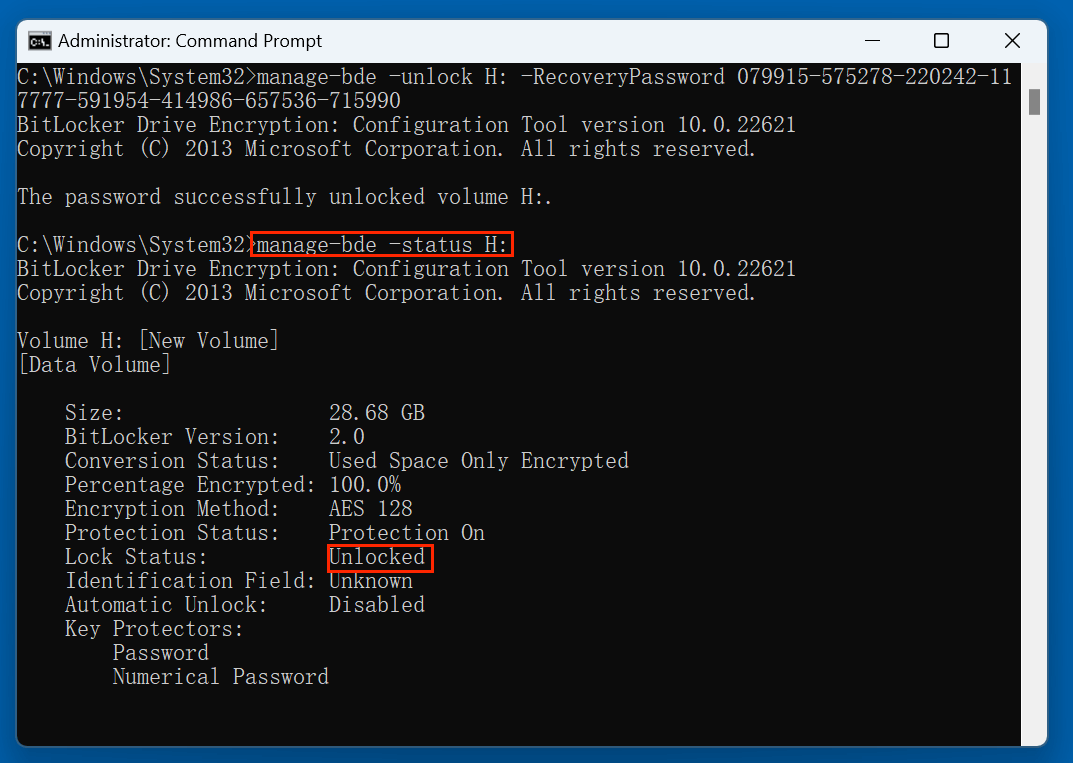
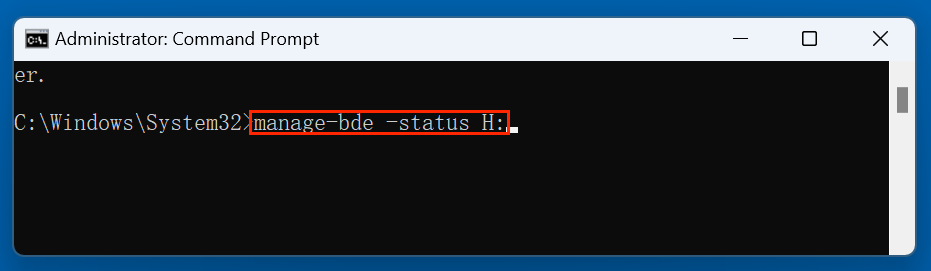
- To verify the drive is unlocked, run:
manage-bde -status H:
You should see the Lock Status: Unlocked in the output.
![format a BitLocker drive using CMD]()
How to Format a BitLocker Drive Using CMD?
Once your BitLocker-encrypted drive is unlocked or decrypted, the next step is to format it using Command Prompt. There are two common methods to do this: using Diskpart, a built-in Windows utility for advanced disk management, or using the more straightforward format command directly from CMD.
Both methods are effective, but your choice may depend on the complexity of the task, the state of the disk, and your familiarity with CMD commands.
Method 1: Using Diskpart to Format a BitLocker Drive
Diskpart gives you granular control over drives and volumes. It's powerful but should be used with caution - selecting the wrong disk or volume could result in formatting the wrong drive.
Step 1. Launch CMD as Administrator
Type "cmd" into the Windows search box, and then right-click and select Run as administrator.
Step 2. Enter Diskpart
In CMD, type: diskpart. Press Enter. You'll enter the Diskpart environment, where a new prompt (DISKPART>) appears.
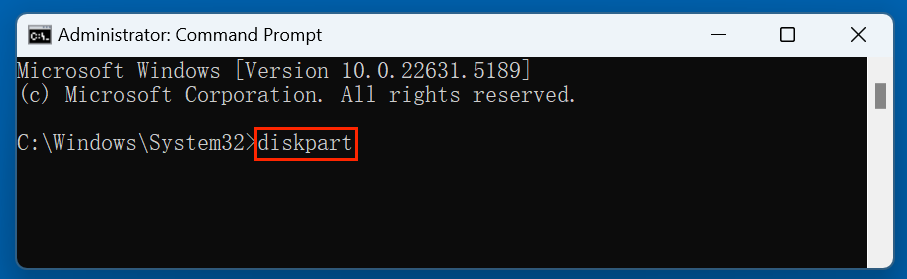
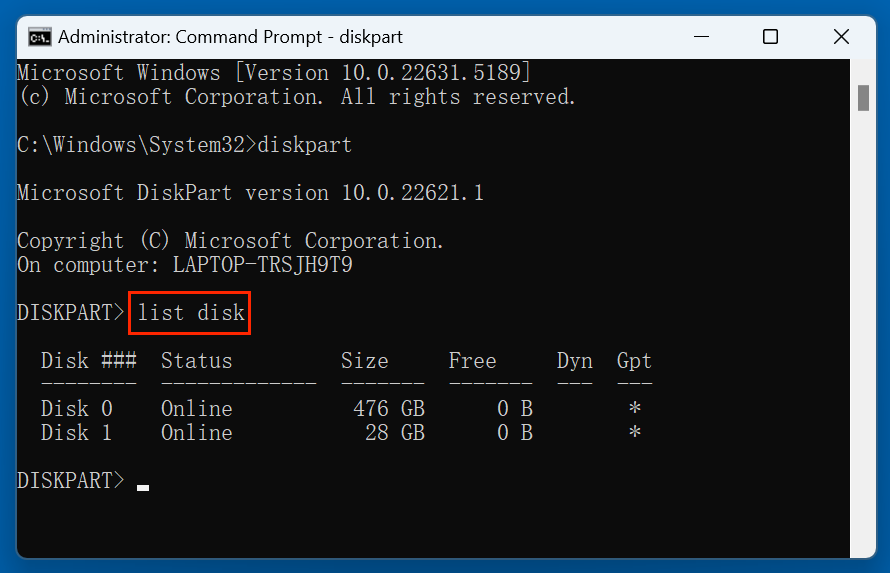
Step 3. List Available Disks
To view all the physical drives connected to your computer: list disk. Identify the disk number that corresponds to your BitLocker drive.
Step 4. Select the Target Disk
- Type: select disk X. (Replace X with your disk number. For example: select disk 1.)
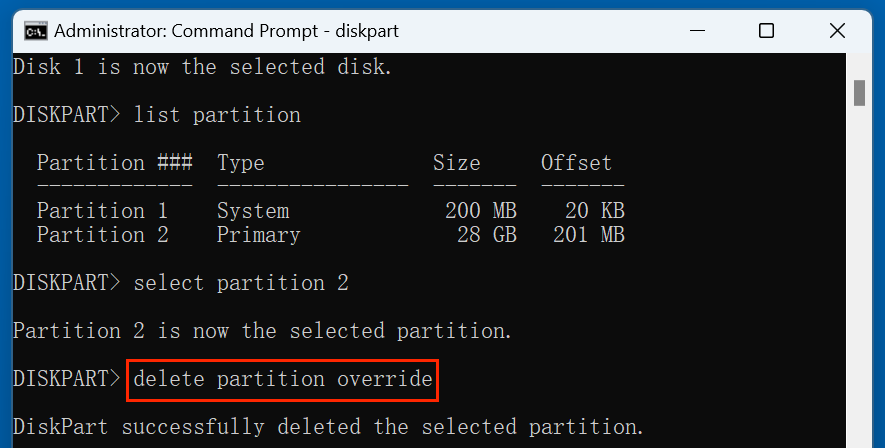
- To find the correct partition (volume) on the disk: list partition.
- Identify the correct volume associated with the drive letter.
- Select the Partition. Use the command: select partition Y. (Replace Y with the correct volume number. Such as select partition 2.)

Step 5. Delete the Partition
Now, delete the partition: delete partition override.
Step 6. Format the Partition
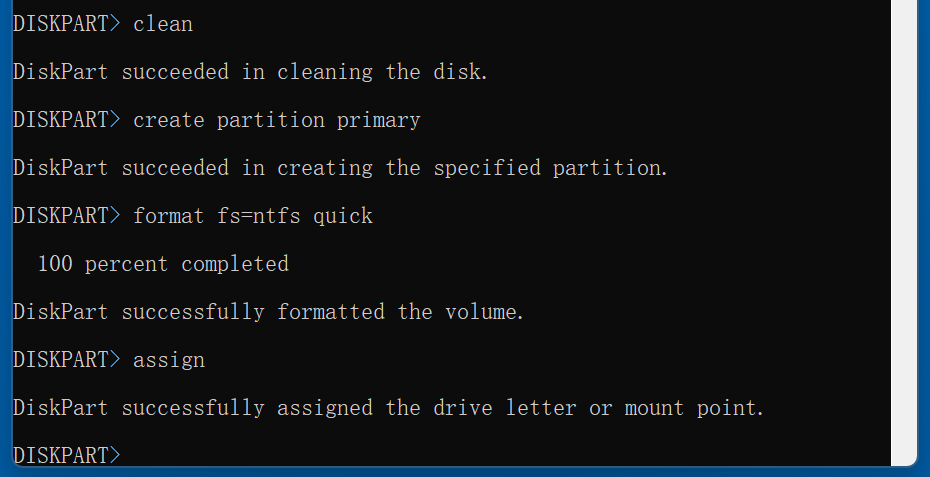
Use the following commands to format the partition
clean
create partition primary
format fs=ntfs quick
assign
Step 7. Exit Diskpart
After formatting, type the command to exit: exit
Method 2: Using the Format Command Directly (Easier Option)
If you already know the drive letter of the unlocked BitLocker volume, this is a faster method.
- Launch the Command Prompt in Administrator mode.
- Type the format command with the desired parameters: format H: /fs:ntfs /q.
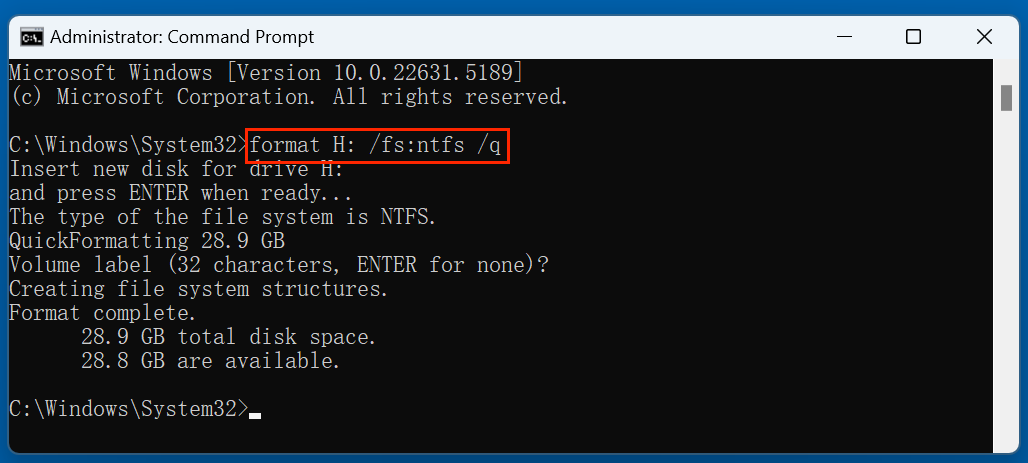
Parameters Explained:
- H: – The drive letter of the target BitLocker volume.
- /fs:ntfs – Specifies the NTFS file system (you can also use exfat or fat32).
- /q – Performs a quick format, which is faster and suitable if you’re not worried about secure deletion.
Add a Volume Label (Optional):
To name the drive during format:
format H: /fs:ntfs /q /v:SecureUSB
After you press Enter, CMD will prompt:
Insert new disk for drive H:
and press ENTER when ready...
Just press Enter, and the format process will begin. It will end with:
Format complete.
Safety Tips When Using CMD to Format Drives
- Double-check the drive letter or volume number before formatting. A single mistake can result in loss of critical data on the wrong drive.
- Don't use the clean command unless you're sure the disk contains no valuable data - this command removes all partitions.
- If the drive contains multiple partitions, consider deleting them and creating a new partition to prevent hidden encrypted remnants.
- After formatting, check the drive in File Explorer to confirm it's properly mounted and accessible.
How to Remove BitLocker Encryption Before Formatting (Optional)
If you'd rather decrypt the drive before formatting (e.g., to avoid encryption-related issues or to make the drive easier to manage afterward), you can turn BitLocker off before formatting.
- Open CMD as Administrator.
- Use this command to disable BitLocker: manage-bde -off H:
![format a BitLocker drive using CMD]()
- Check decryption progress: manage-bde -status H:
![format a BitLocker drive using CMD]()

Once decryption is complete, proceed to format the drive using either Diskpart or the format command.
💡 Note: Decryption may take a while, especially on large drives.
What to Do If Format Fails
Sometimes, formatting a BitLocker drive using CMD may fail. Here are common issues and how to fix them.
1. Write Protection Error
If you see an error like "The disk is write protected,"" try the following:
- Run diskpart
- Select the disk:
list disk
select disk X
attributes disk clear readonly
Then try formatting again.
2. Volume is Locked
Make sure the BitLocker volume is unlocked. Check with: manage-bde -status D:
If locked, unlock with your recovery key.
3. Use Clean Command as a Last Resort
If nothing works and you need to completely wipe the drive:
- Run diskpart
- Select the correct disk:
list disk
select disk X - Type: clean
This command removes all partitions and formatting info from the drive. You can then recreate and format a new partition.
Additional BitLocker Formatting Tips
1. Renaming the Drive During Format
You can give your drive a name during formatting:
format H: /fs:ntfs /q /v:NewDriveName
2. Choosing the Right File System
- NTFS – Best for Windows systems, supports large files and permissions.
- exFAT – Compatible across Windows and macOS, good for external drives.
- FAT32 – Older file system, limited to 4GB file sizes, widely compatible.
3. Using Disk Management (GUI Alternative)
If you're uncomfortable with CMD, you can also format BitLocker drives using Disk Management (diskmgmt.msc). However, if the drive is locked, the format option may be unavailable unless it's unlocked first.
Wipe BitLocker Encrypted Drive Without Recovery Key
If you will sell, donate or dispose of the BitLocker encrypted drive, you should permanently erase all personal data from it to prevent potential data recovery. Donemax Data Eraser is a powerful disk wipe tool. It can securely and permanently erase all data from the BitLocker encrypted drive.
Step 1. Download and install Donemax Data Eraser on your computer and connect the BitLocker encrypted drive to the same computer.
Step 2. Open Donemax Data Eraser, choose Erase Hard Drive mode. Then select the BitLocker drive, click on Erase Now button.

It will securely and permanently erase all data from the drive.
FAQs about Formatting a BitLocker Encrypted Drive
Yes. By using the clean command in DiskPart via Command Prompt, you can wipe the entire partition structure of the drive, including the BitLocker encryption metadata. This effectively resets the drive, though all existing data will be permanently erased.
Yes. Formatting a drive replaces the existing file system with a new one. Since the BitLocker encryption is tied to the previous file system and partition headers, a full format or "clean" command will remove the encryption entirely.
Standard Windows formatting tools (like right-clicking in File Explorer) may fail if the drive is locked or if there are disk errors. In these cases, using Command Prompt with administrative privileges is the most reliable way to force a format.
If you encounter a write-protection error while formatting, you can use the command attributes disk clear readonly in DiskPart before proceeding with the clean and format commands.
If you use the clean command, the data is no longer accessible to the operating system, but specialized data recovery software might still find fragments unless a "Full Format" or a dedicated data wiping tool is used to overwrite the sectors.
Conclusion
Formatting a BitLocker-encrypted drive using CMD may seem technical at first, but with the right approach and commands, it becomes straightforward. Whether you're unlocking the drive, removing encryption, or directly formatting with diskpart, Command Prompt gives you full control over the process.
Just remember: formatting will erase everything, so it's critical to back up important data and use caution when identifying and selecting drives. Whether you're cleaning up an old encrypted USB, troubleshooting a corrupted SSD, or preparing a drive for reuse, CMD is a reliable and powerful tool to get the job done
Donemax Data Eraser
One of the best data erasure programs for permanently erase data from PC, Mac, HDD, SSD, USB drive, digital camera and other devices. Once the data is erased, it is lost for good, cannot be recovered by any method.
Related Articles
- Mar 11, 2026Introduction to Data Erasure Standards
- Jun 25, 2024How to Wipe LaCie Drive Before Selling or Donating?
- Jan 14, 2026How to Permanently Wipe Data from Action Camera?
- May 30, 2025How to Wipe A Drive with CCleaner?
- Apr 09, 2024Why Can't Erase DVD/CD?
- Apr 25, 2025Factory Reset Windows 7: A Complete Step-by-Step Guide

Contributing Writer
Maria
Maria is one of the senior writers & editors of Donemax who lives and works in Sydney, Australia. She loves PC, Mac and Internet Technology. She has 6 years of writing articles about data recovery on PC/Mac, disk cloning solution, data eraser and computer OS optimization, etc. She is also interested in testing various software and digital products.

Editor in chief
Gerhard Chou
In order to effectively solve the problems for our customers, every article and troubleshooting solution published on our website has been strictly tested and practiced. Our editors love researching and using computers and testing software, and are willing to help computer users with their problems