
Written byLucienUpdated on Apr 07, 2024
How to Erase A SSD from BIOS?
Approved byGerhard Chou
PAGE CONTENT:
Data protection is very important in this digital world. It's important to safely erase the data from your solid-state drive (SSD), whether getting rid of an old one, using it in a new system, or just wanting to keep your data private. Some prefer a more direct method: erase the SSD from the BIOS (Basic Input/Output System).
There are many software options for this. It's important to know why safe data erasure is important before we get into how to erase an SSD from the BIOS. When you normally delete files or format a drive, the data isn't erased; instead, it's marked as free space, meaning it can be recovered with the recovery software.
It is important to use methods that erase all of the drive's data to ensure that private information can't be recovered. This guide will review all the details of safely erasing an SSD from the BIOS.
BIOS and SSD Security
The Basic Input/Output System (BIOS) is the software that sets up the hardware in a computer when it first starts up. Its primary purpose is to provide essential instructions for the operating system to initialize and load. Although the BIOS is mostly responsible for setting up hardware, some versions have extra tools for handling storage devices.
Among these tools, some versions of BIOS can safely delete data from SSDs. With this feature, the BIOS can do more than initialize the hardware. It also makes it easy for users to handle their storage devices and keep their security updated from the system firmware. It means that users can use the BIOS environment to securely wipe SSDs, which protects the private data that the devices store.
Erase A SSD in BIOS
The "Secure Erase" process can erase an SSD from the BIOS. This feature lets users wipe their solid-state drives clean from the system BIOS. It's important to remember that not all BIOS versions or computers can do this. Additionally, there are different options, like using SSD management tools, to deal with the need to format an SSD.
These apps have easy-to-use interfaces and various tools for managing and maintaining SSDs, such as the ability to format them. It is important to ensure that all important data is backed up properly before resetting, whether you use the BIOS or special software. If you don't, you could lose the data.
Step 1. Getting into the BIOS.
You have to restart your computer to get to the BIOS settings. Depending on the manufacturer, there are many ways to access BIOS, but generally speaking, you must press a designated key (such as F2, F10, or Del) when the device boots up. Refer to the motherboard or computer handbook for the precise key and instructions.
Step 2: Getting Around BIOS Menus.
Go to the drive management or storage area once you're in the BIOS. Depending on your BIOS version and manufacturer, this section's precise location and name may change.
Step 3: Finding the SSD.
From the list of connected storage devices, select the SSD that you wish to delete. To make sure you choose the right drive, make a note of its model or serial number.
SSD Is Not Detected in BIOS, Fix IT
If you can not find the SSD in BIOS, follow this guide to fix this issue so you can find it in BIOS.
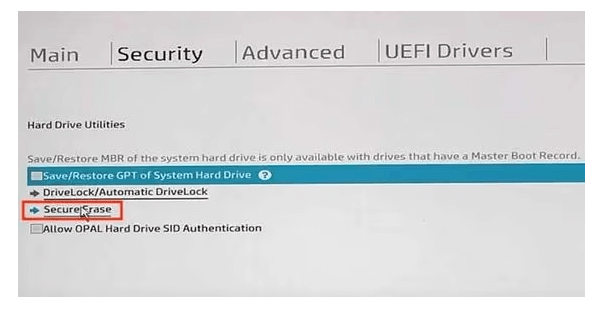
Step 4: Launching Secure Erasure.
Search for a setting about security features or SSD management. There ought to be a way to start a secure erase on the chosen SSD from this menu. Depending on the version of your BIOS, this option may have a different name, such as "Erase SSD" or "Secure Erase."
Step 5: Verification.
Since deleting the SSD will erase all data permanently, the BIOS will probably ask you to confirm your choice before allowing the erasure to start. Verify your decision to move forward.
Step 6: Wait For Completion.
The duration of the secure erase procedure may vary based on the size of the SSD and your system's speed. To avoid data corruption, be patient and don't stop the procedure.
Step 7: Validation.
A confirmation message can appear in the BIOS after the secure erase process is completed. Make sure the SSD has been successfully wiped by checking again.
Step 8: Exit From BIOS.
Once the erasure has been verified, quit the BIOS settings and restart your computer. You can safely delete and dispose of your SSD or use it again.
Recover Lost Data from SSD
Check how to recover deleted, formatted or lost data from a SSD on your Windows PC or Mac.
Note: Although erasing SSD from BIOS will delete everything from the SSD, the erased data is not lost forever, and can be recovered by data recovery software. If you want to permanently erase data from a SSD before you sell or donate it, just try data erasure program.
Wipe SSD with Data Erasure Program
Data erasure program is able to securely and permanently erase data from HDD, SSD, USB flash drive, memory card, digital camera, etc. Once the data is erased by data erasure program, the data is lost for good, can’t be recovered by any data recovery method.
And data erasure program is much easier to use than BIOS erasure. Just find a reliable data erasure program - such as Donemax Data Eraser to help you wipe the SSD.
Donemax Data Eraser
- Permanently erase files, wipe SSD, erase deleted data, etc.
- Certified data erasure algorithms including Peter Gutmann, U.S. Army AR380-19, DoD 5220.22-M ECE, etc.
- 100% safe SSD erasure software, no physical damage, will not shorten the service life of the SSD.
Donemax Data Eraser can help you wipe SSD on Windows PC or Mac. Once the data stored on the SSD is erased by Donemax Data Eraser, the data is gone forever, no way to restore it. Please make a backup before you wipe your SSD.
Step 1. Connect the SSD to your computer and open Donemax Data Eraser.
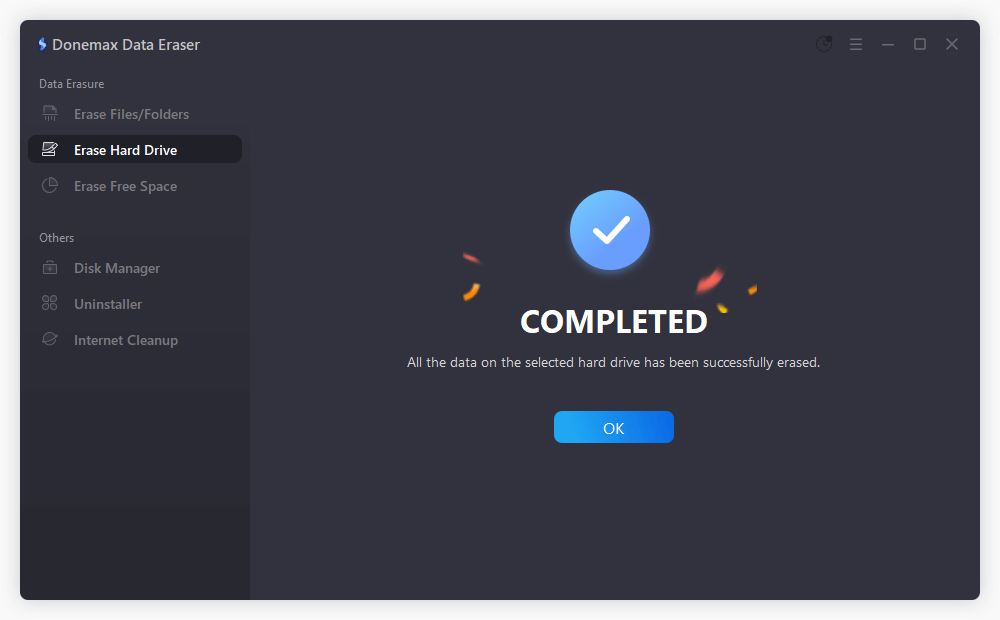
Step 2. Choose Erase Hard Drive mode, then select the SSD and click on Erase Now button.

Step 3. Then it will securely and permanently erase all data including existing data, deleted/lost data, hidden data from the SSD, leaving no trace for data recovery.
Donemax Data Eraser also can help you repair damaged SSD, mount SSD on Mac, eject external SSD in safe mode, etc.
Conclusion:
In conclusion, safely removing data from an SSD is important for keeping data private and safe. Using normal methods might not eliminate all the data, but the BIOS's "Secure Erase" tool is a quick and easy way to do it. By going to the BIOS settings, picking the SSD, and starting the secure erase process, users can be sure that the drive will never store any more private data.
You can also format and handle SSDs differently, such as with SSD management tools and other alternatives. It's important to back up important data before moving forward, no matter the method used. It will protect their data and keep things safe.
If you are not a IT Pro, you can try to use an easy-to-use data erasure program to help you wipe the SSD before you sell or donate it.
Related Articles
- Apr 22, 2024How to Securely Wipe Crucial SSD?
- Mar 19, 2026Searching for a BCWipe Activation Key? Read This First!
- Mar 11, 2026How to Erase Data on Old Computer before You Sell It?
- May 10, 2025What is DoD Disk Wipe and How to Use It?
- Jun 13, 2025How to Permanently Shred a Text (.txt) File on Windows or macOS?
- Feb 20, 2024Can Format Erase Everything Permanently from The Hard Drive?

Contributing Writer
Lucien
Lucien is a writer and a chief programmer of Donemax software who has worked in the company for 5+ years. He has written much of the content on the site and devotes to providing troubleshooting and solution for Windows and Mac users including disk cloning, data recovery, migration, eraser, error fixes.

Editor in chief
Gerhard Chou
In order to effectively solve the problems for our customers, every article and troubleshooting solution published on our website has been strictly tested and practiced. Our editors love researching and using computers and testing software, and are willing to help computer users with their problems