Written byMariaUpdated on May 23, 2025
Format SD Card to NTFS on Windows 11 / 10 / 8 / 7
Approved byGerhard Chou
Before we start: Using File Explorer, Disk Management, or command tools, it's simple and fast to format an SD card to NTFS on Windows. With the third-party software Donemax Data Eraser, you can also wiping the the data permanently while formatting the SD card.
PAGE CONTENT:
Formatting an SD card is a common operation for optimizing storage use, improving compatibility, or preparing a card for a specific device or task. While SD cards are often formatted in FAT32 or exFAT by default, there are cases where formatting an SD card to NTFS is the best choice. This article provides a comprehensive guide to formatting SD cards to NTFS on Windows 11, 10, 8, and 7, including different methods, potential issues, and compatibility notes.
Why Format an SD Card to NTFS?
By default, SD cards use FAT32 or exFAT file systems because they are widely compatible across multiple devices. However, NTFS offers several advantages in certain use cases:
- Support for Large Files - NTFS supports individual files larger than 4GB, which is a limitation in FAT32. If you're storing high-resolution videos, disk images, or game files, NTFS may be the only suitable option.
- Enhanced Security Features - NTFS supports file permissions, encryption (EFS), and access control lists (ACLs), which are absent in FAT32/exFAT. This is especially useful in professional or enterprise environments where data access needs to be restricted.
- Journaling and Error Recovery - NTFS is a journaling file system. This means it maintains logs of file changes, making it more robust in recovering from unexpected shutdowns or corruption.
- More Efficient Space Usage - NTFS handles small clusters better, which can reduce wasted space and slightly improve performance on large drives.
🔖 Note: NTFS is not supported on most Android phones, cameras, and some smart TVs or gaming consoles.
Precautions for SD card formatting to NTFS:
Before formatting, remember that all existing data will be erased. Be sure to back up your important files from the SD card using:
- File Explorer (manual copy)
- Cloud storage (Google Drive, OneDrive, etc.)
- Backup software like Donemax Disk Clone, Macrium Reflect, AOMEI Backupper
4 Methods to Format SD Card to NTFS on Windows 11/10/8/7
Method 1: Format SD Card to NTFS via File Explorer
Step-by-Step:
- Use a card reader to connect your SD card to the computer.
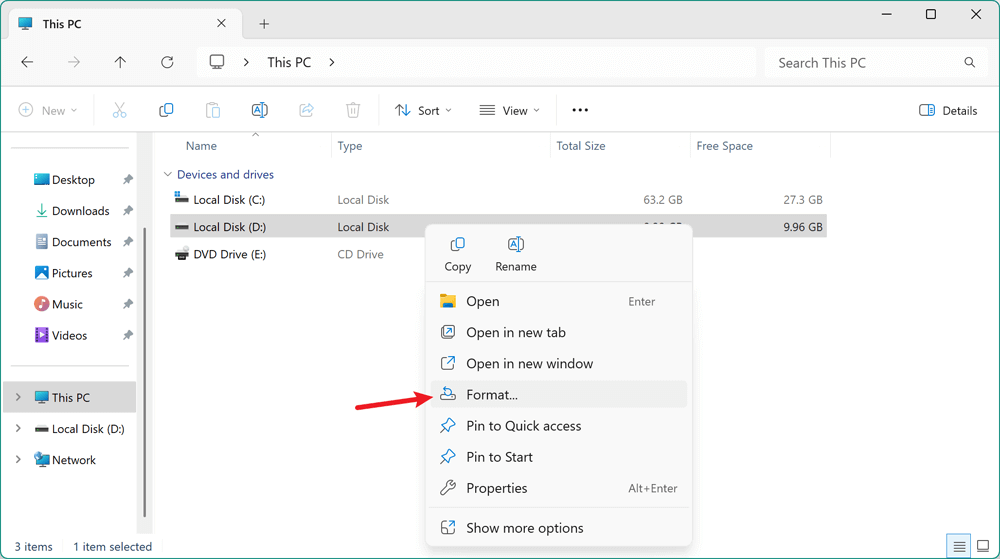
- Press Windows + E to launch File Explorer.
- Right-click on the SD card drive and select Format.
![format SD card to NTFS on Windows]()
- Under File system, choose NTFS.
- (Optional) Enter a Volume label (name your card).
- Check the box Quick Format for faster operation.
- Click Start and confirm the warning message.
![format SD card to NTFS on Windows]()

Troubleshooting:
- If NTFS does not appear in the File System dropdown, the card may be formatted in a way that blocks NTFS conversion. Try Disk Management or Diskpart instead.
Method 2: Format SD Card to NTFS via Disk Management
Steps:
- Select Disk Management by pressing Windows + X.
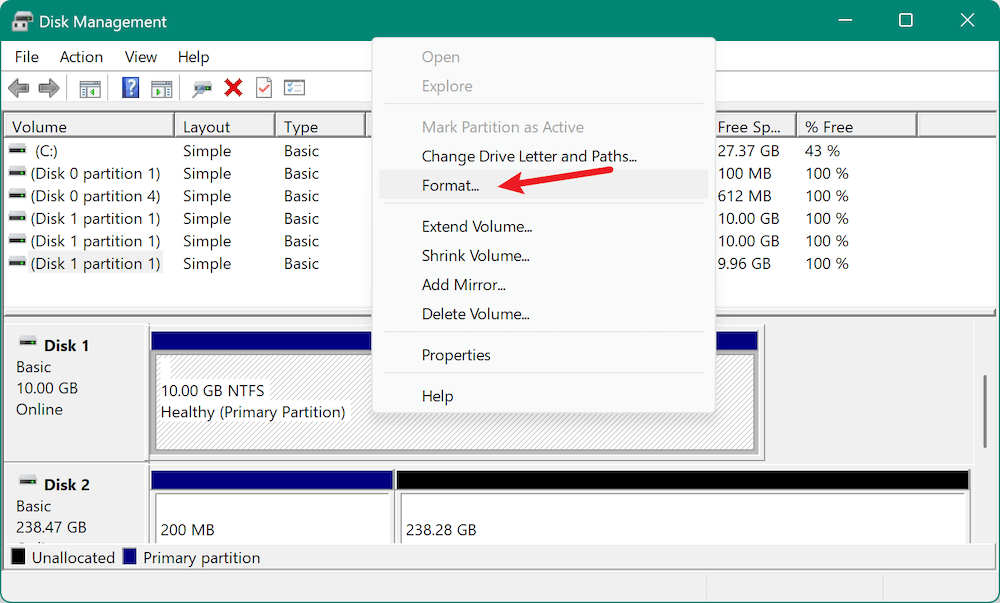
- Find your SD card (often listed as Removable).
- Choose Format by performing a right-click on the SD card partition.
![format SD card to NTFS on Windows]()
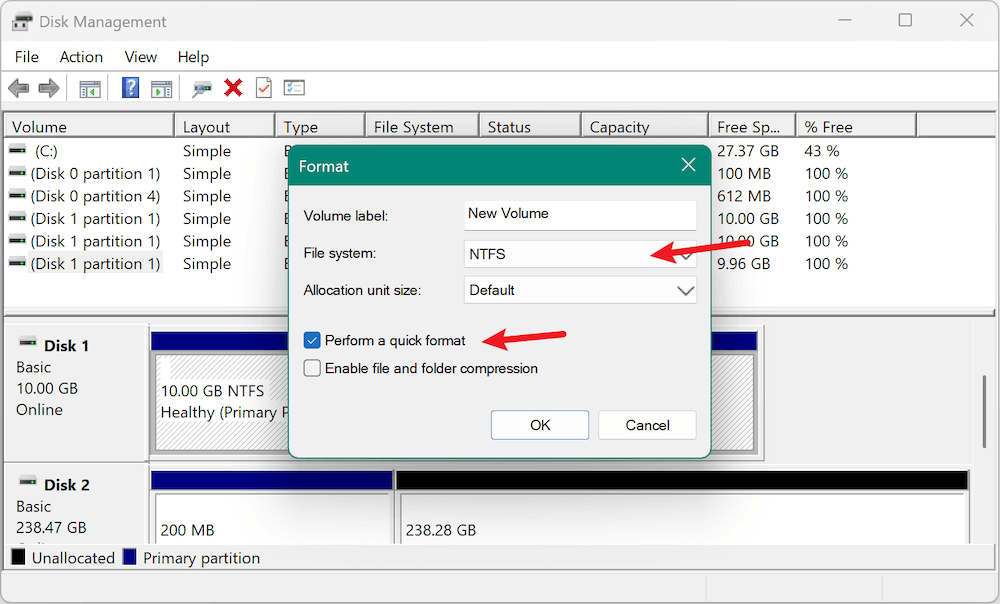
- Select the NTFS file system.
- Assign a label if desired, check "Perform a quick format", and click OK.
- Confirm the warning to begin formatting.
![format SD card to NTFS on Windows]()
Benefits:
- Allows better control over partitioning
- Can format RAW or unallocated space easily
Method 3: Format SD Card to NTFS Using Command Prompt (Diskpart)
This method is powerful and can format cards that don't show the NTFS option in the GUI tools.
When to Use This Method
- SD card isn't showing NTFS as a format option
- File Explorer fails with "Windows was unable to complete the format"
- You receive errors like "Volume is too large for FAT32"
- Card shows as RAW, unallocated, or inaccessible in Disk Management
- Write protection has been removed, but formatting still fails
Step-by-Step Guide to Formatting via Diskpart
Step 1: Open Command Prompt as Administrator
- Type cmd after pressing Windows + S.
- From the results, select Command Prompt.
- Select Run as Administrator.
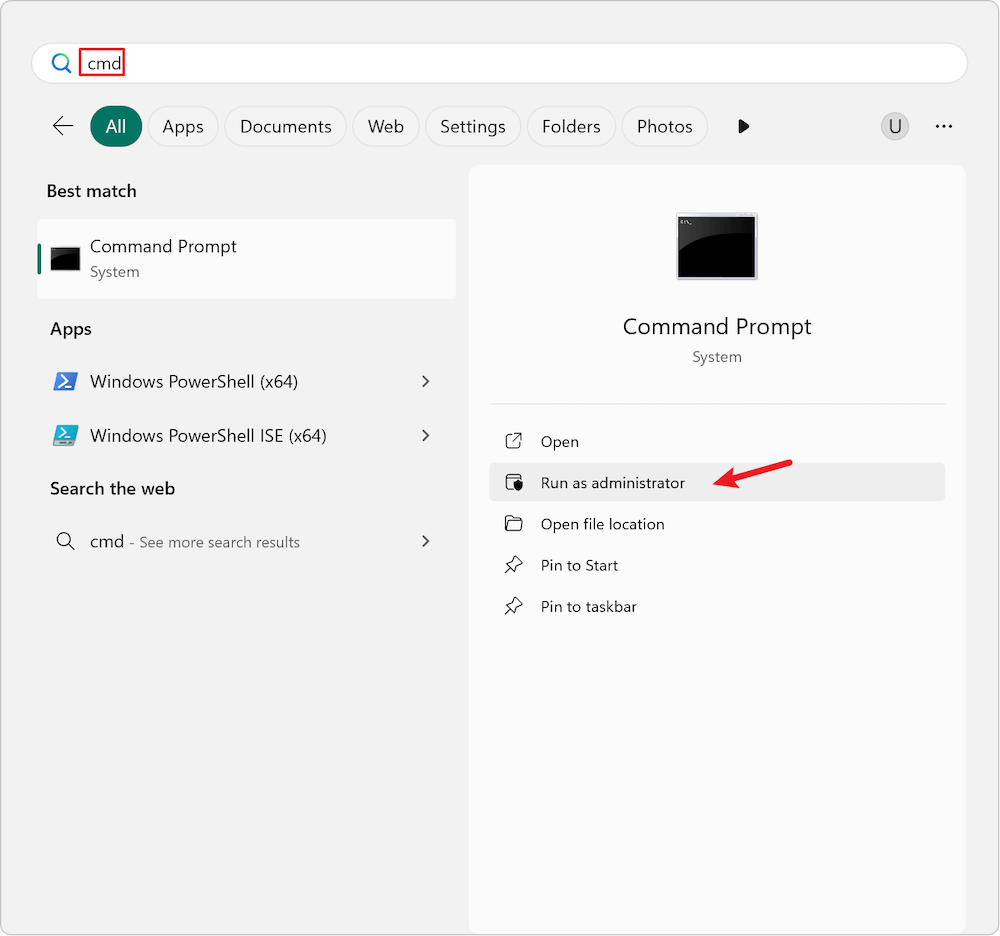
You will see a black command-line window.
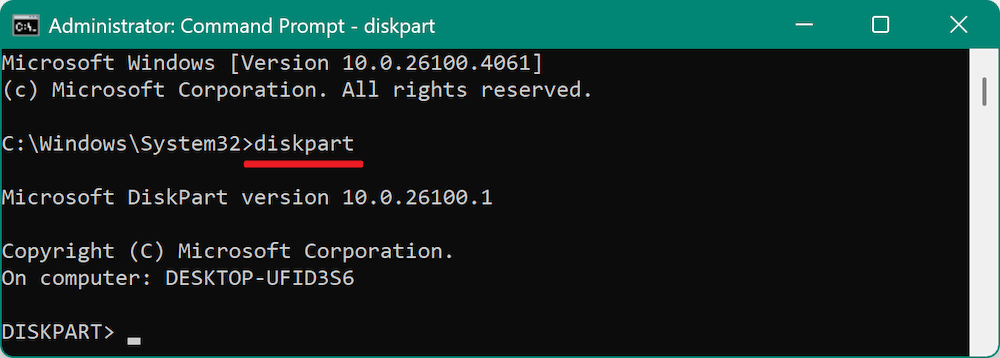
Step 2: Launch Diskpart
diskpart
This opens the Diskpart utility, a separate command-line interface for disk management.
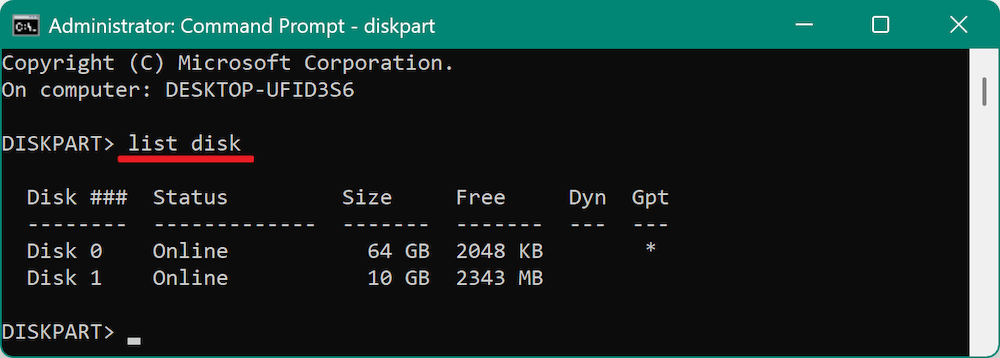
Step 3: List All Disks
list disk
This will display all storage devices connected to your computer. Carefully identify your SD card by its size. For example, if your SD card is 64 GB, look for a disk with a size close to that.
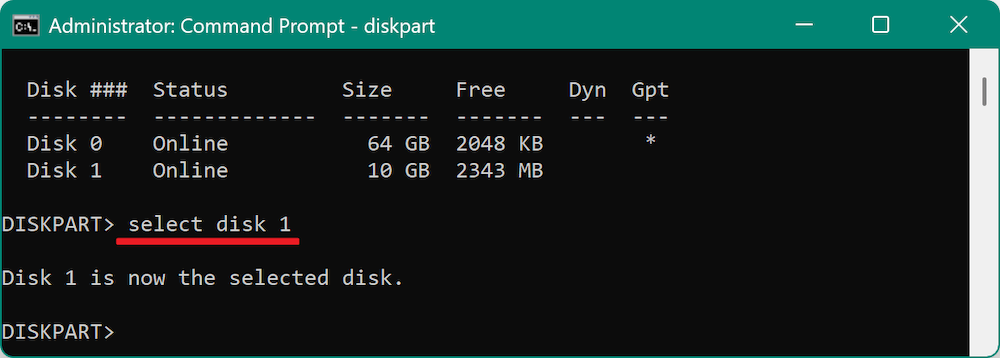
Step 4: Select the SD Card
select disk X
Replace X with the number corresponding to your SD card (e.g., select disk 2). You'll receive confirmation: "Disk 2 is now the selected disk."
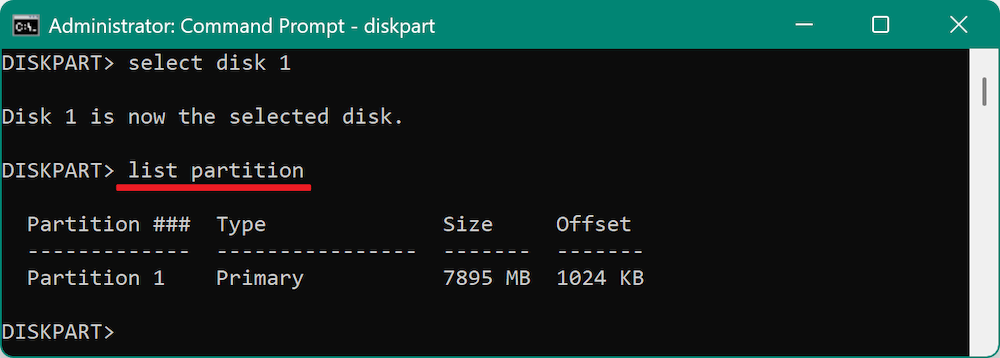
Step 5: View Partitions (Optional)
list partition
This helps verify what's on the disk. If the card is blank or shows no partitions, that's fine.
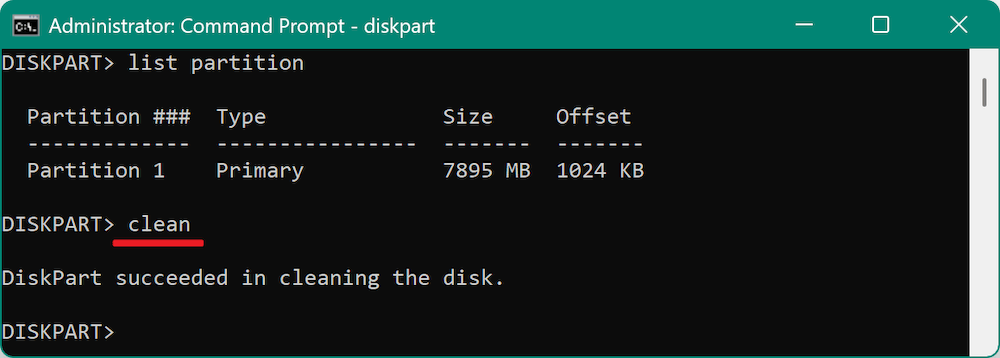
Step 6: Clean the Disk (Optional, but Recommended)
clean
This command erases all partitions and data. It prepares the disk for fresh formatting and can fix corrupted partition tables. Use this only if you've backed up data and want a fresh start.
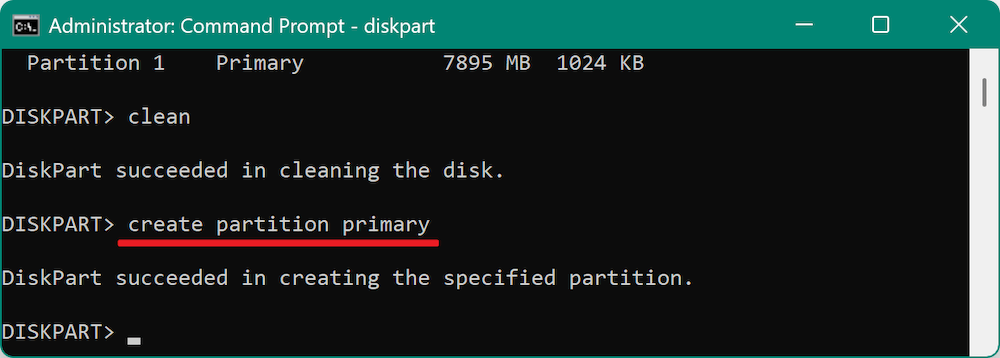
Step 7: Create a New Partition
create partition primary
This creates a new partition across the full size of the SD card.
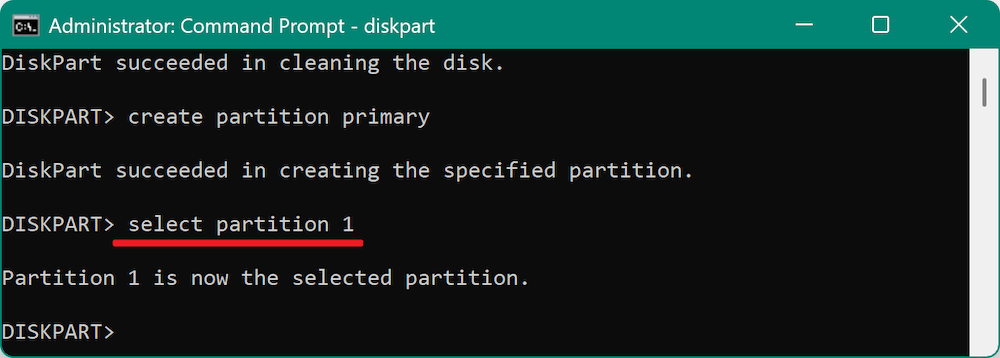
Step 8: Select the New Partition
select partition 1
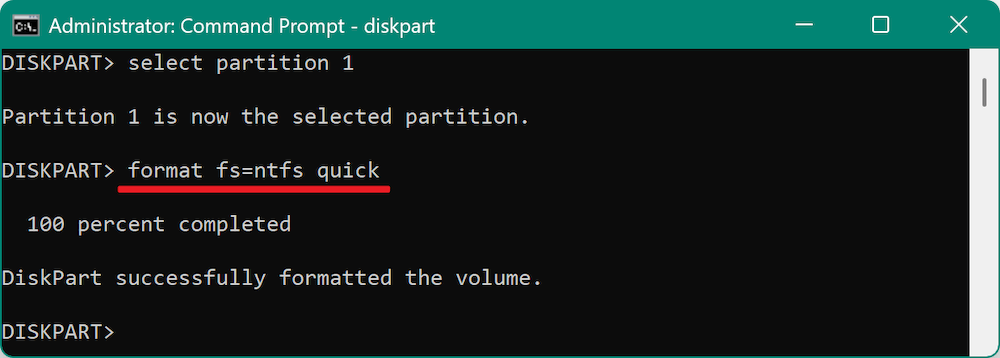
Step 9: Format to NTFS
format fs=ntfs quick
The quick parameter speeds up formatting. Omit it for a full format: format fs=ntfs. Full format checks for bad sectors but takes longer.
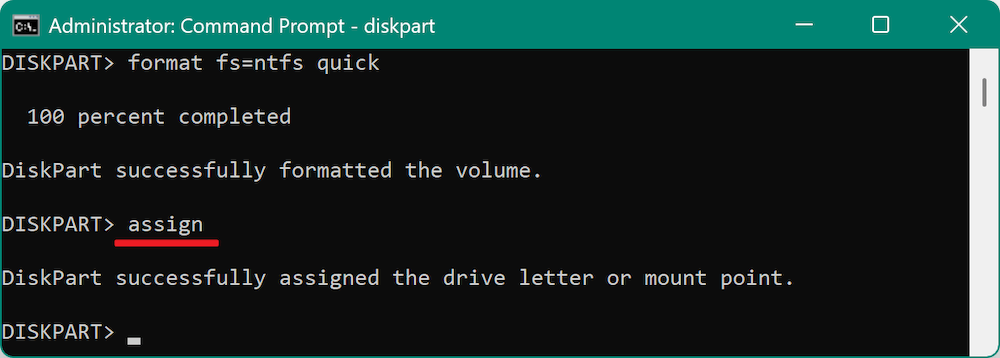
Step 10: Assign a Drive Letter
assign
This makes the newly formatted SD card visible in File Explorer.
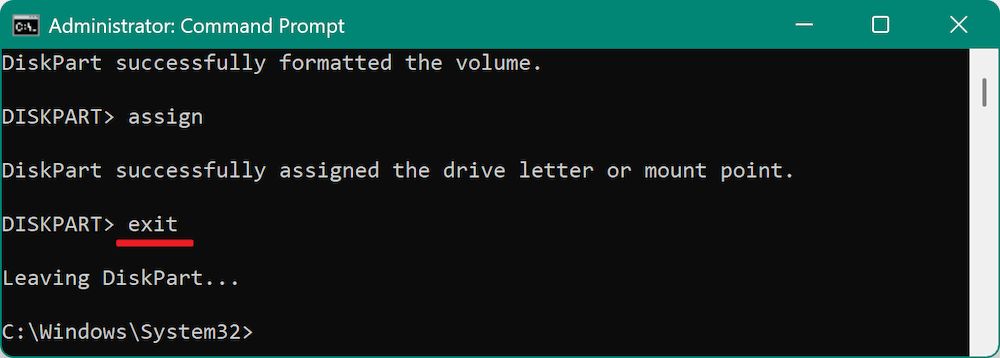
Step 11: Exit Diskpart and Command Prompt
exit
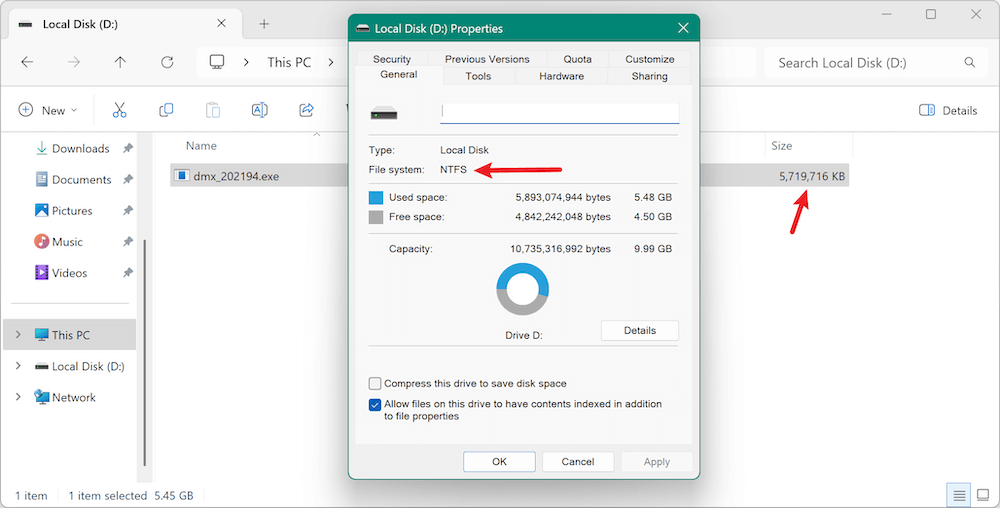
Post-Format Checklist
- Open File Explorer to verify the SD card appears and is usable.
- Check Properties > File System to confirm NTFS was applied.
- Copy a test file >4GB to confirm NTFS benefits.
Method 4: Format SD Card to NTFS with Donemax Data Eraser
If Windows tools fail, NTFS is not available, or you want advanced features, third-party tools can help. For example, if you want to format the SD card and ensure the data is also permanently wiped, you can use Donemax Data Eraser to format the card and wipe data.
Donemax Data Eraser
- Format drive and wipe data permanently.
- International data erasure algorithms supported.
- Three data wiping modes and other tools.
Here are the steps to format SD card to NTFS and wipe data with Donemax Data Eraser:
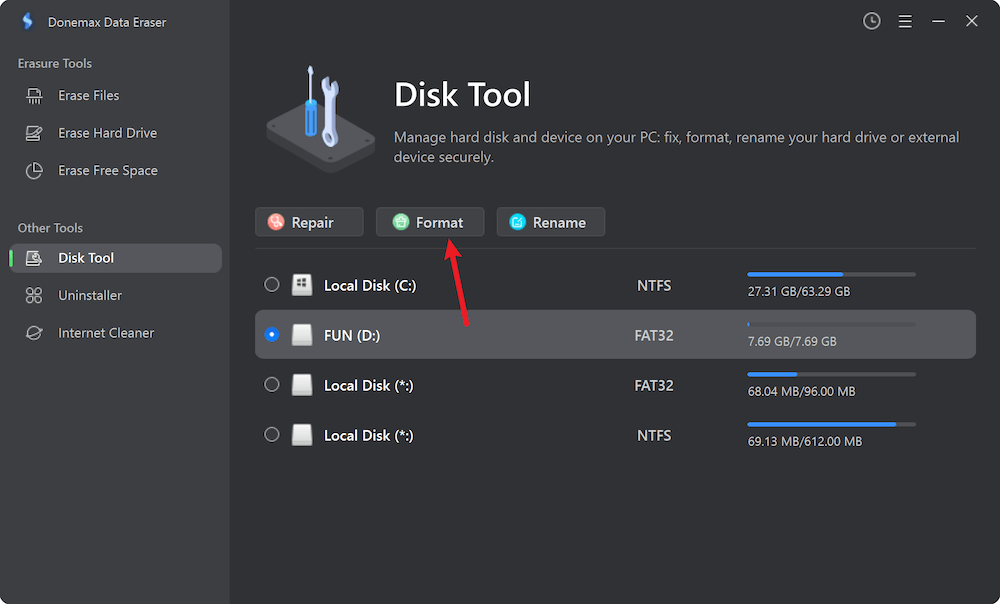
- Install and launch the software. Change to Disk Tool option. Locate your SD card in the interface and click Format button.
![format SD card to NTFS on Windows]()
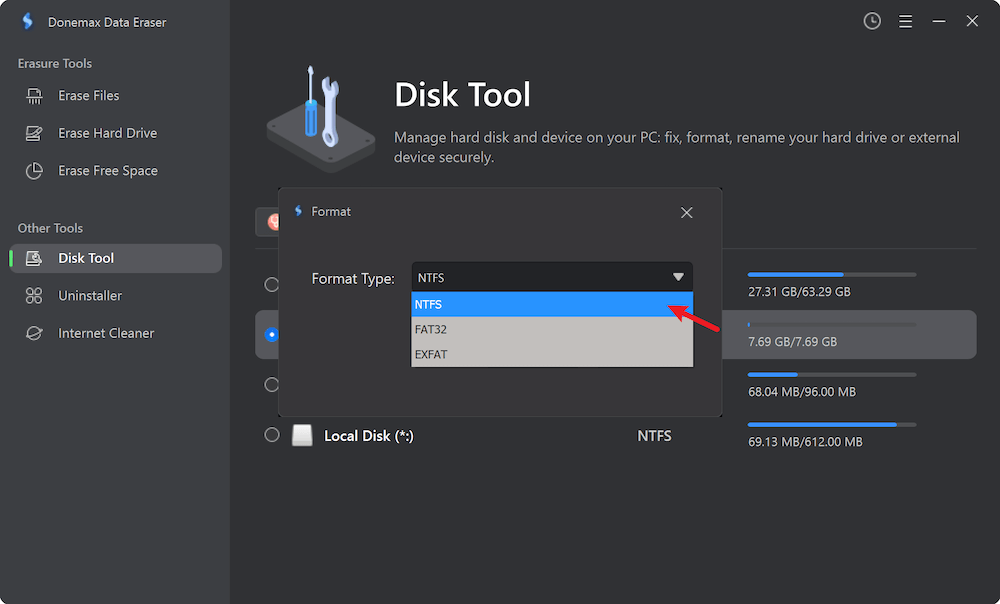
- Select the file system as NTFS and start to format the SD card.
![format SD card to NTFS on Windows]()
- Now the SD card is in NTFS format, but the data is not wiped. Select Erase Hard Drive mode and choose the formatted SD card.
![format SD card to NTFS on Windows]()
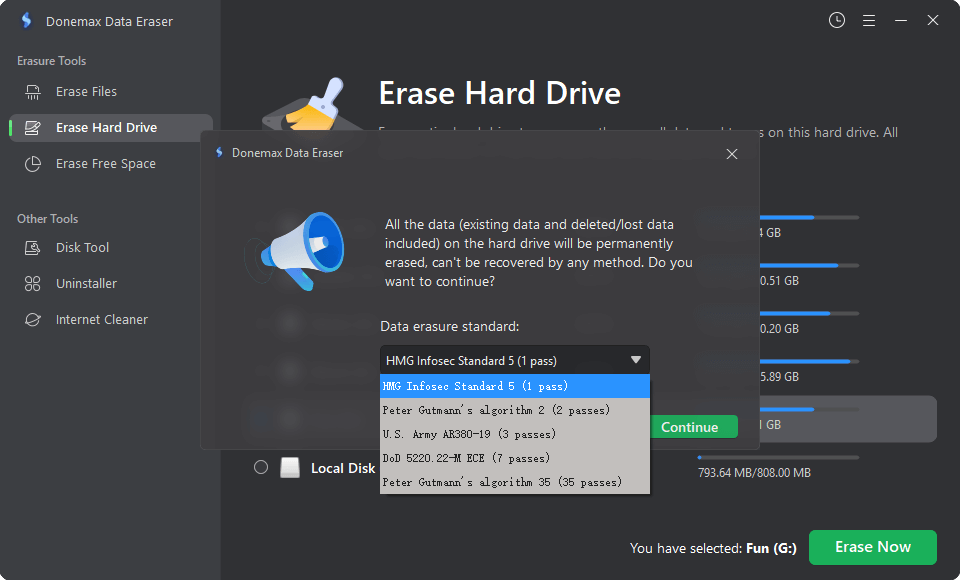
- Choose a data erasure standard to wipe the data permanently from the SD card.
![format SD card to NTFS on Windows]()
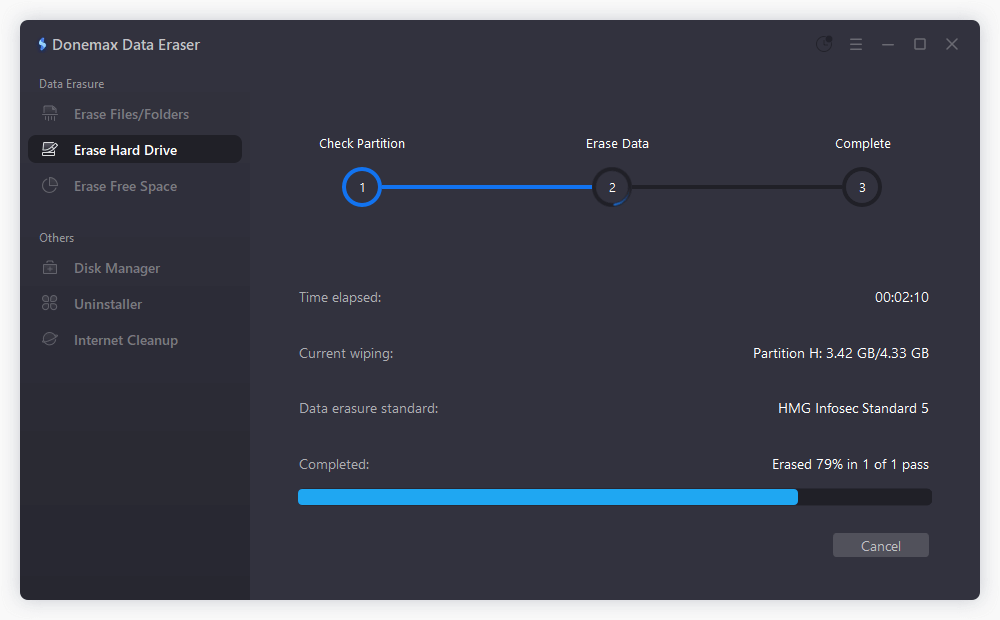
- Start to process the data process. Once it's done, all the data on the SD card is gone forever and no recovery software can recover the wiped data.
![format SD card to NTFS on Windows]()

Advantages:
- Better error handling.
- Can format SD cards that Windows doesn't recognize properly.
- Includes other utilities like file shredding, drive wiping, etc.
Troubleshooting Common SD Card Formatting Issues
1. SD Card is Write-Protected
- Check for a physical lock switch on the SD card or adapter.
- Use Diskpart to clear read-only attributes:
attributes disk clear readonly
2. SD Card Not Recognized
- Try a different USB port or card reader.
- Update or reinstall drivers via Device Manager.
- Use chkdsk to fix file system errors:
chkdsk E: /f
3. Cannot Format: Option Greyed Out
- The card may be corrupted or severely fragmented.
- Use Diskpart or third-party tools.
- Try deleting the volume in Disk Management and creating a new partition.
4. Windows Says "Windows Was Unable to Complete the Format"
- Run a full format instead of quick.
- Try another formatting method (e.g., Diskpart).
- Scan for bad sectors using:
chkdsk E: /r
Compatibility Notes: NTFS vs. FAT32 and exFAT
While NTFS is powerful, it comes with limited compatibility across non-Windows systems.
Where NTFS Works:
- Windows PCs (all versions).
- Xbox (limited support).
- PS3/PS4/PS5 (read-only).
- Linux (read/write with proper driver).
- macOS (read-only unless third-party Mac NTFS driver installed).
Where NTFS Fails:
- Most Android phones and tablets (unless rooted)
- Digital cameras and GoPros.
- Smart TVs and older media players.
- Car infotainment systems.
Reverting NTFS Back to exFAT or FAT32 (Optional)
If you later need to revert to a more compatible file system, here's how:
File Explorer:
- Right-click on the SD card.
- Choose Format.
- Select exFAT or FAT32 (FAT32 only available for <32GB in Windows).
Command Prompt:
format E: /fs:exfat
Or for FAT32 (up to 32GB only):
format E: /fs:fat32
Use third-party tools like GUIFormat to format larger cards to FAT32.
Conclusion
Formatting an SD card to NTFS is straightforward when using the right method for your version of Windows. Whether you're working on Windows 11, 10, 8, or 7, there are multiple ways to format your SD card, ranging from simple GUI tools like File Explorer to powerful command-line options like Diskpart.
Before formatting, always back up your data, and ensure NTFS is the right choice based on your device compatibility needs. If NTFS doesn't work for your devices, consider using exFAT, which offers broader compatibility without the 4GB file limit of FAT32.
Donemax Data Eraser
One of the best data erasure programs for permanently erase data from PC, Mac, HDD, SSD, USB drive, digital camera and other devices. Once the data is erased, it is lost for good, cannot be recovered by any method.
Related Articles
- May 23, 2025Format a USB Drive to NTFS on Windows 11 / 10 / 8 / 7
- Oct 17, 2023How to Use CCleaner Wipe Free Disk Space?
- Jul 01, 2026Best File Systems for External Drives: How to Format & Partition
- Feb 06, 20242025 Two Effective Methods to Wipe HDD?
- Apr 14, 2026How to Wipe Hard Drive from BIOS: Step-by-Step Guide for HDD & SSD
- Jul 27, 2025Stellar BitRaser Review and Better Alternative (2025)

Contributing Writer
Maria
Maria is one of the senior writers & editors of Donemax who lives and works in Sydney, Australia. She loves PC, Mac and Internet Technology. She has 6 years of writing articles about data recovery on PC/Mac, disk cloning solution, data eraser and computer OS optimization, etc. She is also interested in testing various software and digital products.

Editor in chief
Gerhard Chou
In order to effectively solve the problems for our customers, every article and troubleshooting solution published on our website has been strictly tested and practiced. Our editors love researching and using computers and testing software, and are willing to help computer users with their problems