
Written byCoco LinUpdated on Jan 12, 2024
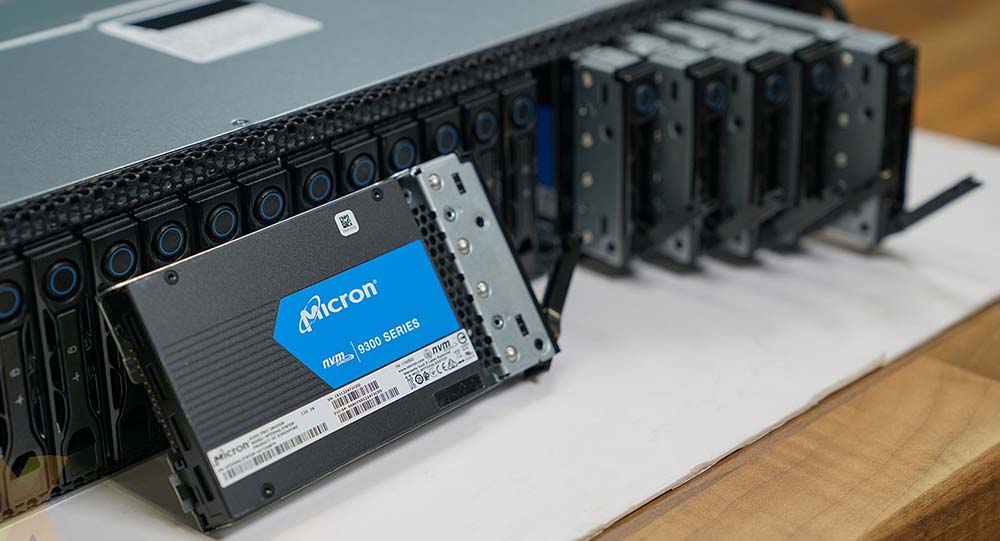
How to Wipe NVMe SSD?
Approved byGerhard Chou
PAGE CONTENT:
It is more important than ever to keep our data secure in this digital age when everything is kept in bits and bytes. Picture your NVMe SSD as a safe deposit box containing your priceless possessions, including photos, documents, and essential data. Consider giving that chest to another person now.
Once you've given it to someone, how can you guarantee they won't be able to peep inside? Eliminating any traces of your data from your NVMe SSD is similar to locking the treasure box after wiping it clean. Relax, it's easier than it seems! Here, we'll walk you through the simple process of securely erasing your NVMe SSD, protecting your precious valuables, and ensuring they remain yours alone.
Why Wiping An NVMe SSD Is Important?
Securely cleaning an NVMe SSD is crucial, so ensure you understand that before diving into the procedures. There is no assurance of total removal when using conventional deletion techniques. Data can still be recoverable with the right tools, even after regular deletions. Without appropriate wiping methods, the risk of exposure is great when dealing with sensitive information such as financial records, personal details, or private work files.
Methods to Wipe NVMe SSD
Effectively wiping an NVMe SSD can be done in a few different ways. A few examples of the most popular ones are:
Method 1: Using Built-in Secure Erase Feature
A built-in secure erase option is available on some SSDs, allowing users to wipe the drive effectively. However, not all solid-state drives (SSDs) have this capability, and the procedure may differ from manufacturer to manufacturer. In most cases, the procedures include:
Identify Drive Support: Make sure your solid-state drive (SSD) is compatible with the secure erase function by consulting the manufacturer's website or manual.
Accessing BIOS/UEFI: Turn on your machine again and enter the BIOS or UEFI configuration. Find the option for Secure Erase. The drive will be permanently erased, so proceed with caution.
Execute Secure Erase: Carefully follow the on-screen instructions to choose the NVMe SSD and confirm the secure erase.
Method 2: Using Secure Wiping Software
When it comes to safely erasing SSDs, there are several third-party software solutions to choose from. In many cases, these add-ons offer greater customization and control than the built-in functions. Donemax Data Eraser, Blancco Drive Eraser, Parted Magic, and DBAN (Darik's Boot and Nuke) are highly respected programs. The typical steps include:
Step 1. Download and install a Data Eraser - such as Donemax Data Eraser on your computer.
Step 2. Open Donemax Data Eraser, choose data erasure mode - Erase Hard Drive.

Step 3. Select the NVMe SSD you want to wipe, then click on Erase Now button.
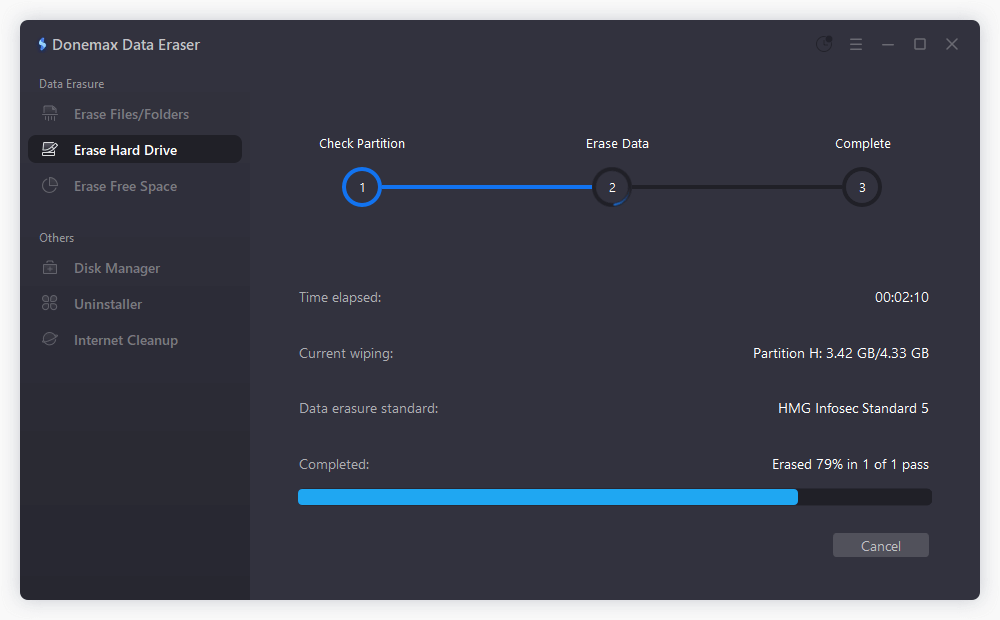
It will securely wipe and format the NVMe SSD. All data including existing data, deleted/lost data on the SSD will be permanently erased, leaving no trace for data recovery.
Method 3: Using Encryption and Formatting
Data retrieval can be made even more difficult by encryption and formatting. However, it is less secure than the previous approaches. On the other hand, this approach makes data recovery more challenging rather than erasing it. Here are the steps:
Encryption: To encrypt the drive, use the NVMe SSD's built-in encryption features or third-party software, such as BitLocker for Windows or FileVault for Mac. At this point, the data is encrypted to make it unintelligible to anyone who does not possess the key.
Formatting: Apply the operating system's formatting tool to the encrypted NVMe SSD. A fresh file system is created on the disc during this process.
Method 4: Physical Destruction
The most secure option is physically destroying the NVMe SSD, which should only be done as a last resort or with extremely sensitive data. The data will be permanently lost since the drive will be physically damaged beyond repair.
Advantages of NVMe Drive Wiping:
- Data Security: By erasing data, wiping solutions protect NVMe drives from prying eyes.
- Regulatory Compliance: Assists with GDPR and HIPAA compliance through data sanitization before disposal.
- Preventing Data Leakage: Removes all remaining data security vulnerabilities on NVMe drives.
- Identity Theft Protection: Reduces the danger of identity theft by permanently erasing personal information.
- Efficient Disposal: Enables responsible drive disposal by streamlining erasure.
- Responsibility to the Environment: Helps dispose of old electronics in a way that doesn't harm the environment.
- Relief from Worries: It guarantees efficient data deletion, lessening worries about breaches.
Conclusion:
For data security and privacy, it is critical to erase data from an NVMe SSD properly. Ensure no recoverable data is left on the disk by utilizing the built-in secure wipe tools, third-party software, encryption methods, or even physically destroying it. Make data security a top priority, take all necessary steps, and adopt the approach that best suits your needs.
To ensure complete data wiping and protection, seeking expert assistance or services for sensitive data may be necessary. By following these measures, you can be assured that your information will remain private and protected from potential breaches or illegal access.
Related Articles
- May 30, 2025How to Wipe A Drive with CCleaner?
- Mar 26, 2026How to Wipe an External Hard Drive: The Ultimate Guide
- Apr 15, 2026How to Clean SSD on Windows 11/10: 5 Proven Ways
- May 26, 2024Wipe Old Hard Drive After Cloning It to SSD
- Dec 18, 2024Wipe Hard Drive on ASUS Laptop: A Comprehensive Guide
- Feb 17, 2025How to Dispose of a Dying Hard Drive?

Contributing Writer
Coco Lin
Coco has been a writer and a chief programmer at Donemax software since 2018. Over 10 years of experience of writing troubleshooting articles in the software industry, she is passionate about programming and loves to providing solutions to Windows and Mac users. Also she enjoys music and palying tennis in her free time.

Editor in chief
Gerhard Chou
In order to effectively solve the problems for our customers, every article and troubleshooting solution published on our website has been strictly tested and practiced. Our editors love researching and using computers and testing software, and are willing to help computer users with their problems