
Written byCoco LinUpdated on May 10, 2024
How to Wipe An USB Flash Drive on Windows 11?
Approved byGerhard Chou
PAGE CONTENT:
Are you looking to sell your USB flash drive, give it to a friend, or get a new one? No matter the reason, your private information mustn't get into the wrong hands. But there's a catch: you can't just delete files or reset the drive. It would help if you found out more.
It will help you learn how to safely erase your USB flash drive on Windows 11. It's not enough to delete the files that can be seen; every bit of data must be lost forever. We have easy-to-follow steps for everyone, whether you're new to tech or a seasoned pro. Hold tight because we'll start a journey to protect your information and give you peace. Let's start!
Why Should You Wipe a USB Drive?
- Keeping Your Privacy Safe: USB flash drives often hold private information like financial records, personal papers, or secret work files. By properly wiping the drive, this information can't be viewed by people who aren't supposed to.
- Stopping Data Theft: If you no longer need a USB flash drive, removing files or formatting the drive will not eliminate the data. If you don't properly delete your data, data recovery tools can get back removed files, leaving you open to data theft.
- Ready To Sell: Wiping your USB flash drive clean ensures the new owner won't be able to get to your files if you decide to sell or trash it.
Format or Wipe USB Flash Drive on Windows 11 with Built-in Tool or Third-party Software
Before you format or wipe your USB flash drive on your Windows 11 PC, make sure you have a backup of your important data or the data stored on the USB flash drive is no longer useful. Just choose a solution to help you format or wipe the USB flash drive depending on your needs.
Method 1. Format USB flash drive on Windows 11 using built-in format feature
Step 1. Connect the USB flash drive to your Windows 11 PC.
Step 2. Open This PC, find the USB flash drive, right-click it and choose Format.
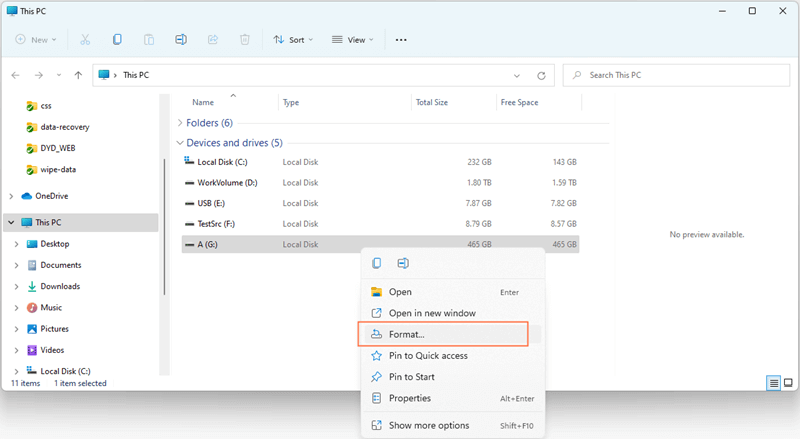
Step 3. Select a file system (such as ExFAT or FAT32), then click on Start button to format the USB flash drive.

Note: Quick Format is selected by default, if you want to perform a full format, uncheck Quick Format.
Method 2. Format USB flash drive with Disk Management
If the USB flash drive is not showing up in File Explorer, just use Disk Management to format it.
Step 1. Type Disk Management in Windows search box, then open this tool.
Step 2. Find and select the USB flash drive, right-click it, choose Format.
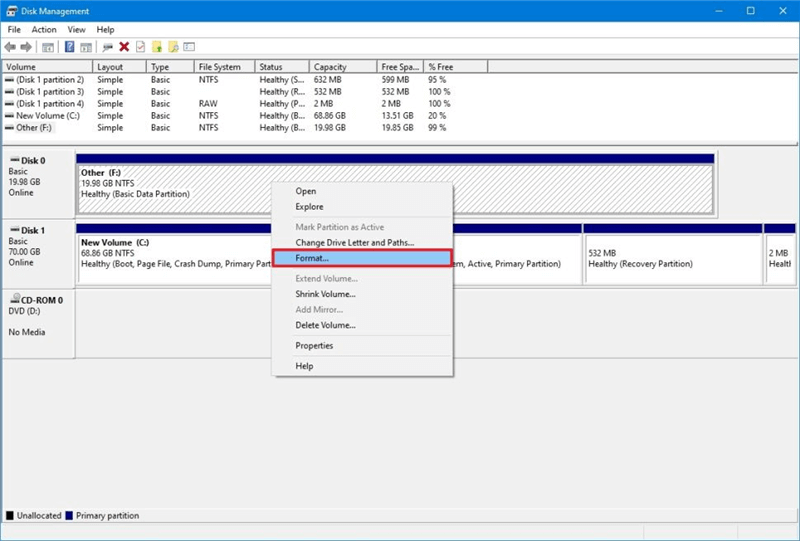
Step 3. Select a file system, and then start to format the USB flash drive.
Note: The formatted data is not lost forever, you or anyone else can easily recover lost data from a formatted USB flash drive on Windows or macOS.
How to Recover Lost Data from Formatted USB Drive
It is easy to unformat USB flash drive on Windows and macOS to get all deleted, formatted and lost data back!
Method 3. Wipe USB flash drive with Data Erasure Program
There is an easy and effective way to erase a USB flash drive on Windows 11 that involves using third-party software. Third-party software often has easier-to-use and more customizable ways to delete data than the built-in methods that come with Windows 11.
These tools are made to make sure that your USB flash drive doesn't hold any private data. It gives you peace of mind when transferring or getting rid of data. So, how does someone use outside tools to erase a USB flash drive on Windows 11? Let's look at the steps:
Step 1. Choose a reliable data erasure program.
The first step is to find and choose a third-party data erasure program you can trust to wipe your data. There are a lot of choices on the market, and each one has its own set of features and functions. Look for easy-to-use, dependable software that ideally has good reviews and suggestions from people you can trust.
Donemax Data Eraser is an easy-to-use data erasure program. It can help you securely and permanently erase data from PC, Mac, HDD, SSD, USB drive, SD card, etc. If you want to wipe an USB flash drive on Windows 11, this software is a good choice.
Windows 11 Disk Cloning - Donemax Data Eraser
- Wipe USB flash drive on Windows 11
- Permanently erase all data from your USB flash drive.
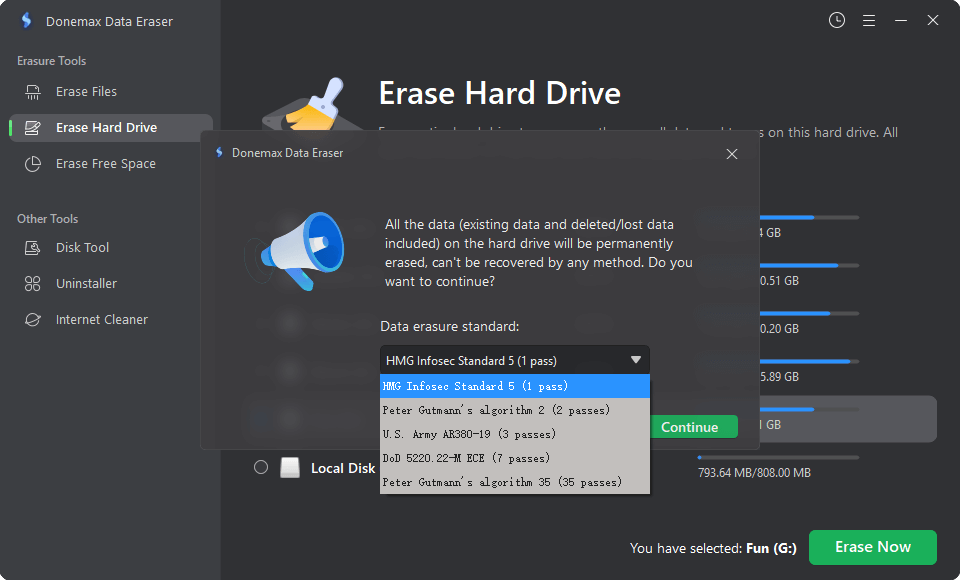
- Certified data erasure standards such as Peter Gutmann, U.S. Army AR380-19, DoD 5220.22-M ECE, etc.
Once you wipe your USB flash drive with Donemax Data Eraser, all data stored on the USB flash drive is lost for good, cannot be recovered by any method.
Step 2. Choose Erase Hard Drive mode.
Once you've selected the Donemax Data Eraser, you can download it and install it on your Windows 11 computer. Then connect the USB flash drive to your PC and open Donemax Data Eraser, choose Erase Hard Drive mode.

Step 3. Choose erasure method to erase the USB flash drive.
Select the USB flash drive, then click on Erase Now button, choose a data erasure standard and click on Continue button to start the wiping process.
Step 4. Wipe the USB flash drive.
Once you're happy with everything, it's time to start the wiping process. Depending on your USB flash drive size and your choice of wiping it, the process could take a while. Just relax and let the software do its thing.
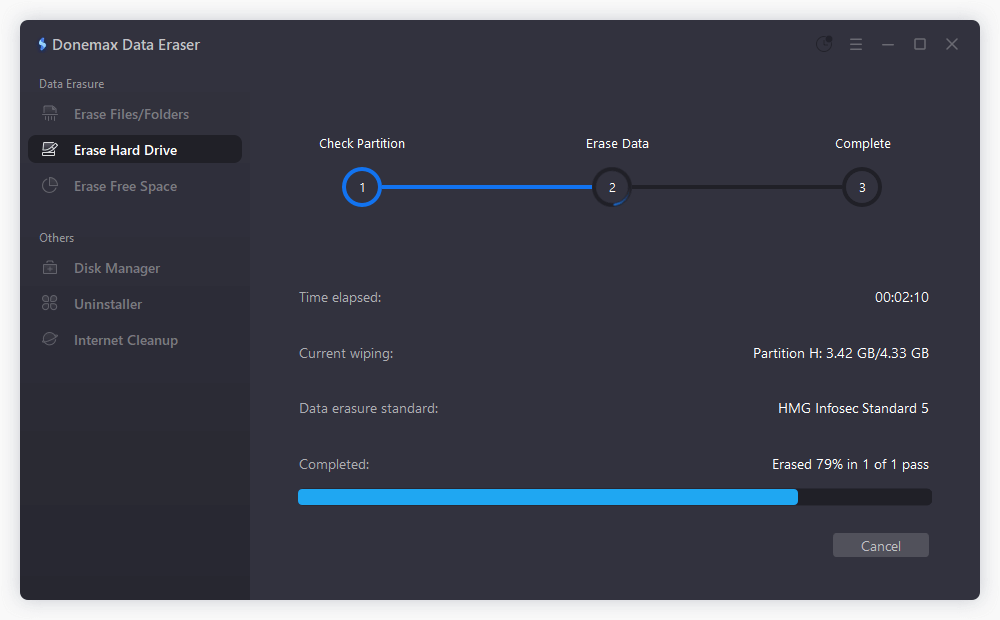
Once the wiping process gets finished, the program will let you know that the operation was successful. Before moving on, please take a moment to ensure your USB flash drive has been completely erased.
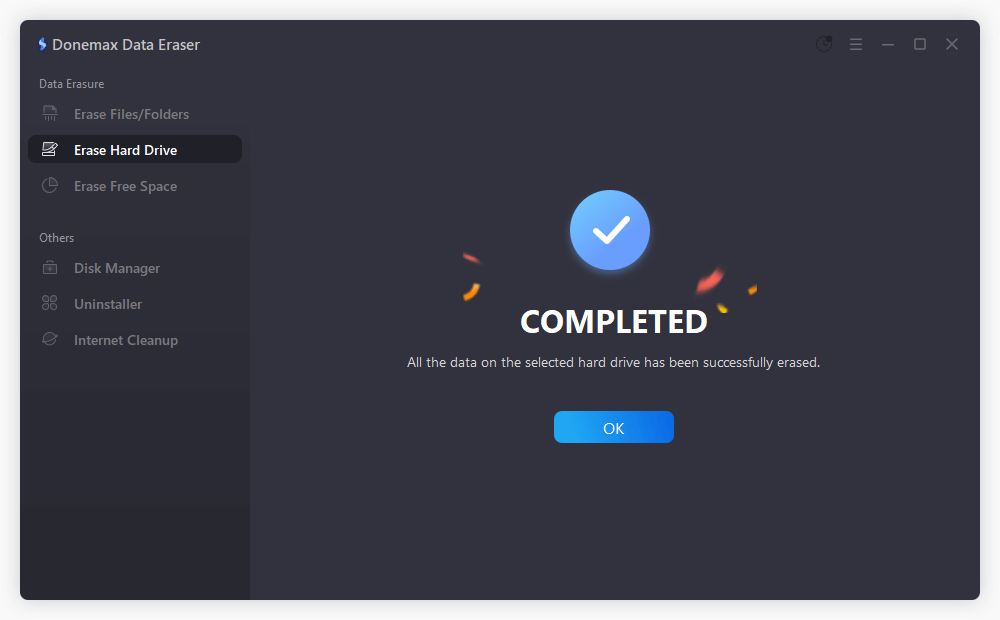
Now that you have erased all the data on your USB flash drive, you can safely throw it away, use it for something else, or give it to someone else without worrying that private data will get into the wrong hands.
Conclusion:
In conclusion, you must safely wipe a USB flash drive on Windows 11 to protect your privacy and stop data theft. It is very important to ensure that all of your data is deleted permanently, whether you use built-in tools like Disk Management or third-party data erasure software.
Following the instructions in this guide, you can safely get rid of, repurpose, or move your USB flash drive without worrying that private data will get into the wrong hands. Remember that if you protect your info today, you can avoid security problems tomorrow.
FAQs About Wiping USB Flash Drive on Windows 11
1. How to use Diskpart Command Line to format USB flash drive on Windows 11?
Windows has a powerful command-line tool called Diskpart that lets users control disks, partitions, and volumes. To erase an USB flash drive on Windows 11, follow these steps:
- Connect the USB drive to your screen.
- Start the Command Prompt, type "cmd." and choose "Run as administrator."
- Type "diskpart" into the Command Prompt window, then press Enter to open the Diskpart tool.
- If you type "list disk" and press "Enter," your computer will show you a list of all the available files. Write down the disk number that goes with your USB flash drive.
- Type "select disk X" and press Enter to select the USB flash drive. Remember to change "X" to the disk number of your drive.
- Next, type "clean" and press Enter. This program will eliminate all of the disk's partitions and volumes.
- Type "exit" and press Enter to leave the Diskpart tool when the disk is clean.
2. How to format USB flash drive on Windows 11 via Windows settings?
The Settings app in Windows 11 makes deleting data from a USB hard drive easy. Here is how to do it:
- Connect the USB drive to your screen.
- Press the Windows key + letter I to open the settings.
- Click "System" on the left, then choose "Storage" from the menu.
- After going down a bit, click on "Advanced storage settings."
- The USB flash drive you connected will be shown under "External storage." Press on it.
- Scroll down to the USB flash drive specs and click "Format storage device."
- A message will tell you that formatting the drive will delete all its data. Press "Format" to move on.
3. How to wipe an USB flash drive on Windows 11?
Data erasure program, such as Donemax Data Eraser, can help you securely wipe an USB flash drive on Windows 11, making data recovery be impossible:
- Download and install Donemax Data Eraser on your Windows 11 PC, open it.
- Choose Erase Hard Drive mode, then select the USB flash drive.
- Click on Erase Now button to permanently erase all data from the USB flash drive.
4. What is the best USB disk wipe software for Windows 11?
Here are top 5 erasure programs for you to wipe an USB flash drive on Windows 11:
- Donemax Data Eraser
- EaseUS BitWiper
- Magoshare AweEraser
- DoYourData Super Eraser
- Stellar Drive Wipe
5. How to permanently erase data from an USB flash drive?
If you want to permanently erase data from your USB flash drive, just try data erasure program. Unlike disk format, data erasure will securely and permanently erase data from your USB flash drive beyond the scope of data recovery.
Data erasure programs can help you permanently erase data from your USB flash drive using special data erasure standards.
Related Articles
- Apr 30, 2026Best File Systems for External Drives: How to Format & Partition
- Jun 12, 2023Permanently Erase Data Before Selling A Windows 8/8.1 PC
- Feb 09, 2024Download Ontrack Erasure Program Alternative for Windows and macOS
- Apr 27, 2026Which Data Erasure Software Actually Works? We Put 6 Tools to the Test
- Apr 25, 2025How to Factory Reset a Hard Drive (SSD Included)?
- Jan 12, 2026Wipe Data Before Selling a DJI Camera: Complete Guide

Contributing Writer
Coco Lin
Coco has been a writer and a chief programmer at Donemax software since 2018. Over 10 years of experience of writing troubleshooting articles in the software industry, she is passionate about programming and loves to providing solutions to Windows and Mac users. Also she enjoys music and palying tennis in her free time.

Editor in chief
Gerhard Chou
In order to effectively solve the problems for our customers, every article and troubleshooting solution published on our website has been strictly tested and practiced. Our editors love researching and using computers and testing software, and are willing to help computer users with their problems