
Written byMariaUpdated on May 16, 2025
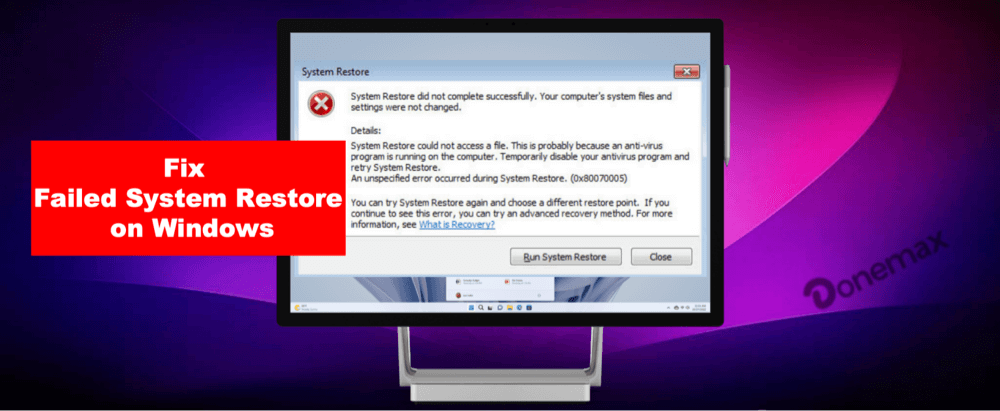
Fix Failed System Restore on Windows 11/10
Approved byGerhard Chou
PAGE CONTENT:
Users can restore their system to a previous operating state without damaging personal files thanks to Windows' built-in System Restore capability. It's especially helpful when the system becomes unstable due to faulty updates, driver installations, or malware infections. However, what happens when System Restore itself fails to work? Many users report errors such as "System Restore did not complete successfully", or receive various error codes that make the recovery process frustrating and ineffective.
In this guide, we'll explore why System Restore may fail on Windows 11 and 10, and walk you through comprehensive steps to resolve these issues.
Common Error Messages and Symptoms for Failed System Restore
When System Restore fails, Windows usually throws an error message like:
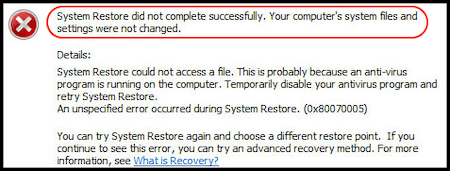
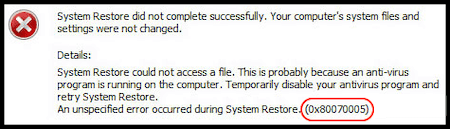
- "System Restore did not complete successfully. Your computer's system files and settings were not changed."
![System Restore did not complete successfully]()
- Error codes such as:
- 0x80070005 – Access is denied.
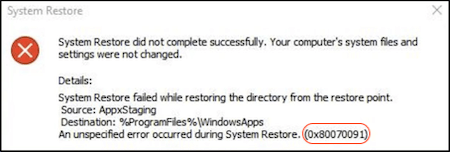
- 0x80070091 – The directory is not empty.
![System Restore did not complete successfully]()
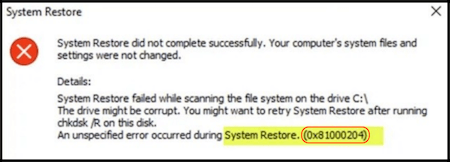
- 0x81000204 – The system restore fails due to service configuration issues.
![System Restore did not complete successfully]()
- 0x8000ffff – Catastrophic failure.
![System Restore did not complete successfully]()
- System freeze or boot loops after attempting a restore.
- Restore points disappearing or not being detected.
These errors typically arise from permission problems, corrupted files, antivirus interference, or incompatible system settings.
Preliminary Checks Before Applying Fixes for Failed System Restore
Before jumping into advanced solutions, perform the following basic checks:
1. Free Up Disk Space
System Restore requires adequate free space on your system drive (usually the C: drive). Aim for at least 5–10 GB of free space for a successful restore operation.
2. Disable Third-Party Antivirus Temporarily
Security software can sometimes block System Restore from accessing critical system files. Temporarily disable antivirus or anti-malware tools before retrying the process.
3. Disconnect External Devices
USB flash drives, external hard disks, or printers may interfere with restore points. Remove all unnecessary peripherals during the restore attempt.
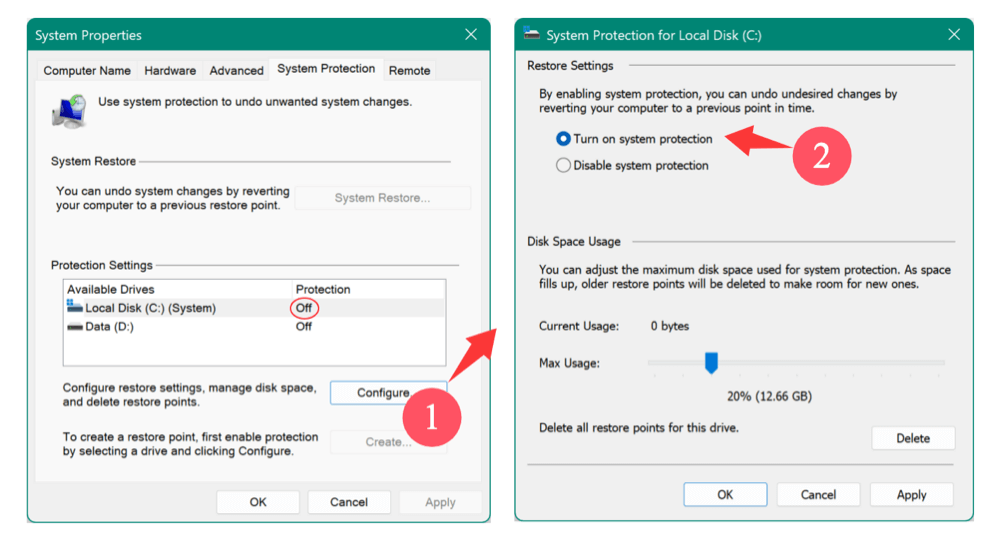
4. Ensure System Restore is Enabled
- Type sysdm.cpl using Win + R, then press Enter.
- Go to the System Protection tab.
- Make sure protection is On for the system drive (C:). If it's off, you will not be able to use restore points effectively.
Solutions to Fix Failed System Restore on Windows11/10
Let's explore the most effective methods to fix System Restore errors.
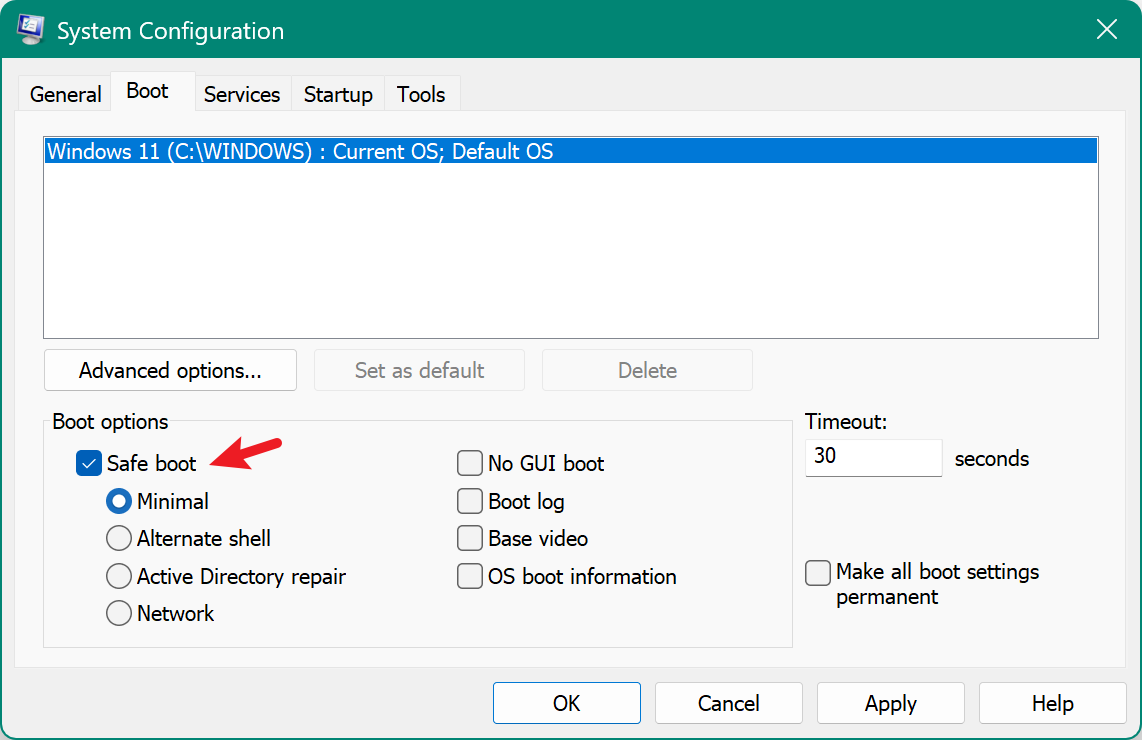
1. Run System Restore in Safe Mode
Running System Restore in Safe Mode minimizes driver and software conflicts.
Steps:
- Type msconfig using Win + R, then hit Enter.
- Select Safe boot from the Boot choices under the Boot menu.
- Click Apply and restart the computer.
![System Restore did not complete successfully]()
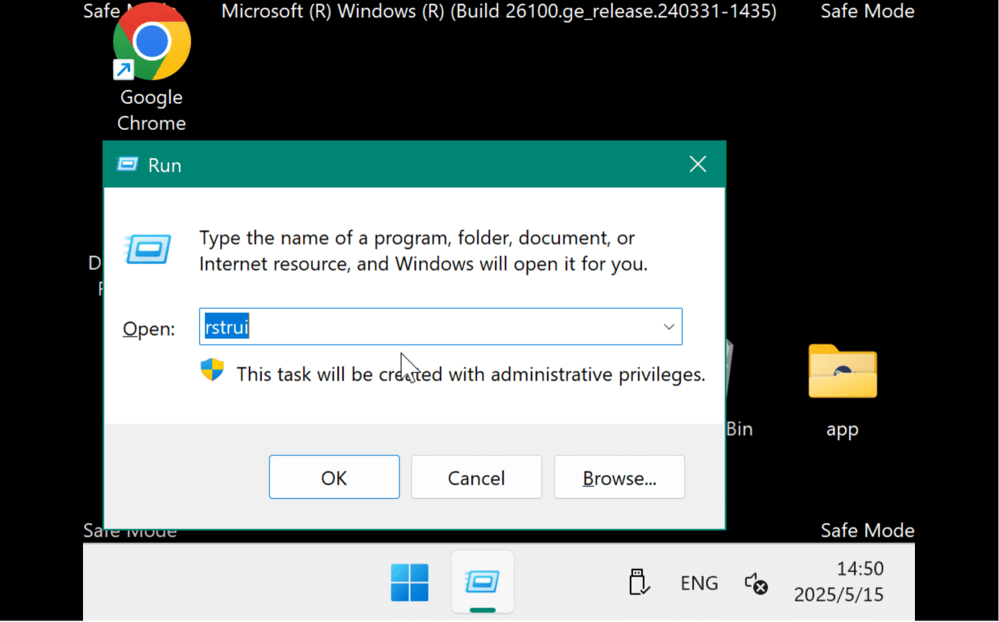
- Once in Safe Mode:
- To start System Restore, press Win + R, type rstrui, and press Enter.
![System Restore did not complete successfully]()
- Choose a restore point, then proceed with the wizard.
![System Restore did not complete successfully]()
- To start System Restore, press Win + R, type rstrui, and press Enter.

After the restore, go back to msconfig and uncheck Safe Boot to return to normal startup.
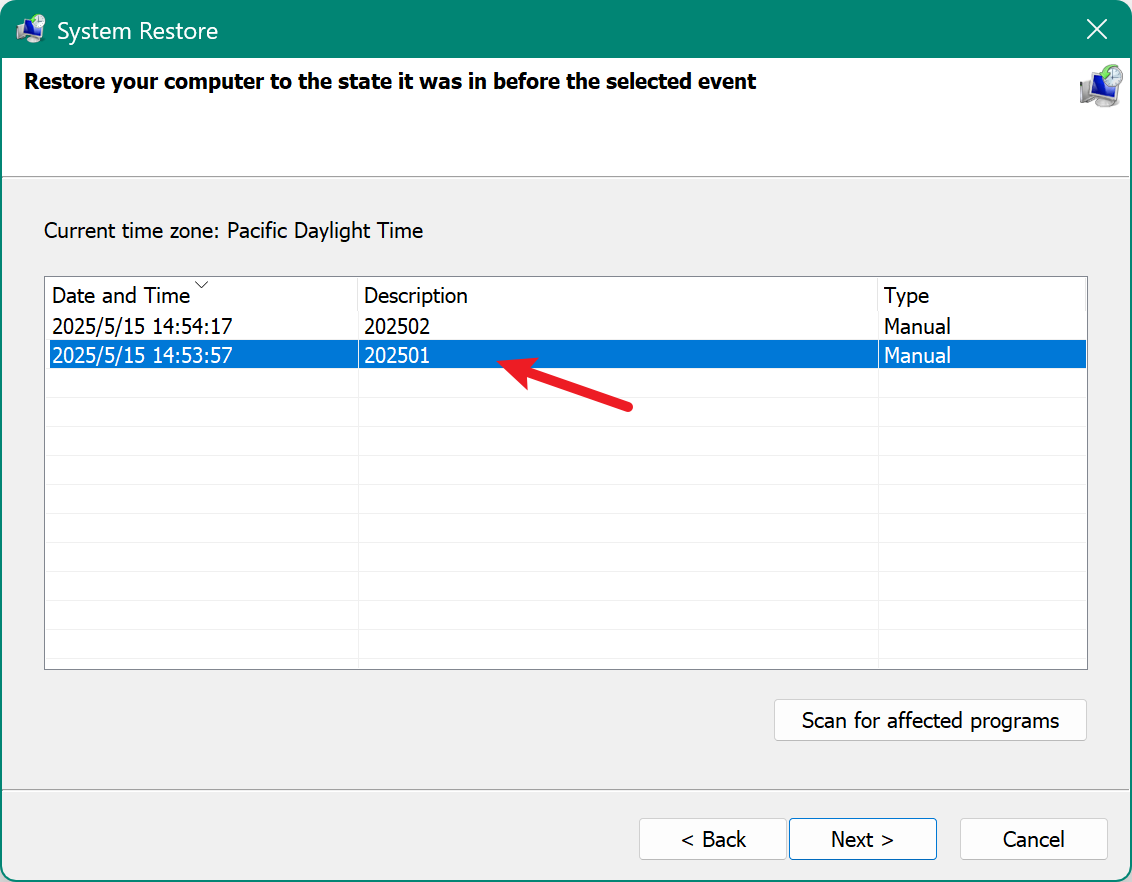
2. Use an Alternative Restore Point
Sometimes a specific restore point is corrupted. Try a different one:
Steps:
- Open System Restore via the Control Panel or by typing rstrui in the Run dialog.
- Select "Choose a different restore point" if available.
- Pick another restore point and proceed.
![System Restore did not complete successfully]()
If no restore points are visible, check the Show more restore points box.
3. Check and Repair System Files
Corrupted system files can break System Restore. Use built-in tools like SFC and DISM.
Step 1: Run the SFC
How to Run SFC:
- Type Command Prompt using Win + S, then right-click and choose "Run as Administrator."
- Type the below command and hit Enter:
sfc /scannow
- Hold off till the scan is finished. This may take 10–20 minutes depending on system performance.
![System Restore did not complete successfully]()
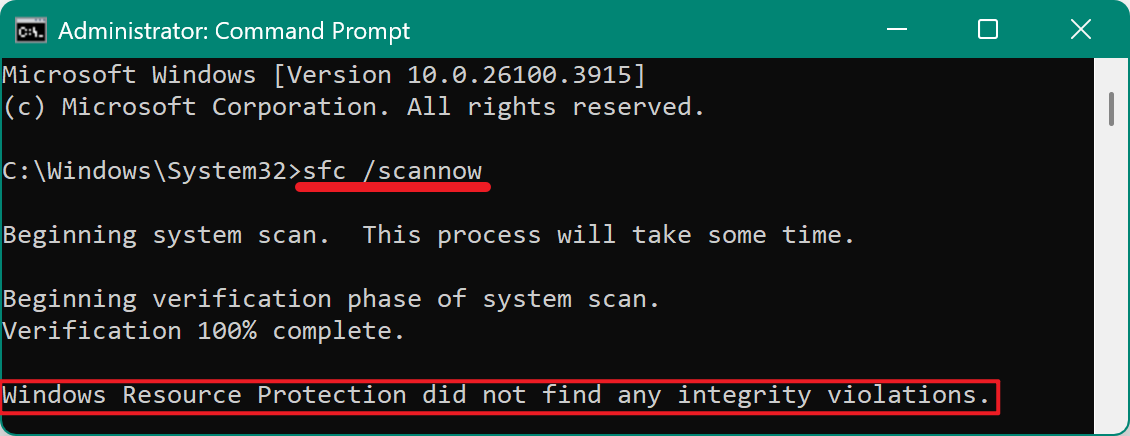
What the Results Mean:
- "Windows Resource Protection did not find any integrity violations."
– No problems were detected. - "Windows Resource Protection found corrupt files and successfully repaired them."
– Issues were fixed; you can retry System Restore. - "Windows Resource Protection found corrupt files but was unable to fix some of them."
– You'll need to use DISM (see below).
Step 2: Use DISM to Repair the Windows Image
If SFC cannot fix all issues, the DISM tool helps repair the Windows system image used by SFC. It's especially useful if SFC reports unfixable problems or keeps failing repeatedly.
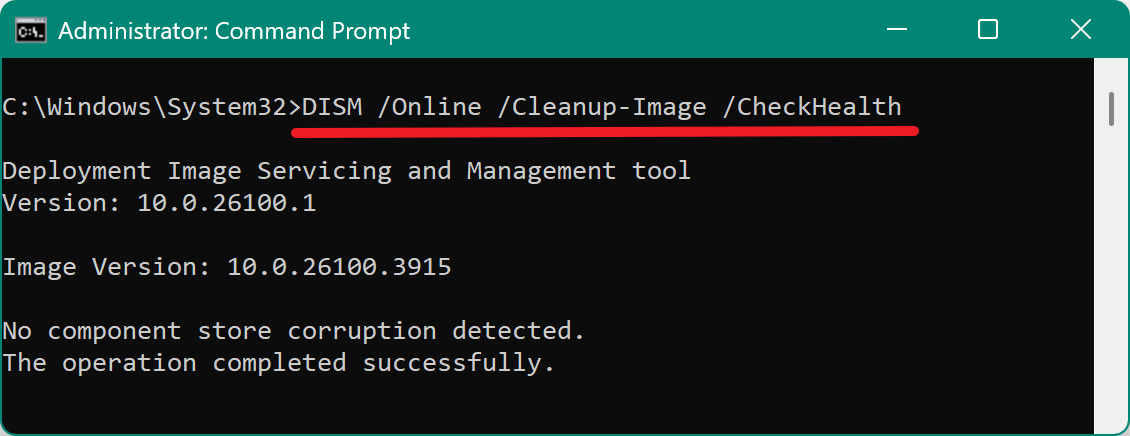
DISM Commands:
- In the same Command Prompt (Admin), run:
DISM /Online /Cleanup-Image /CheckHealth
![System Restore did not complete successfully]()
This checks whether the image is repairable.
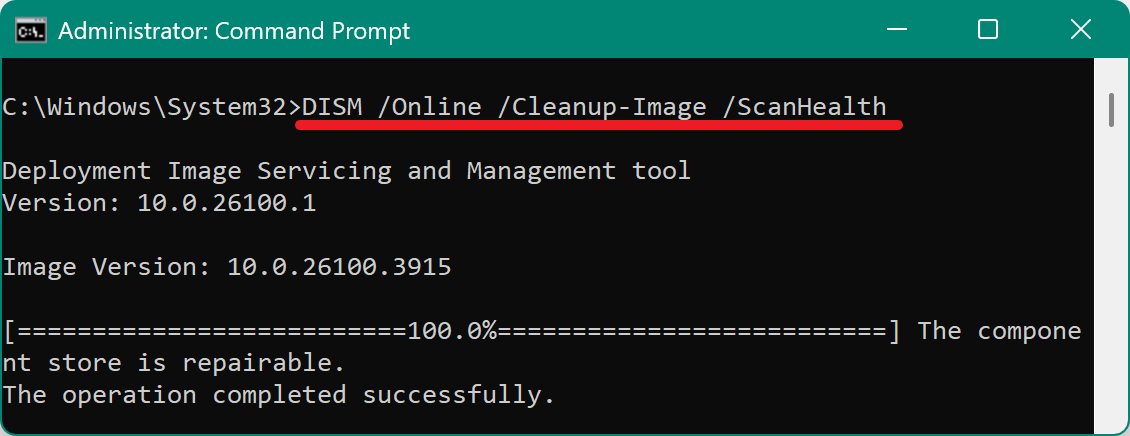
- Then run:
DISM /Online /Cleanup-Image /ScanHealth
![System Restore did not complete successfully]()
This performs a more detailed scan of the system image.
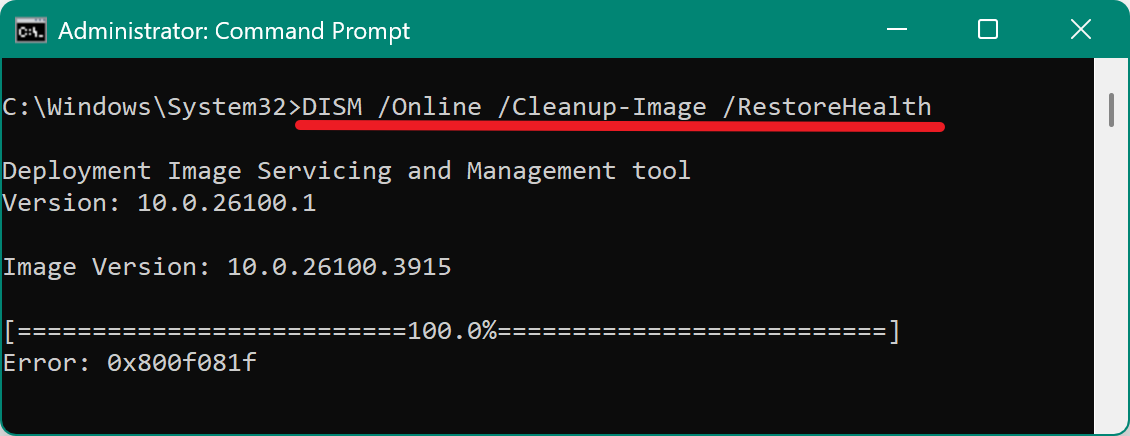
- If problems are found, run the repair command:
DISM /Online /Cleanup-Image /RestoreHealth
![System Restore did not complete successfully]()
This may take 15–30 minutes. It connects to Windows Update to download and replace corrupted files.
💡 Note: If you have no internet connection, you can use a local Windows installation ISO or DVD as the source. Example:
DISM /Online /Cleanup-Image /RestoreHealth /Source:WIM:X:\sources\install.wim:1 /LimitAccess
Step 3: Rerun SFC After DISM
Once DISM completes, it's best to rerun the SFC tool to ensure all system files are fully repaired:
sfc /scannow
This will now use the repaired image as a reference to fix any lingering issues.
Real-World Example:
A user experiencing repeated System Restore failures with error 0x8000ffff ran sfc /scannow and found corrupted CBS log entries but couldn't fix them. After running the DISM /RestoreHealth command, followed by another SFC scan, the tool was finally able to repair the corrupt files, and System Restore completed successfully on the next attempt.
Tips and Best Practices:
- Always run both SFC and DISM in Administrator mode.
- Restart your PC after using these tools to ensure changes take effect.
- If you're using a Windows Insider build, some file integrity checks may fail due to testing-phase components—this is normal.
- Review the SFC log at: C:\Windows\Logs\CBS\CBS.log
for details on unrepairable files.
What If Both Tools Fail?
If even DISM can't restore the system image, consider:
- Using System Image Recovery (if you have a backup).
- Resetting the PC from Recovery Options.
- Reinstalling Windows, as a last resort.
By repairing the integrity of Windows files and images, SFC and DISM often resolve the root cause of failed System Restore attempts, saving you from more drastic recovery steps.
4. Fix Error 0x80070091 by Renaming the WindowsApps Folder
The 0x80070091 error ("The directory is not empty") is often linked to the WindowsApps folder.
Steps:
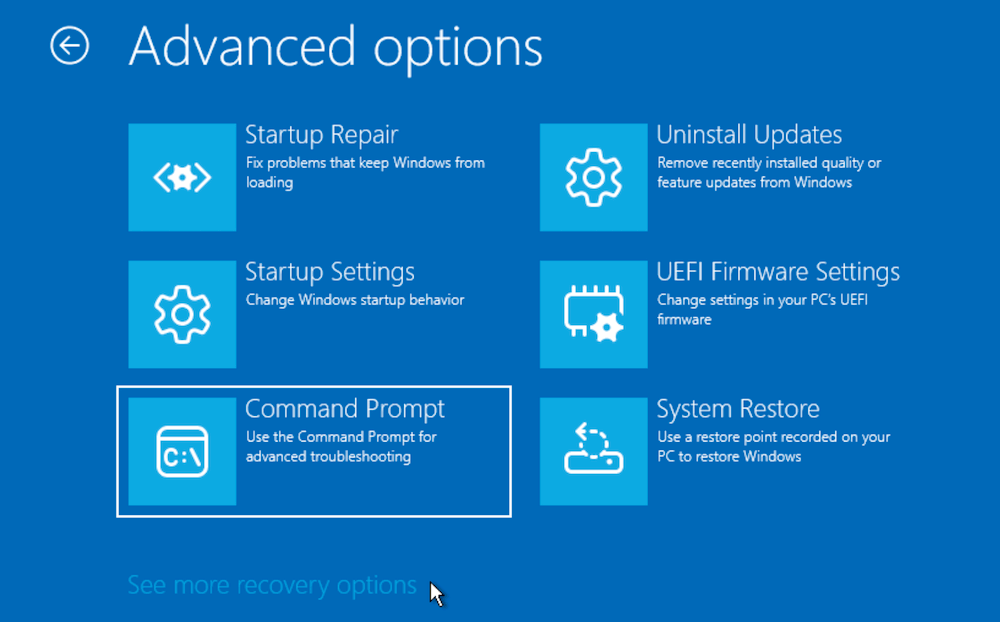
- Boot into Windows Recovery Environment:
- Hold Shift while clicking Restart on the login screen.
- Select Command Prompt from Troubleshoot via Advanced options.
![System Restore did not complete successfully]()
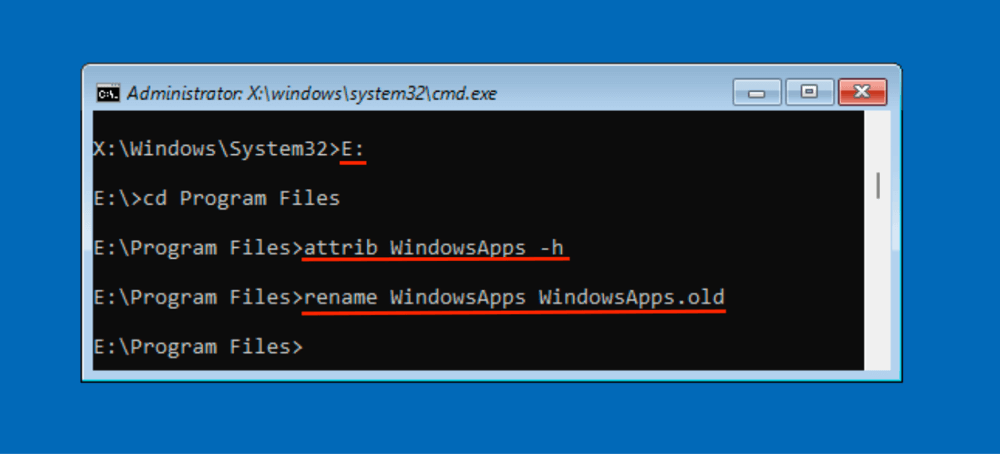
- In the Command Prompt:
C:
cd Program Files
attrib WindowsApps -h
rename WindowsApps WindowsApps.old(replace C: with the right drive letter of the system drive in WinRE)
![System Restore did not complete successfully]()
- Reboot the PC and try System Restore again.
This will force Windows to recreate the WindowsApps folder and remove any corruption.
5. Disable Antivirus or Security Software
Security tools might block System Restore from modifying system files. To troubleshoot:
- Temporarily uninstall your third-party antivirus program.
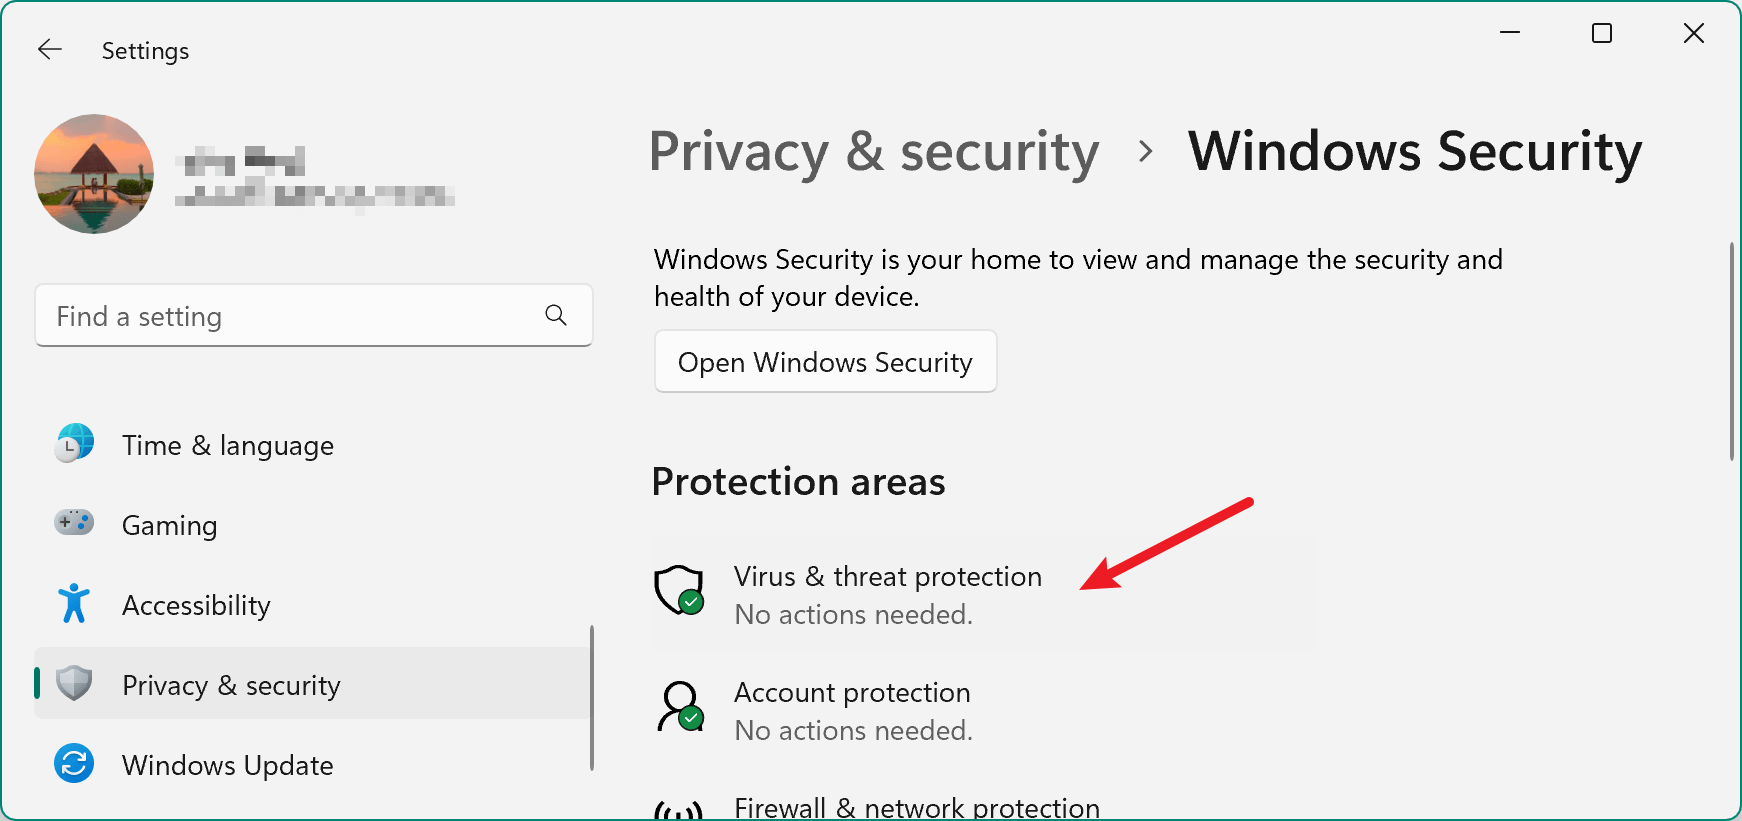
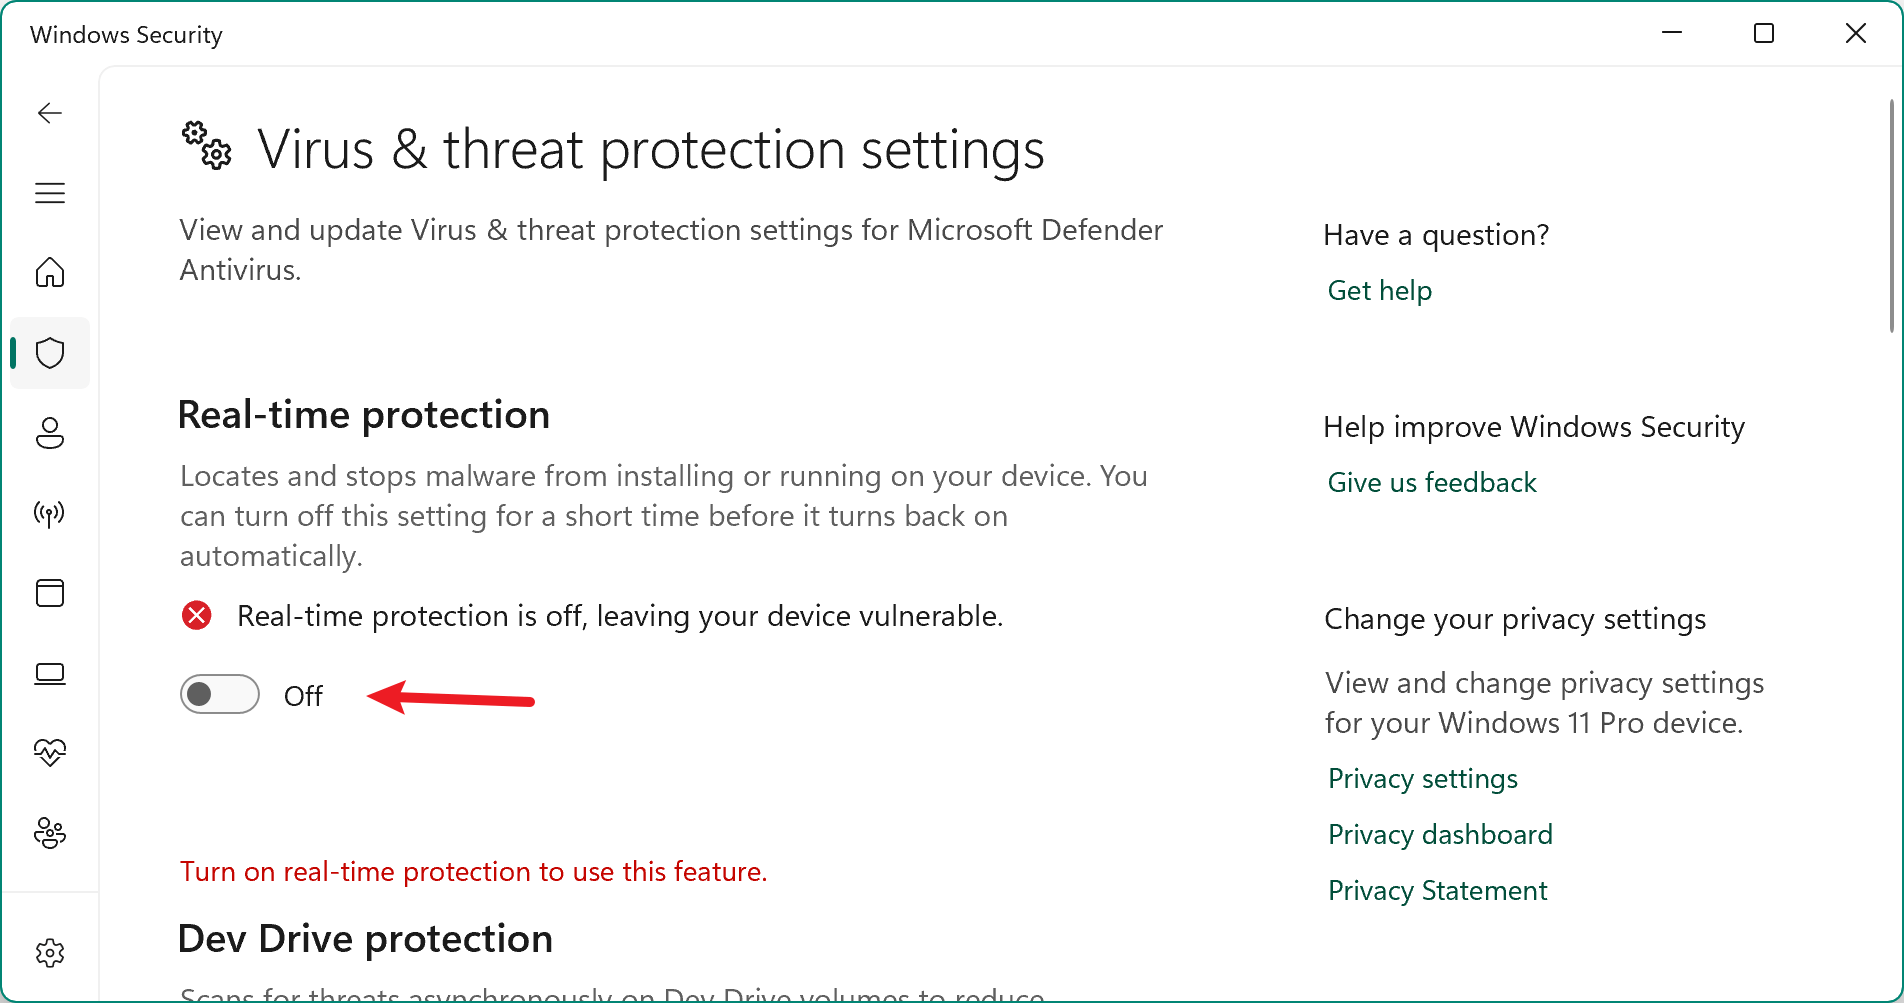
- Disable Windows Defender's real-time protection (temporarily):
- Go to Virus & threat protection from Windows Security under Privacy & Security in Settings.
![System Restore did not complete successfully]()
- To disable real-time protection, click switch off directly.
![System Restore did not complete successfully]()
- Go to Virus & threat protection from Windows Security under Privacy & Security in Settings.
Retry System Restore after disabling the software.
6. Check Event Viewer for Details
The Event Viewer logs detailed error messages related to System Restore.
Steps:
- Press Win + X and choose Event Viewer.
- Go to Windows Logs > Application.
- Look for events marked with Error or Critical around the time you attempted the restore.
- Double-click the event for details, such as which file or service caused the issue.
![System Restore did not complete successfully]()
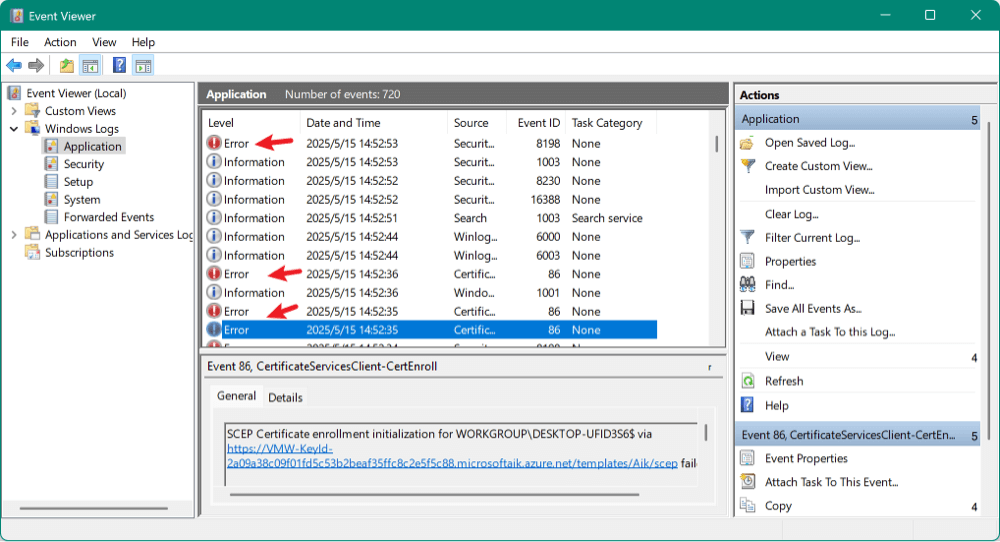
This information can help pinpoint the exact cause of failure.
7. Use System Image Backup or "Reset This PC" as a Last Resort
If all else fails, consider more extensive repair options.
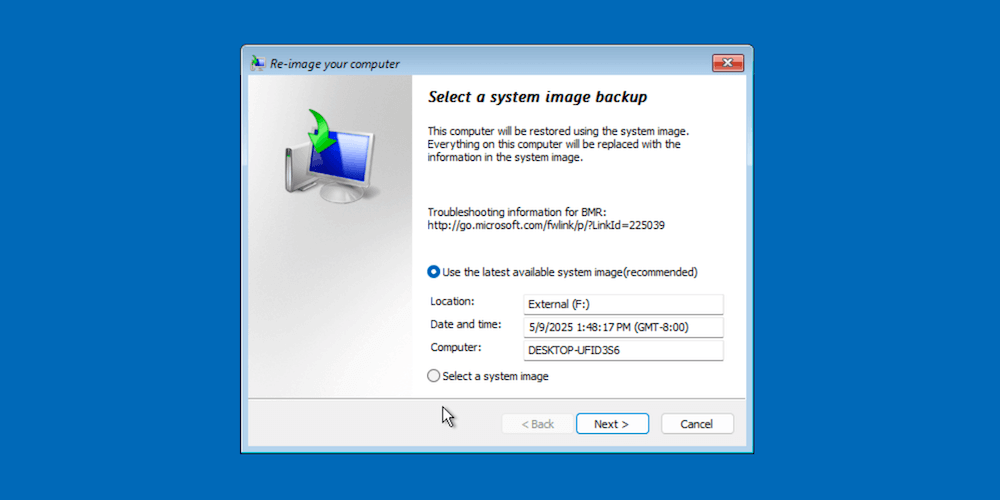
System Image Recovery
If you created a full system image:
- Boot into Recovery Environment.
- Choose System Image Recovery from Advanced options via Troubleshoot.
![System Restore did not complete successfully]()
- To restore the system image, adhere to the instructions.
![System Restore did not complete successfully]()

Reset This PC
- Go to Recovery from System via Settings.
- Select "Get started" under "Reset this PC."
![System Restore did not complete successfully]()
- Choose either:
- Keep my files (removes apps and settings).
- Remove everything (full reset).

This will reinstall Windows, resolving persistent errors while allowing file retention (optional).
Prevent Future System Restore Failures
System Restore is only useful when restore points are healthy and the environment supports restoration. Follow these practices to keep it working smoothly:
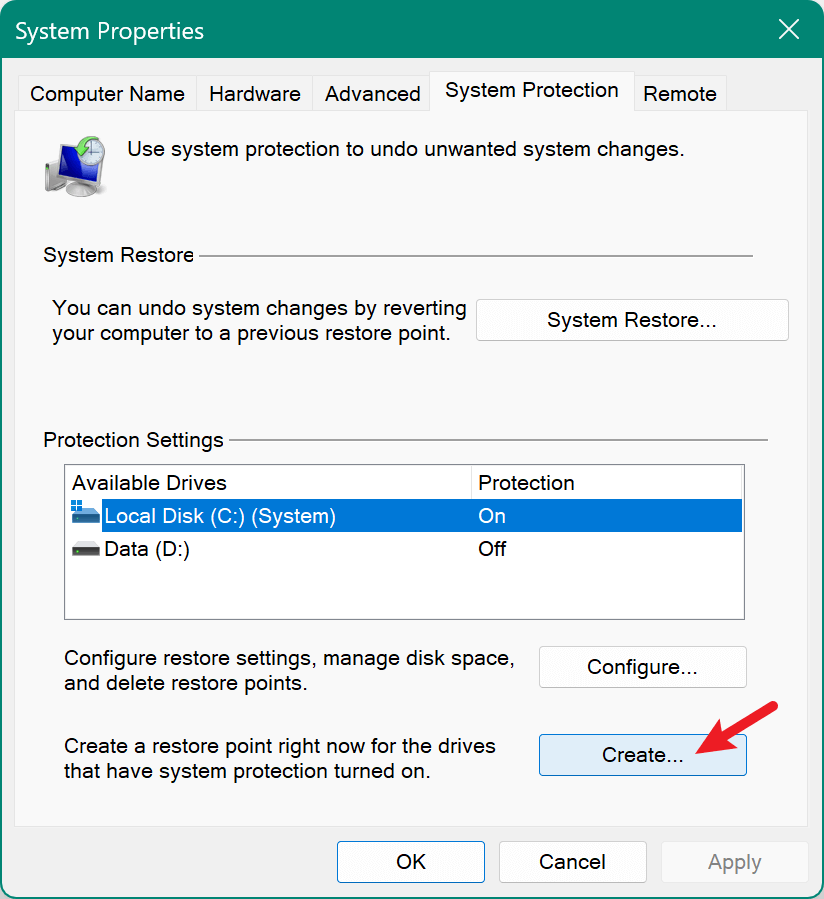
1. Create Restore Points Manually
Before installing major updates, drivers, or new software, manually create a restore point:
- In the Start Menu, type "Create a restore point."
- Click Create and give the restore point a name under the System Protection tab.
![System Restore did not complete successfully]()
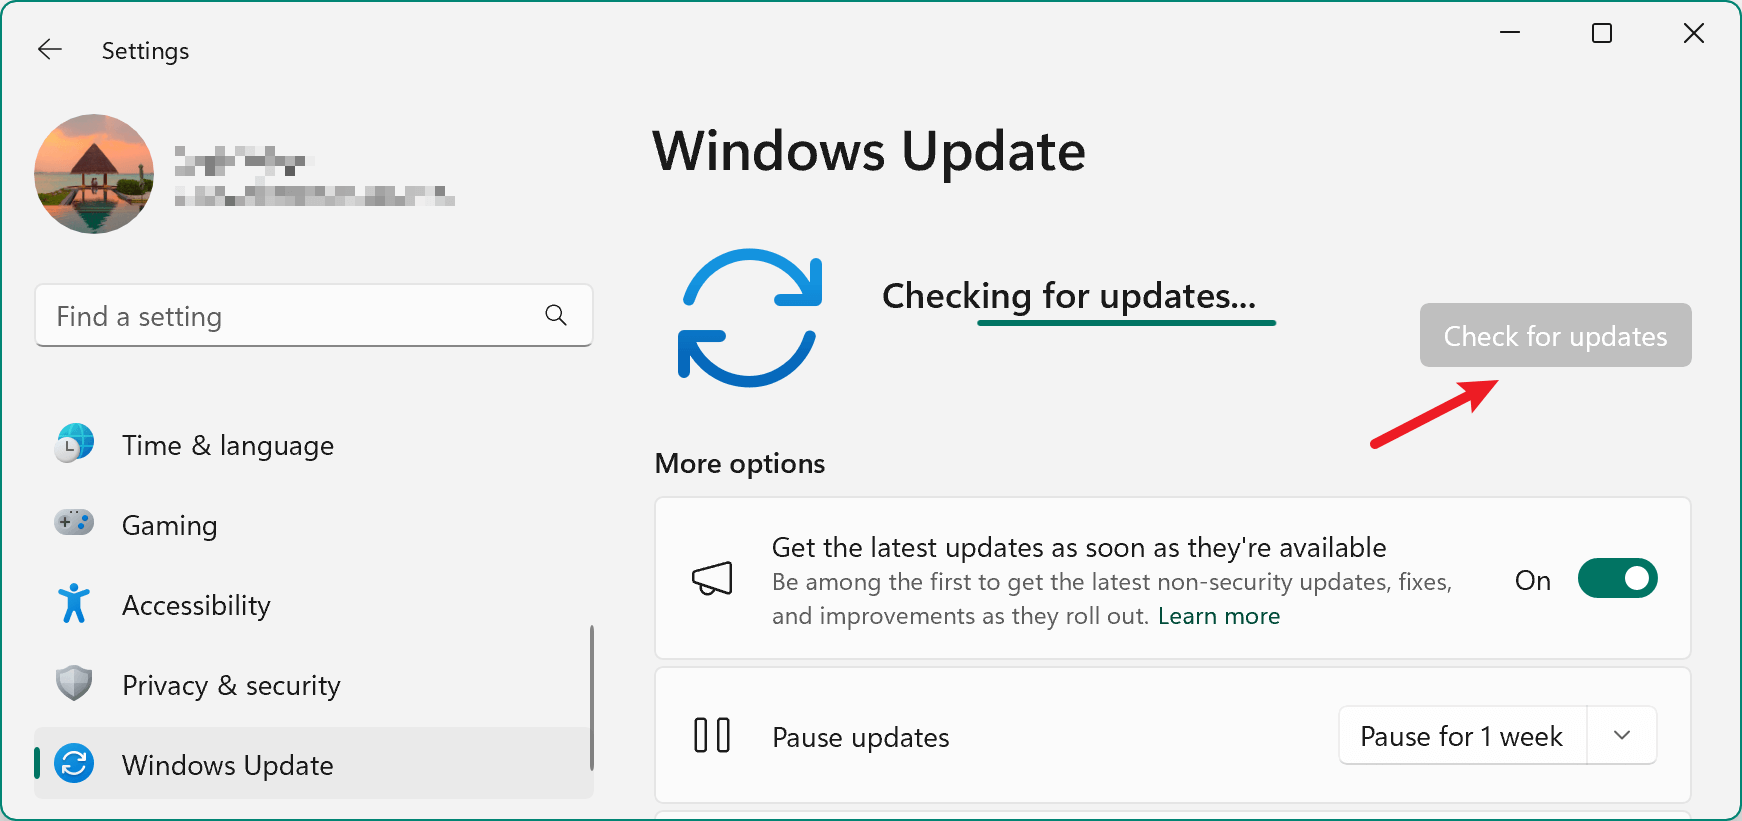
2. Keep Your System Updated
Install the latest Windows updates and drivers. Microsoft often patches bugs that affect System Restore reliability.
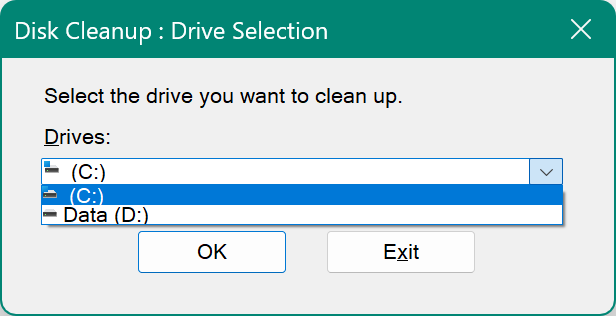
3. Maintain Disk Health
- Use built-in utilities like Disk Cleanup.
![System Restore did not complete successfully]()
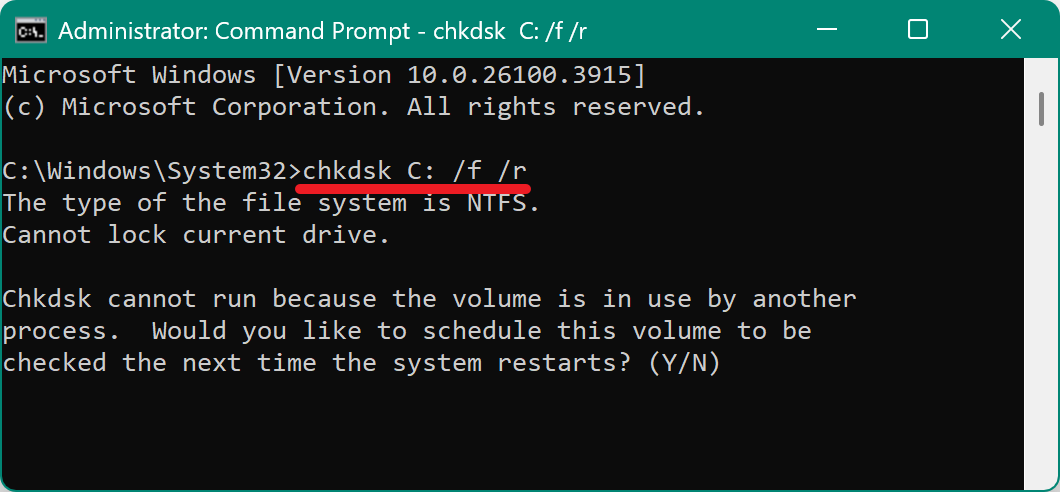
- Regularly run chkdsk to check for disk errors:
chkdsk C: /f /r
![System Restore did not complete successfully]()
4. Avoid Overuse of Optimization Tools
Registry cleaners or aggressive system optimizers can delete essential restore point data. Use them cautiously.
Alternative Solutions for System Restore for Windows 11/10
As the system restore points are stored on the same drive, if there are issues with the drive, it would cause damage to the restore points and cause the failed system restore. To avoid the problem, we suggest you use some other methods to back up and protect your system.
The reliable way to back up system is using a disk copy software. Donemax Disk Clone is a professional disk clone tool which can ensure to create a bootable copy for Windows 11/10 systems.
Donemax Disk Clone
- Reliable disk copy software for Windows 11/10/8/7.
- Create exact copy of entire disk or a single partition.
- Make a bootable clone backup for Windows system.
With the software, you can clone the system disk to another disk. It will be safe to save the cloned drive offline to avoid damage. Also, the software will clone everything including the system data, installed programs, personal settings and files.
Follow the guide below to clone the Windows 11/10 system disk to another drive with Donemax Disk Clone:
Step 1. Connect an empty and new disk as destination to the computer first. Run the software and select Disk Clone mode. Choose the system disk as source and the new disk as destination.

Step 2. You can preview the disk layout at this step. If needed, you can modify the disk layout as you want. If you cloned to an SSD, ensure to tick "Check the option if the destination is SSD."

Step 3. At last, click on the Clone button, the software will start to clone everything from the Windows system disk to the destination disk. It will take some time depending on the size of the system disk and performance of the computer.
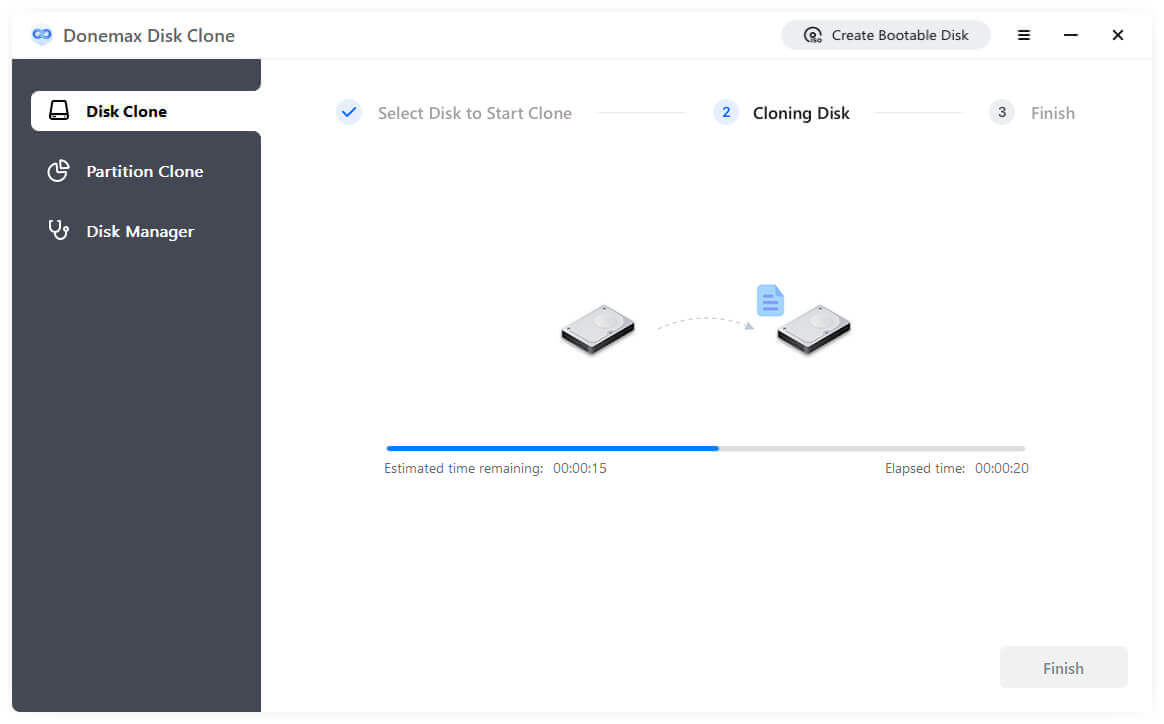
If there are issues with the system disk, you can just connect the cloned drive and start the computer from the cloned drive directly. It's fast and easy to make the computer up and running immediately.
Conclusion
System Restore is a vital safety net for Windows users, but its reliability can be hindered by corrupted files, software conflicts, or insufficient system resources. If your restore fails, don't panic. Start with basic troubleshooting, like Safe Mode or alternate restore points. Then progress through system scans, file repairs, and targeted fixes based on specific error codes. In extreme cases, recovery tools like System Image or Reset This PC can save your data and restore stability.
By understanding the causes of restore failures and applying these step-by-step solutions, you can resolve most System Restore issues on Windows 11 and 10—and avoid similar problems in the future by maintaining a healthy and well-managed system.
Also, it's highly suggested to use multiple methods to back up your system, including create system backup image, or clone the system disk with reliable disk clone software.
Donemax Disk Clone
An award-winning disk cloning program to help Windows users and Mac users clone HDD/SSD/external device. It also can create full bootable clone backup for Windows PCs and Macs.
Related Articles
- Jun 24, 2025How to Format Hard Drive on Window 7?
- Feb 18, 20257 Solutions to Fix Internal Drive Not Showing Up on Windows Without Losing Data
- Oct 11, 2024How to Format a Drive to exFAT?
- Apr 29, 2025How to Fix BitLocker Not Working? [6 Solutions]
- Mar 27, 2026Format a Disk/Hard Drive via CMD on Windows 11/10/8/7?
- May 23, 2025How to Fix Hard Drive Disappeared in Windows 10?

Contributing Writer
Maria
Maria is one of the senior writers & editors of Donemax who lives and works in Sydney, Australia. She loves PC, Mac and Internet Technology. She has 6 years of writing articles about data recovery on PC/Mac, disk cloning solution, data eraser and computer OS optimization, etc. She is also interested in testing various software and digital products.

Editor in chief
Gerhard Chou
In order to effectively solve the problems for our customers, every article and troubleshooting solution published on our website has been strictly tested and practiced. Our editors love researching and using computers and testing software, and are willing to help computer users with their problems