Written byChristinaUpdated on Oct 30, 2025
How to Upgrade a HDD to a KIOXIA SSD?
Approved byGerhard Chou
Before we start: If you want to upgrade HDD to KIOXIA SSD, you can first clone the HDD to SSD with Donemax Disk Clone. It will make an exact copy of all the data. If the HDD is a system drive, it can help you create a bootable copy SSD without reinstalling system.
PAGE CONTENT:
If your computer feels sluggish or takes forever to boot up, it's probably time to swap out that old HDD for a SSD. One of the best choices available today is a KIOXIA SSD—renowned for its speed, reliability, and cutting-edge flash memory technology. Whether you're upgrading a laptop or a desktop PC, upgrading HDD to KIOXIA SSD can drastically improve performance, loading times, and overall system responsiveness.
In this comprehensive guide, we'll walk you through everything you need to know—from understanding why KIOXIA is a solid choice, to preparing, cloning, installing, and optimizing your new SSD.
Why Upgrade HDD to KIOXIA SSDs?
Formerly known as Toshiba Memory, KIOXIA is a leader in NAND flash memory and SSD innovation. KIOXIA drives are built on BiCS FLASH™ 3D flash memory technology, offering a strong blend of performance and durability.
Key Advantages:
- High Performance: Faster read/write speeds for quicker boot and application load times.
- Reliability: Low failure rates and better resistance to shock and vibration compared to HDDs.
- Energy Efficient: Uses less power than traditional drives, extending battery life in laptops.
- Affordability: Offers competitive pricing across various storage capacities.
KIOXIA SSDs come in different product lines—EXCERIA SATA, EXCERIA PLUS G2, and EXCERIA PRO NVMe—catering to different user needs from general upgrades to gaming and professional workloads.
Performance Comparison: HDD vs. KIOXIA SSD
Here's what you can expect after upgrading:
|
Metric |
HDD |
KIOXIA SSD |
|---|---|---|
|
Boot Time |
60–90 sec |
10–20 sec |
|
App Launch Time |
5–10 sec |
1–2 sec |
|
File Transfer |
50–120 MB/s |
500 MB/s+ (SATA), |
|
Noise |
Audible spinning |
Silent |
|
Shock Resistance |
Low |
High |
Real-world usage becomes noticeably smoother—multi-tasking, booting, launching apps, and file access all feel instantaneous.
Preparing for the Upgrade from HDD to KIOXIA SSD
Before jumping into hardware installation, preparation is key. Here's what you need to do:
1. Check System Compatibility
- Interface Type: Determine whether your system supports SATA or NVMe (M.2) SSDs.
- Form Factor: Most desktops use 2.5-inch SATA SSDs. Laptops may use either 2.5" or M.2 SSDs.
- BIOS Support: Ensure your BIOS can support SSD booting. Most modern systems do.
2. Download Required Tools
- Cloning Software: Donemax Disk Clone, Macrium Reflect, or AOMEI Backupper.
- KIOXIA SSD Utility: For firmware updates and monitoring health.
3. Choosing the Right KIOXIA SSD
Your choice of SSD depends on your system specs and performance goals.
KIOXIA SSD Product Lines:
- EXCERIA SATA SSD: Ideal for everyday computing; excellent for older desktops and laptops.
- EXCERIA G2 & PLUS: Faster speeds; suited for gaming and multitasking.
- EXCERIA PRO NVMe: Top-tier NVMe performance for professionals and content creators.
Capacity Recommendations:
- 250GB–500GB: Good for light users.
- 1TB: Balanced option for most users.
- 2TB+: Best for gamers, video editors, or heavy multitaskers.
Step-by-Step Guide to Upgrading HDD to KIOXIA SSD
Let's break down the upgrade process into manageable steps.
Step 1: Clone HDD to KIOXIA SSD
1. Connect the SSD to Your Computer
Plug in the KIOXIA SSD using a USB adapter or install it temporarily in a second slot if your PC allows.
2. Download and Install Cloning Software
Install your preferred cloning tool. For beginners, Donemax Disk Clone is the best choice as it's intuitive and reliable.
Donemax Disk Clone
- Most effective and reliable disk clone software.
- Clone HDD to SSD to speed up your computer.
- Create exact copy for partition or entire disk.
3. Select the Source and Destination Drive
Run the software Donemax Disk Clone and choose Disk Clone. Select your source (HDD) and destination (SSD)

4. Change the Disk Layout.
If necessary, you can also change the disk layout on the SSD to fully use the space. Also, ensure to tick "Check the option is the destination is SSD."

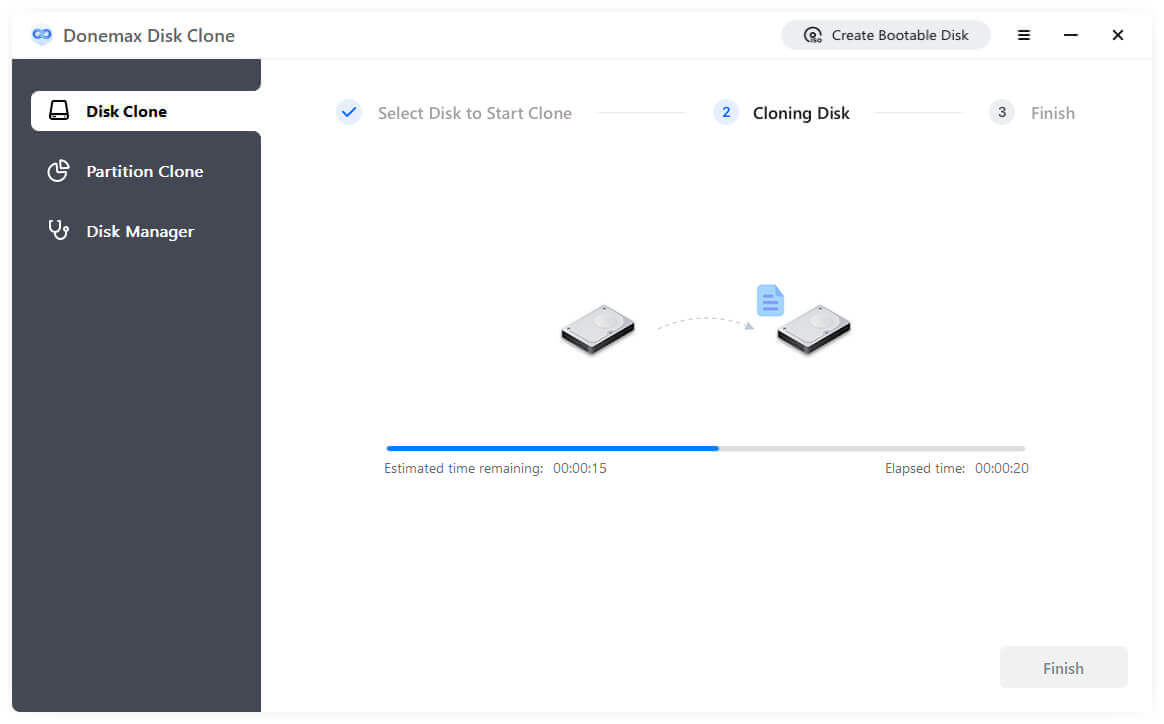
5. Start the Clone Process
Click the Clone Now button to begin cloning. This process may take 30 minutes to several hours, depending on the amount of data.
6. Safely Remove the SSD
Once cloning is done, eject the SSD and shut down your computer.
Step 2: Physically Install the KIOXIA SSD
Once the drive is cloned, it's time to install it physically in place of your old HDD. Instructions vary slightly between desktops and laptops.
For Desktop PCs:
- Power Down and Unplug Everything
Safety first—make sure all cables are unplugged and the PC is powered off.
- Open the Case
Remove the side panel. Use an anti-static strap to avoid damaging components with electrostatic discharge.
- Locate Drive Bays or M.2 Slot
- 2.5" SSD: Mount in a 2.5" bay or use a 3.5" adapter bracket.
- M.2 SSD: Locate the M.2 slot (usually near the CPU socket) and insert the SSD at a 30-degree angle.
- Connect the Drive
- For SATA SSDs: Attach a SATA power line from the power supply and a SATA data cable to the motherboard.
- For M.2 SSDs: Gently press the drive down and secure it with a screw.
- Close Up and Reconnect
Reattach the side panel and reconnect all cables.
For Laptops:
- Power Down and Disconnect
Remove the power adapter and battery (if it's removable).
- Unscrew and Open the Back Panel
Use a precision screwdriver to open the bottom cover.
- Remove the Old Drive
- Unplug the SATA or M.2 connector.
- Gently lift out the old HDD.
- Install the KIOXIA SSD
Place the SSD in the same slot and connect it properly.
- Reassemble
Close the back panel, screw it in place, and reinsert the battery if needed.
Step 3: Boot from the KIOXIA SSD
After the SSD is installed, you need to make sure the system boots from it.
Access the BIOS/UEFI:
- Power on the system and press the appropriate key (usually DEL, F2, ESC, or F12) to enter BIOS/UEFI.
- Move to the Boot Order or Boot Priority menu.
- Set the KIOXIA SSD as the first boot device.
- Save and exit (usually F10).
If the drive was cloned correctly, Windows should boot just like before—but now dramatically faster.
Step 4 (Optional): Clean Install of Windows
If you prefer a fresh start, skip cloning and do a clean install instead.
- Create a Windows Installation USB
- Use the Windows Media Creation Tool on a separate PC.
- Insert USB and Boot from It
- Choose the SSD as the install destination.
- Follow the Installation Prompts
- Format the SSD during the process for a clean installation.
- Install necessary drivers and updates post-installation.
Step 5: Optimize Your New SSD
Once booted, a few tweaks can help your SSD perform its best:
- Enable AHCI Mode in BIOS if not already active.
- Turn on TRIM: Windows 10 and later usually enable TRIM automatically.
- Disable Disk Defragmentation: SSDs don't need defragmenting and doing so can wear them out.
- Check SSD Health: Use the KIOXIA SSD Utility to monitor temperature, total writes, and lifespan.
Tips after Upgrading HDD to KIOXIA SSD
1. Format the Old HDD (Optional)
If you want to use the old drive as storage:
- Go to Disk Management
- Right-click on the HDD and choose "Format"
- Assign a drive letter
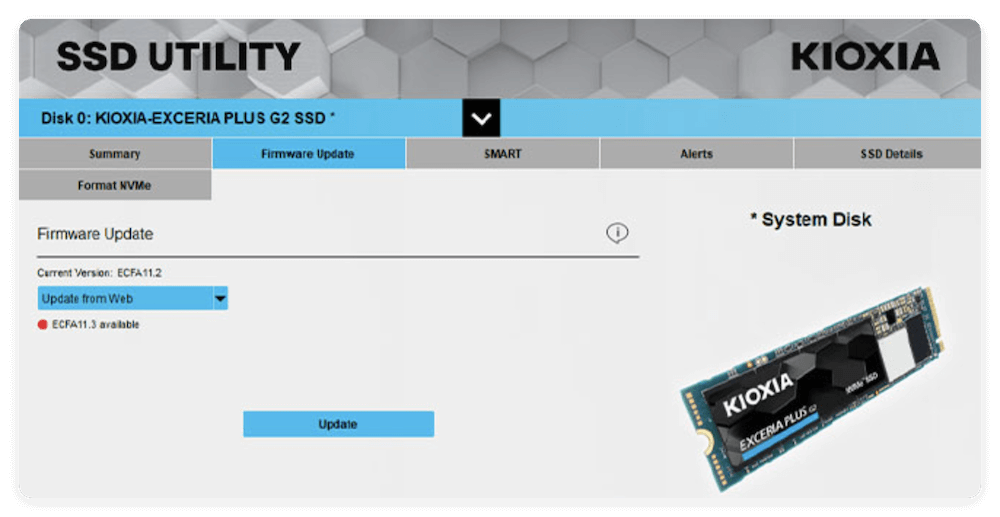
2. Update Firmware
Use KIOXIA SSD Utility to:
- Check for firmware updates
- Monitor temperature, health, and lifespan
- Enable performance-enhancing features
3. Enable TRIM
TRIM helps maintain SSD performance over time. Normally, system will enable TRIM by default. Here is how to verify TRIM is Enabled (Windows):
Open Command Prompt and type:
fsutil behavior query DisableDeleteNotify
A result of 0 means TRIM is enabled. If the result is 1, you can type the following command to enable it:
fsutil behavior set DisableDeleteNotify 0
4. Adjust Power Settings
To prevent unexpected shutdowns or sleep issues:
- Set power plan to "High Performance" in Windows
- Disable hybrid sleep mode
Troubleshooting Common Issues about Upgrading HDD to KIOXIA SSD
SSD Not Detected
- Check cable connections and ensure the drive is properly seated.
- Enable AHCI mode in BIOS.
- Try a different SATA port or USB enclosure.
Cloning Failed or Won't Boot
- Double-check clone settings and try another software.
- Use Windows Repair tool or reinstall OS if needed.
BIOS Doesn't Recognize SSD
- Update your BIOS firmware.
- Reset BIOS to default settings.
Low Drive Space After Cloning
- Use Disk Management to extend the partition.
- Ensure hidden recovery partitions aren't taking up unnecessary space.
Conclusion
Upgrading from an HDD to a KIOXIA SSD is one of the most cost-effective ways to breathe new life into your computer. With faster speeds, greater reliability, and smoother overall performance, the benefits are immediate and long-lasting. Whether you're a casual user, gamer, or creative professional, there's a KIOXIA SSD suited to your needs.
Follow this step-by-step guide, and you'll enjoy a smoother, faster, and more responsive computing experience in no time.
Donemax Disk Clone
An award-winning disk cloning program to help Windows users and Mac users clone HDD/SSD/external device. It also can create full bootable clone backup for Windows PCs and Macs.
Related Articles
- Dec 24, 2024How to Clone Old NVMe SSD to New NVMe SSD?
- Apr 09, 2024How to Replace Computer HDD With Samsung SSD?
- Mar 18, 2024How to Clone Windows Hard Drive to Crucial T500 NVMe SSD?
- Jul 13, 2023How to move C drive to a new SSD in Windows easily?
- Nov 05, 2024How to Clone NVMe SSD to SATA SSD?
- Apr 16, 2024How to Migrate Windows 11 to Samsung SSD?

Contributing Writer
Christina
Christina is the senior editor of Donemax software who has worked in the company for 4+ years. She mainly writes the guides and solutions about data erasure, data transferring, data recovery and disk cloning to help users get the most out of their Windows and Mac. She likes to travel, enjoy country music and play games in her spare time.

Editor in chief
Gerhard Chou
In order to effectively solve the problems for our customers, every article and troubleshooting solution published on our website has been strictly tested and practiced. Our editors love researching and using computers and testing software, and are willing to help computer users with their problems