
Written byStevenUpdated on Apr 16, 2024
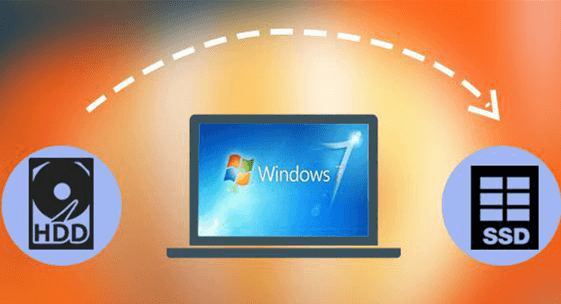
How to Upgrade HDD to SSD on Windows 7?
Approved byGerhard Chou
PAGE CONTENT:
Moving your storage from a Hard Disk Drive (HDD) to a Solid State Drive (SSD) is one of the best ways to give your Windows 7 computer a new lease on life. Even though extended support for Windows 7 has finished, many people still use it. When you upgrade to an SSD, boot times, application loading times, and general system responsiveness can all be greatly improved.
It can make your Windows 7 experience feel much faster and more enjoyable. This guide will walk you through the whole process, from learning about the benefits to moving your files and OS to the new SSD without any problems.
Why Upgrade HDD to SSD on Windows 7?
Traditional hard drives store data on spin platters, making entry times slower. However, SSDs use flash memory chips that make it much faster to get information. Upgrading to an SSD has a lot of great advantages:
✦ Very quick boot times: No more waiting minutes for your computer to start. SSDs can cut boot times by a lot so that you can get to your PC in seconds.
✦ Better loading of applications: Experience a huge drop in the time it takes for applications to load. It will feel faster and more responsive when opening web browsers and changing documents.
✦ Better system performance overall: In general, SSDs make systems faster. Moving files, opening folders, and using the system as a whole will feel a lot faster.文本
✦ Less electricity use: SSDs usually use less power than HDDs, which could make laptop batteries last longer.
✦ Less noisy operation: Since SSDs don't have any moving parts, they are quieter than HDDs, which make noise when they spin.
Before Cloning Windows 7 HDD to SSD:
Before starting the transfer process, it's important to do some planning:
1. Check For Compatibility
- SSD Choice: Make sure your computer can handle the SSD type you choose (most Windows 7 computers can handle SATA).
- Storage Space: Think about how much space you need. Even though SSDs are usually smaller than HDDs, make sure the one you choose has enough room for all of your data, both now and in the future.
- Format and Size: Make sure the SSD can properly fit into the drive bay in your computer. 2.5-inch is a common size for laptops, and 3.5-inch is a common size for PCs.
2. Backing Up Data
Make a copy of all your important files on the current hard drive. Since formatting the HDD is part of the change process, backing up will ensure you don't lose any important data. For backups, you can use an external hard drive, a cloud storage service, or another internal drive (if you have one).
3. Necessary Tools
Get the tools and items you'll need for the upgrade:
- New SSD: Pick an SSD that works with your wants.
- Screwdrivers: The right screwdrivers to open your computer case.
- SATA Data Cable: The SATA data cable goes from the SSD to the motherboard.
- SATA Power Cable: A SATA power connection is needed to connect the SSD to your power supply.
After the change, you can get a case if you want to use the old HDD as external storage.
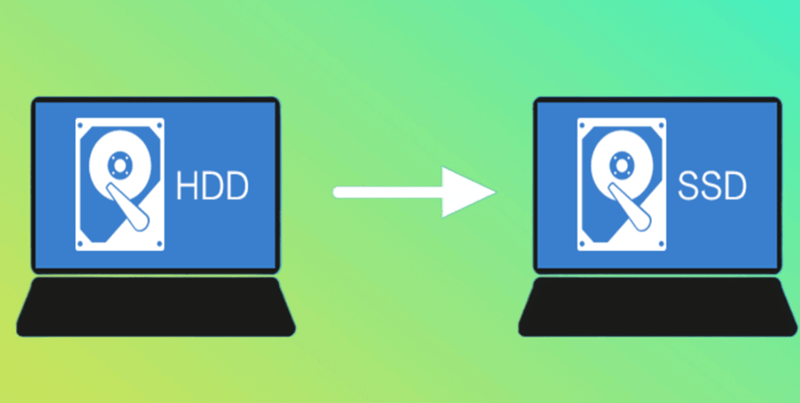
Clone HDD to SSD on Windows 7
Software for cloning drives makes moving your Windows 7 OS, apps, and files from an old hard drive (HDD) to a new solid-state drive (SSD) easy and quick. To use disk cloning tools to do the upgrade, do these things:
Step 1: Choose Cloning Software.
Choose disk cloning software with a good reputation, works with Windows 7, and can copy files to an SSD. Donemax Disk Clone, Macrium Reflect, EaseUS Todo Backup, and Clonezilla are all popular choices. Get the software you want and put it on your computer.
In this article, we will show you how to clone HDD to SSD on Windows 7 using Donemax Disk Clone:
Donemax Disk Clone
- Clone HDD to SSD on Windows 7/8/10/11, etc.
- Support to clone large HDD to a smaller SSD.
- Move all data including operating system, programs, user files, settings to the SSD.
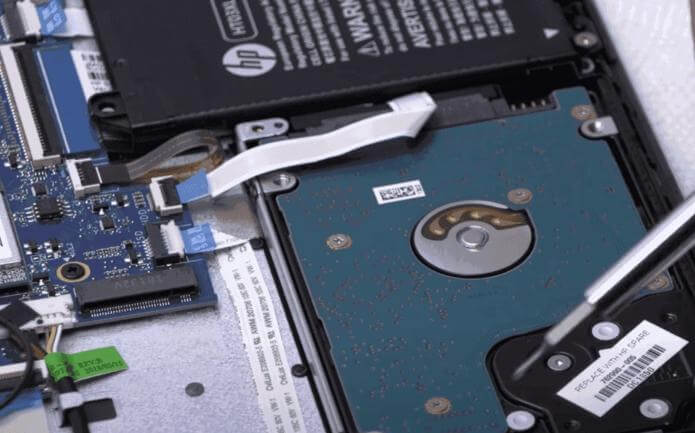
Step 2: Get Your SSD Ready.
Install the SSD into your computer by hand, following the manufacturer's directions. Connect the SSD to a free SATA port on your motherboard, and make sure it is firmly mounted in the drive bay.
Step 3: Start the Cloning Software.
Open Donemax Disk Clone on your computer. It offers two disk clone modes: Partition Clone and Disk Clone. To upgrade HDD to SSD, choose Disk Clone mode.
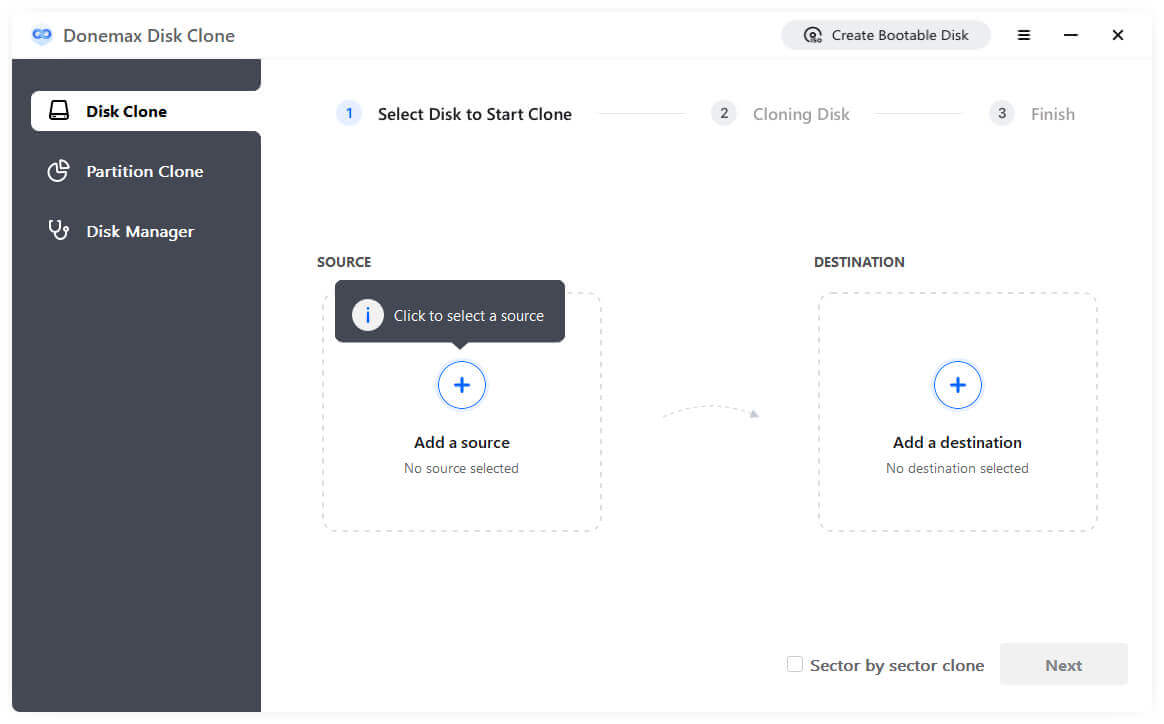
Step 4: Choose the Drives.
Just select the Windows 7 HDD as the source disk and select the SSD as the destination disk. Click Next.

Step 5: Set Up Options for Cloning.
Check out and set up any extra cloning choices the software gives you, like cloning sectors by sectors, resizing partitions, or leaving out certain files or partitions from the cloning process. Change the settings to suit your needs and tastes. Tick “Check the option if the destination is SSD.”

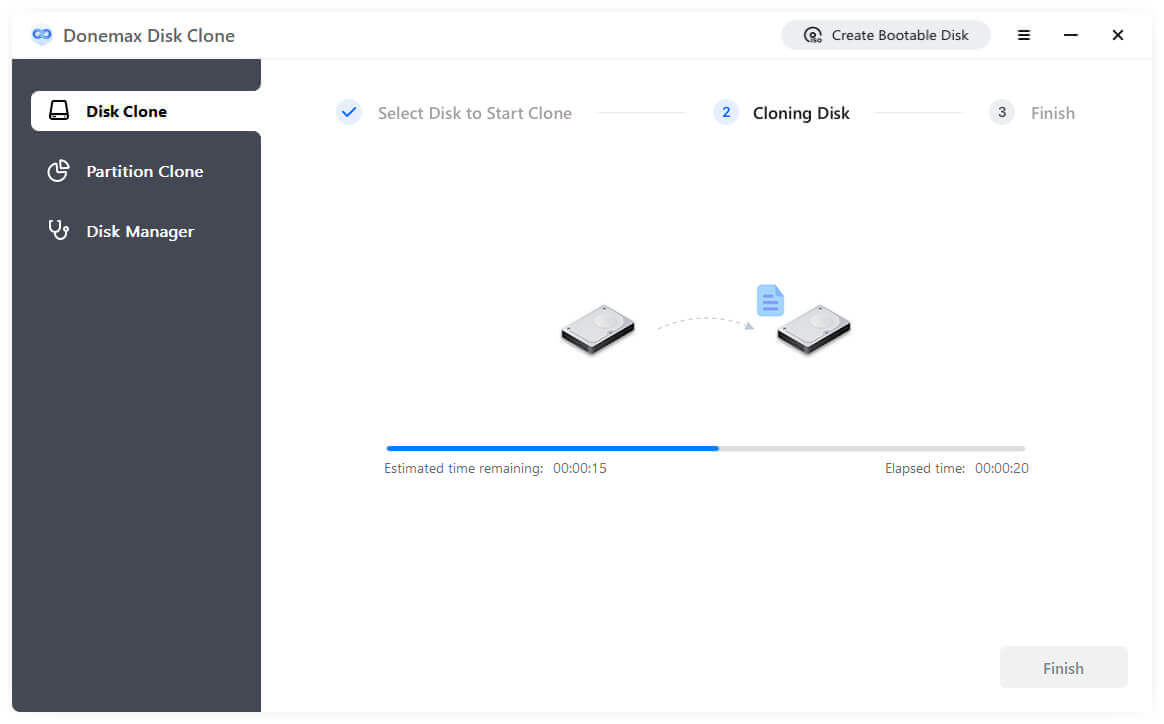
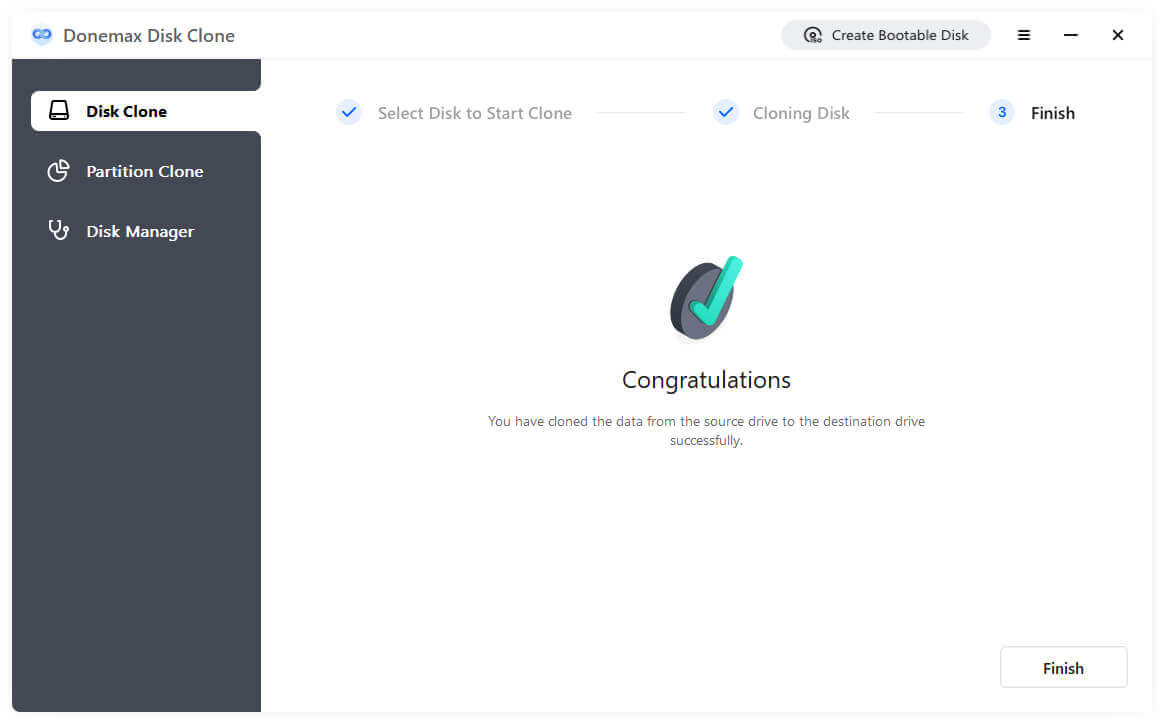
Step 6: Start the Process of Cloning.
From the software's screen, start the cloning process. The cloning process could take a while to finish, depending on how fast your gear is and how much data is being sent. Keep an eye on the progress bar that the software gives you.
Step 7: Check the Integrity of The Cloned Data.
After the cloning, ensure the copied data on the SSD is still correct. Some disk copying software has built-in functions to ensure the data transfer goes smoothly and without problems.
Step 8: Disconnect the Hard Drive.
If you want to use the SSD as the main boot drive, disconnect the HDD from the computer to avoid any start conflicts. Ensure the SSD is hooked to your motherboard's main SATA port.
Step 9: Use the SSD to Start.
Restart your PC and enter the BIOS settings to make the SSD the main boot drive. Save the changes, then leave the BIOS or UEFI settings. Now, your computer should start from the SSD and run Windows 7.
How to Set the SSD as the Boot Drive
Enter into BIOS Settings and select the SSD as the new boot drive. Restart the Windows PC form the boot drive.
Step 10: Check the System.
Once the SSD is successfully booted, check the system's speed, boot times, and how quickly applications respond to ensure the switch from HDD to SSD goes smoothly. Enjoy how much faster and more efficiently your updated Windows 7 system works.
Conclusion:
Ultimately, switching from an HDD to an SSD in a Windows 7 machine can make it run faster and easier. The benefits include faster boot times, better application loading, and general system responsiveness. It is true whether you do a clean install with backup and restore or use disk cloning software.
Following the steps in this guide, you can switch to SSD technology without problems and enjoy faster, more efficient Windows 7 computing. Take advantage of SSDs' speed and dependability to give your old machine a new lease on life.
FAQs About Upgrading HDD to SSD on Windows 7
1. How to clone HDD to SSD on Windows 11 without data loss?
Disk cloning software, such as Donemax Disk Clone, can help you clone everything from HDD to SSD:
- Download and install Donemax Disk Clone on the Windows 7 PC, then open it.
- Choose Disk Clone mode. (Make sure the new SSD is connected to the Windows 7 PC)
- Select the HDD as the source disk, select the SSD as the destination disk. Click Next.
- Tick Check the option if the destination is SSD. Click on Clone button.
- Clone all data from the HDD to the SSD.
2. How to create a bootable clone backup for Windows 7?
You can use Donemax Disk Clone to clone all data including Windows 7 OS, user files, programs, settings from the PC to the external hard drive and create a full bootable clone.
3. Why can’t boot from the cloned SSD on Windows 7?
Make sure you have set the SSD as the boot drive in BIOS settings or UEFI mode.
Your Windows 7 PC may not boot from the cloned SSD if the it uses the incorrect boot mode. Enable the UEFI boot mode if the destination disk is a GPT disk. The best boot mode for an MBR drive is legacy. If the Windows 7 PC does not support UEFI boot mode, the SSD cannot use boot mode.
4. What is the best clone tool for upgrading HDD to SSD on Windows 7?
Here is the list of top 5 clone software for Windows 7:
- Donemax Disk Clone
- EaseUS Disk Copy
- Minitool Partition Master
- DoYourClone
- Macrium Reflect
Related Articles
- Apr 21, 2024How to Upgrade HDD/SSD to Large Disk Without Data Loss?
- Jun 11, 2024How to Clone Hard Drive to Crucial P3 NVMe Plus SSD?
- Jun 09, 2023How to Clone the Boot Drive of Windows 10 to Another HDD/SSD
- Apr 16, 2024How to Migrate Windows 11 to Samsung SSD?
- Jan 23, 2024How to Clone A Disk With Several Partitions?
- Sep 12, 2023Top 3 Free and Safe Bit Copy Software for Windows

Contributing Writer
Steven
Steven has been a senior writer & editor of Donemax software since 2020. He's a super nerd and can't imagine the life without a computer. Over 6 years of experience of writing technical solutions and software tesing, he is passionate about providing solutions and tips for Windows and Mac users.

Editor in chief
Gerhard Chou
In order to effectively solve the problems for our customers, every article and troubleshooting solution published on our website has been strictly tested and practiced. Our editors love researching and using computers and testing software, and are willing to help computer users with their problems