
Written byStevenUpdated on Jun 06, 2025
Restore USB Drive to Full Capacity: A Complete Step-by-Step Guide
Approved byGerhard Chou
Tip: Before or after fixing USB drive not showing full capacity issues, you can use data recovery software - such as Donemax Data Recovery to recover inaccessible or lost files. This software can even help repair damaged USB flash drive, reformat the USB flash drive to its full capacity.
PAGE CONTENT:
USB drives are a popular and convenient way to store and transfer files. However, sometimes they may lose part of their storage capacity due to improper formatting, partitioning errors, or use with bootable software like Rufus or Etcher. If you've ever found that your 32GB USB drive only shows 2GB available, you're not alone. Fortunately, restoring your USB drive to its full capacity is usually straightforward - provided you follow the right steps.
In this guide, we'll explore why USB drives lose storage space, how to fix it across different operating systems, and what you can do to avoid this problem in the future.
Why USB Drives Lose Storage Capacity
Prior moving into the solutions, it is beneficial to understand what causes this issue. Some of the most common reasons include:
1. Partitioning by Bootable Software
Creating bootable USB drives for OS installations or recovery tools often modifies the drive's partition table. These tools (like Rufus or balenaEtcher) sometimes leave only a portion of the storage accessible.
2. Corrupted or Hidden Partitions
Corruption or hidden partitions caused by abrupt ejections or malware can render part of the USB storage invisible or unusable.
3. Formatting Errors
Improper formatting with an incorrect file system or cluster size can lead to a USB drive reporting incorrect capacity.
4. Drive Used with Other Operating Systems
Sometimes, using a USB drive with Linux-based systems or devices (e.g., Raspberry Pi) results in multiple partitions that Windows or macOS cannot interpret properly.
5. Hardware or Firmware Issues
Rarely, a faulty flash controller or degraded NAND cells can cause a drop in usable capacity, though this typically signals the drive is failing.
Initial Troubleshooting and Backup
Before attempting to restore the drive, perform the following checks:
- Try a Different USB Port or Computer: Eliminate hardware compatibility issues.
- Check Disk Space via File Explorer vs Disk Management (Windows): File Explorer may not display all partitions.
- Backup Important Data: Restoring capacity often involves deleting existing partitions and formatting the drive, which erases data.
Methods to Restore USB Drive to Full Capacity
We'll now look at how to restore full USB capacity using tools in Windows and macOS.
Fix 1. Use Disk Management (Windows) to Restore USB Capacity
Disk Management is a built-in Windows utility that allows users to view and manage drives and partitions.
Steps:
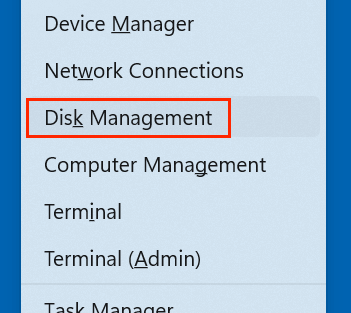
- Choose Disk Management by pressing Win + X.
![restoring your USB drive to its full capacity]()
- Locate your USB drive in the list.
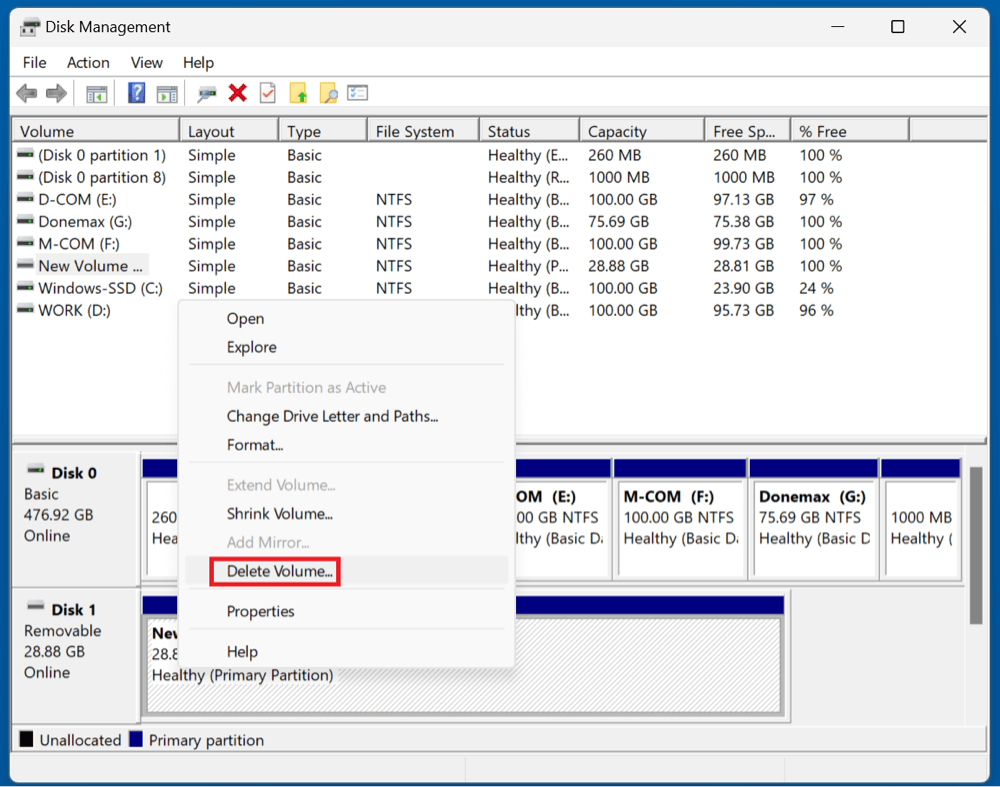
- Select Delete Volume by performing a right-click on any USB partition. Apply this to every partition.
![restoring your USB drive to its full capacity]()
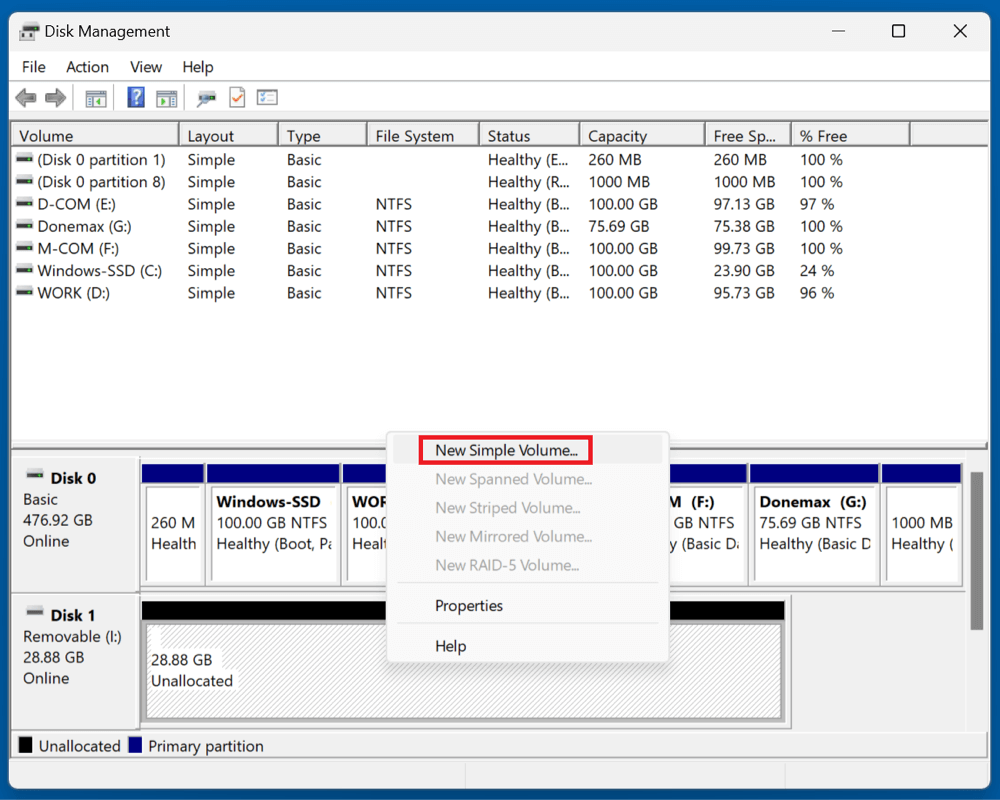
- Right-click Unallocated Space and choose New Simple Volume.
![restoring your USB drive to its full capacity]()
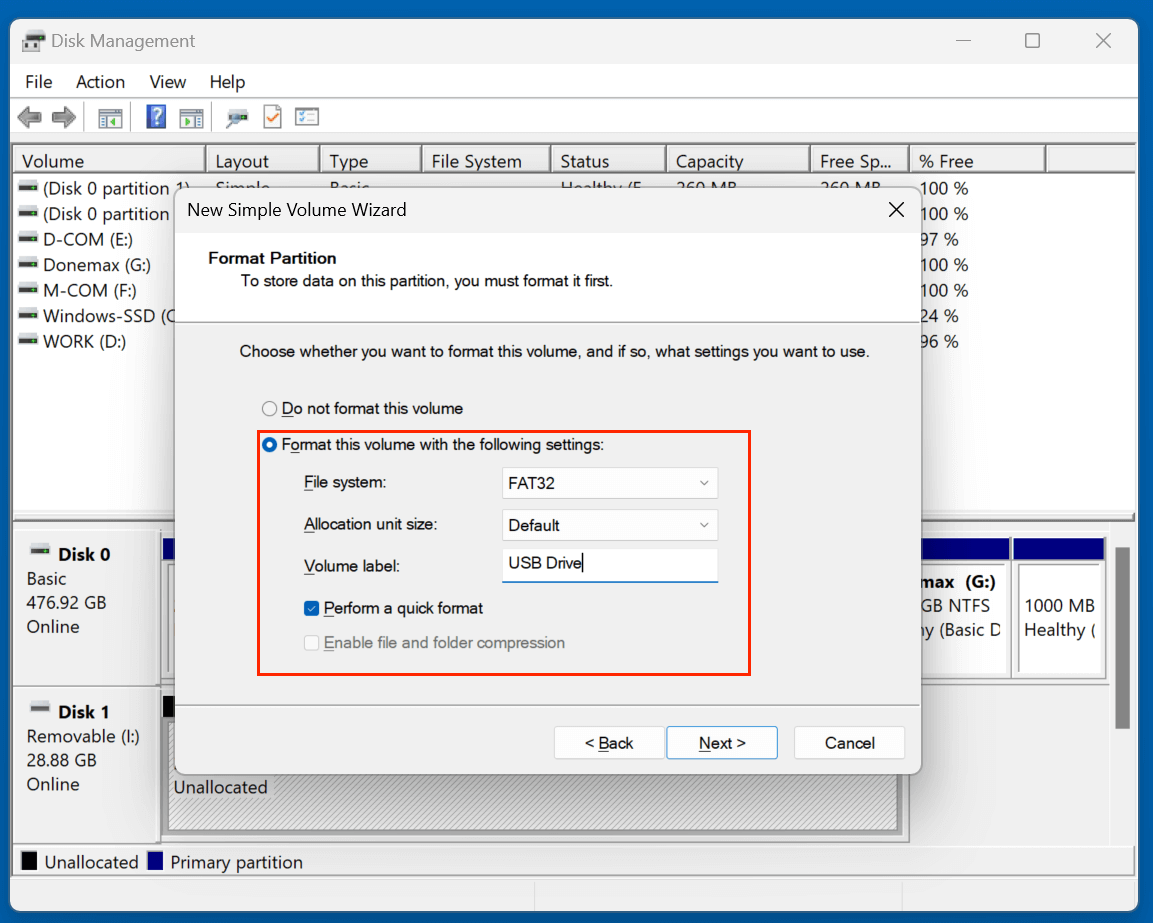
- Select a file system by following the instructions (FAT32 is widely compatible).
![restoring your USB drive to its full capacity]()
- Assign a drive letter and complete the format.
This should restore the drive to its original size.
Fix 2. Use DiskPart to Format the USB Drive
DiskPart is a powerful command-line tool that can override errors Disk Management can't fix.
Steps:
- Open the Command Prompt in the Windows search box, type cmd, and choose Run as administrator.
- In the terminal, type:
diskpart
- Type:
list disk
Identify your USB drive by its size.
- Type:
select disk X
(Replace X with the correct disk number.)
- Type:
clean
This erases all partitions.
- Now type:
create partition primary
format fs=fat32 quick
assign
exit![restoring your USB drive to its full capacity]()
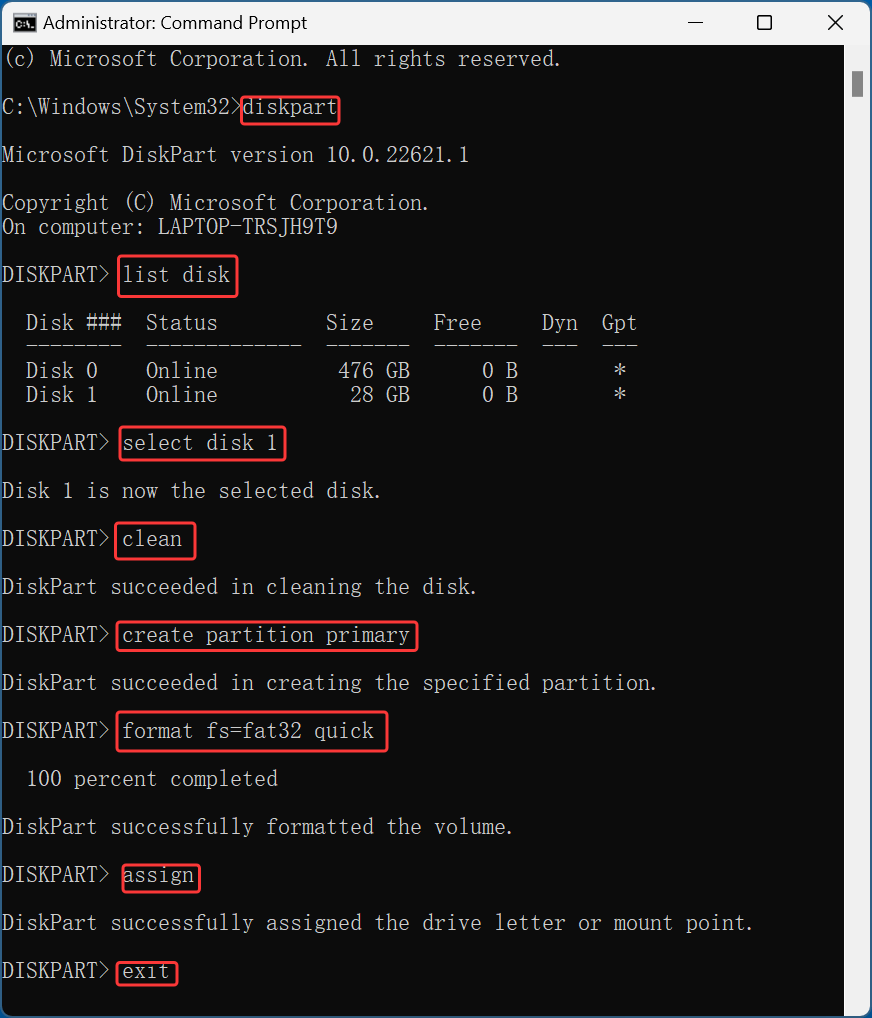
This will clean and format the USB drive, restoring full capacity.
Fix 3. Use Third-Party Tools to Repair the USB Drive
If you're uncomfortable using command-line tools, third-party partition managers offer user-friendly interfaces.
Popular Tools:
- Donemax Data Recovery
- MiniTool Partition Wizard
- EaseUS Partition Master
- AOMEI Partition Assistant
Basic Usage:
- Download and install your preferred tool.
- Open the tool and locate your USB drive.
- Delete all partitions.
- Make use of all the available space to create a new division.
- Format the drive as FAT32 or exFAT.
These tools often provide additional features such as partition recovery and error checking.
Fix 4. Use SD Card Formatter Tool
This tool, developed by the SD Association, is designed for SD and USB drives often used with Raspberry Pi or cameras. It's known to effectively restore USB drives with odd partitioning.
Steps:
- Download SD Card Formatter from the official SD Association website.
- Install and open the tool.
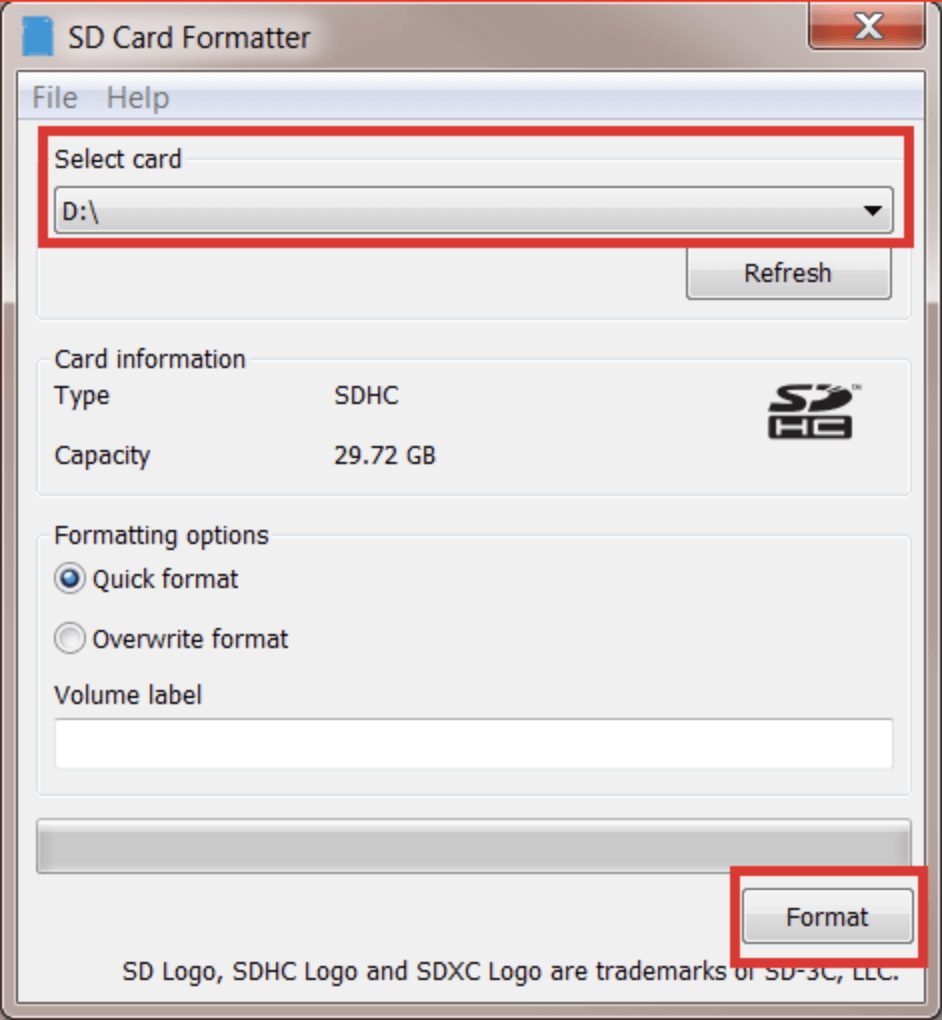
- Select your USB drive.
- Choose Overwrite Format for a full reset.
- Click Format.
![restoring your USB drive to its full capacity]()
This is especially helpful if you've used your USB for Linux distros or embedded systems.
Restoring USB Drive on macOS
If you're using a Mac and your USB drive is showing reduced capacity or acting erratically, the macOS system provides built-in tools that can help restore it to full functionality. These include Disk Utility, a graphical interface for managing disks, and Terminal, for more advanced command-line operations.
Fix 1. Use Disk Utility to Restore USB Drive Capacity
Disk Utility is the easiest and most user-friendly way to erase and repartition a USB drive on macOS. It is suitable for most users who prefer a graphical interface over the command line.
Steps to Restore Full Capacity Using Disk Utility:
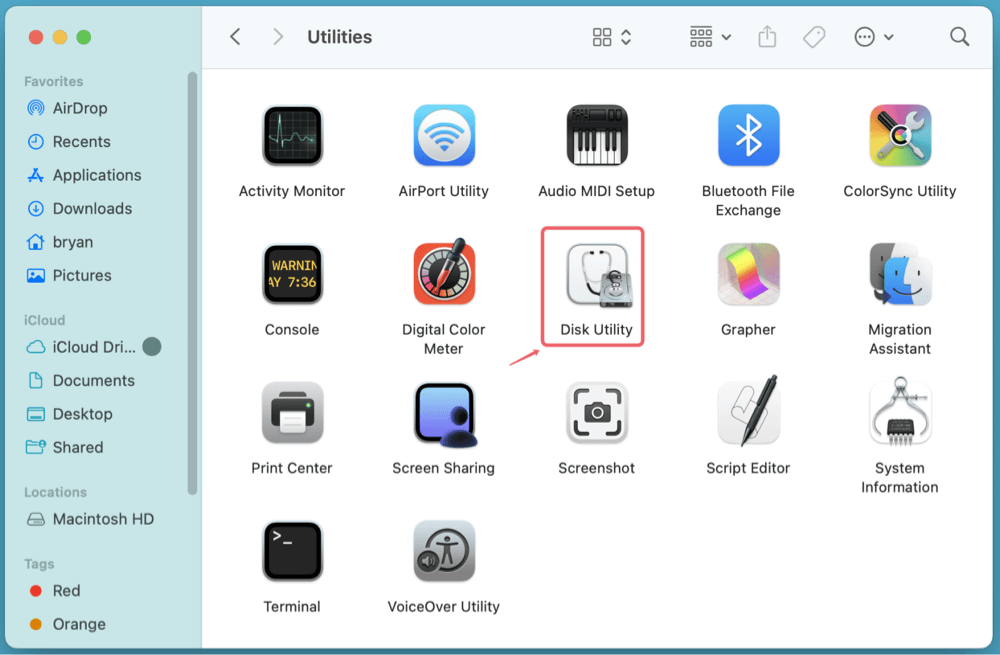
1. Launch Disk Utility
Go to Applications > Utilities > Disk Utility, or press Command + Space and search for "Disk Utility".
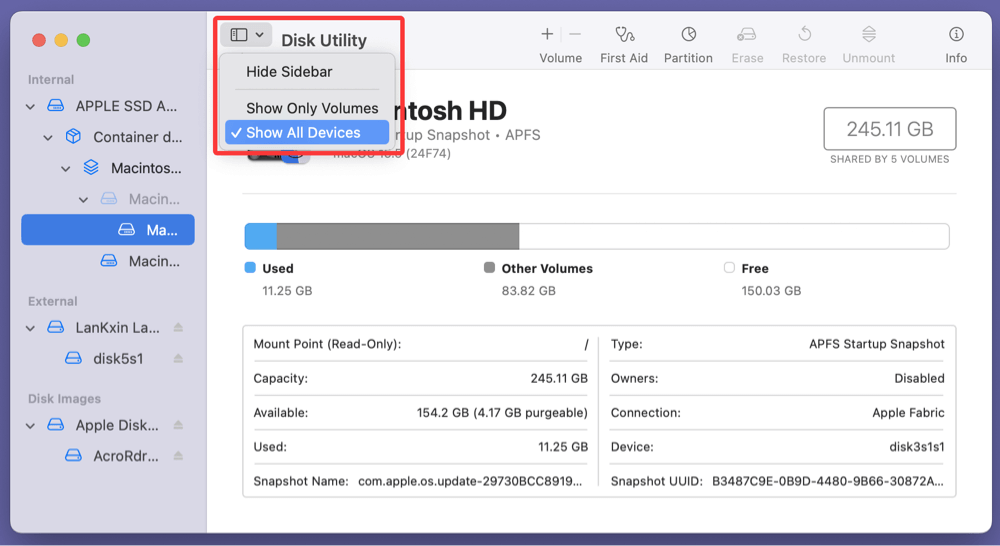
2. Show All Devices
In the top-left corner, click View > Show All Devices. This ensures you see the physical USB drive and not just the volume inside it.
3. Select the USB Drive (Not the Volume)
On the sidebar, click on the root drive of your USB (it usually displays the brand or model name). Avoid selecting just the volume (which may be indented beneath it).
4. Click Erase
Click the Erase button in the toolbar.

5. Choose Format and Scheme
For general compatibility, choose:
- Format: ExFAT (supports large files and works on both Mac and Windows)
- Scheme: Master Boot Record (MBR) if you want to use the USB with Windows as well.
- You can also choose Mac OS Extended (Journaled) or APFS if the drive will be used exclusively on Mac.
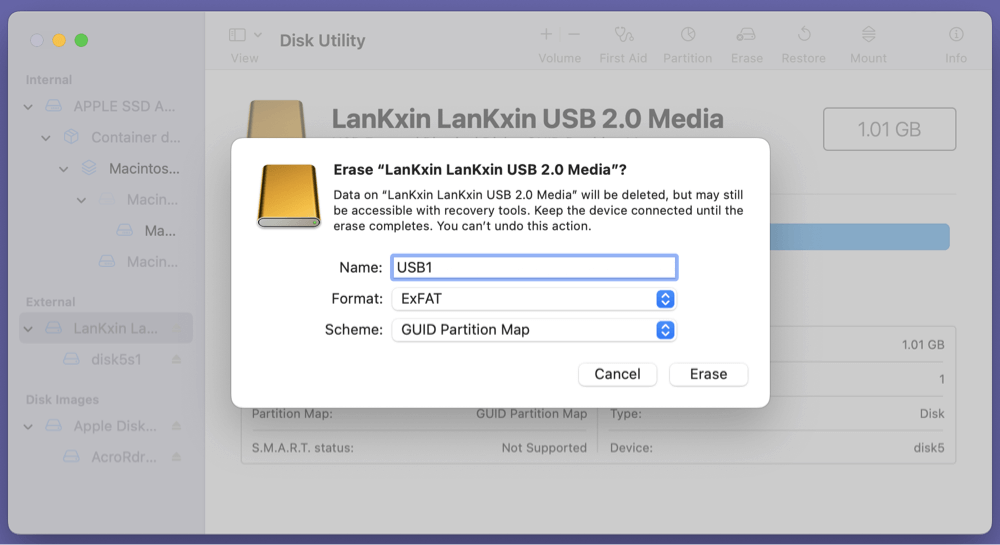
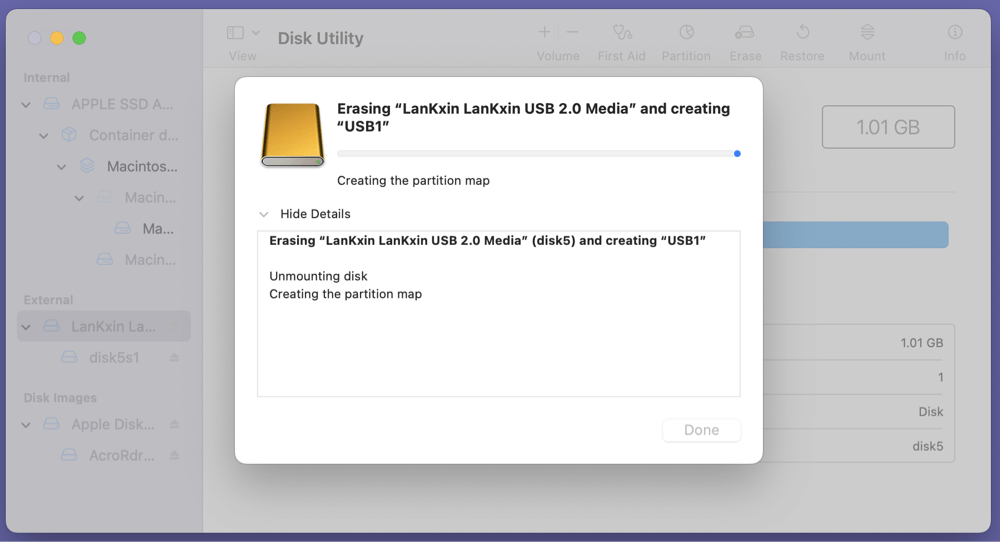
6. Click Erase to Format the Drive
This will delete all data and repartition the drive to its full capacity.
7. Eject the Drive Safely
Once the format completes, click the eject icon next to your USB drive in Disk Utility before removing it.
Why This Works
Using "Erase" in Disk Utility removes all partitions and rebuilds the volume structure. Choosing "Show All Devices" is critical - if you only erase the volume, not the whole disk, some partitions or formatting issues may remain.
Fix 2. Use Terminal to Erase & Repair the USB Drive
If Disk Utility fails, or if you need finer control over the formatting process (especially with unusual errors or failed partitions), Terminal is a powerful alternative. It can forcefully unmount, reformat, and restore USB drives.
Steps to Restore Full USB Capacity via Terminal:
1. Open Terminal
Open Disk Utility from Utilities via Applications.
2. List All Disks
Type:
diskutil list
This command will display a list of all connected disks and volumes. Carefully identify your USB drive (typically named /dev/disk4, /dev/disk5, etc.), based on its size and label.
3. Unmount the USB Drive
Use:
diskutil unmountDisk /dev/diskX
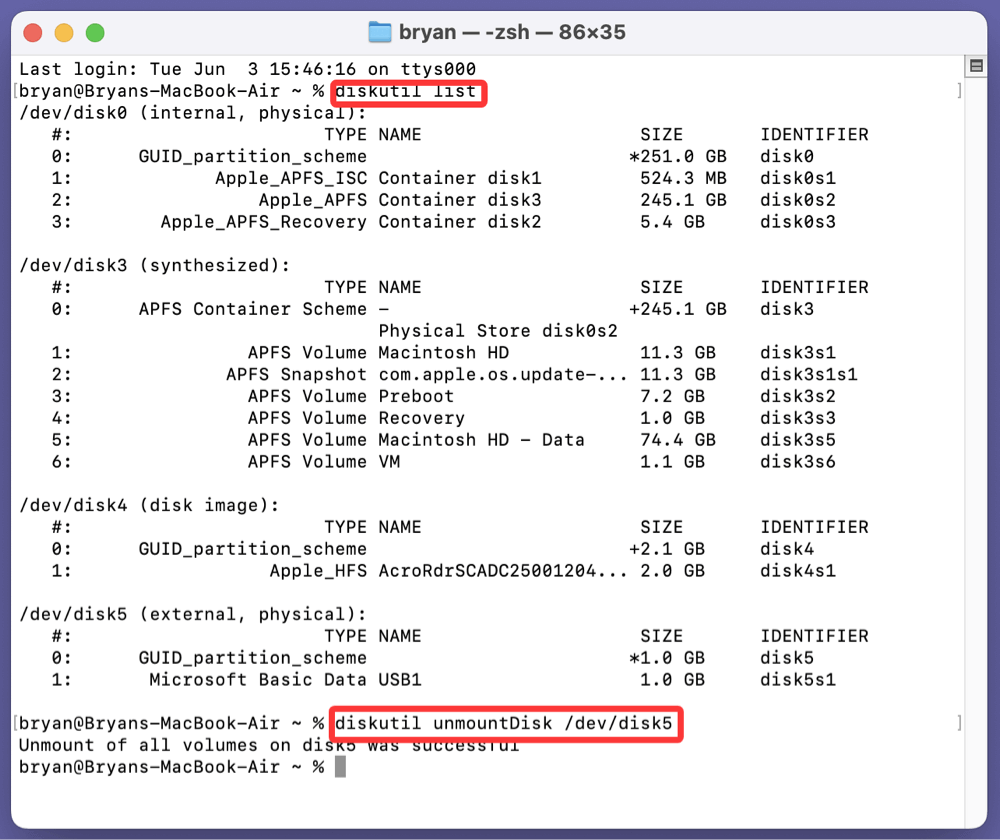
Replace diskX with the actual disk identifier (e.g., disk5). This ensures no partitions are in use when formatting.
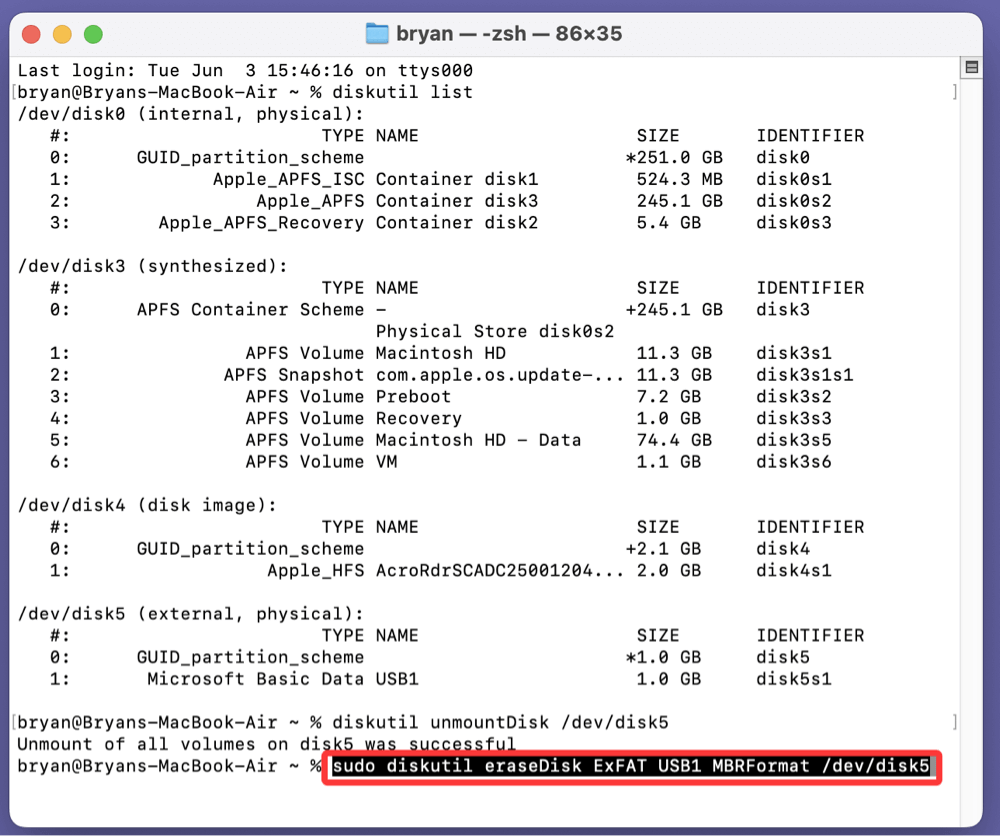
4. Erase the Disk and Reformat
Run the following:
sudo diskutil eraseDisk ExFAT USB_NAME MBRFormat /dev/diskX
Replace:
- USB_NAME with your preferred name for the USB drive.
- diskX with your actual disk identifier.
- You can also use FAT32 instead of ExFAT if needed for older systems.
5. Wait for Confirmation
Terminal will provide output detailing the formatting process. If successful, your USB drive is now restored to full capacity.
6. Eject the USB Drive
Type:
diskutil eject /dev/diskX
Or eject it from Finder before unplugging.
Common Terminal Errors and Fixes
- "Resource busy" error: This means the disk is in use. Try:
sudo lsof | grep /dev/diskX
Then kill any processes using it.
- Wrong disk selection: Always double-check the disk identifier from diskutil list to avoid wiping your main drive.
When to Use Terminal Over Disk Utility
- Disk Utility fails to erase or repartition the drive.
- The drive has multiple strange or corrupt partitions.
- You need to script or automate the process.
- You're troubleshooting compatibility for cross-platform use.
Pro Tip: Format for Cross-Platform Use
If you use the USB drive on both Mac and Windows systems, choose:
- Format: ExFAT - Supports large files and is compatible with Windows/macOS.
- Scheme: Master Boot Record (MBR) - Ensures the drive is bootable or mountable on most systems.
Troubleshooting Common Issues
Even after following the steps, issues may arise. Here are some solutions:
USB Not Detected
- Try a different port or computer.
- Update USB drivers via Device Manager (Windows).
Read-Only USB Drive
- In DiskPart, type:
attributes disk clear readonly
Windows Unable to Format
- Use SD Card Formatter or third-party tools.
Drive Still Shows Wrong Capacity
- Re-run diskpart → clean.
- Try a full format instead of a quick format.
Recover Lost Data After Fixing USB Capacity Issues
Whether deleting volume or erasing the USB drive will erase everything from the USB drive. Fortunately, data recovery software - such as Donemax Data Recovery can help you get the deleted or lost files back.
Step 1. Download and install Donemax Data Recovery on your computer (Don't install the program on the USB drive).
Step 2. Open Donemax Data Recovery and select the USB drive to start data recovery.

Step 3. Click on Scan button. It will scan the entire USB drive and find all recoverable files.

Step 4. Once the scan gets finished, just select the wanted files, click on Recover button to save them.

How to Prevent USB Drive Not Showing Full Capacity Problem in the Future?
To minimize the chances of a USB drive losing capacity again:
- Always Eject Safely: Prevents file system corruption.
- Avoid Frequent Boot Configurations: Use dedicated USBs for OS installations.
- Use Reliable Software: Stick with trusted formatting and partitioning tools.
- Regularly Scan for Malware: Especially if using the drive across multiple systems.
Conclusion
Restoring your USB drive to full capacity is not only possible, but often simple with the right tools and knowledge. Whether you're using Windows, macOS, the key is to delete all existing partitions and create a new one using the full available space.
From built-in tools like Disk Management and Disk Utility to command-line options like DiskPart and fdisk, as well as third-party applications, you have multiple paths to success.
Remember, always back up your data and handle your USB drives properly to avoid issues in the future. If you have lost data due to deleting volumes or formatting the USB drive, just use data recovery program - such as Donemax Data Recovery to recover the lost files.
Donemax Data Recovery
One of the best data recovery programs to recover deleted, formatted or lost data from PC, Mac, HDD, SSD, USB drive, SD card, camera, RAID, Sever or other storage devices.
Related Articles
- May 22, 2026How to Fix SanDisk USB Drive Not Recognized?
- Mar 06, 2025How to Use WD My Passport/My Passport Ultra on Mac?
- Sep 03, 2025Can't Open USB Drive on Windows 11/10/8/7? Fix It Now
- Jun 25, 2024Fix LaCie Hard Drive Not Mounting on Mac
- Jan 19, 2026How to Format An SSD for Mac?
- Jan 12, 2024How to Format Kingston XS1000/XS2000 External SSD on Mac?

Contributing Writer
Steven
Steven has been a senior writer & editor of Donemax software since 2020. He's a super nerd and can't imagine the life without a computer. Over 6 years of experience of writing technical solutions and software tesing, he is passionate about providing solutions and tips for Windows and Mac users.

Editor in chief
Gerhard Chou
In order to effectively solve the problems for our customers, every article and troubleshooting solution published on our website has been strictly tested and practiced. Our editors love researching and using computers and testing software, and are willing to help computer users with their problems