
Written byCharlesUpdated on May 13, 2025
How to Install A New SSD on Lenovo Laptop?
Approved byGerhard Chou
PAGE CONTENT:
Putting a new Solid State Drive (SSD) in your Lenovo laptop can make it run faster and give you a better overall experience. SSDs are popular for modern computers because they are faster than standard Hard Disk Drives (HDDs) and can quickly boot up, transfer files, and respond. Because they don't have any moving parts, SSDs are also more lasting, use less energy, and are quieter.
This guide tells you everything you need to do, step-by-step, to put a new SSD in your Lenovo laptop, from getting your data ready and backing it up to installing the drive and making it work best. This guide will help you do a smooth and successful SSD update, whether you want to make your laptop last longer or make it faster and more efficient.
Benefits of Upgrading to an SSD on Lenovo Laptop
Before you start the download process, it's helpful to know why switching to an SSD is a good idea:
- Speed: Hard Disk Drives (HDDs) are much slower than solid-state drives (SSDs). SSDs offer faster boot times, faster file transfers, and better general system responsiveness.
- Durability: Since SSDs don't have any moving parts, they are less likely to lose data due to mechanical failure and can handle being hit by a hard object.
- Energy Efficiency: SSDs use less power than HDDs, which helps your laptop's battery last longer.
- Noise Reduction: SSDs work because they don't have any moving parts. That makes working quieter.
Preparing for the Upgrade to SSD on Lenovo Laptop
1. Backup Your Data
It's important to back up your important info before you begin. You can use a portable hard drive, cloud storage, or a mix. That ensures your info is safe, even if something goes wrong during the installation.
2. Gather Necessary Tools and Components
You'll need the following tools and parts to install a new SSD:
- A suitable SSD (make sure it fits the specs of your Lenovo laptop).
- A set of screwdrivers and a small Phillips-head screwdriver will work most of the time.
- A USB to SATA adapter or an SSD case (so you can copy your current drive if needed).
- Software for cloning (if you want to copy your old drive to the new SSD)
3. Choose the Right SSD
Make sure that the SSD you buy will work with your Lenovo laptop. Check the size (2.5-inch SATA, M.2 SATA, or M.2 NVMe), the space you need, and other details like the guarantee and read/write speeds.
4. Cloning Your Existing Drive (Optional)
It is possible to copy your current drive to the new SSD to keep your current operating system, apps, and files. All of your information will be copied from the old drive to the new one during this process. With a reliable disk clone software, it's able to boot from the cloned SSD directly after putting it on Lenovo laptop.
Donemax Disk Clone is highly suggested to clone the hard drive to SSD. It's professional and effective to clone the system disk and make the cloned SSD bootable.
Donemax Disk Clone
- Secure and effective disk copy software.
- Create bootable clone for system disk.
- Compatible with both Windows and macOS.
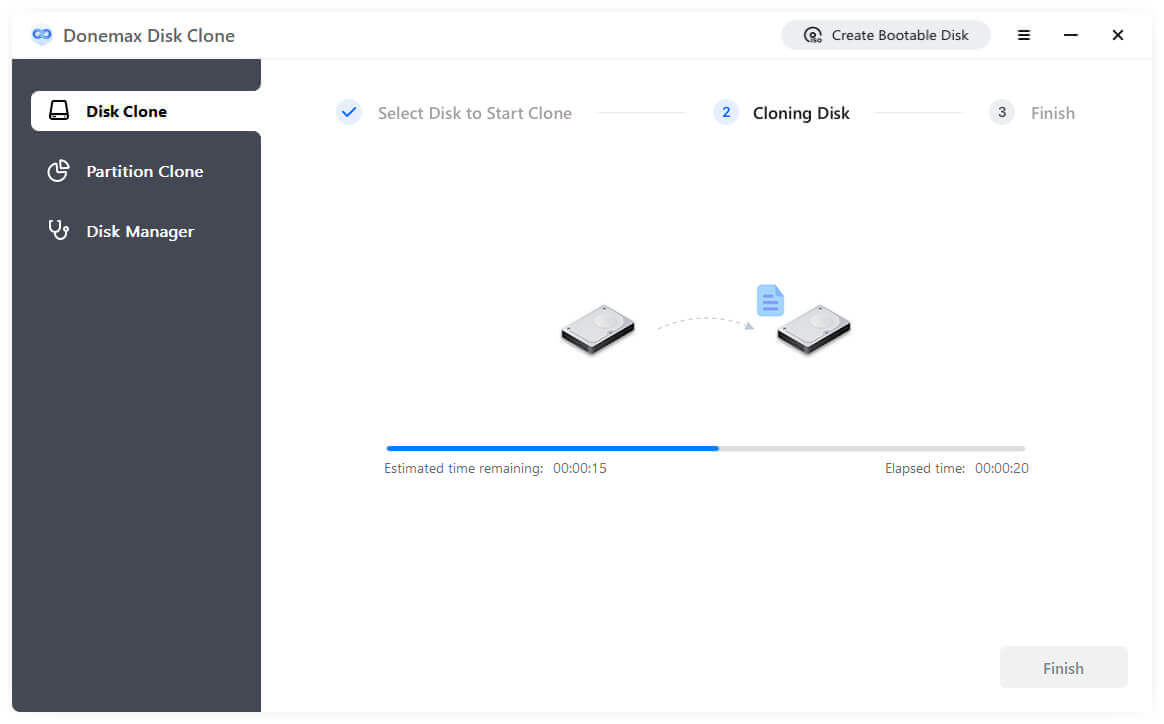
The software is easy-to-use and it's able to clone the system hard drive to the SSD easily within a few steps. Follow the guide below to start cloning the drive to SSD:
Step 1. Connect the New SSD to Your Laptop: To connect the new SSD to your laptop, use the USB to SATA cable or an external case.
Step 2. Run the software and choose "Disk Clone" mode: Ensure to create a bootable clone for the system disk, choose the "Disk Clone" mode which will clone the entire system disk. Select the original system disk of Lenovo laptop as source and select the new SSD as destination.

Step 3. Preview and edit the disk layout: After clicking "Next" button, you can preview the disk layout on the SSD. If you want, it's easy to modify the disk layout. Also, as the destination is SSD, tick the checkbox for "Check the option if the destination is SSD" option.

Step 4. Clone the system disk to SSD: At last, click the "Clone" button to continue. The software will start to clone the entire system disk from Lenovo laptop to the new SSD. It will take a while depending on the size of the original system disk.
After cloning the system disk to SSD on Lenovo laptop, you can then continue to follow the guide and replace the original system hard disk with the new SSD on Lenovo laptop.
Physical installation of the SSD on Lenovo Laptop
1. Power Down and Unplug Your Laptop
Remove the power cord from your Lenovo laptop and turn it off. Remove the battery if it is easy to access and can be detached.
2. Access the Drive Bay
Turn the laptop over and look for the drive bay. Usually, screws hold this in place, so use a knife to take them out. Open the drive bay cover slowly.
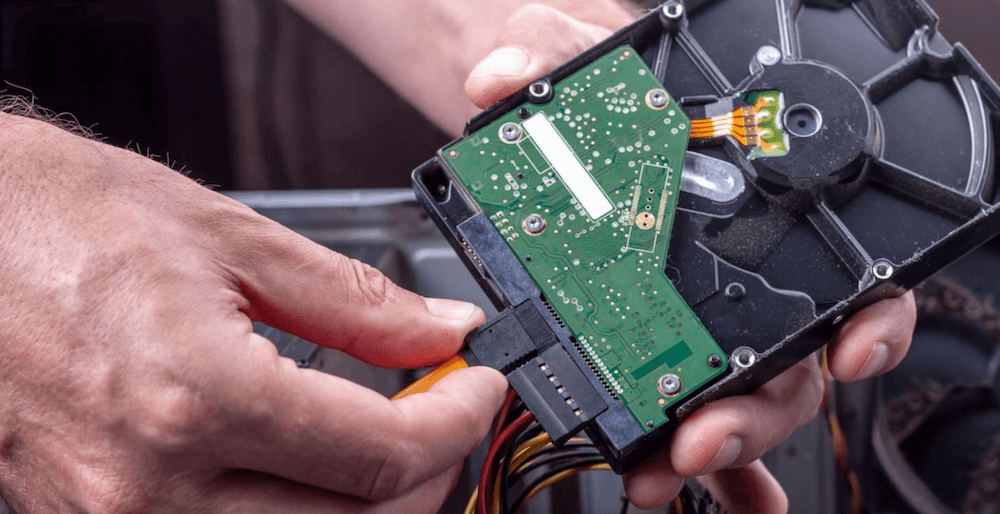
3. Remove the Old Drive
When you're ready to replace a drive, carefully disconnect it from the SATA port and remove it from the drive bay. You may need the pins and mounting brackets for the new SSD. DO NOT throw them away.
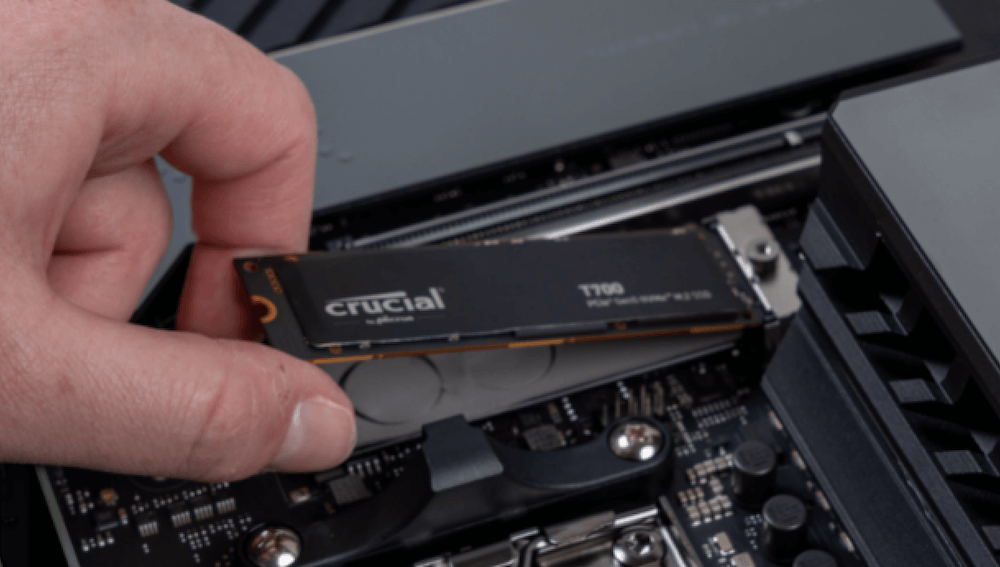
4. Install the New SSD
- 2.5-Inch SATA SSD: If you bought a 2.5-inch SATA SSD, put it in the drive bay and use the screws and mounting clamps you took off earlier to hold it in place.
- M.2 SSD: Ensure that the slot on the processor lines up with your new M.2 SSD drive, then carefully slide it in at an angle. Use the given screw to hold it in place.
5. Reconnect and Close the Drive Bay
If there is a SATA interface, connect the new SSD to it again and make sure it is safely in place. Put the cover back on the drive bay and lock it with the screws.
Post-Installation Steps after Adding SSD to Lenovo Laptop
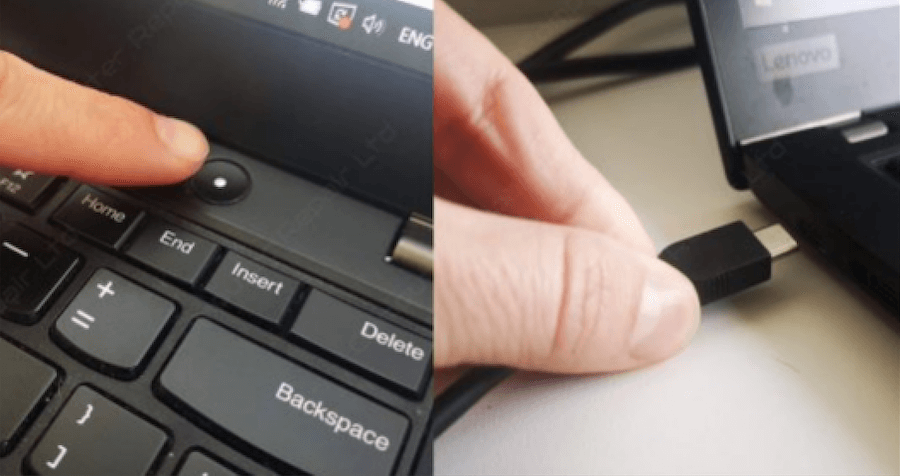
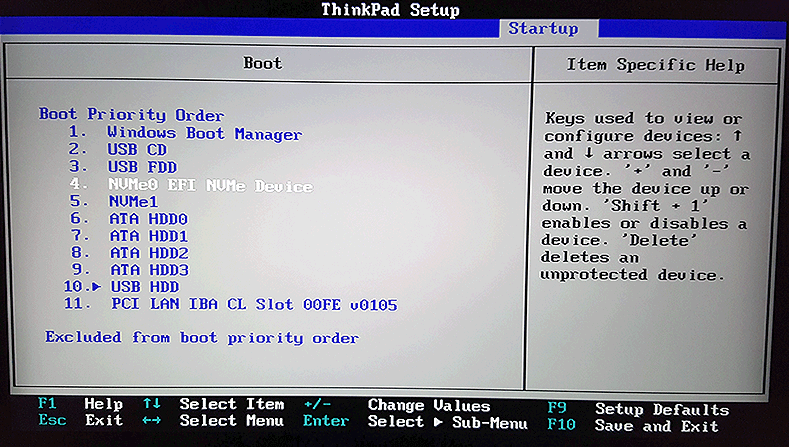
1. Power On and BIOS Configuration
Press the right key when you turn on your laptop to enter the BIOS/UEFI settings. Depending on the type of your laptop, this key is usually F2, F10, or Delete. If you copied your old drive, ensure the new SSD is detected and set as the main boot drive. Then you can restart the Lenovo laptop and it will start from the new SSD directly without reinstalling the system, programs and so on.
2. Install the Operating System
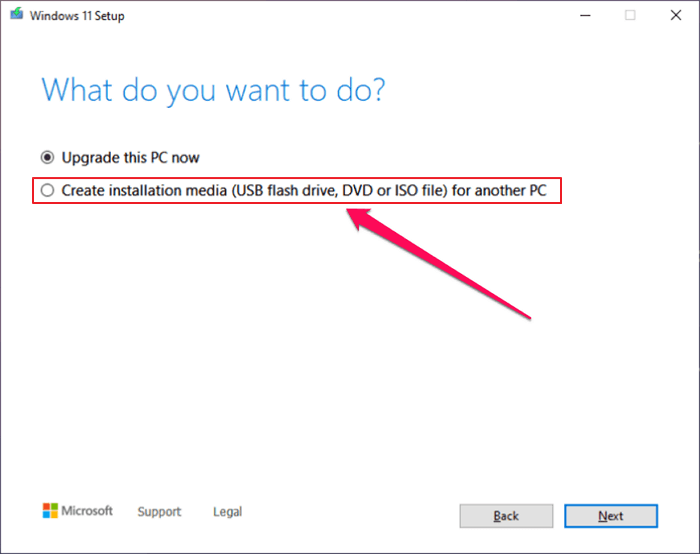
If you didn't make a copy of your old drive, you must set up your new SSD with a new operating system. You can use a bootable USB drive with the OS software for this.
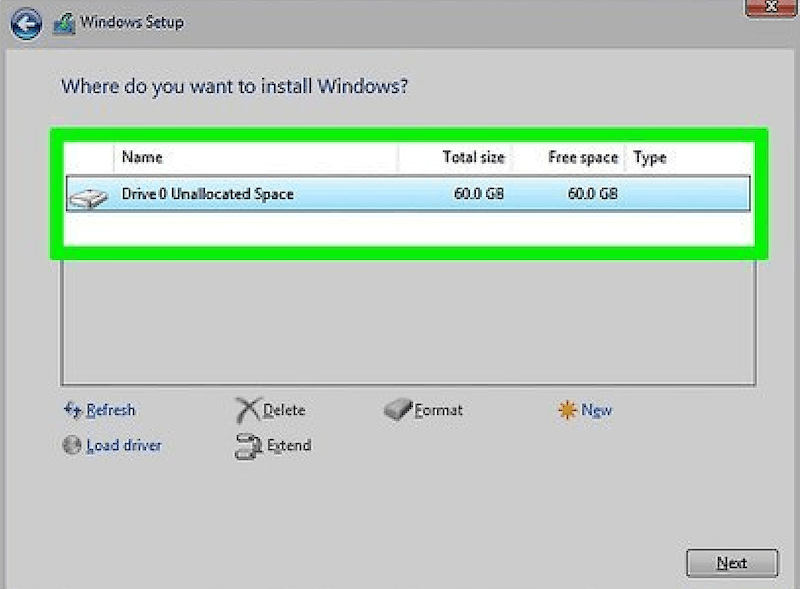
Make a bootable USB drive using the Windows Media Creation Tool. Then, plug it into your laptop and follow the on-screen directions to set up Windows on your new SSD.
3. Restore Your Data
After setting up the operating system, you can use the backup you made earlier to restore your old data. You should reinstall any necessary programs and return your files to the new SSD.
4. Optimizing Your SSD
Follow these tips to make sure your SSD works well and lasts as long as possible:
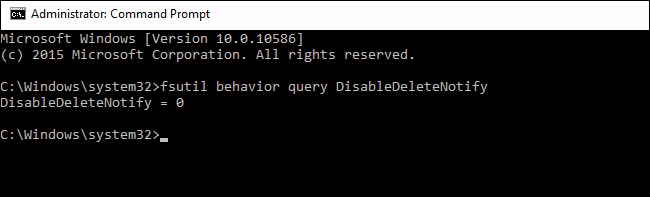
- Enable TRIM: By automatically removing useless data blocks, TRIM helps SSDs work well over time. Most modern working systems have this turned on by default, but you can check this in your system settings to make sure. To check if TRIM is enabled on your Windows 11/10 PC, from the WinX Menu, open Command Prompt (Admin), type the following and hit Enter:
fsutil behavior query DisableDeleteNotify
![install a new SSD on Lenovo laptop]()
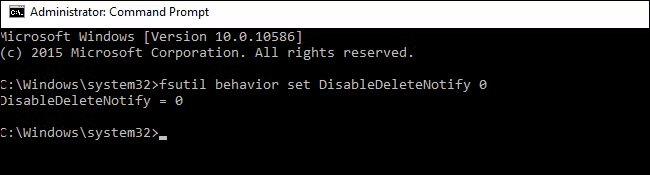
If you see a 0 it means that TRIM is enabled and you do not need to do anything further. But if you receive a 1, it means that TRIM is disabled and you need to enable it with the following command:
fsutil behavior set DisableDeleteNotify 0
![install a new SSD on Lenovo laptop]()
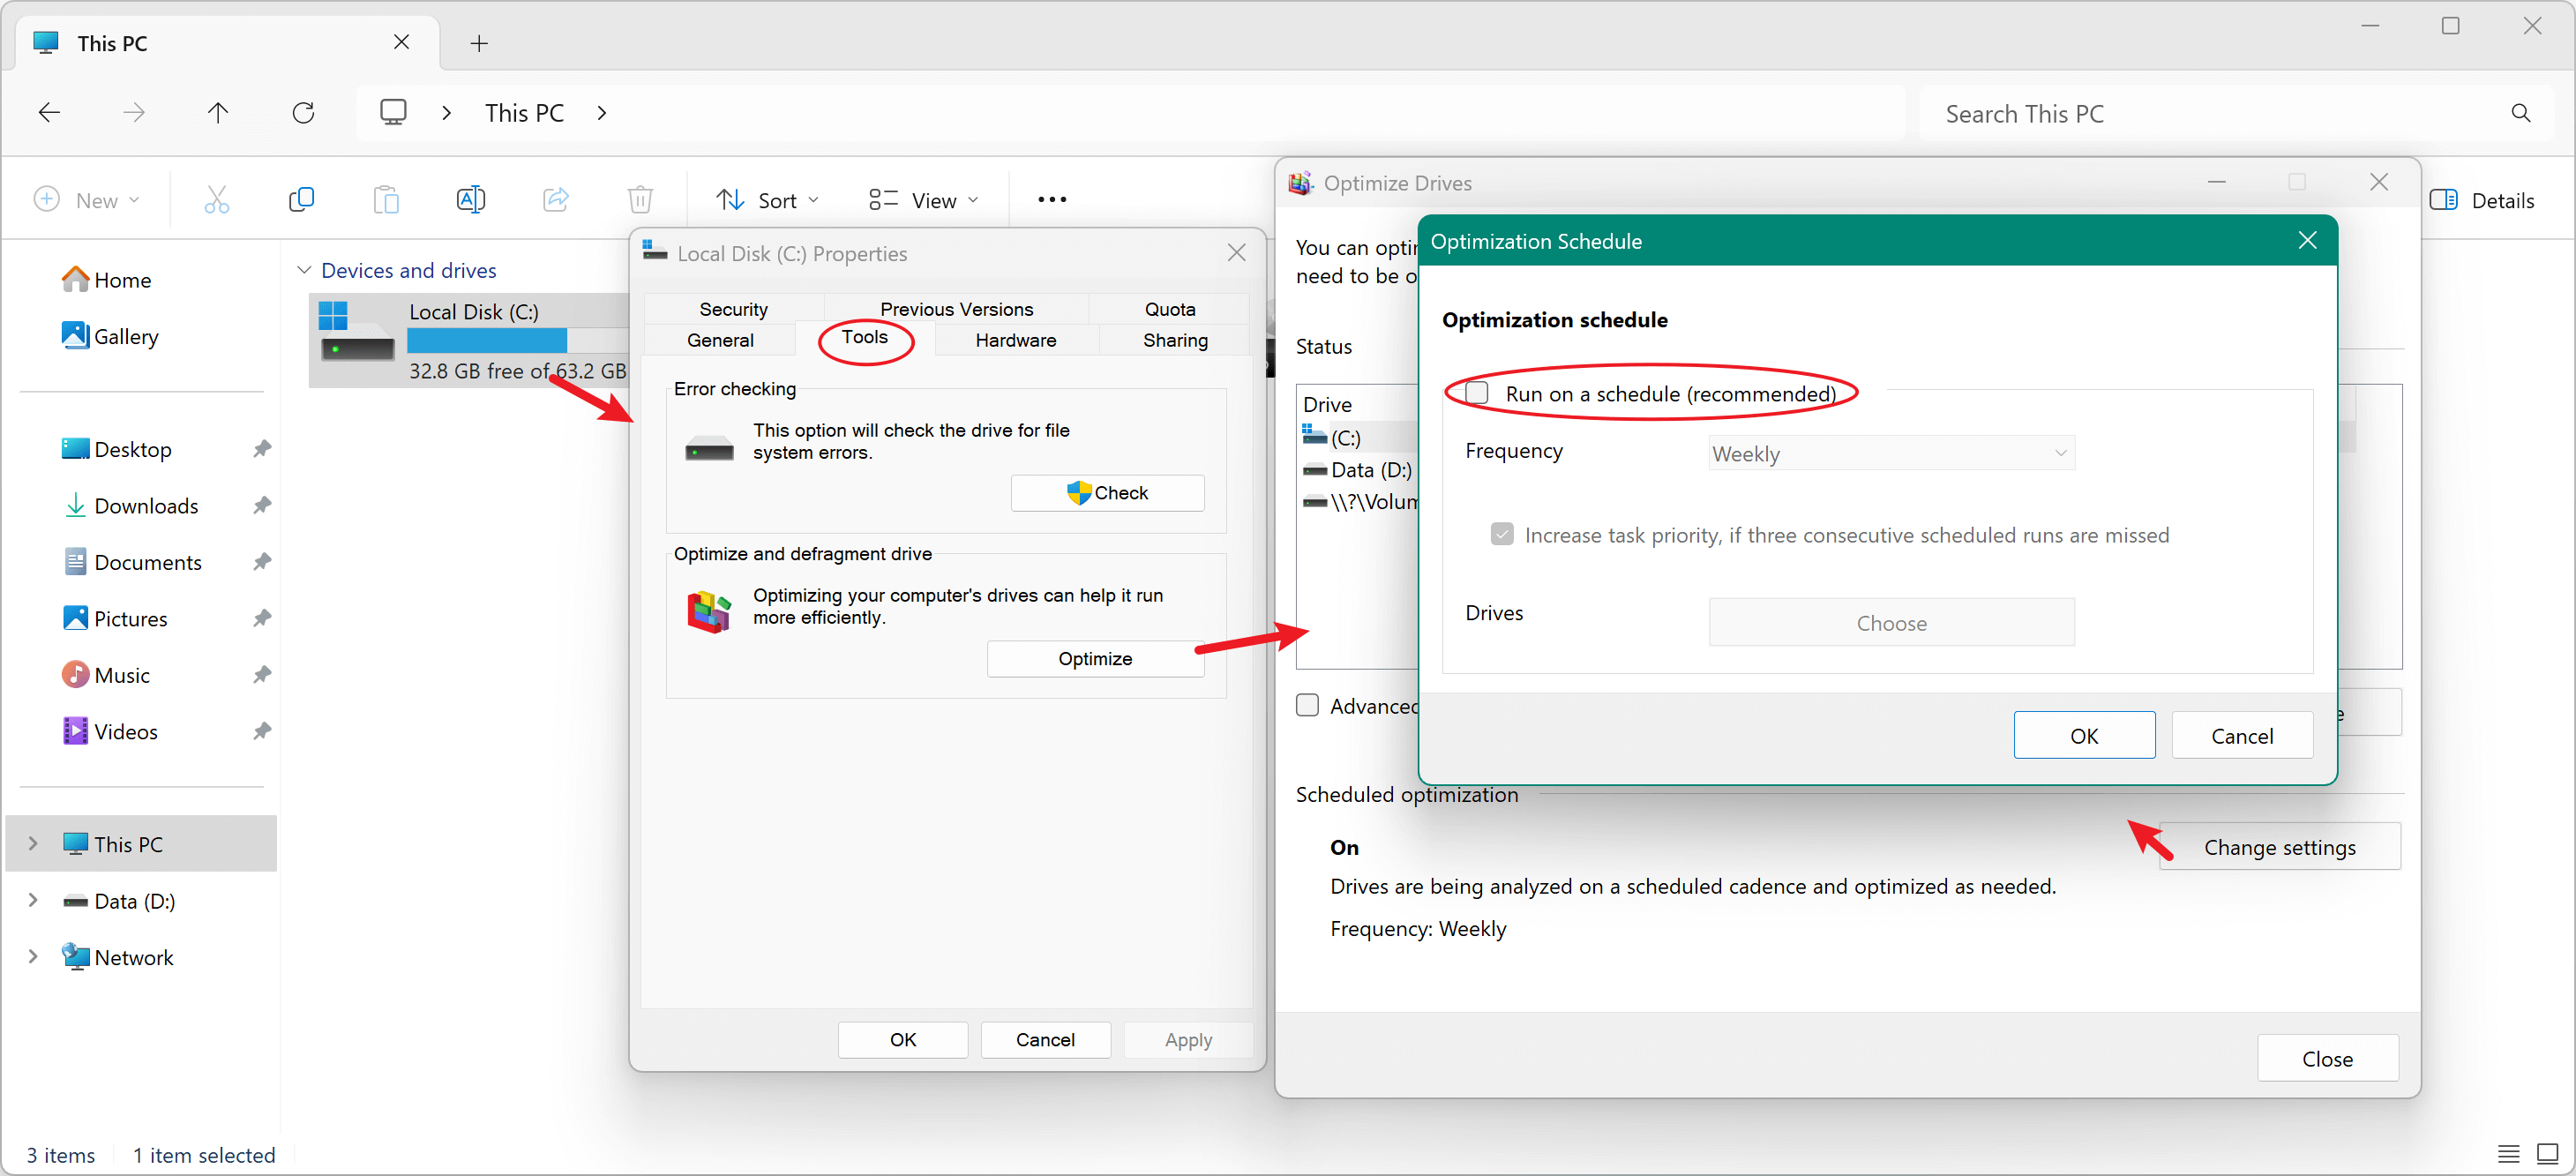
- Disable Disk Defragmentation: SSDs don't gain from defragmentation as HDDs do, and it can even shorten their life. Make sure that your operating system does not clean your disk.
![install a new SSD on Lenovo laptop]()
- Adjust Power Settings: If speed is more important than battery life, change your laptop's power settings to get the most out of its SSD.
Conclusion:
Adding a new SSD to your Lenovo laptop is a big change that makes it faster, more reliable, and better at what it does. If you carefully follow this detailed guide, you can install the software, clone your current drive if necessary, and make your system run at its best. An SSD update is a good idea because it speeds up boot times, makes applications run better, and makes the computer last longer.
No matter how much you know about technology, this change will give your laptop a new lease on life, making it easier to use and more fun. With your new SSD, you can enjoy a faster and more stable Lenovo laptop.
Donemax Disk Clone
An award-winning disk cloning program to help Windows users and Mac users clone HDD/SSD/external device. It also can create full bootable clone backup for Windows PCs and Macs.
Related Articles
- Feb 23, 2024How to Format and Unformat Sony SD Card on Windows & macOS?
- Feb 11, 2025How to Show Hidden Files on a USB Flash Drive?
- Jul 03, 2025How to Format a Drive for PS5?
- Mar 22, 2024What Is NVRAM (Or PRAM)? How to Reset NVRAM/PRAM on Mac to Solve Problems?
- Feb 11, 2025Fix SanDisk Memory Card Not Working Without Losing Data
- Sep 01, 2025How to Unlock Memory Card: A Complete Guide

Contributing Writer
Charles
Charles, who lives in Sydney, Australia, is an editor & writer of Donemax Team. He is good at writing articles related with Apple Mac computers, Windows operating systems, data recovery, data erasure, disk clone and data backup, etc. He loves reading and playing tennis in his spare time and is interested in testing new digital devices such as mobile phones, Macs, HDDs, SSDs, digital cameras, etc.

Editor in chief
Gerhard Chou
In order to effectively solve the problems for our customers, every article and troubleshooting solution published on our website has been strictly tested and practiced. Our editors love researching and using computers and testing software, and are willing to help computer users with their problems