
Written byChristinaUpdated on May 22, 2025
[6 Methods] How to Recover Deleted Pictures Folder on Mac?
Approved byGerhard Chou
Before we start: If you can't find the Pictures folder on your Mac and have lost all important photos, you can try Mac data recovery software - such as Donemax Data Recovery for Mac. It can help completely recover lost photos on Mac or restore entire Pictures folder.
PAGE CONTENT:
The Pictures folder on a Mac is where your photos, screenshots, and image files are typically stored by default. It is an essential location for managing your personal and professional images, often housing your entire photo library and important visual memories. But what happens when this folder or its contents get accidentally deleted or lost? This article will guide you through understanding the Pictures folder, how to access it, common reasons for its deletion, and most importantly, detailed methods to recover deleted photos or the entire Pictures folder on your Mac.

What Is the Pictures Folder on Mac?
On macOS, the Pictures folder is a default user directory designed to store image files and photo-related data. It is located inside your home directory, generally at:
/Users/yourusername/Pictures
This folder often contains the Photos Library, which is the database used by the macOS Photos app to organize and manage your photos and videos. Besides the Photos Library, users sometimes manually save or move images such as JPEGs, PNGs, GIFs, and screenshots here.
Key Components Inside the Pictures Folder
- Photos Library.photoslibrary: This is a package file containing your entire Photos app data - images, videos, edits, albums, metadata, etc.
- Individual image files: Some users might keep loose images or projects directly inside the folder.
- Subfolders: Sometimes users create additional folders inside Pictures for organization.
The Pictures folder works in tandem with macOS's Photos app, where photos imported or synced from iPhones or cameras usually get stored within the Photos Library. This folder is essential for those relying on macOS photo management and backups.
How to Access the Pictures Folder on Mac?
There are several ways to quickly access the Pictures folder:
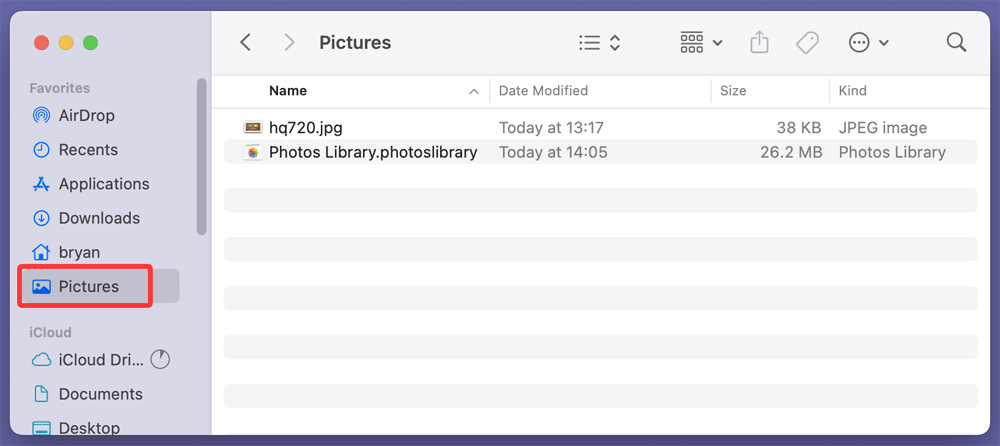
Using Finder Sidebar
- Open Finder.
- Look under the Favorites section on the left sidebar.
- Click on Pictures.
![Using Finder Sidebar To Access The Pictures Folder]()
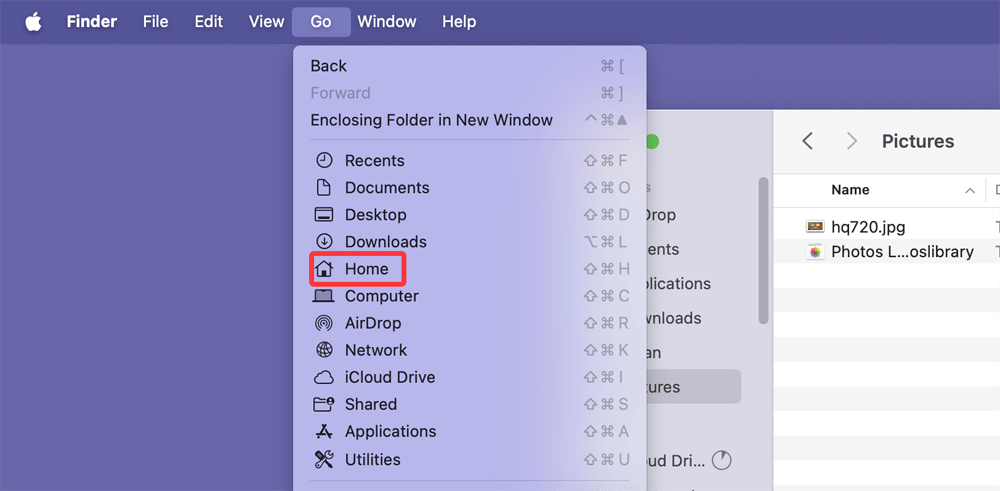
Using the Go Menu
- Click Go on the Finder menu bar.
- Select Home.
![Using the Go Menu To Access The Pictures Folder]()
- Open the Pictures folder from the home directory.
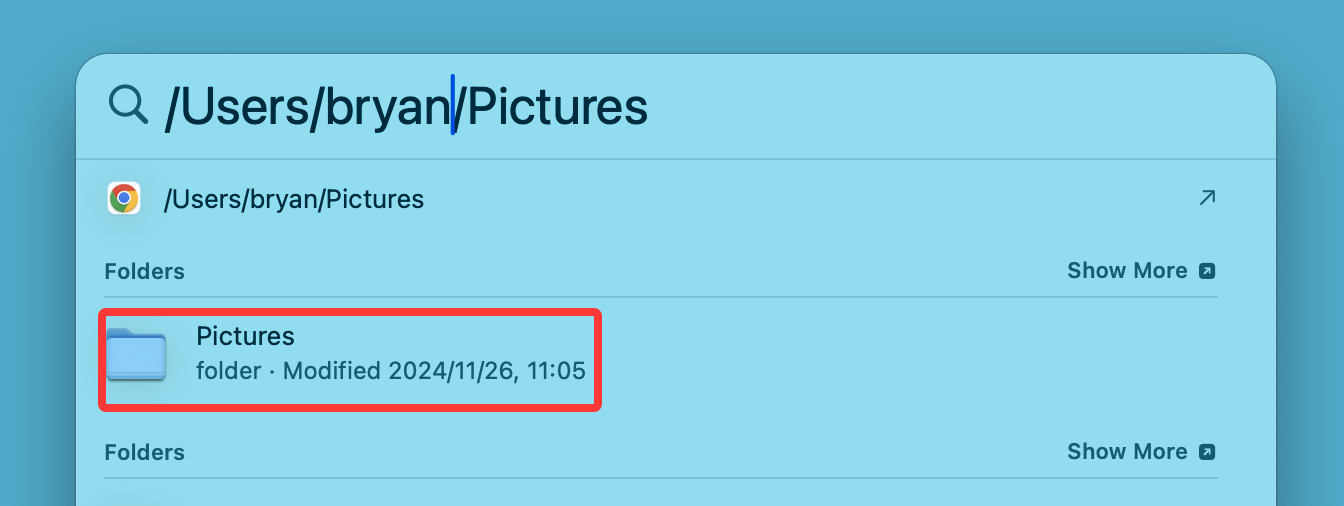
Direct Path Access
You can also open Finder and press Command + Shift + G, then enter:
~/Pictures
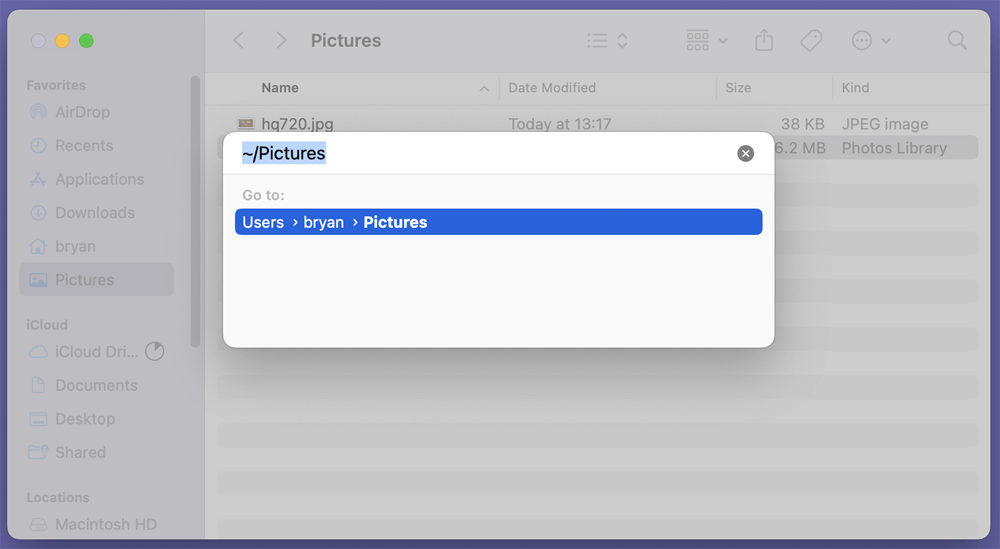
This will take you directly to the Pictures folder.
Common Reasons Why Pictures Folder or Its Contents Get Deleted
Accidental or unexpected deletion of your Pictures folder or its files can occur due to several reasons:
1. User Error
- Deleting the folder or files unintentionally.
- Moving files to the wrong location.
- Emptying the Trash without verifying contents.
2. System or Software Errors
- macOS bugs or updates causing file corruption or deletion.
- Errors during system migration or upgrades.
3. Third-party Applications
- Untrusted or buggy apps modifying or deleting files.
- Cleaning utilities or antivirus software mistakenly removing pictures.
4. Malware or Virus (Less Common)
- Malicious software deleting or encrypting photos.
Signs Your Pictures Folder or Files Are Missing or Deleted
You may notice several signs indicating your Pictures folder or its contents are missing:
1. Pictures Folder Is Missing from Finder or Home Directory
Normally, your Pictures folder should appear in the Finder sidebar under Favorites, or in the Home directory (/Users/YourUsername/). If it no longer appears in either location, it's a strong indication that the folder has been:
- Accidentally deleted
- Moved to another directory
- Hidden due to system settings or permissions changes
How to confirm:
- Open Finder > Go > Home, then look for "Pictures".
- If not visible, press Command + Shift + . (period) to show hidden files.
2. "Photos Library Not Found" or Error on Opening Photos App
If the Photos app displays an error message like:
"Photos cannot find the system photo library named 'Photos Library.photoslibrary.'"
…it likely means that the Photos Library file located inside the Pictures folder has been deleted or moved. This will prevent the app from launching your photo collection and is a clear indicator that the main data store for your images is missing.
What to check:
- Open Finder > Go > Home > Pictures.
- Look for the file Photos Library.photoslibrary.
If it's not there, proceed to recovery steps such as checking the Trash or using Time Machine.
3. Missing Albums, Photos, or Folders in Photos App
Even if the Pictures folder itself is still present, individual files may be deleted or corrupted. Within the Photos app, you might see:
- Empty albums that used to have content.
- Missing thumbnails or "!" error symbols on images.
- Sync issues with iCloud Photos due to missing local files.
This may indicate that the physical files tied to your photo library have been deleted, renamed, or moved outside the expected directory structure.
4. Photos Are Unsearchable or Do Not Open
You might try to search for a specific image or album only to find it doesn’t show up. Alternatively, clicking on a photo may result in:
- A blank image preview
- A message like "The file could not be found"
- Image preview loading indefinitely
This can occur if the file still has a reference inside the Photos Library, but the underlying image data has been lost or disconnected from the file system.
5. Pictures Folder Shows as Empty or 0 Bytes
If the Pictures folder is visible but shows "0 bytes" or no content, it could mean:
- The folder was emptied manually or by a script/tool.
- The folder's data was corrupted.
- System-level file system errors have made the files inaccessible.
How to Recover Deleted Pictures Folder on Mac?
Losing your Pictures folder or photos can feel catastrophic, but macOS offers multiple ways to recover deleted data. Here's a step-by-step guide to reclaim your deleted pictures folder or its contents.
1. Check the Trash Bin
When you delete files or folders on a Mac, they first go to the Trash before permanent deletion. This is the easiest place to check first.
How to recover from Trash:
- Click the Trash icon in the Dock.
- Browse or search for the Pictures folder or missing photos.
- Right-click the folder or files and select Put Back.
![Check the Trash Bin]()
- This will restore them to their original location.
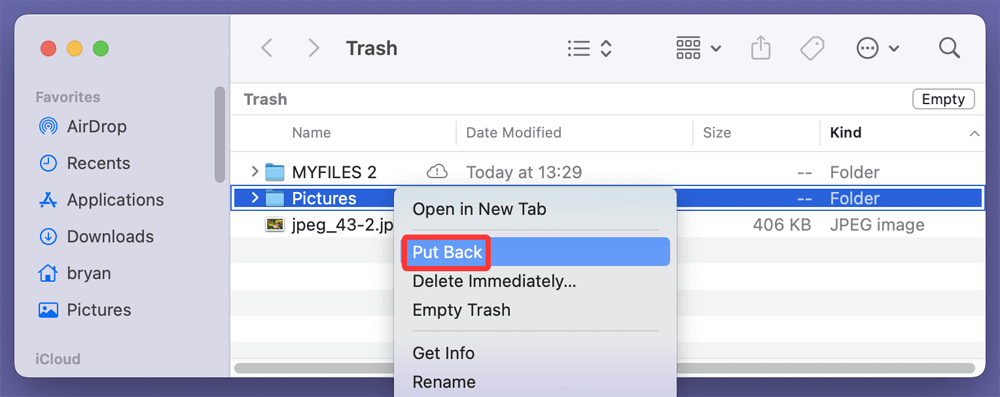
Note: If you have emptied Trash after deletion, files are permanently deleted and you’ll need other recovery options.
2. Use Time Machine Backup
Time Machine is macOS's built-in backup feature, highly effective for recovering lost files and folders.
How to recover Pictures folder using Time Machine:
- Attach the backup drive for your time machine.
- Open Finder and navigate to your Home directory or wherever the Pictures folder was.
- Choose Browse Time Machine Backups after clicking the Time Machine symbol in the navigation bar.
![Choose Browse Time Machine Backups]()
- To return to a time when the Pictures folder was present, use the timeline on the right.
- Locate the Pictures folder or missing photos.
- Select the folder/files and click Restore.
![Select the folder/files and click Restore]()
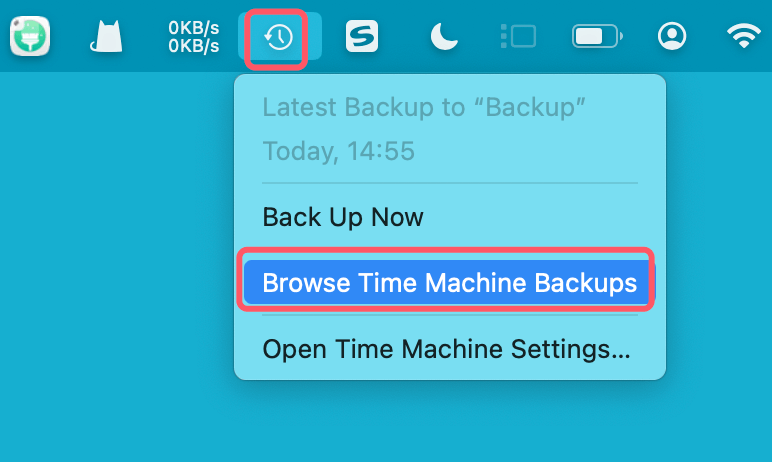
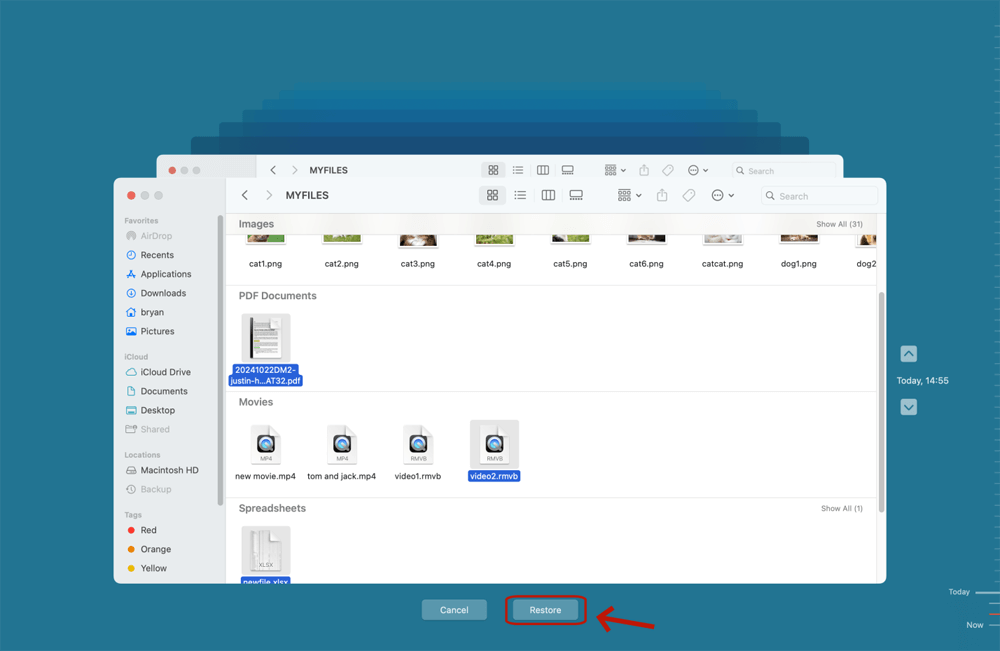
Time Machine will return the folder or files to their original location.
Note: You must have set up Time Machine backups before the deletion occurred for this to work.
3. Restore from iCloud Photos (If Applicable)
If you use iCloud Photos, your pictures might be safely stored in Apple's cloud service and can be restored if deleted locally.
To recover via iCloud:
- Open the Photos app and check the Recently Deleted album (items are kept for 30 days).
- Visit iCloud.com and sign in with your Apple ID.
- Go to the Photos section and look for deleted images.
- Restore photos or albums from the Recently Deleted folder on iCloud.
![Restore from iCloud Photos]()
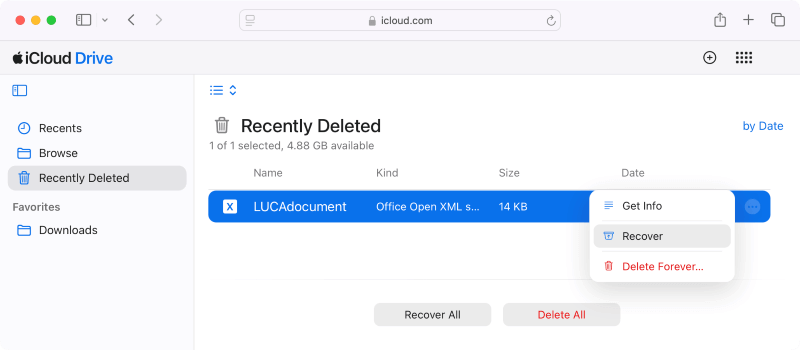
If your Pictures folder contained images synced with iCloud Photos, they might be safe in the cloud even if deleted locally.
4. Use macOS Terminal to Recover (Advanced)
Sometimes the folder might not be deleted but accidentally hidden or moved. Using Terminal commands, you can attempt to locate or unhide the Pictures folder.
Example commands:
- To check if Pictures folder exists but hidden:
defaults write com.apple.finder AppleShowAllFiles YES
killall Finder
This shows hidden files/folders in Finder.
- To find the Pictures folder via Terminal:
cd ~
ls -la
Look for the Pictures folder listing.
- To move it back if misplaced:
mv /path/to/misplaced/Pictures ~/Pictures
Note: This method requires basic knowledge of Terminal and should be used carefully.
5. Use Third-Party Data Recovery Software
If Trash is emptied and you have no backups, third-party Mac data recovery tools are your next best option. These applications scan your drive for deleted files and attempt to restore them.
Donemax Data Recovery for Mac is one of the best Mac data recovery software. It can easily and completely recover photos and pictures folders on Mac.
Step 1. Download and install Donemax Data Recovery for Mac on your Mac.
Step 2. Open Donemax Data Recovery for Mac, then select Macintosh HD to start data recovery.

Step 3. Run a deep scan by clicking on Scan button. It will find all recoverable files including photos and folders.

Step 4. Preview found files and select the Pictures folder or photos you want to recover. Recover to an external drive or different folder to avoid data overwrite.

Precautions:
- Stop using your Mac immediately after deletion to prevent overwriting files.
- Always save recovered files to a different drive or external storage.
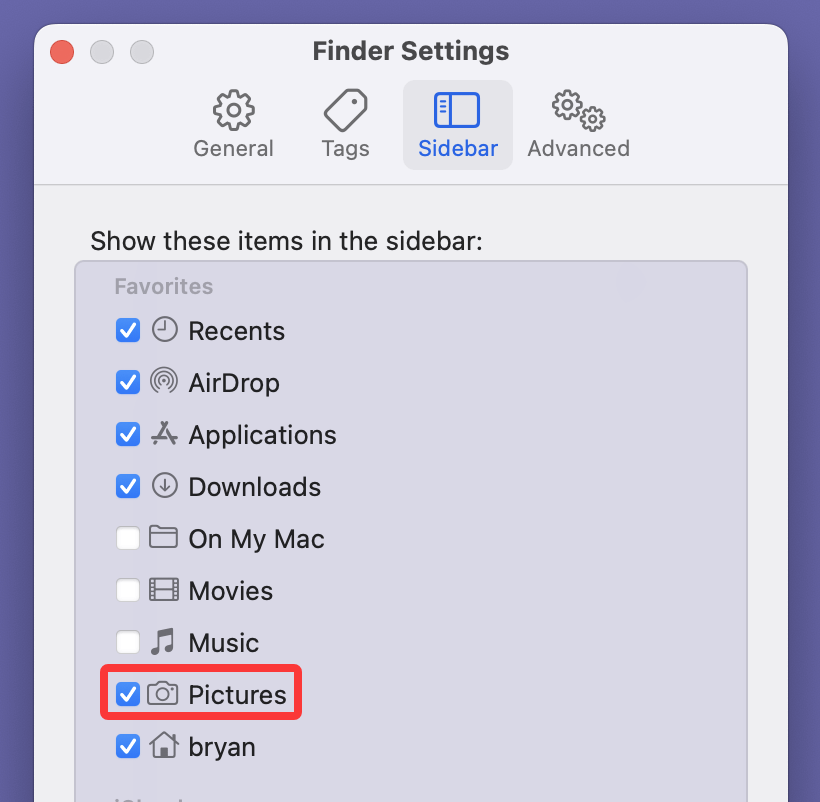
6. Check Finder settings
If you can't find the Pictures folder on Finder, just check the Settings.
⚫Open a Finder.
⚫Click Finder on Apple menu, choose Settings.

⚫When Finder Settings opens, click Sidebar, ensure Pictures is selectd.
Prevent Future Data Loss in Pictures Folder
Recovery can be stressful and time-consuming, so prevention is key.
Best Practices for Backing Up Your Photos
- Set up Time Machine for automatic backups to an external drive.
- Enable iCloud Photos for cloud backup and syncing.
- Use third-party cloud services (Google Photos, Dropbox) for additional redundancy.
- Regularly export important photos to external drives or NAS devices.
Organize and Protect Photos
- Avoid deleting or moving the Pictures folder manually.
- Use the Photos app's albums and tagging features to keep photos well-organized.
- Avoid risky apps or system cleaning tools that might delete or move files.
Conclusion
The Pictures folder on your Mac is a vital repository for your memories and images. Accidental deletion or loss of this folder can cause distress but thanks to macOS features like Trash, Time Machine, and iCloud Photos, plus third-party recovery tools, you have several options to restore your lost data. Remember to always back up your photos regularly, be cautious while handling system files, and act quickly if you notice files missing. This way, your precious pictures remain safe and accessible whenever you need them.
Donemax Data Recovery for Mac
Donemax Data Recovery for Mac is one of the best Mac data recovery software. It is easy-to-use and can help in recovering deleted, formatted, inaccessible or lost data from Mac HDD/SSD, external disk, USB drive, SD card, camera or other storage devices.
Related Articles
- Sep 01, 2025Recover Deleted iMessages or Text Messages on Mac
- May 27, 2026How to Recover Lost Data from Crashed M5 Max Mac: The Ultimate Guide
- Apr 22, 2026Top 6 Free Undelete Software for Mac: Complete Guide (2026)
- Nov 26, 2025WD External Drive Not Showing Up on Mac – How to Fix?
- Aug 22, 2025Recover Unsaved or Lost PDF Files on Mac
- Jul 07, 2025How to Recover Lost Data After Upgrading to macOS Tahoe 26?

Contributing Writer
Christina
Christina is the senior editor of Donemax software who has worked in the company for 4+ years. She mainly writes the guides and solutions about data erasure, data transferring, data recovery and disk cloning to help users get the most out of their Windows and Mac. She likes to travel, enjoy country music and play games in her spare time.

Editor in chief
Gerhard Chou
In order to effectively solve the problems for our customers, every article and troubleshooting solution published on our website has been strictly tested and practiced. Our editors love researching and using computers and testing software, and are willing to help computer users with their problems