
Written byCharlesUpdated on Jul 27, 2026

Before we start: To perform Trash data recovery on macOS 27 Golden Gate, first check if the files are still sitting in your Trash bin by opening Trash and choosing 'Put Back'. If you already emptied the Trash, stop using your Mac immediately to prevent data overwriting. Use Donemax Data Recovery for Mac to run a deep scan on your drive, preview lost files, and save them safely to an external location. Alternative native options include restoring from Time Machine backups or iCloud Recently Deleted folders.
PAGE CONTENT:
Upgrading to macOS 27 Golden Gate brings incredible new performance enhancements, refined window management, and upgraded system security. However, no matter how advanced Apple's desktop operating system becomes, human errors like accidentally deleting important documents, photos, or project files can still happen in a split second.
You might hit Command + Delete by mistake, or click "Empty Trash" before realizing that an essential folder was inside. When your Trash bin is emptied on macOS 27 Golden Gate, panic usually sets in. You might ask yourself: Are my files permanently lost, or is there a way to bring them back?
The good news is that emptying the Trash does not instantly erase your data from your Mac storage. In this guide, we will cover everything you need to know about Trash data recovery on macOS 27 Golden Gate, explaining native restoration tricks, iCloud methods, Time Machine backups, and how to recover permanently deleted files using Donemax Data Recovery for Mac.
To successfully recover deleted files, it helps to understand how macOS 27 Golden Gate manages storage and deletion under its advanced APFS file system.
When you move a file to the Trash bin, the file remains fully intact in a hidden directory on your Mac drive. It simply waits there until you choose to restore it or empty the bin.
When you click "Empty Trash", macOS 27 Golden Gate removes the file directory pointers—the internal map that tells the system where your file begins and ends. The physical storage space where your file sits is marked as "available space."
Because the actual binary data stays on your solid-state drive (SSD) or hard drive until new files write over that exact space, your lost files are still recoverable. However, continuous web browsing, downloading new software, or saving new files can overwrite that space. Therefore, acting fast is the most critical factor in successful data recovery.
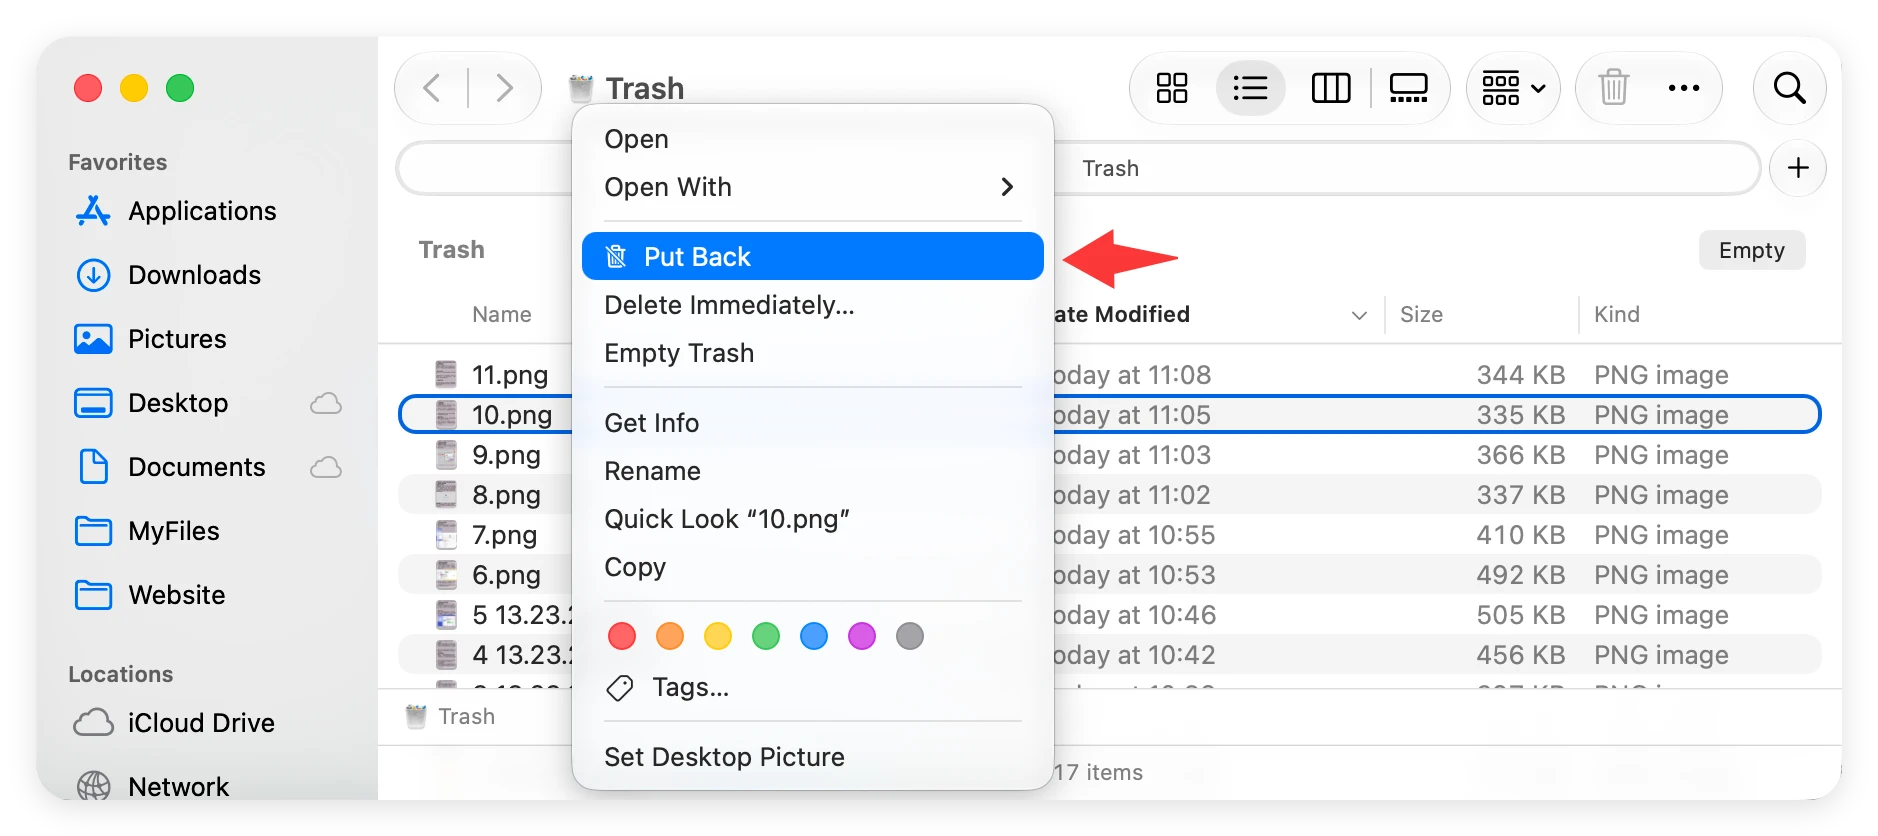
If you have not emptied your Trash bin yet, getting your files back takes only two simple clicks.
Step 1: Open Trash. Click the Trash icon located on your Mac Dock to open the Trash folder.
Step 2: Locate Your Files. Scroll through the items to locate the deleted files or folders you want back.
Step 3: Click 'Put Back'. Right-click (or Control + click) on the file, then select Put Back from the context menu.
Step 4: Verify Restoration. macOS 27 Golden Gate will automatically return the item to its original folder location.
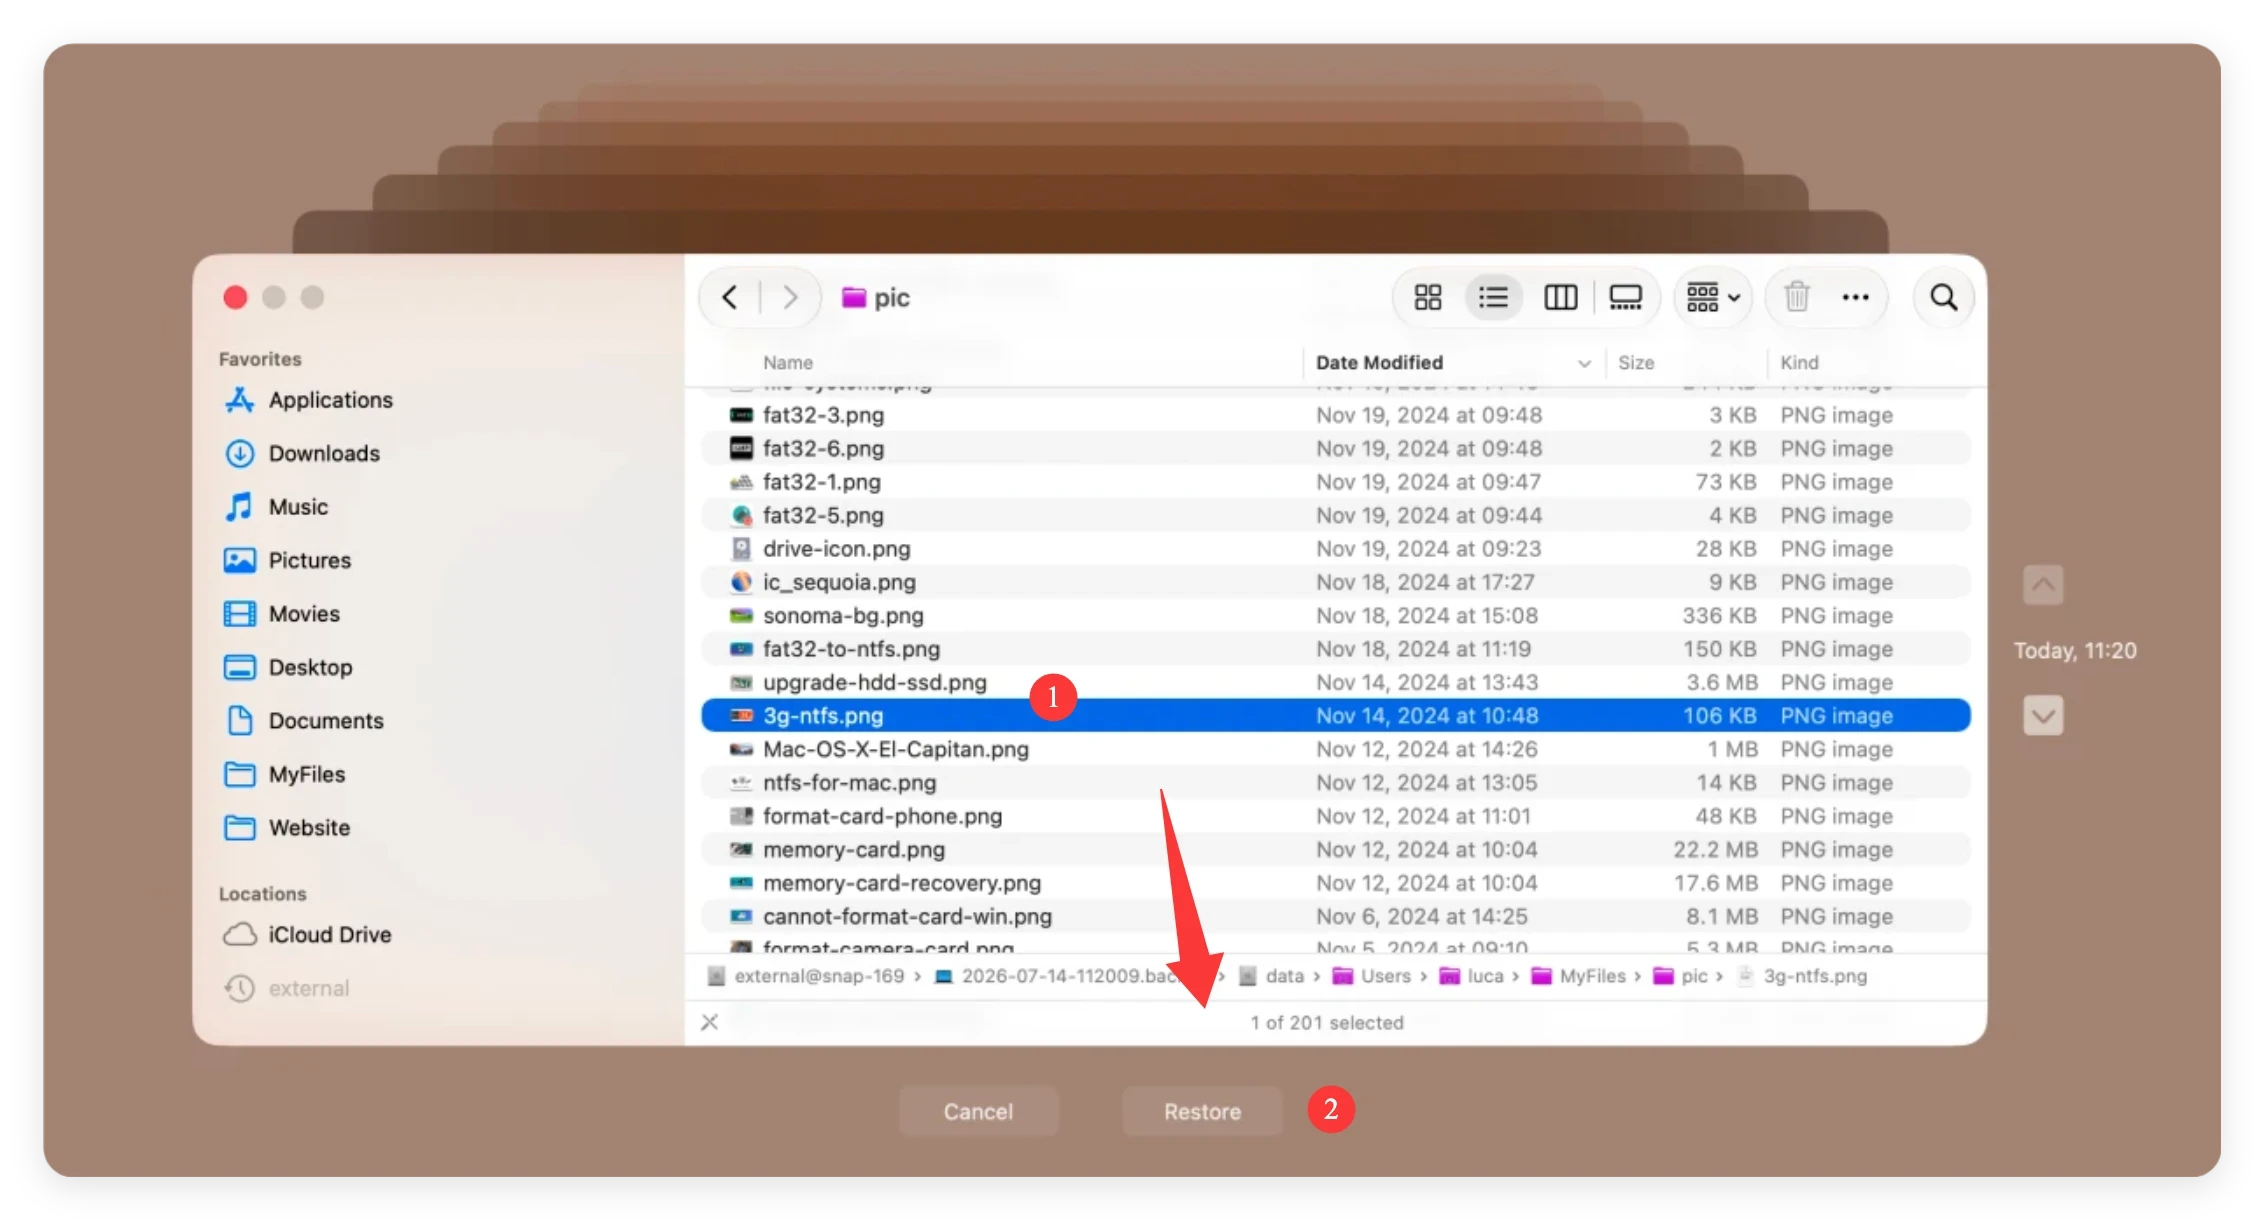
If you enabled Time Machine on your Mac before deleting the files, you can roll back your system snapshot to retrieve your missing data.
Step 1: Plug in Backup Drive. Connect your external Time Machine backup drive to your Mac.
Step 2: Open Target Folder. Open the folder where your deleted files were originally stored (for example, Documents or Desktop).
Step 3: Enter Time Machine. Click the Time Machine icon in the menu bar and choose Browse Time Machine Backups.
Step 4: Navigate Timeline. Use the timeline on the right edge of the screen to go back to a date before the files were deleted.
Step 5: Restore Item. Select the missing file and click Restore. The file will be placed back into its original folder.
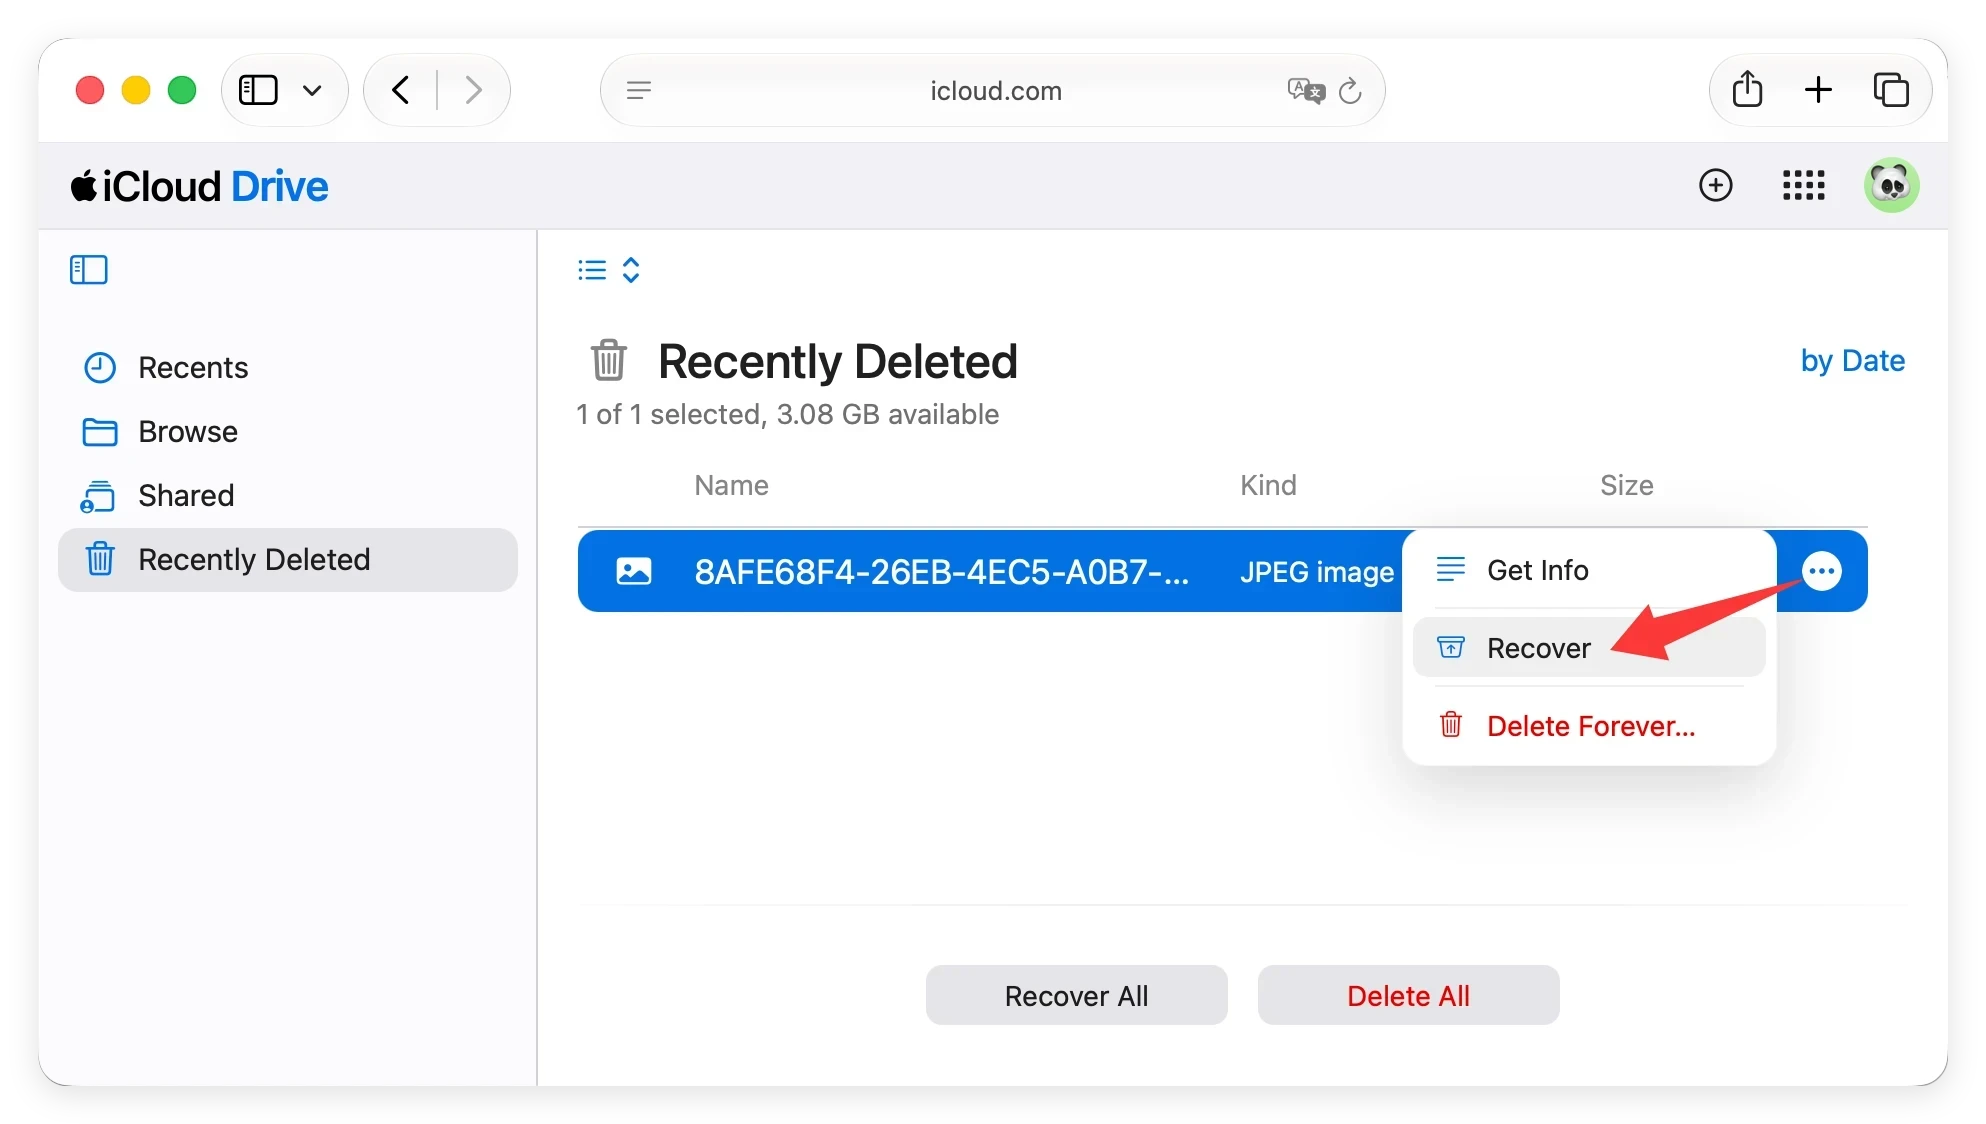
If the deleted files were synced with iCloud Drive or stored on your Mac Desktop/Documents while iCloud Sync was turned on, they might be waiting in your iCloud Trash.
Step 1: Visit iCloud Web. Open any web browser on macOS 27 Golden Gate and visit iCloud.com.
Step 2: Log In. Sign in with your Apple ID and password.
Step 3: Open iCloud Drive. Click on Recently Deleted.
Step 4: Select & Restore. Check the items you want back, and click Recover.
If you have already emptied your Trash bin or used Command + Option + Delete to permanently bypass the Trash, native Mac controls will not show your files. In this scenario, using Donemax Data Recovery for Mac is the most reliable way to perform Trash data recovery on macOS 27 Golden Gate.
Donemax Data Recovery for Mac is a powerful, user-friendly data recovery software designed for macOS systems, including macOS 27 Golden Gate. Its deep scanning engine bypasses missing file pointers, reading raw data sectors on APFS, HFS+, exFAT, and FAT32 drives to rebuild lost files.
Step-by-Step Guide to Recovering Emptied Trash Files:
Step 1: Download & Install Software. Download and install Donemax Data Recovery for Mac f. To avoid overwriting lost files, install the software on an external drive or secondary volume.
Step 2: Select Your Mac Storage Drive. Launch Donemax Data Recovery for Mac. On the main window, select your main Mac drive (usually named Macintosh HD or APFS System Volume).
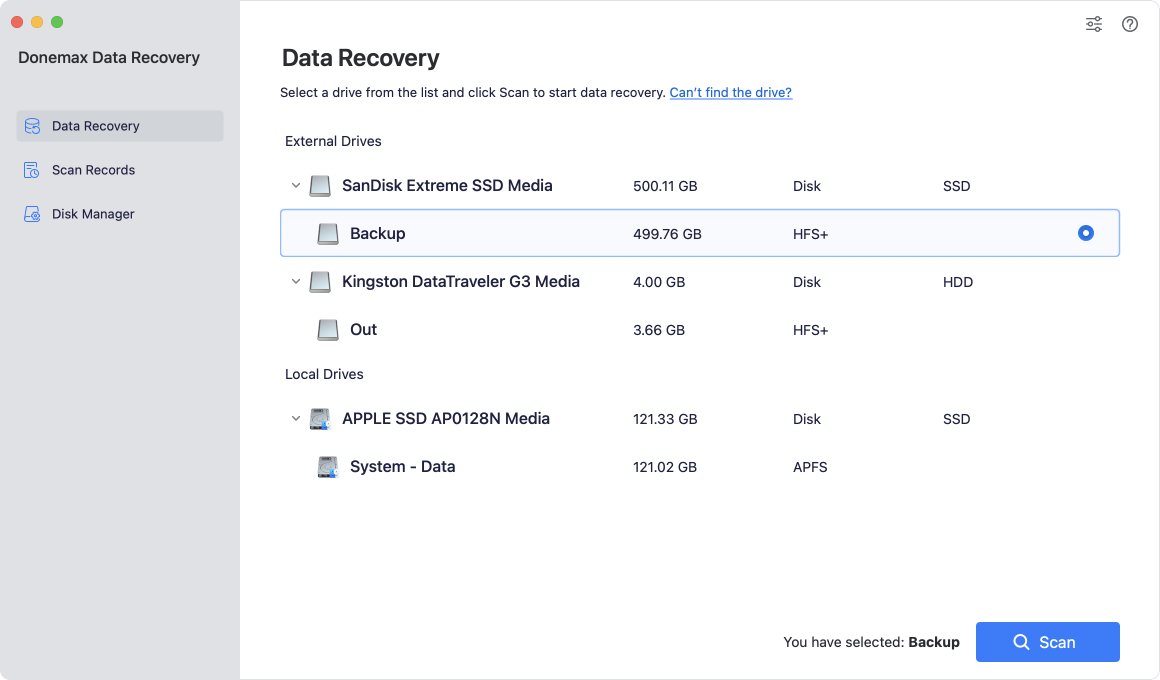
Step 3: Start Deep Sector Scan. Click the Scan button. The software will execute a comprehensive deep scan to search for raw data fragments and recently emptied Trash items.
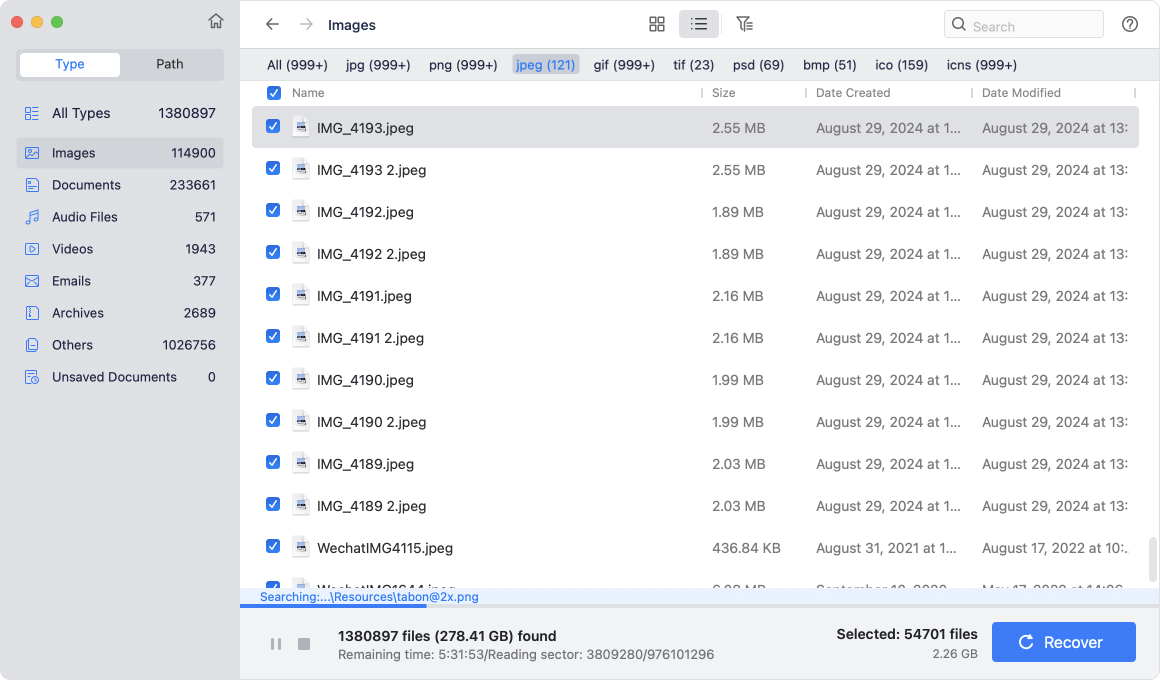
Step 4: Preview Found Files. Once the scan completes, browse through organized file categories (Documents, Photos, Videos, Audio). Double-click files to preview them.
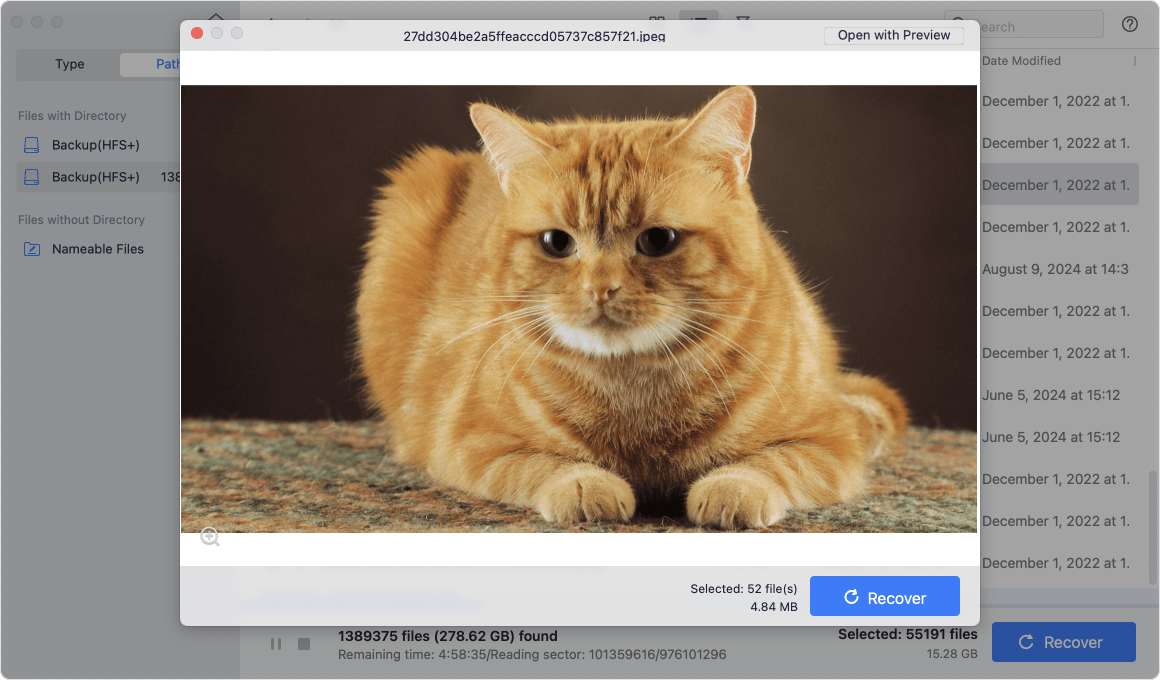
Step 5: Save Recovered Data. Select the files you wish to restore, click the Recover button, and choose a safe location (such as an external flash drive) to save them.

Why Choose Donemax Data Recovery for Mac?
Here is a quick overview of when to use each recovery approach based on your current situation:
| Recovery Method | Best Used For | Requires Prior Backup? |
|---|---|---|
| Trash 'Put Back' | Files still sitting inside the Trash bin | No |
| Donemax Data Recovery | Emptied Trash, formatted drives, or missing partitions | No |
| Time Machine Backup | Users with active external backup drives | Yes |
| iCloud Recently Deleted | Files synced across iCloud Drive / Desktop | No (Requires iCloud Sync) |
To give yourself the highest possible chance of recovering your lost files, keep these essential practices in mind:
Accidentally emptying your Trash bin on macOS 27 Golden Gate can be stressful, but it does not have to mean permanent file loss.
If your files were recently moved to the Trash, check the bin first and use the "Put Back" option. If you have active backups, restore them via Time Machine or iCloud.
For cases where the Trash bin was emptied and no backup exists, Donemax Data Recovery for Mac provides a fast, reliable, and safe solution to recover your lost documents, photos, and media. Download Donemax Data Recovery for Mac today and recover your files in just a few simple steps!
Donemax Data Recovery for Mac
Donemax Data Recovery for Mac is one of the best Mac data recovery software. It is easy-to-use and can help in recovering deleted, formatted, inaccessible or lost data from Mac HDD/SSD, external disk, USB drive, SD card, camera or other storage devices.
Charles
Charles, who lives in Sydney, Australia, is an editor & writer of Donemax Team. He is good at writing articles related with Apple Mac computers, Windows operating systems, data recovery, data erasure, disk clone and data backup, etc. He loves reading and playing tennis in his spare time and is interested in testing new digital devices such as mobile phones, Macs, HDDs, SSDs, digital cameras, etc.
Gerhard Chou
In order to effectively solve the problems for our customers, every article and troubleshooting solution published on our website has been strictly tested and practiced. Our editors love researching and using computers and testing software, and are willing to help computer users with their problems