Written byMariaUpdated on May 13, 2025
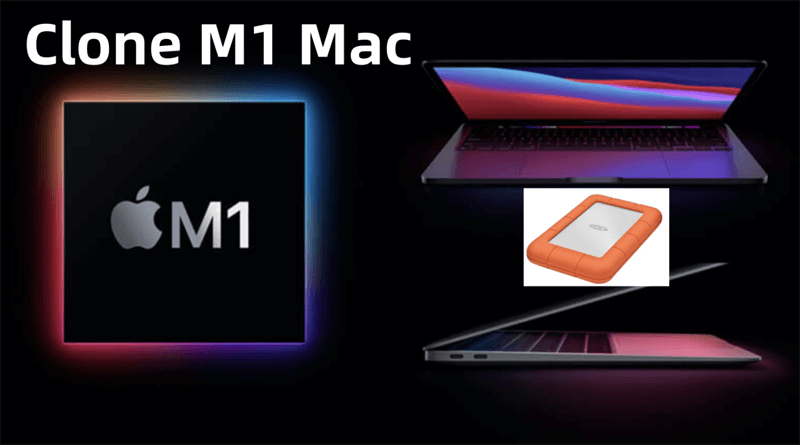
How to Clone a M1 Chip Mac to an External Hard Drive?
Approved byGerhard Chou
Before we start: Donemax Disk Clone for Mac can help you copy a disk to another disk on a M1 Mac, create disk image backup on a M1 Mac. It also can clone all data from M1 Mac's internal disk to an external hard drive, making a full bootable clone backup.
PAGE CONTENT:
With the introduction of Apple's M1 chip, Macs underwent a significant transformation in performance, architecture, and security. While the M1 chip has brought remarkable speed and efficiency improvements, it also introduced new complexities - especially when it comes to system cloning, backups, and booting from external drives. Whether you're upgrading to a new Mac, preparing for a system failure, or simply creating a complete backup, cloning your M1 Mac to an external hard drive can save you time and hassle.
In this comprehensive guide, we'll walk you through the entire process of cloning your M1 chip Mac to an external hard drive. From understanding the concept of cloning to preparing your drive, choosing the right tool, and executing the clone, this article covers everything you need to know.
Before Starting to Clone a M1 Mac
1. Understand Cloning vs. Backup
Before diving into the technical steps, it's important to distinguish between cloning and backing up.
- Cloning refers to creating an exact, bootable copy of your entire Mac's internal drive onto an external drive. It's essentially mirroring everything, including the operating system, applications, settings, and files.
- Backup, especially through Apple's built-in Time Machine, typically involves copying just your personal data and system snapshots for recovery purposes. While Time Machine is powerful, it doesn't create a bootable copy of your Mac.
Pros of Cloning:
- Faster full system recovery.
- Ability to boot from the clone (with caveats for M1).
- Simple migration to another Mac.
Cons:
- Requires more storage space.
- Doesn't offer file versioning like Time Machine.
If your goal is to have a complete system snapshot ready to restore or migrate, cloning is the best choice.
2. Prerequisites and Preparations for M1 Mac Clone
Before cloning your M1 Mac, a few critical steps must be followed to ensure success and compatibility.
1. External Drive Requirements
- Choose an external SSD or HDD with at least the same or more storage capacity as your Mac's internal drive.
- USB-C or Thunderbolt connections are preferable for faster data transfer.
2. Format the External Drive
Apple Silicon Macs use APFS (Apple File System) by default. Formatting your external drive to APFS ensures compatibility.
To format:
- Open Disk Utility.
- Select your external drive and click Erase.
- Choose APFS as the format and GUID Partition Map as the scheme.
- Click Erase to confirm.
![Format the External Drive]()

Warning: Erasing will delete all existing data on the drive. Make sure you've backed up any important files first.
How to Clone a M1 Mac to an External Hard Drive?
🔖Best Tools to Clone M1 Mac
Cloning tools must support the M1's architecture and security model. Here are the top choices:
| No. | Best M1 Mac clone software | Key Features |
|---|---|---|
| 1 | Donemax Disk Clone for Mac |
|
| 2 | Carbon Copy Cloner (CCC) |
|
| 3 | SuperDuper! |
|
| 4 | Disk Utility (Manual Method) |
|
Due to the complex structure of M1 Macs (e.g., signed system volumes), third-party cloning software like Donemax Disk Clone for Mac is the most reliable.
🔖Step-by-Step Guide Using Donemax Disk Clone to Clone M1 Mac
Donemax Disk Clone for Mac is highly recommended for cloning M1 Macs due to its robust support and easy interface. Follow these steps:
Step 1: Download and Install Donemax Disk Clone for Mac
First of all, download Donemax Disk Clone, then install it on your M1 Mac.
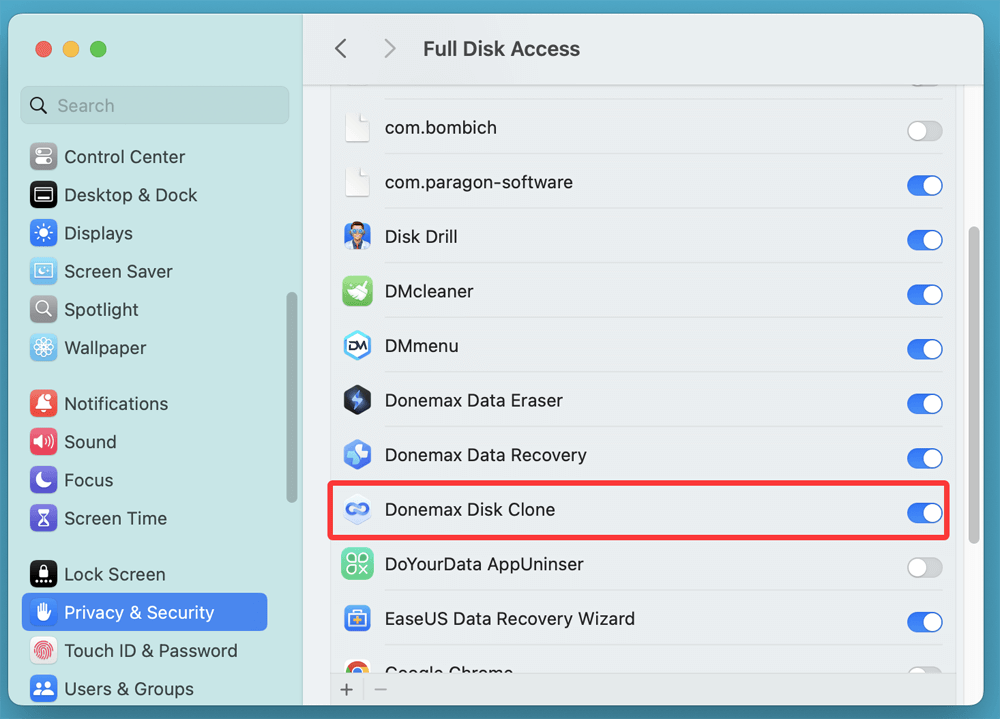
Upon launching Donemax Disk Clone for Mac, macOS will prompt you to grant Full Disk Access. This is necessary for the app to read/write all data.
- Go to System Settings > Privacy & Security > Full Disk Access.
- Enable Donemax Disk Clone from the list.
![Download and Install Donemax Disk Clone for Mac]()
Step 2: Connect and Format Your External Drive
Connect the external hard drive or SSD to your Mac. If it's a new drive or previously used on a Windows system, it must be reformatted to APFS to be compatible with macOS cloning.
To format the drive:
- Open Disk Utility from Utilities via Applications.
- Select your external drive from the left sidebar (be sure to choose the device, not just the volume).
- Click Erase at the top.
- Click Erase and wait for the process to finish.
![Connect and Format Your External Drive]()

Once done, the drive will be empty and ready to receive the cloned data.
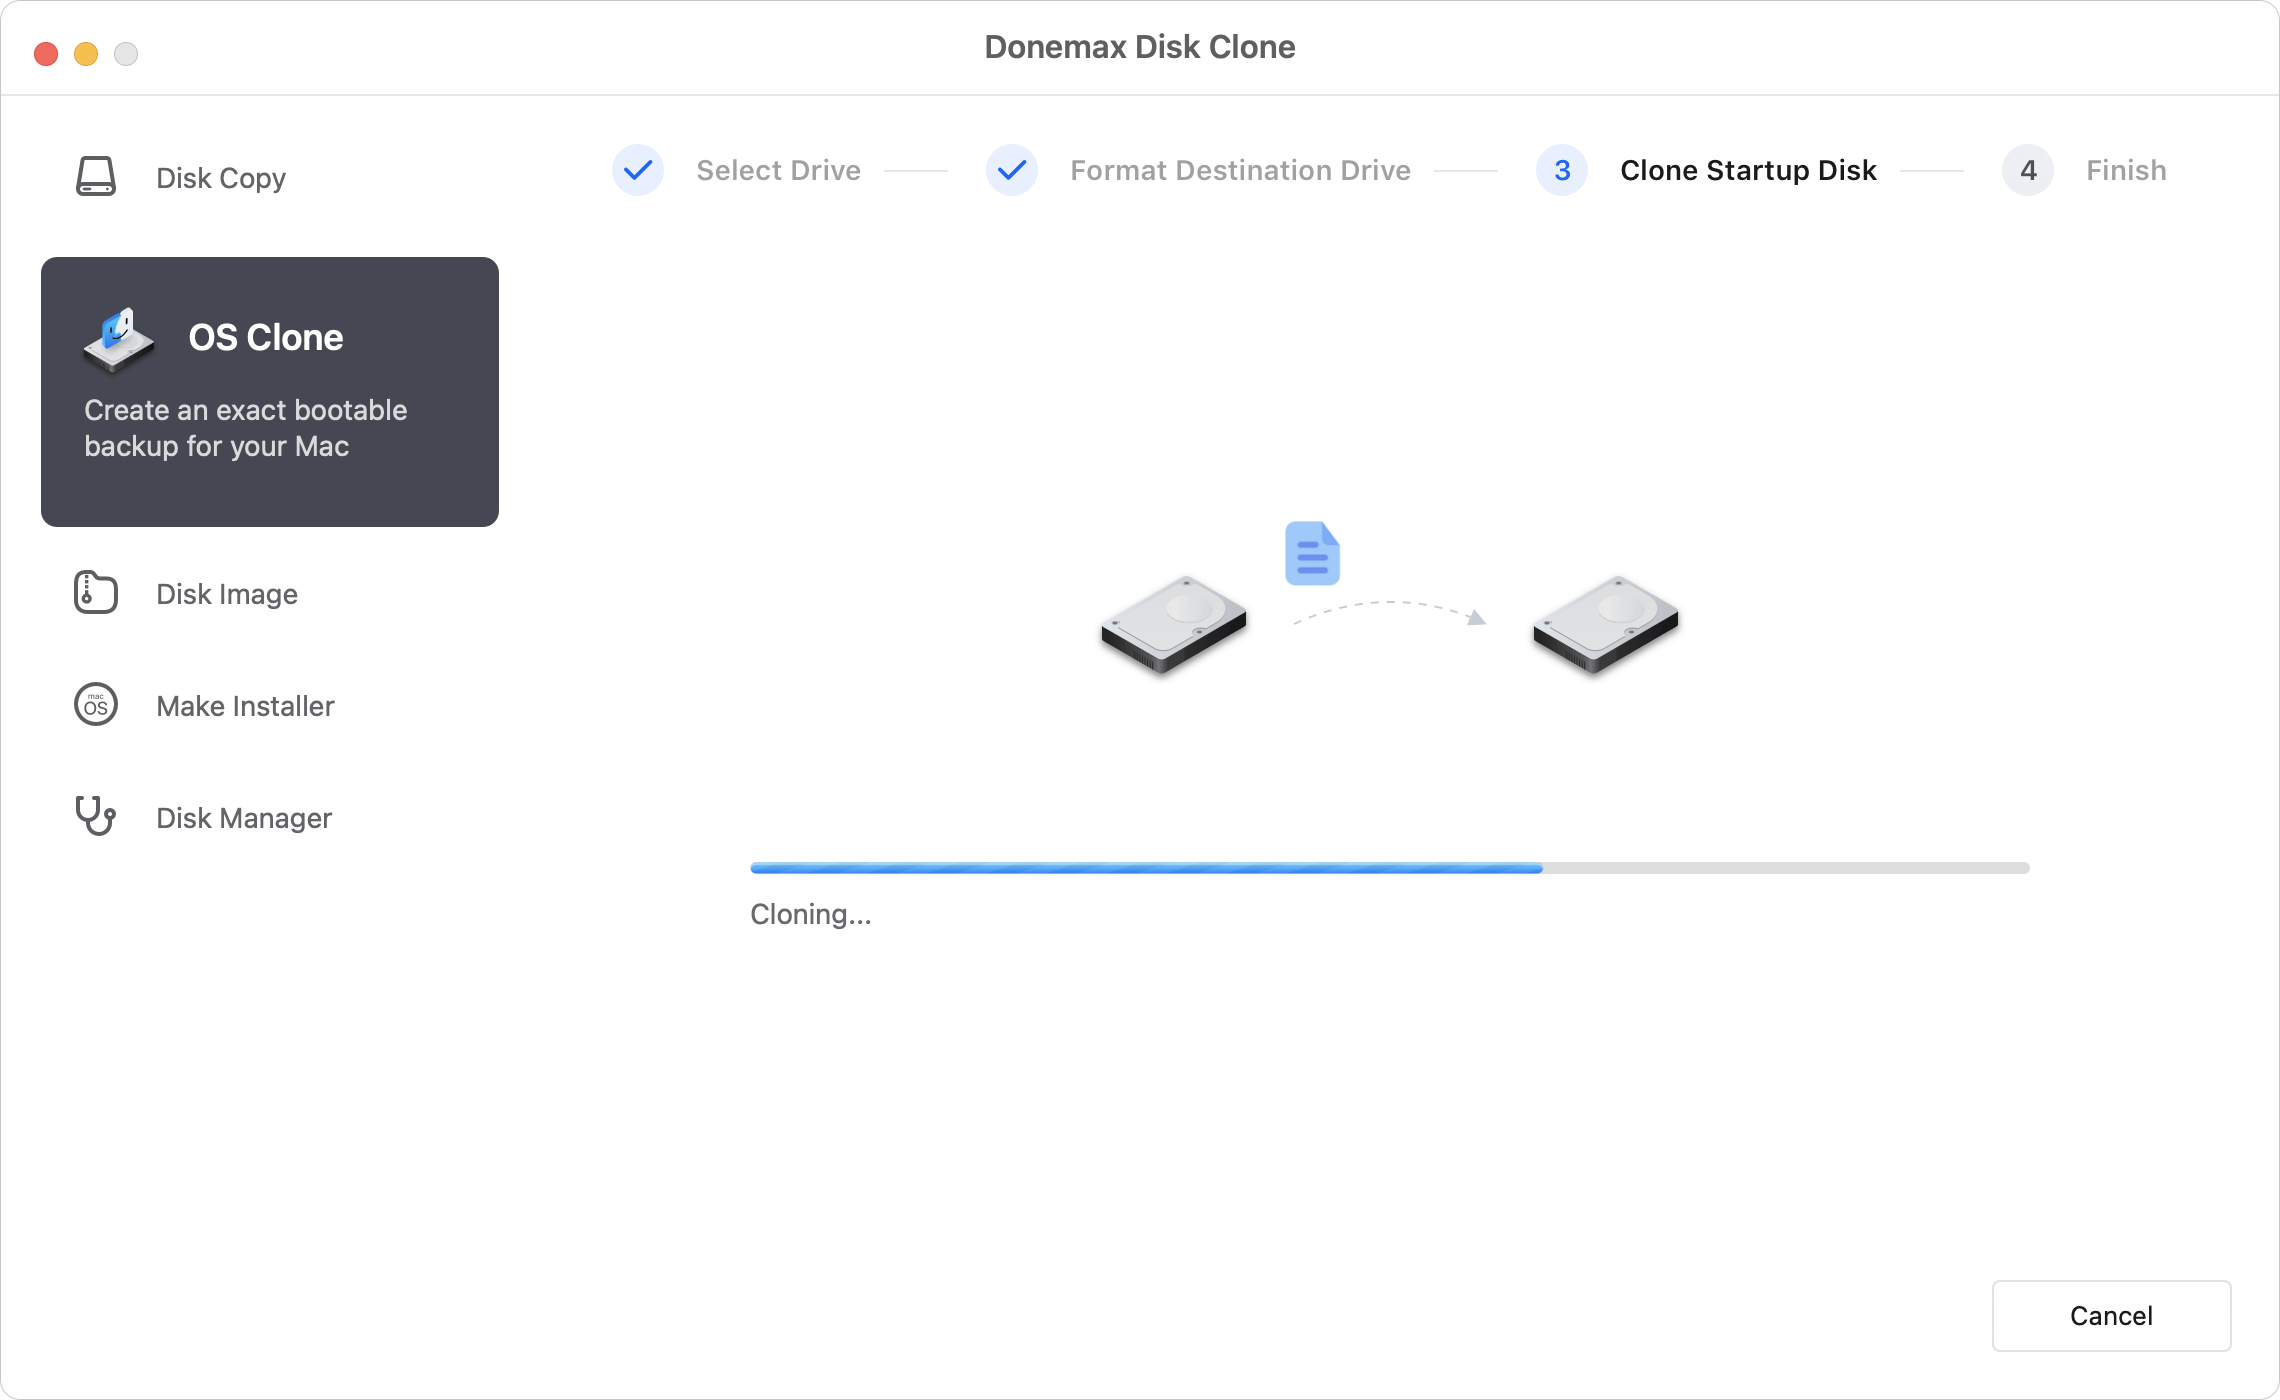
Step 3: Choose OS Clone Mode
Now that Donemax Disk Clone for Mac is installed and your drive is ready, it's time to set up the clone.
- Launch Donemax Disk Clone for Launchpad. To clone everything from the M1 Mac to the external hard drive, choose OS Clone mode.
- Select the external hard drive as the destination drive.
![Choose OS Clone Mode]()

Step 4: Perform the Clone
Once you've selected the external hard drive as the destination drive, click Clone Now button to begin the cloning process.
- Donemax Disk Clone for Mac will begin reading the files from your Mac and writing them to the external drive. (It will clone everything including macOS, settings, apps, user data from the M1 Mac to the external hard drive.)
- Depending on the amount of data and the drive speed, the process can take anywhere from 20 minutes to several hours.
- A progress bar will show the transfer rate, estimated time remaining, and any issues.
Once the process gets finished, open the external hard drive and check the cloned data.

Step 5: Verify the Clone
After Donemax Disk Clone for Mac completes the clone, it's wise to verify that everything transferred correctly.
- Open Finder and navigate to the external drive.
- rowse through system folders, applications, and your user directory to confirm everything appears in place.
🔖Booting from the Cloned Drive (Optional and Conditional)
Due to Apple's Secure Boot policies and M1 chip architecture, booting from external drives is more restrictive.
Can You Boot an M1 Mac from a Clone?
You can, but with limitations:
- The external drive must contain a signed, verified version of macOS.
- Startup Security must be adjusted.
- Some cloned volumes may not be bootable even if cloned successfully.
How to Boot from External Drive:
- Connect the cloned drive.
- Shut down the Mac.
- Hold the Power button until “Loading startup options” appears.
- Select the external drive.
- If prompted, go to Startup Security Utility and:
- Allow booting from external or removable media.
- Lower Secure Boot level if needed.
Be cautious with changing Secure Boot settings - restore them after testing to maintain security.
If booting fails, don't panic. You can still restore from the clone even if booting isn't possible.
🔖M1 Mac Clone Tips and Troubleshooting
Cloning an M1 Mac is not always straightforward. Here are some common issues and fixes:
Issue 1: Clone Fails or Freezes
- Ensure the external drive is properly formatted (APFS).
- Recheck Full Disk Access permissions.
- Try restarting both your Mac and Donemax Disk Clone for Mac.
Issue 2: Clone Completes but Drive Isn't Bootable
- Verify if Donemax Disk Clone for Mac created a System volume. If not, reinstall macOS on the external drive, then clone your data.
- Adjust Startup Security settings as mentioned above.
Issue 3: Drive Not Detected
- Try a different USB-C port or cable.
- Check if the drive appears in Disk Utility and mount it manually.
- Reset NVRAM and SMC (not always applicable on M1).
Issue 4: Permission Errors
- Files cloned may have different ownership.
- Use Terminal or CCC's "Repair Permissions" tool.
Always test your clone by accessing files and checking storage size.
🔖Use Cases for a Cloned M1 Mac
Cloning isn't just about emergency recovery - here are scenarios where it's invaluable:
1. System Recovery
If your Mac's SSD fails or becomes corrupted, you can restore from the clone without data loss.
2. Testing macOS Updates
Install a new version of macOS on the clone first to test compatibility before upgrading your main system.
3. Hardware Migration
When moving to a new M1 Mac, connect the cloned drive and use Migration Assistant for a smooth transition.
4. Secure Offsite Backup
Keep a cloned drive in a secure location to protect against theft, disaster, or ransomware.
Conclusion
Cloning your M1 Mac to an external hard drive provides a powerful safeguard against data loss, hardware failure, or accidental deletion. While Apple's M1 chip introduced additional layers of security and complexity, modern tools like Donemax Disk Clone for Mac make the process relatively straightforward. By preparing your external drive, selecting the right software, and following the appropriate steps, you can ensure your system is safely mirrored and ready for quick recovery.
Remember, while cloning is excellent for full system snapshots, it doesn't replace regular file-based backups. For maximum protection, consider using both a Time Machine backup and a system clone.
With your cloned drive in hand, you can sleep easier knowing your digital world is backed up and ready when you need it.
Donemax Disk Clone for Mac
An award-winning disk cloning program to help Mac users clone HDD/SSD/external device. It also can create full bootable clone backup for Macs.
Related Articles
- Jan 02, 2024How to Create A Bootable Clone Backup for Mac?
- Feb 12, 2026How to Clone Hard Drive on Mac Server?
- Aug 07, 2025Best Alternative to SuperDuper! for Mac
- Jul 17, 2026A Good Cloning Tool for A18 PRO MacBook Neo | Donemax
- Oct 24, 2025How to Clone Disk on M5 Chip Mac: Step-by-Step Guide
- Apr 07, 2024How to Clone An Intel Mac to An External SSD?

Contributing Writer
Maria
Maria is one of the senior writers & editors of Donemax who lives and works in Sydney, Australia. She loves PC, Mac and Internet Technology. She has 6 years of writing articles about data recovery on PC/Mac, disk cloning solution, data eraser and computer OS optimization, etc. She is also interested in testing various software and digital products.

Editor in chief
Gerhard Chou
In order to effectively solve the problems for our customers, every article and troubleshooting solution published on our website has been strictly tested and practiced. Our editors love researching and using computers and testing software, and are willing to help computer users with their problems