
Written byChristinaUpdated on May 21, 2026
How to Create a Bootable Backup Clone on MacBook Neo?
Approved byGerhard Chou
Before we star: Make a fully functional, pixel-perfect copy of your internal hard drive with Donemax Disk Clone for Mac. If your MacBook Neo's internal drive misbehaves, you can simply plug this external drive in, run your system directly from it, and get right back to work in minutes without missing a beat.
PAGE CONTENT:
Picture this: You are working on your sleek, blazing-fast 2026 MacBook Neo. You're typing up an essential document, processing vacation photos, or finalizing a massive project when—poof—something goes wrong. Maybe a software update goes completely sideways, or your system throws a unexpected error pattern that renders the macOS startup partition unreadable. Suddenly, that gorgeous Liquid Retina screen looks a lot less friendly.
In the past, regular backups like Time Machine were your primary safety net. But setting up a brand-new or wiped Mac from scratch can take hours. That is exactly where a bootable backup clone comes to the rescue.
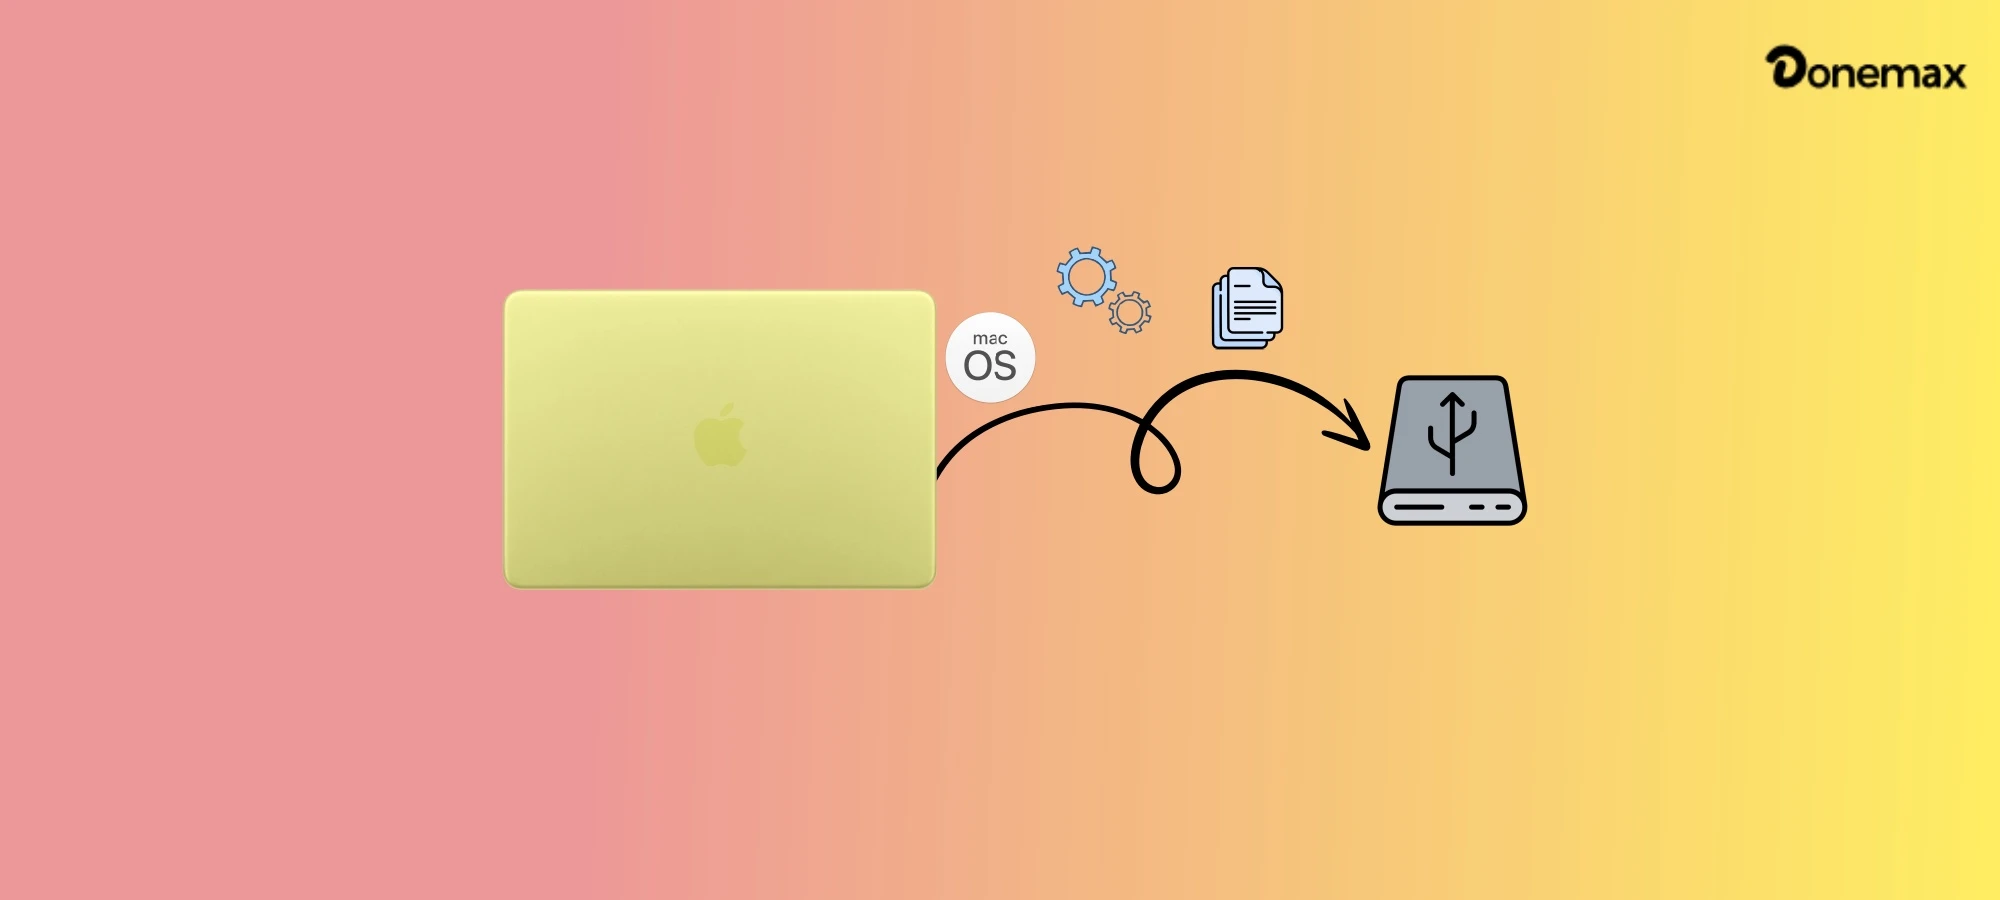
In this friendly, step-by-step guide, we will walk you through exactly how to create bootable backup clone on MacBook Neo using the industry's premier utility: Donemax Disk Clone for Mac. We'll untangle the technical jargon, show you how to navigate Apple's advanced 2026 hardware constraints, and make sure your digital life remains fully bulletproof.
Before the Bootable Clone for MacBook Neo
To make sure your cloning process goes smoothly without any unexpected errors, take a brief moment to run through this simple preparation checklist:
1. Choose a High-Speed External Drive:
For the best performance on a MacBook Neo, we highly recommend using a Solid State Drive (SSD) utilizing an NVMe structure with a Thunderbolt 3/4 or high-tier USB4 interface cable. Ensure your external drive has at least the same capacity as your MacBook Neo's internal hard drive.
💡 Tip: Note that the cloning process will completely erase everything on the external drive, so make sure to double-check that you don't have any loose, unbacked files lying around on it!
2. Plug in Your Power Adapter:
Cloning shifts hundreds of gigabytes of data and keeps your processors running at high capacity. Keep your MacBook Neo connected to its MagSafe or USB-C power bricks during the operation to avoid power dropouts.
3. Choose the Reliable Cloning software:
To bypass these complex technical roadblocks without forcing you to learn complicated Terminal command lines, Donemax developed Donemax Disk Clone for Mac.
| Feature | What It Does for You |
|---|---|
| OS Cloning Mode | Leverages secure Apple-compliant technology to replicate the system volume, giving you a valid, bootable external operating system container. |
| Universal File Support | Flawlessly handles intricate APFS structures, hidden user libraries, application caches, and complex file permissions without manual setup. |
Create Bootable Backup Clone on MacBook Neo
Ready to make your MacBook Neo totally safe? Follow these simple, clear visual steps to set up your external bootable environment.
Step 1: Download, Install, and Launch Donemax Disk Clone for Mac
Head over to the official Donemax portal, download the premium installation package for Donemax Disk Clone for Mac, and drag the app into your Applications folder. When you open it for the first time, your Mac will prompt you to provide the application with Full Disk Access within System Settings -> Privacy & Security. This step is completely safe and absolutely vital for the tool to interact securely with your drive blocks.
Donemax Disk Clone for Mac
- Make full and bootable clone backup for macOS.
- Create an exact copy for MacBook Neo and other Macs.
- Safe and easy to clone Mac drive to another.
Step 2: Connect Your External SSD
Plug your high-speed external SSD into one of the available expansion ports on your MacBook Neo. Ensure the connection is stable and the drive mounts correctly on your desktop display interface.
Step 3: Pick Your Target Destination Drive
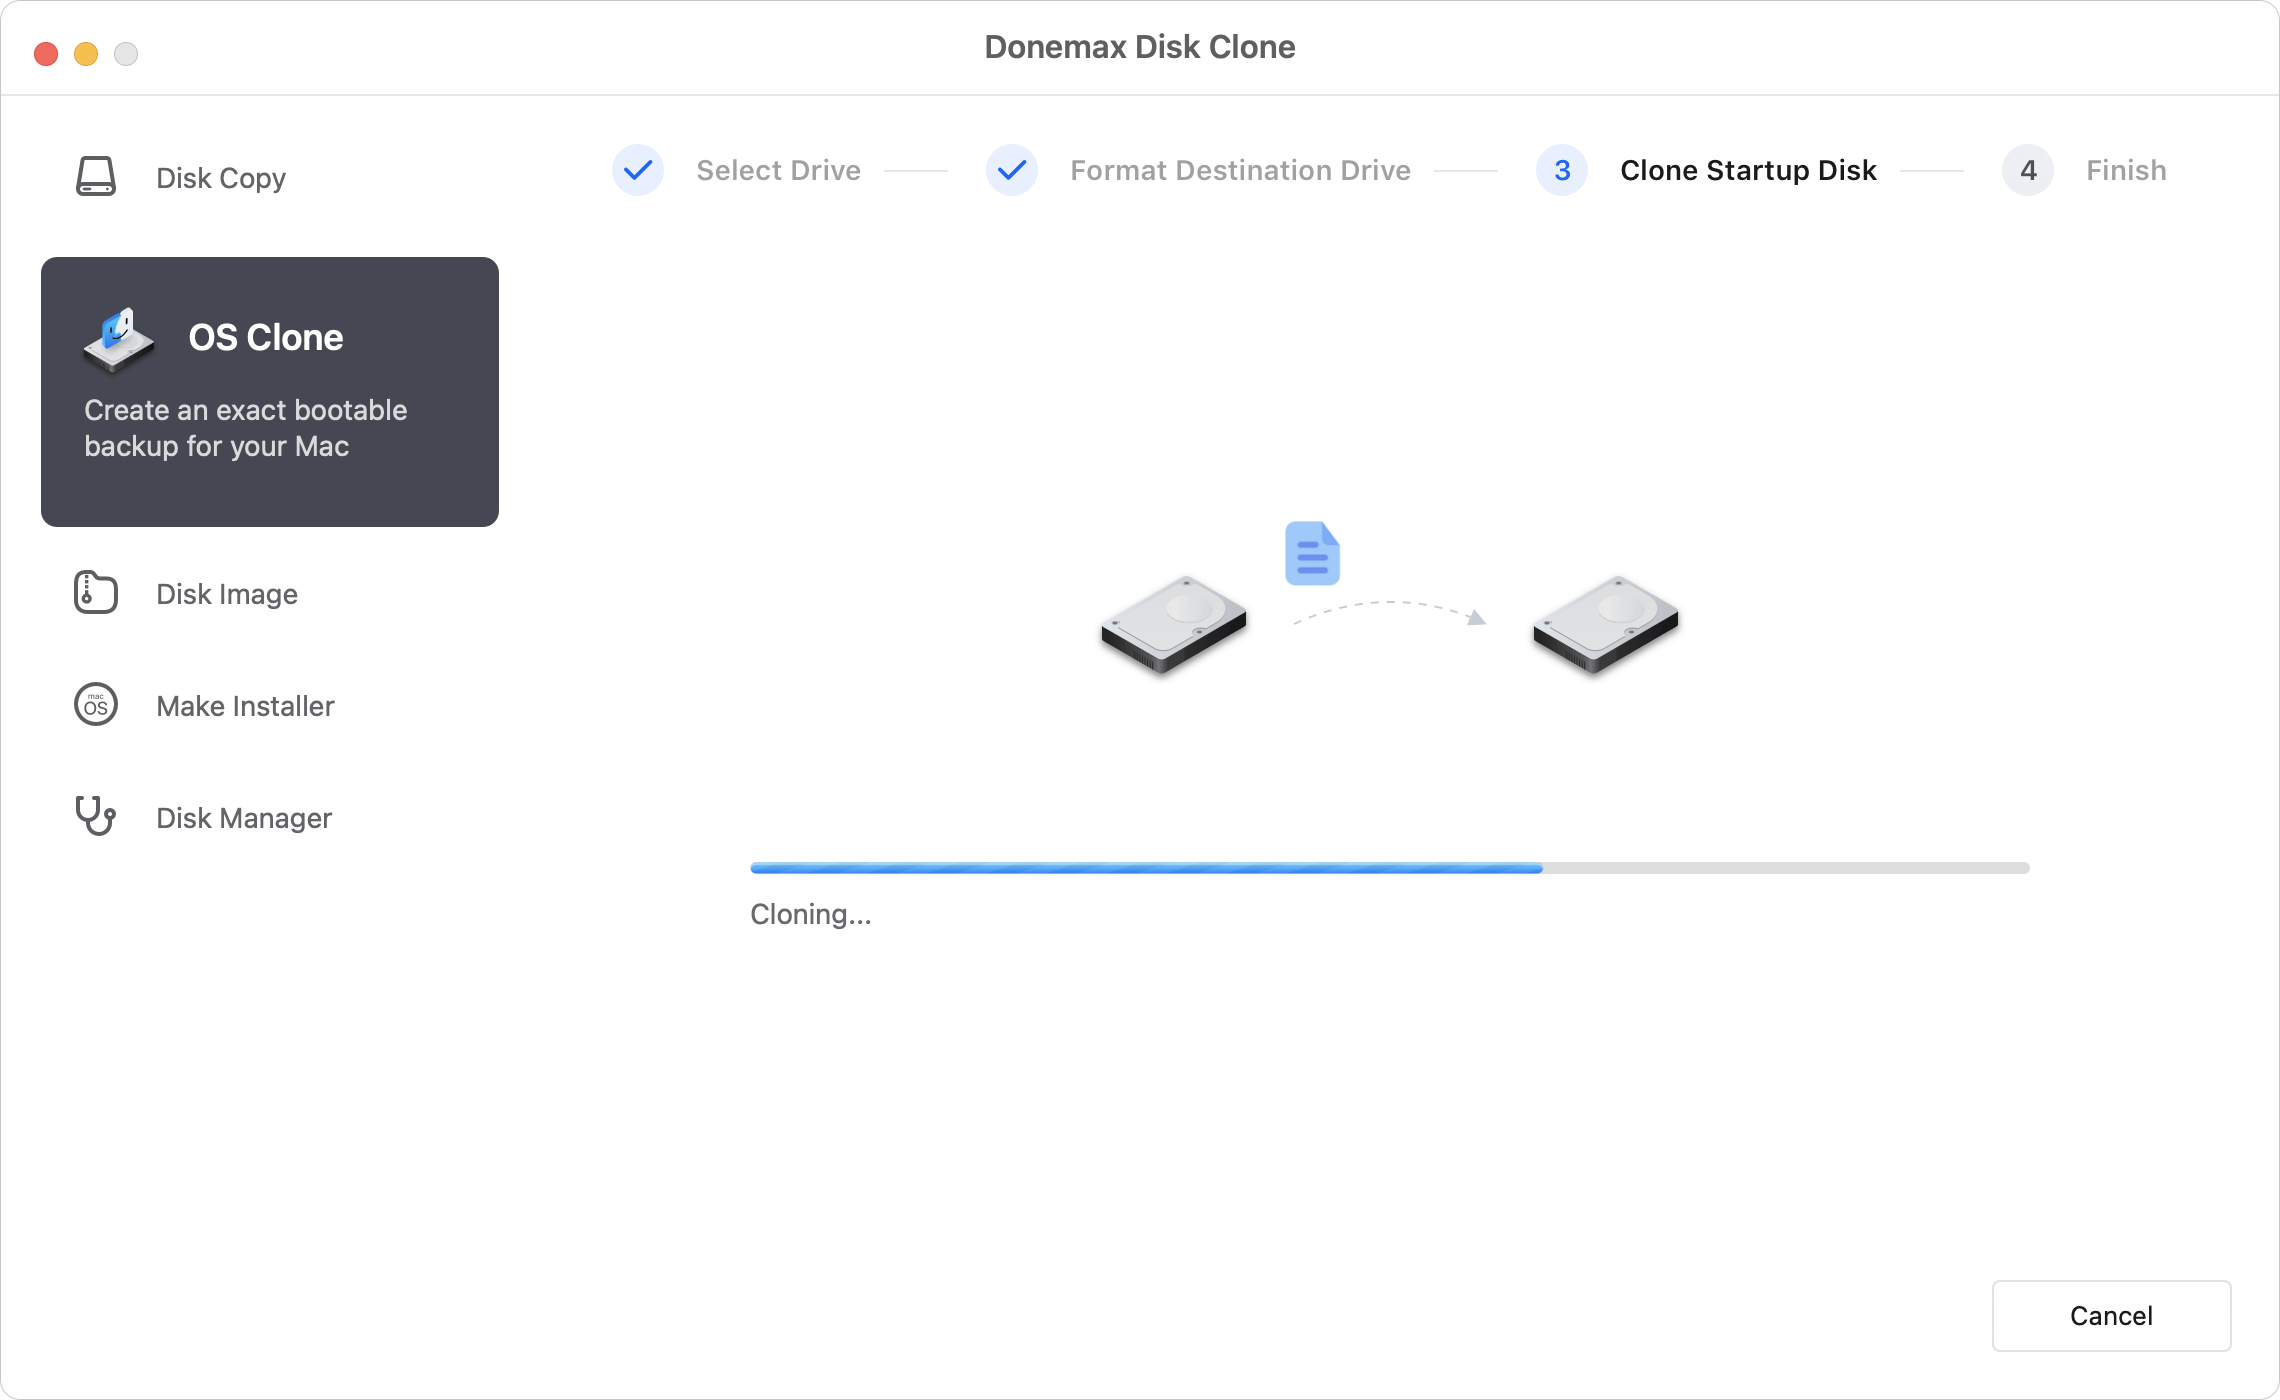
Run Donemax Disk clone and choose the option OS Clone. The application will automatically recognize your primary internal storage partition as the source. Now, select your newly attached external SSD from the drop-down menu or visual disk list as the Destination drive. Remember, this selection will be formatted, so double-check the name!

Step 4: Execute the Clone Operation
Click the large, blue Clone Now button located at the lower right. Donemax will immediately begin checking your structures, formatting the target layout to matching APFS parameters, and executing the duplicate logic. A progress tracking bar will display the estimated completion time. You can safely let this run in the background, though keeping heavy applications closed will speed up the process.
Testing Your New Bootable Clone: How to Use It
A backup is only as good as its verification! To make absolutely sure that your creation was successful and that you know how to leverage it during an emergency, run through this simple testing drill:
- Shut Down Your MacBook Neo Completely: Click the Apple logo in the top-left corner of your screen and select Shut Down. Wait a few seconds for the hardware to completely power off.
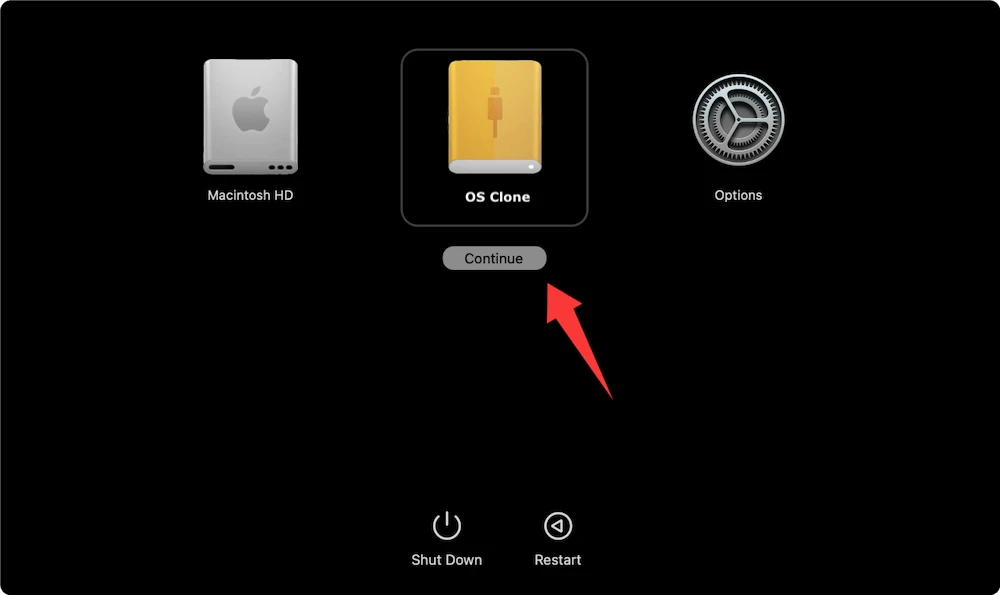
- Enter Startup Options: Press and hold the Power button down continuously. Do not let go! After a few moments, you will see a text prompt on your screen stating 'Loading Startup Options...' Once that appears, release the button.
![Create bootable backup clone on MacBook Neo]()
- Select Your External Clone: Your screen will display your regular internal Macintosh HD alongside your new external backup drive icon. Click on the external drive icon, click Continue, and provide your password if prompted.
![Create bootable backup clone on MacBook Neo]()
- Verify Success: Your Mac will finish booting up. When your desktop appears, everything will look exactly like your original layout, but you are now running 100% off the external SSD! To go back to normal later, simply shut down, turn the Mac on using the same long-press sequence, and select your internal storage drive.

FAQs about Bootable Clone for MacBook Neo
No. Because of the MacBook Neo's strict built-in security, your Mac must have a functioning internal drive to check safety codes before it can start up from an external clone. If the internal hardware is completely broken, you can't boot from the clone.
No, use an SSD instead. While Donemax can technically copy data to an older mechanical hard drive (HDD), modern macOS is built strictly for Solid State Drives (SSDs). Running a system off a spinning hard drive will cause a frustratingly slow experience.
No. Apple's architecture does not support cross-model cross-architecture system booting. A clone created on your specific MacBook Neo contains drivers and configuration parameters customized for that exact machine line and system framework.
Yes. Donemax Disk Clone will make a full clone each time. To make a new backup for your Mac, it will erase the entire external drive.
Apple's native Time Machine is a fantastic, historical file tracker that takes periodic snapshots of your files so you can recover an older version of a text file or a deleted photo. However, if your Mac crashes, you have to reinstall the entire operating system first, wait for the download, and then run a long restoration cycle.
A Donemax Bootable Clone, on the other hand, creates an immediately usable copy of the OS. If your internal drive glitches out, you can boot from the clone right away and keep working immediately, saving hours of downtime.
A Donemax Bootable Clone, on the other hand, creates an immediately usable copy of the OS. If your internal drive glitches out, you can boot from the clone right away and keep working immediately, saving hours of downtime.
Wrapping Up:
In the digital era, data loss is not just an inconvenience—it can bring your professional or personal life to a grinding halt. While Apple's advanced hardware security layouts on the 2026 MacBook Neo make traditional cloning slightly more complex behind the scenes, utilities like Donemax Disk Clone for Mac bring back the simple, one-click confidence every home user deserves.
By integrating natively with Apple's secure infrastructure, Donemax gives you a double layer of protection: an immediate emergency operating system you can boot into if things turn sour, and a completely organized backup of your irreplaceable memories, settings, and workflows. Don't wait for an accidental deletion or an installation glitch to ruin your week. Grab a high-speed external SSD, download Donemax Disk Clone for Mac, and secure your peace of mind today!
Related Articles
- Feb 12, 2026Transfer Data from Old Mac to New Mac: Step-by-Step Guide
- Feb 10, 2026How to Clone HFS/HFS+ Hard Drive on Mac?
- Jun 11, 2026Donemax Disk Clone for Mac - Best Clone Software for M5 Chip Mac
- Feb 02, 2026How to Restore MacBook to Previous Date Without Time Machine?
- Sep 23, 2025Top 10 Disk Cloning Software for Mac - macOS Tahoe Supported
- Sep 18, 2025Can I Restore Mac from External Hard Drive?

Contributing Writer
Christina
Christina is the senior editor of Donemax software who has worked in the company for 4+ years. She mainly writes the guides and solutions about data erasure, data transferring, data recovery and disk cloning to help users get the most out of their Windows and Mac. She likes to travel, enjoy country music and play games in her spare time.

Editor in chief
Gerhard Chou
In order to effectively solve the problems for our customers, every article and troubleshooting solution published on our website has been strictly tested and practiced. Our editors love researching and using computers and testing software, and are willing to help computer users with their problems