
Written byChristinaUpdated on Jul 20, 2026

PAGE CONTENT:
Upgrading to Apple's brand-new operating system is always an exciting experience. With the introduction of macOS 27 Golden Gate, users are enjoying major updates, faster AI performance, and enhanced security layout architectures.
However, with any major system update comes a few changes in how files and settings are organized. One question that frequently pops up among Mac owners is how to effectively manage cloud storage.
Whether you want to protect your important documents from unexpected data loss or free up some precious space on your local hard drive, knowing how to toggle your synchronization settings is vital.

In this guide, we will break down exactly how to enable or disable iCloud backup on macOS 27 Golden Gate using simple, straightforward steps that anyone can follow.
Before jumping into the settings, let's talk about why you might want to modify these configurations in the first place.
Enabling iCloud Drive backup gives you peace of mind. Your desktop files, documents, photos, and system preferences are instantly saved to the cloud. If your MacBook Neo or M-series Mac gets damaged or lost, your files are completely safe and accessible from any Apple device.
On the flip side, disabling certain cloud sync features can be helpful if you are running low on your standard 5GB free iCloud storage tier. Constant syncing can also consume valuable internet bandwidth, especially if you work with massive video files or project archives daily.
By customizing what syncs and what stays offline, you take full control of both your Mac's physical storage and your online digital space.
If you want to turn on cloud synchronization to safeguard your data, the process is incredibly smooth on the new system interface. Follow these steps:
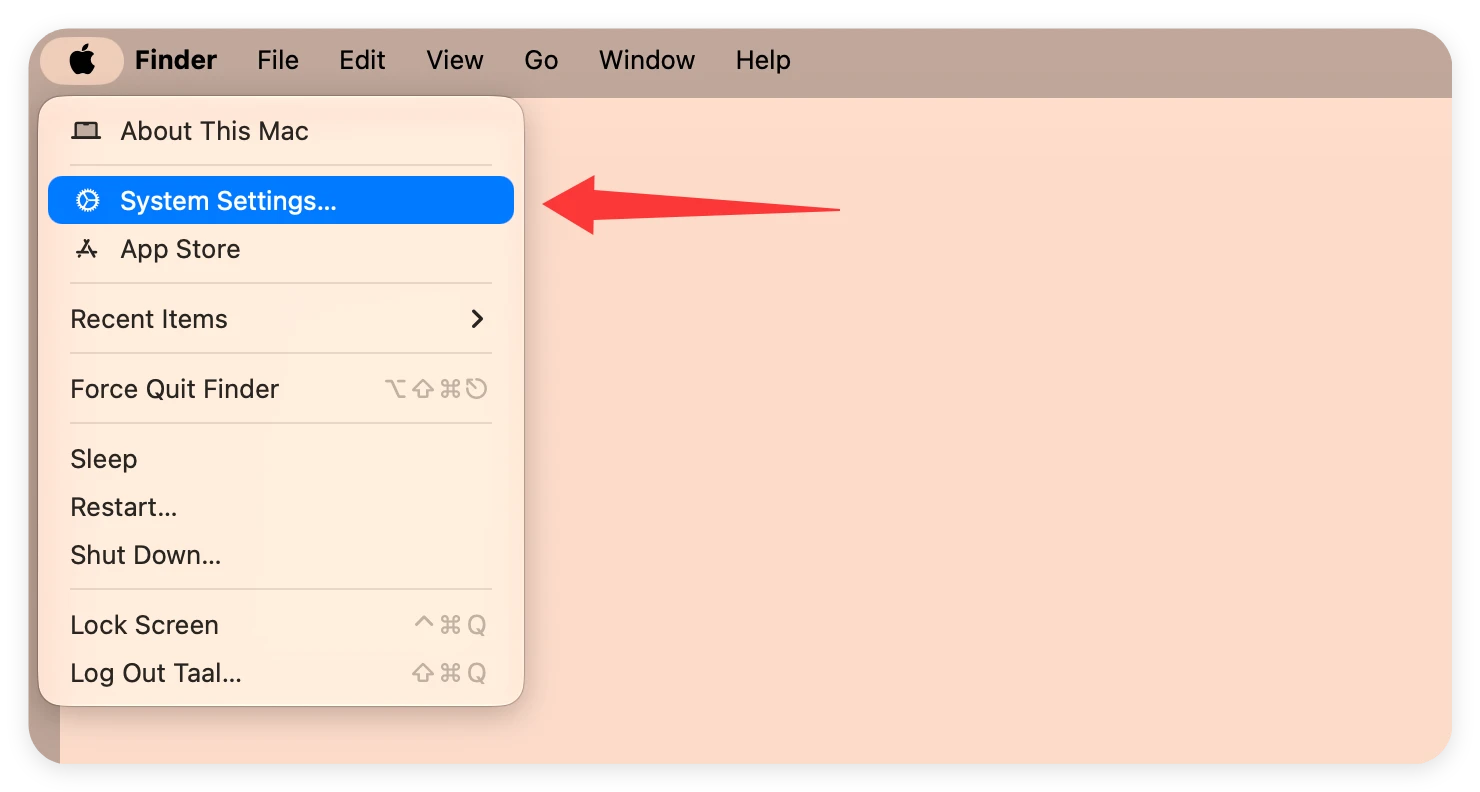
Step 1: Open System Settings
Click on the Apple logo located at the top-left corner of your menu bar. From the dropdown options, select System Settings.
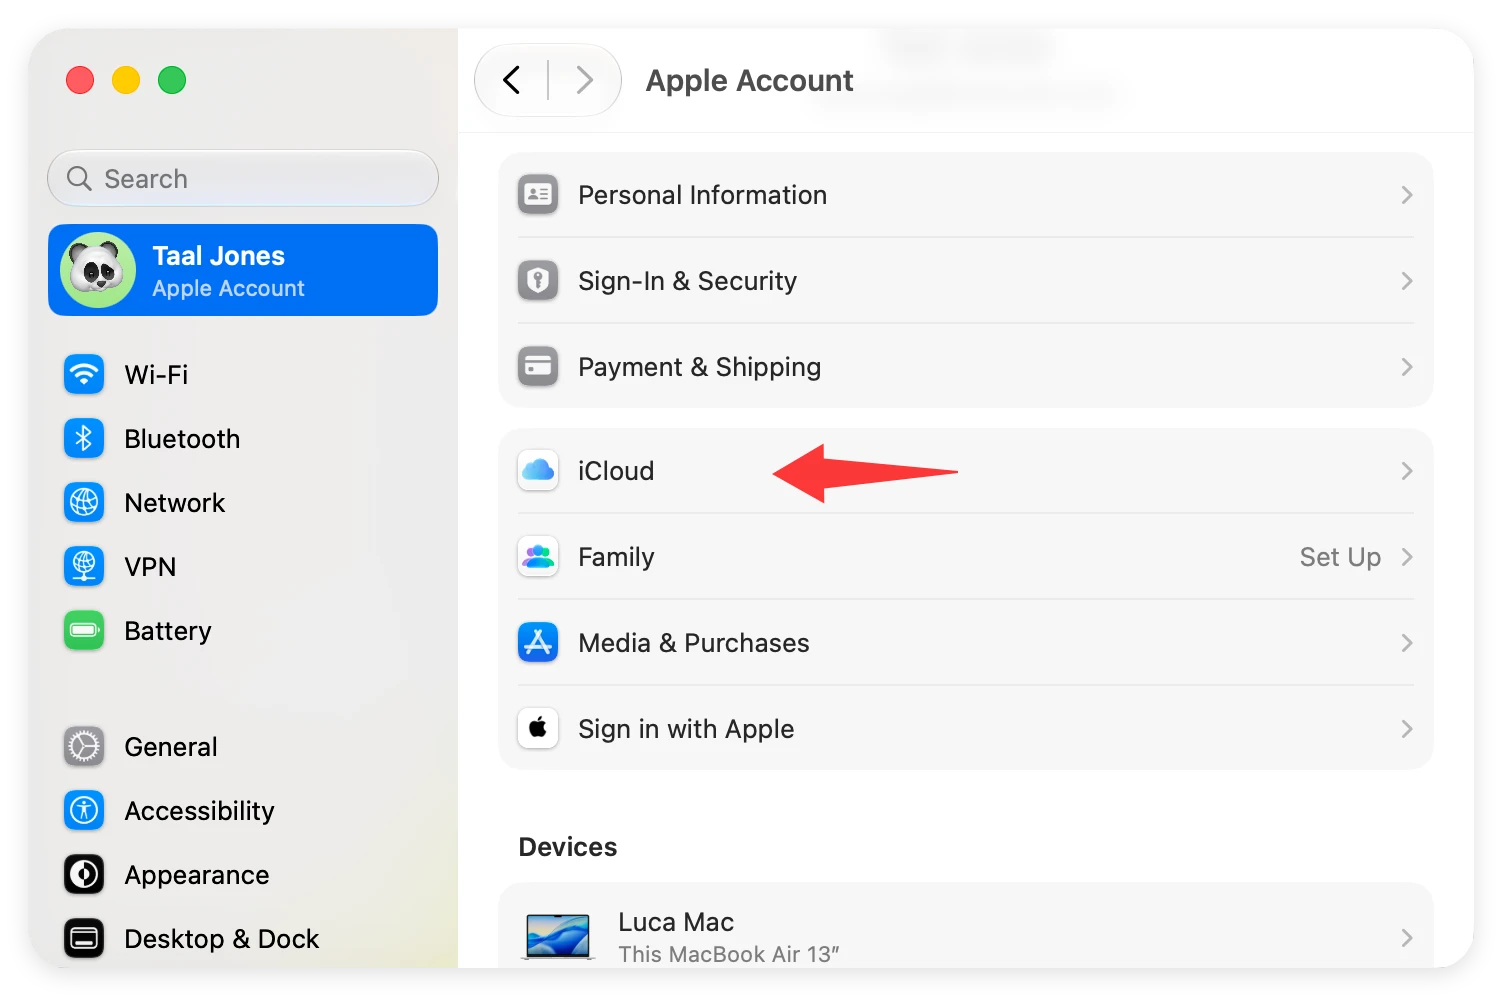
Step 2: Access Your Apple Account Profile
At the very top of the left sidebar, click on your name or Apple Account avatar. This opens your centralized account overview profile. Look through the main panel on the right side and click on the option labeled iCloud.
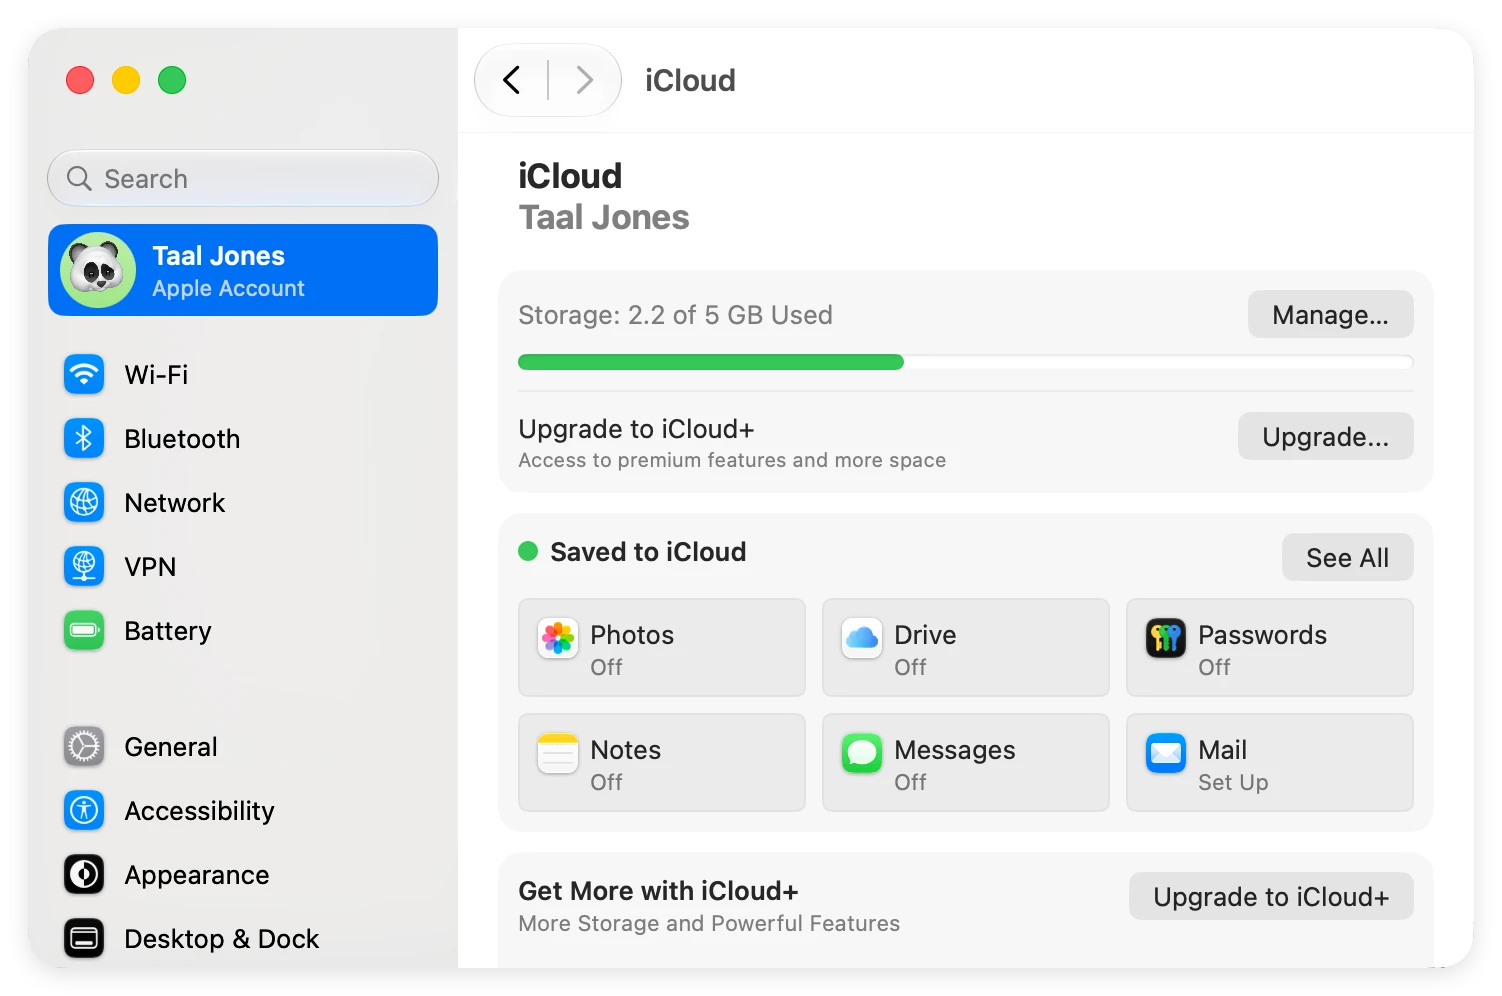
Step 3: Open the iCloud Configuration Panel
Here, you will see a detailed visual breakdown of your cloud storage usage.
Step 4: Turn on iCloud Drive and Folder Syncing
Click on Drive (iCloud Drive). Toggle the main switch to the 'On' position. Make sure to check the boxes for Desktop & Documents Folders. This ensures everything saved on your active workspace is continuously protected in real-time.
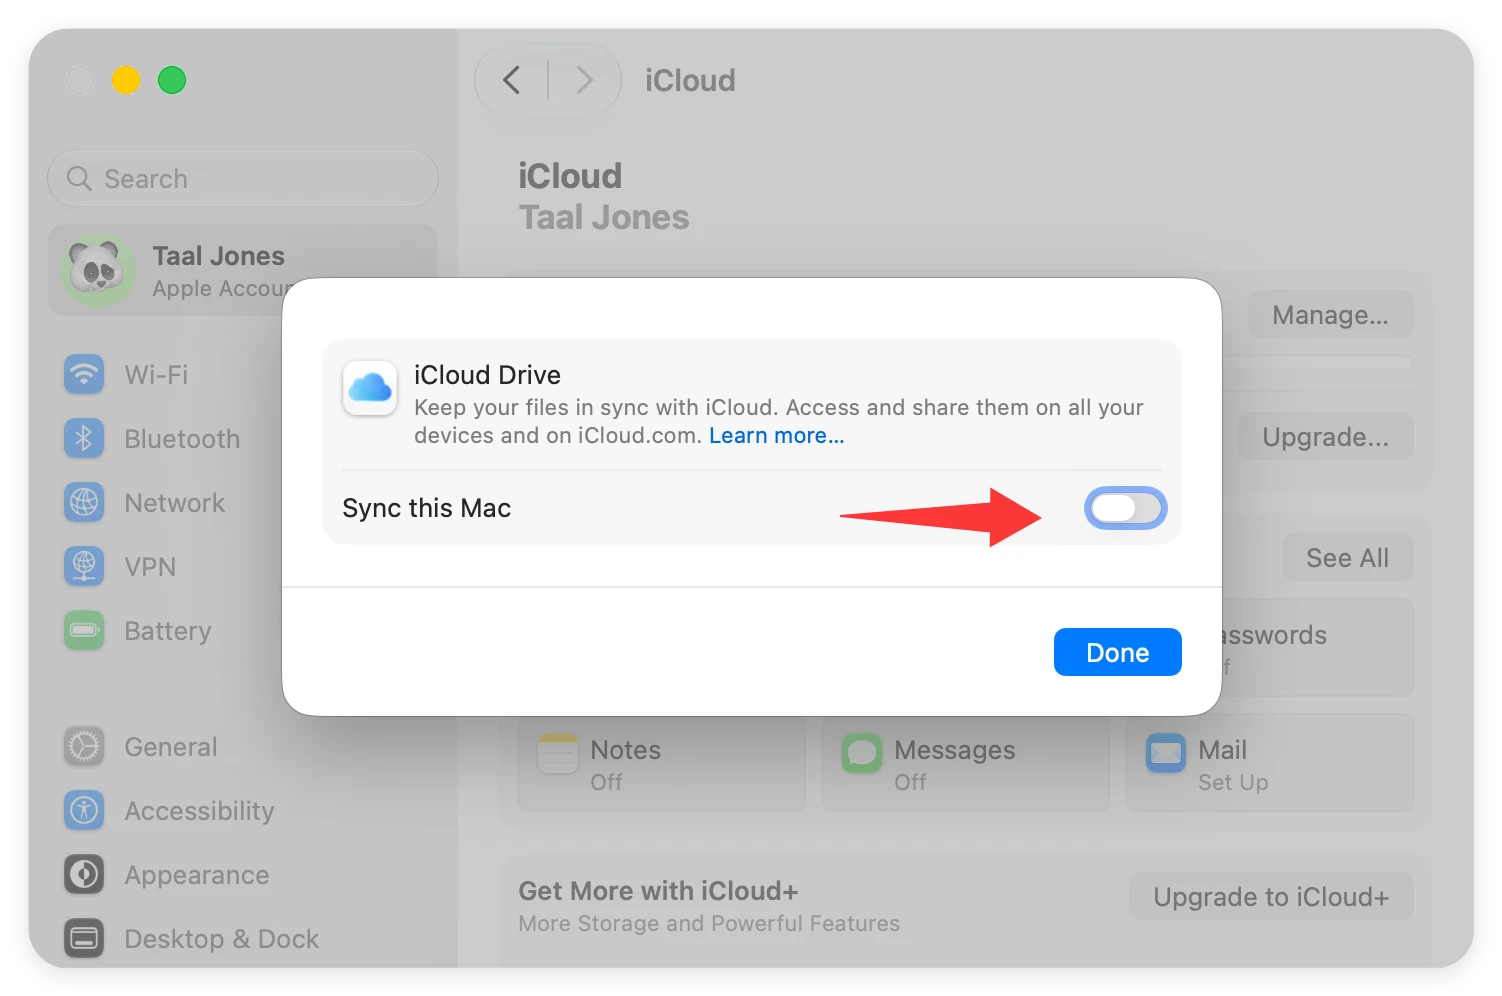
If you prefer keeping your data completely local, or if you are tired of getting those persistent 'Storage Full' alerts, turning off cloud syncing is just as straightforward:
Step 1: Navigate Back to iCloud Settings
Go to Apple Logo > System Settings > [Your Name] > iCloud, exactly as you did before.
Step 2: Select iCloud Drive
Click into the iCloud Drive section to see the specific categories of data currently being pushed to the cloud network.
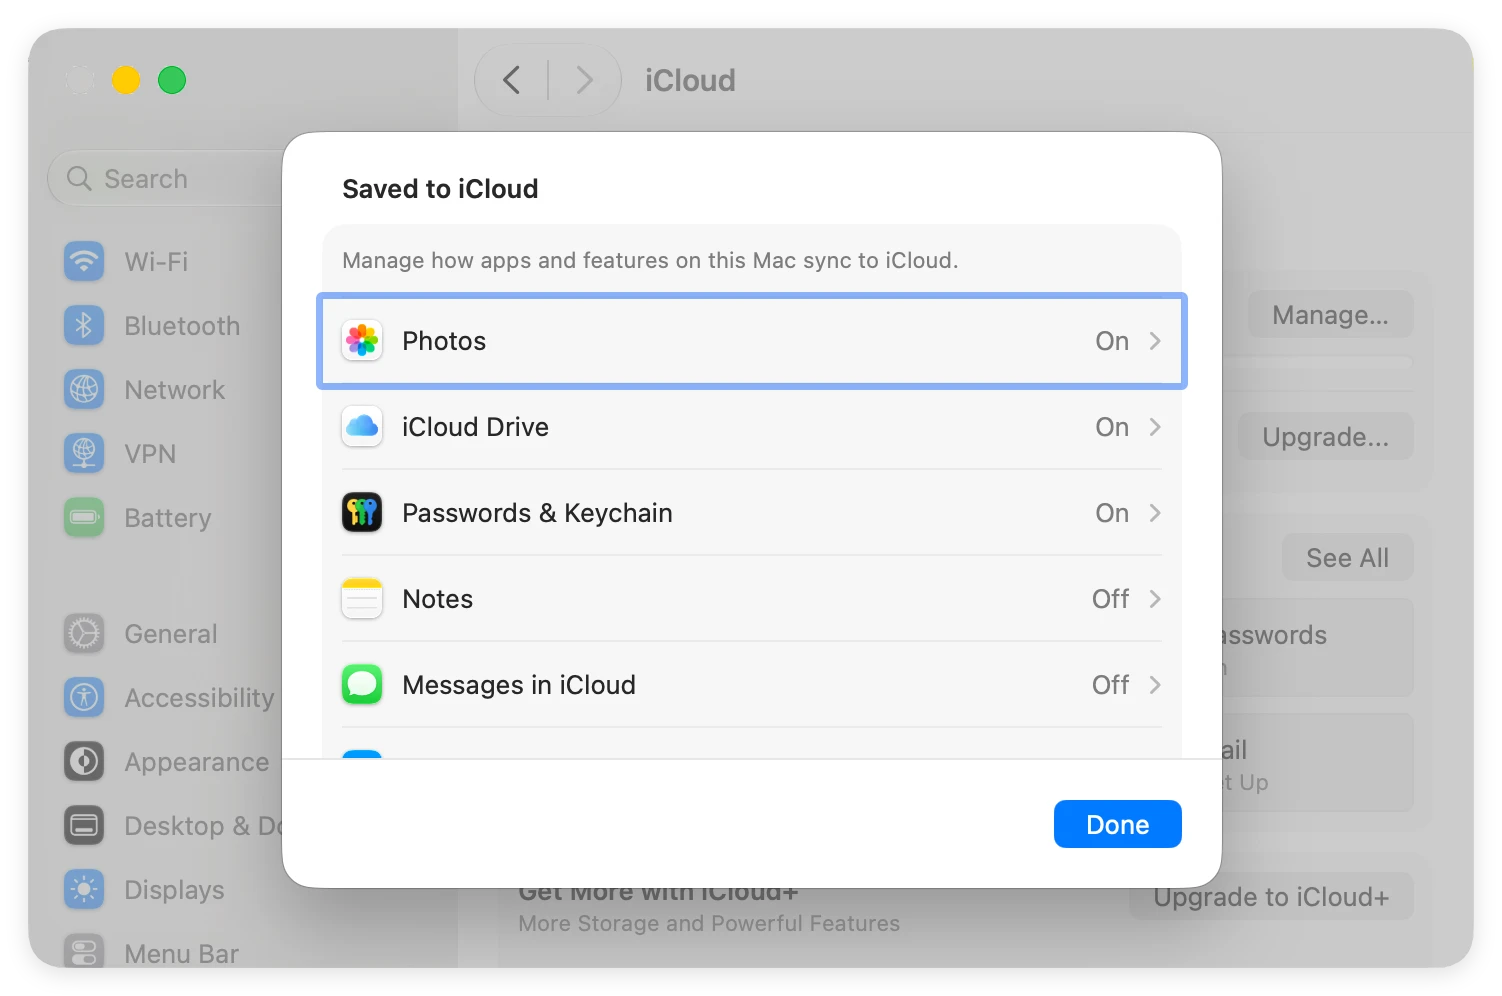
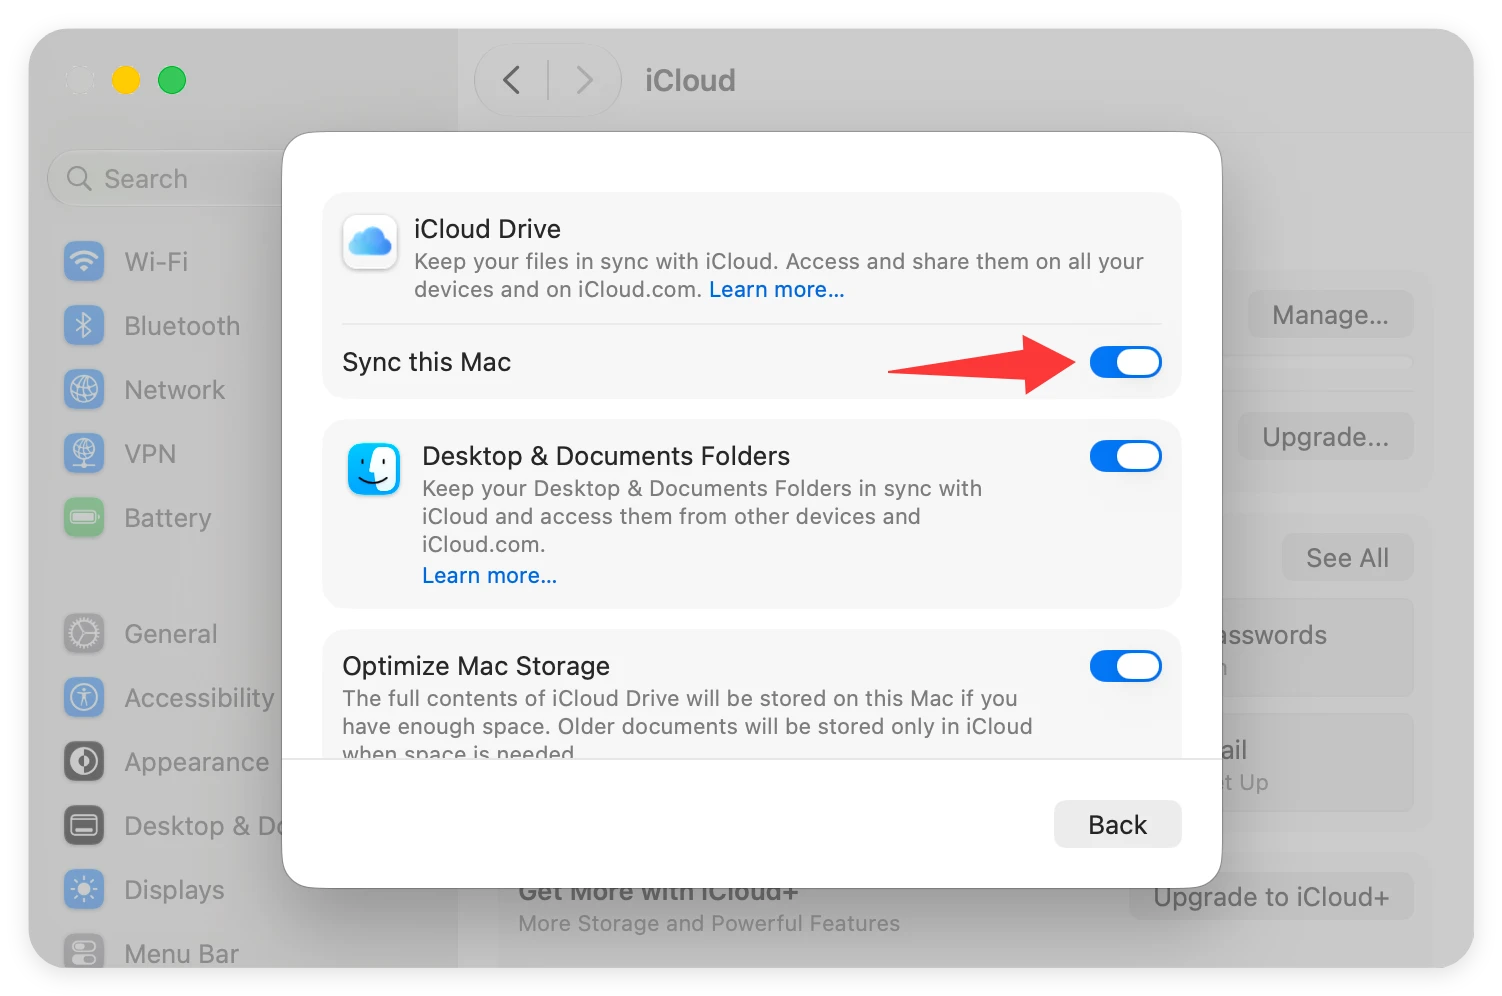
Step 3: Toggle the Main Synchronization Switch Off
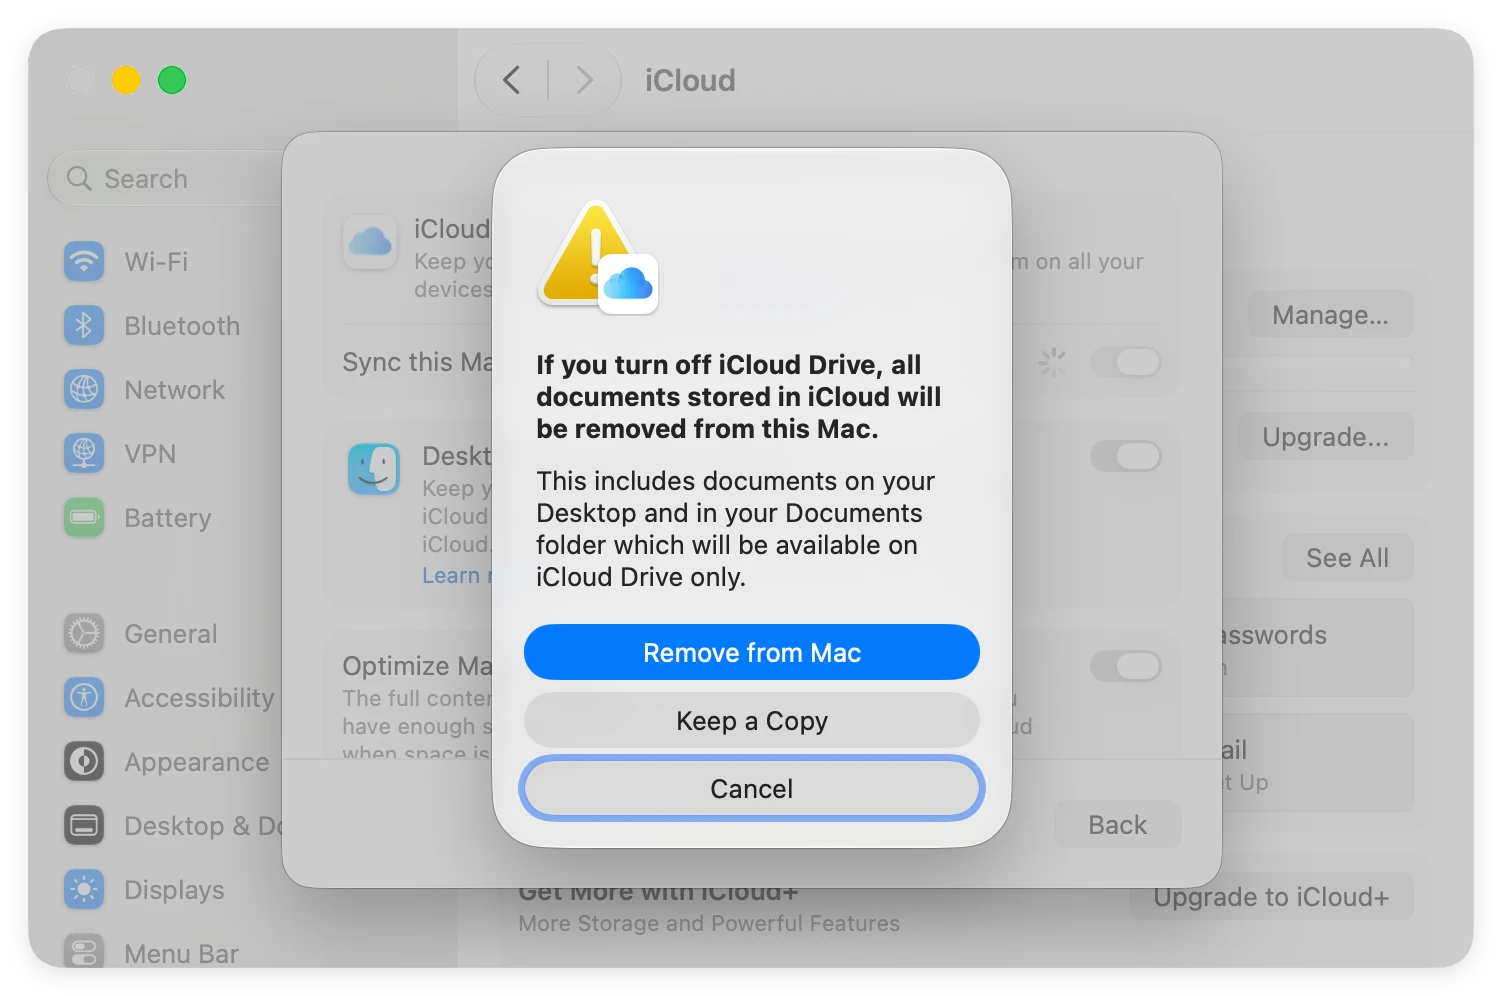
Turn off the primary switch for iCloud Drive. macOS 27 Golden Gate will immediately show a pop-up confirmation message asking how you want to handle your existing files.
Step 4: Choose What to Do with Local Files
You can choose to 'Keep a Copy' of your files directly on your Mac, or delete them from the local disk while preserving them in the cloud interface. Choose the option that fits your current storage needs best.
A common trap many users fall into when disabling cloud features is losing track of where their files are stored. When you disable Desktop & Documents syncing, your files might seem to vanish from your desktop screen.
Don't panic! The system simply moves them into a specialized folder inside your home user path labeled 'iCloud Drive (Archive).' You will need to manually copy these items back to your local storage folders if you want them visible on your physical desktop screen again.
Because architectural updates in macOS 27 Golden Gate aggressively prioritize local disk cleanup when system storage drops below critical limits, it is highly recommended to perform a local manual backup before changing cloud settings. You can copy your most critical files to an external thumb drive or a dedicated local storage partition.
Managing your files shouldn't be a guessing game. Learning how to enable or disable iCloud backup on macOS 27 Golden Gate gives you the power to find the perfect balance between absolute data safety and smart local space optimization.
Take a few minutes today to check your system settings, pick what needs saving, and enjoy a faster, cleaner, and more responsive Mac setup.
Christina
Christina is the senior editor of Donemax software who has worked in the company for 4+ years. She mainly writes the guides and solutions about data erasure, data transferring, data recovery and disk cloning to help users get the most out of their Windows and Mac. She likes to travel, enjoy country music and play games in her spare time.
Gerhard Chou
In order to effectively solve the problems for our customers, every article and troubleshooting solution published on our website has been strictly tested and practiced. Our editors love researching and using computers and testing software, and are willing to help computer users with their problems