
Written byCharlesUpdated on Jul 19, 2025
[4 Methods] How to Unmount a Drive on Mac: Step-by-Step Guide for All Users
Approved byGerhard Chou
PAGE CONTENT:
Whether you're dealing with an external hard drive, a USB flash stick, an SD card, or even a mounted network volume, knowing how to unmount a drive safely on macOS is essential. Incorrectly disconnecting storage devices can result in data corruption, file system damage, or even hardware issues in the long run.
In this guide, we'll walk you through everything you need to know about unmounting drives on Mac - including step-by-step instructions using Finder, Disk Utility, and Terminal. We'll also address common errors and explain what to do if a disk refuses to unmount.
What Does It Mean to Unmount a Drive on Mac?
In macOS, mounting refers to the process of making a drive accessible to the operating system. When a drive is mounted, you can view, read, and write files to it. Unmounting a drive, on the other hand, removes the drive from macOS without physically disconnecting it. Once unmounted, you cannot access the files unless the drive is mounted again.
Unmounting is particularly useful in scenarios such as:
- Safely ejecting an external drive or USB.
- Preparing to format or partition a drive.
- Troubleshooting drive errors.
- Making sure no applications or processes are accessing the disk.
Best 4 Methods for Unmounting Drives on Mac
Method 1: Unmount a Drive Using Finder (Eject Option)
This is the most common method for unmounting external drives.
Steps:
- Connect your drive (if it's an external drive).
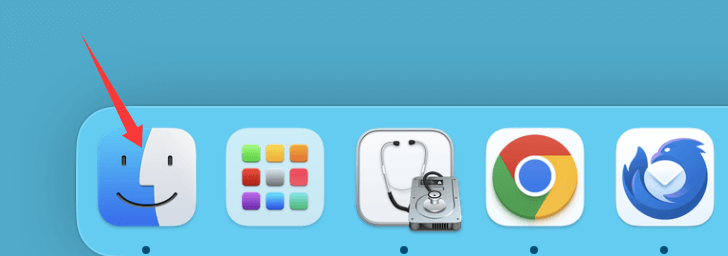
- Open Finder.
![unmounting drives on Mac]()
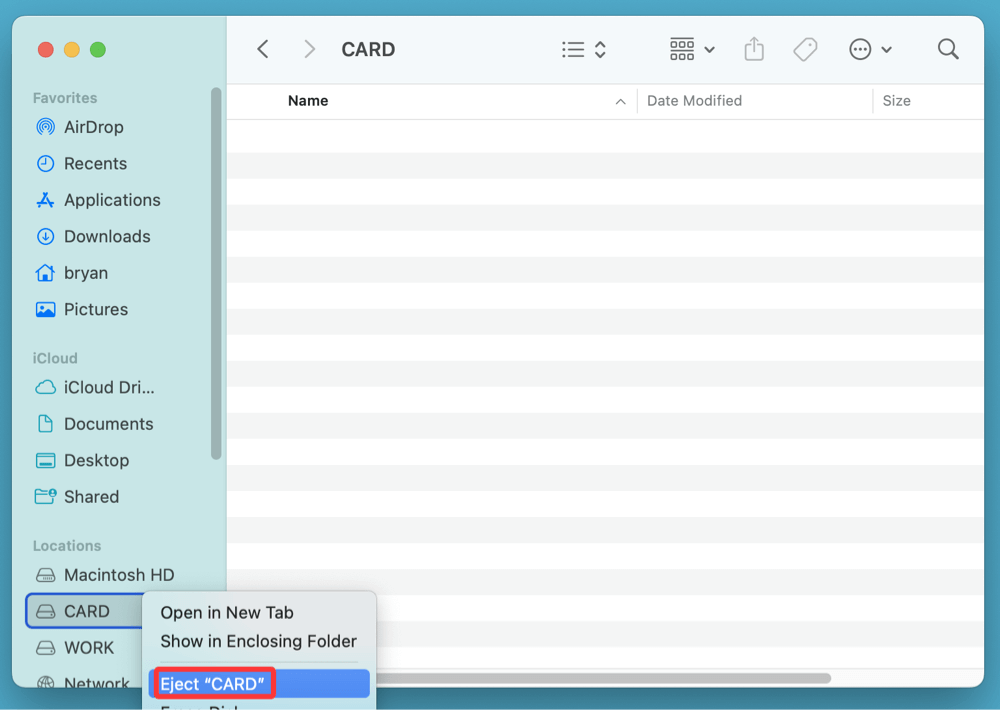
- Locate the drive in the sidebar under "Locations" or on the desktop.
- Click the small Eject icon next to the drive name or right-click the drive icon and select "Eject".
![unmounting drives on Mac]()
- Wait for the drive to disappear from the sidebar or desktop.
💡 Note: Once the drive is ejected (unmounted), you can physically disconnect it without risk of data loss.
When to Use:
- Ejecting USB drives, SD cards, or external HDDs.
- Safely removing a Time Machine backup disk.
Method 2: Unmount a Drive Using Disk Utility
Disk Utility provides a graphical interface for managing all storage volumes on your Mac. It's especially helpful for unmounting internal partitions or drives not visible in Finder.
Steps:
- Open Disk Utility:
- Go to Disk Utility from Utilities via Applications.
- Or search "Disk Utility" via Spotlight (Command + Space).
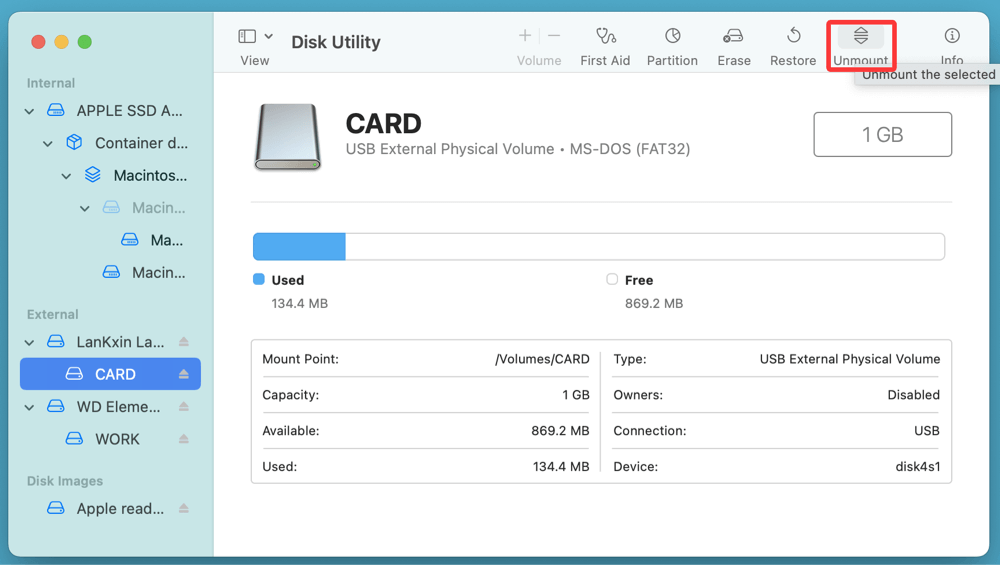
- From the sidebar, select the volume or drive you wish to unmount.
- Click the "Unmount" button in the top toolbar.
![unmounting drives on Mac]()
Do not click "Erase" or "Partition" unless you want to lose data.
- Once unmounted, the drive will become grayed out in the list.
When to Use:
- Unmounting a drive before formatting.
- Managing partitions or encrypted volumes.
- When Finder won't allow ejection.
Method 3: Unmount a Drive Using Terminal (Advanced Users)
For tech-savvy users, Terminal offers precise control over drives and volumes. You can use Terminal to unmount a drive by its disk identifier, which is useful when GUI methods fail.
Step 1: Open Terminal
Go to Terminal from Utilities via Applications, or search "Terminal" using Spotlight.
Step 2: Find the Disk Identifier
Run the following command to list all drives:
diskutil list
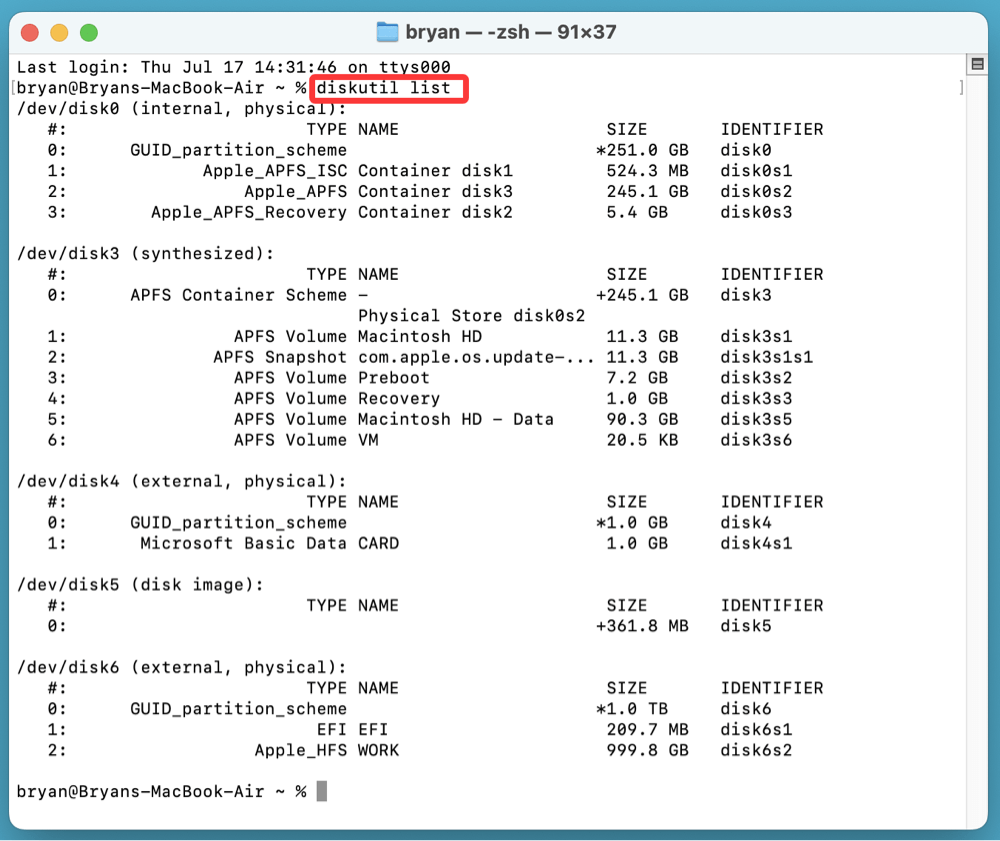
You'll see a list of drives and partitions. Look for the disk you want to unmount - for example: /dev/disk6s2.
Step 3: Unmount the Drive
To unmount a single volume:
diskutil unmount /dev/disk6s2
To unmount the entire disk:
diskutil unmountDisk /dev/disk6
To force unmount (if the disk is busy):
sudo diskutil unmountDisk force /dev/disk6
Enter your Mac's password if prompted.
When to Use:
- If GUI methods fail.
- When automating with scripts.
- For stubborn or busy drives.
Method 4. Unmount a Drive on Mac Using Third-party Apps
There are many apps can help mount or unmount a drive on Mac, such as:
- Donemax Data Recovery for Mac: Unmount a drive on Mac and can recover lost data from a unmounted drive.
- Donemax NTFS for Mac: Even can mount or unmount NTFS drives on Mac.
- DMcleaner for Mac: Quickly mount or unmount an external device on Mac.
What to Do If a Drive Won't Unmount on Your Mac
Sometimes, when you attempt to unmount or eject a drive, macOS shows an error like:
"The disk couldn't be ejected because one or more programs may be using it."
This is a common issue, especially with external drives, and can be caused by open files, hidden system processes, or background services that are actively reading or writing to the disk. Let’s break down the problem and cover all the ways you can troubleshoot and resolve it.
Common Reasons Why a Drive Fails to Unmount
- Files or apps still open: A document, image, or video stored on the drive might still be open in Preview, Pages, VLC, or another app.
- Terminal or Finder is accessing the drive: Even if you aren't actively using a file, Finder may still have the folder open in the background.
- Spotlight indexing: If you just plugged in a new drive, Spotlight may be indexing its contents, which locks it temporarily.
- Time Machine backups: If the drive is set as a Time Machine backup disk, macOS may be writing to it in the background.
- System services or daemons: Background processes such as mds, fsck, or even antivirus software can lock the disk without obvious signs.
Solutions:
1. Close Open Apps
- Quit any app using the drive (e.g., Preview, Photos, VLC).
- Close Finder windows accessing the drive.
2. Use Activity Monitor
- Open Activity Monitor (Applications > Utilities).
- Search for the drive name or mounted path.
- Force quit related processes.
3. Use Terminal with sudo
- Force unmount with:
bash
CopyEdit
sudo diskutil unmountDisk force /dev/diskX
4. Restart Your Mac
- A simple restart can terminate background processes that may be locking the drive.
5. Try Safe Mode
- Restart and hold Shift to boot into Safe Mode.
- Unmount the drive via Disk Utility.
6. Use Recovery Mode
- Restart and hold Command + R (for Intel-based Mac) or Power button (for Apple silicon Mac) to enter Recovery.
- Open Disk Utility and unmount from there.
What NOT to Do
- Do NOT force unplug a drive that's currently mounted - you risk data loss or damaging the file system.
- Avoid force-unmounting Time Machine disks during an active backup. Wait for the backup to finish.
- Don't ignore repeated unmounting errors - this may indicate hardware failure or a corrupted file system.
Still Stuck? Try Third-Party Tools
There are some third-party disk management utilities that can help identify locking processes and manage unmounts more effectively:
- iStat Menus – View what's running in the background.
- CleanMyMac X – Has a disk activity monitoring feature.
- Carbon Copy Cloner – Can alert you to mounted Time Machine volumes and help you unmount them properly.
These tools aren't required but can be helpful for persistent problems.
Bottom Line: If your drive refuses to unmount, it's typically due to background activity or open files. Follow the escalation path - from quitting apps, to force unmounting in Terminal, to using Safe or Recovery Mode - to safely resolve the issue. Never remove a mounted drive by force, and always ensure your data is backed up beforehand.
Understanding Eject vs. Unmount vs. Format
Many users confuse these three terms. Here's a quick comparison:
| Term | Description | Use Case |
|---|---|---|
| Eject | Unmounts and safely disconnects external media | When removing a USB or SD card |
| Unmount | Makes drive inaccessible without removing it | Before formatting or managing partitions |
| Format | Erases and reconfigures file system | When preparing a drive for reuse |
How to Remount a Drive After Unmounting?
Unmounting a drive doesn't delete data; it just makes it temporarily inaccessible.
To remount:
- Physically disconnect and reconnect the drive.
- Use Disk Utility > Select the grayed-out volume > Click "Mount".
- In Terminal:
diskutil mount /dev/diskX
FAQs About Unmounting a Drive on Mac
1. Can I unmount an internal drive?
Yes, but proceed with caution. Unmounting the system volume (e.g., Macintosh HD) while your Mac is running can cause crashes. Only unmount non-system internal volumes when needed.
2. Is it safe to unplug a drive after unmounting?
Yes. Unmounting ensures all data is written and processes are terminated. Once unmounted, it's safe to unplug.
3. Why won't my drive unmount?
The drive may be in use. Close any open files or apps using the drive, and consider force unmounting via Terminal.
4. What does "Force Unmount" do?
It forcibly stops all access to the drive and unmounts it. This is useful when normal methods fail but can risk data loss if something is actively writing to the disk.
5. Does unmounting delete files?
No. It only removes the drive from the active file system. Files remain untouched unless you format the drive.
Tips for Safe Drive Handling on Mac
- Always eject before disconnecting external storage.
- Don't yank out drives, even if you're in a rush - unmount or eject first.
- Use disk images cautiously - unmount them via Disk Utility or Finder.
- Format appropriately - use APFS for SSDs, Mac OS Extended for HDDs, and exFAT/FAT32 for cross-platform use.
- Backup your data before performing any advanced disk operations.
💡 Note: If you've lost data due to unmounting a drive on your Mac, you can use Mac data recovery software - such as Donemax Data Recovery for Mac to get the lost data back.
Conclusion
Unmounting a drive on Mac is a simple yet vital step in managing your storage devices. Whether you prefer using Finder's graphical interface or the power of Terminal, macOS provides multiple methods to ensure you can unmount disks safely and efficiently.
Always remember: don't just pull out a USB or external drive without unmounting it - doing so risks corrupting your files and damaging the drive.
By following the methods outlined in this guide, you can confidently manage and unmount drives on macOS versions including macOS Tahoe, Sequoia Sonoma, Ventura, Monterey, and earlier - keeping your data safe and your system running smoothly.
DMcleaner for Mac
Donemax DMcleaner for Mac is an award-winning Mac cleanup & maintenance application. It offers 10+ tools to help Mac users clean up junk data on Mac, uninstall unwanted apps & delete leftovers, shred files, delete duplicate files, free up disk space, speed up slow Mac, etc. It is also a smart switch manager for Mac, a powerful disk manager for Mac.
Related Articles
- Apr 10, 2025[9 Fixes] Fix Macintosh HD Not Mounting on Mac or Not Showing Up in Disk Utility
- Apr 13, 2026How to Remove/Hide Macintosh HD on Mac Desktop?
- Mar 21, 2025How to Use a Western Digital External Hard Drive on a Mac?
- May 18, 2026Troubleshoot and Fix common macOS Tahoe 26 Beta Issues
- Nov 27, 2024How to Add or Delete Photos on Mac?
- Jul 15, 2025How to Enter and Exit Full Screen on a Mac?

Contributing Writer
Charles
Charles, who lives in Sydney, Australia, is an editor & writer of Donemax Team. He is good at writing articles related with Apple Mac computers, Windows operating systems, data recovery, data erasure, disk clone and data backup, etc. He loves reading and playing tennis in his spare time and is interested in testing new digital devices such as mobile phones, Macs, HDDs, SSDs, digital cameras, etc.

Editor in chief
Gerhard Chou
In order to effectively solve the problems for our customers, every article and troubleshooting solution published on our website has been strictly tested and practiced. Our editors love researching and using computers and testing software, and are willing to help computer users with their problems