
Best data recovery software - easily and completely recover deleted, formatted or lost files.
When using Windows 11, if you want to capture the contents of the Windows 11 PC screen (or part of it), you will use the screenshot function. Windows 11 itself has a compelling built-in screenshot function. Here are six simple ways to capture the screen on Windows 11:
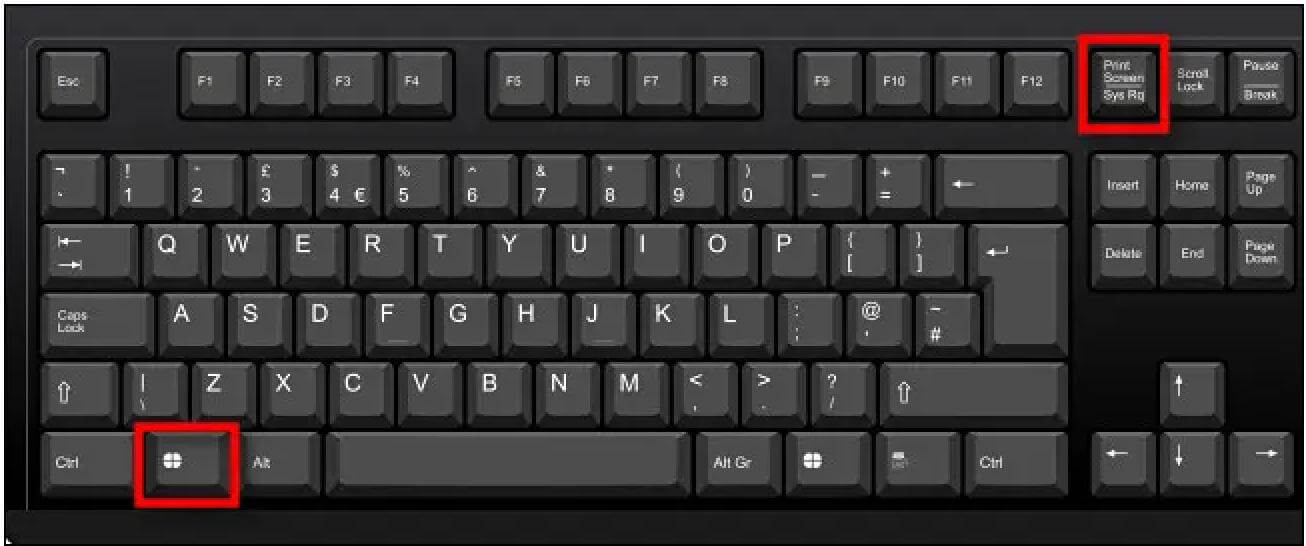
- Method 1: Copy the entire screen to the clipboard using Print Screen
- Method 2: Use Windows+Print Screen to save the screenshot as a file
- Method 3: Use Windows+Shift+S to capture a portion of the screen to the clipboard
- Method 4: Use Print Screen to Open Screenshots
- Method 5: Take a screenshot with the Snipping Tool
- Method 6: Take a screenshot using the Xbox Game Bar
Premise introduction: If you find that you need to retrieve the previously captured pictures when using screenshots, you can use Donemax Data Recovery for data recovery
Method 1: Copy the Entire Screen to the Clipboard Using Print Screen
In Windows 11, you can copy an image of the entire screen to the clipboard (a temporary storage area for copying and pasting) by pressing the Print Screen (PrtScn) key. Sometimes the Print Screen key is labeled "PrtScn" or "PrtScrn" on the keyboard.
You can paste screenshots into any application that can receive pasted images. For example, you can open the Paint app with Windows and use Ctrl+V to paste the image. Then press Ctrl+S to save the screenshot as a file in the desired image format.

Method 2: Use Windows+Print Screen to Save the Screenshot as A File
If you want to immediately save the screenshot as an image file on your PC, press Windows+Print Screen on your keyboard. Windows will take a full-screen screenshot and automatically save it as a file named "Screenshot (#).png" (where "#" is a number taken over time based on the number of screenshots you take) in a folder called "Screenshot (#).png" The path is C:\Users\[User Name]\Pictures\Screenshots directory.
Note: If you have a laptop, you may need to hold down the function key or "Fn" key while pressing Print Screen or "PrtSc" to work, so you may need to press Windows+Fn+Print Screen to capture the screen as a PNG document.
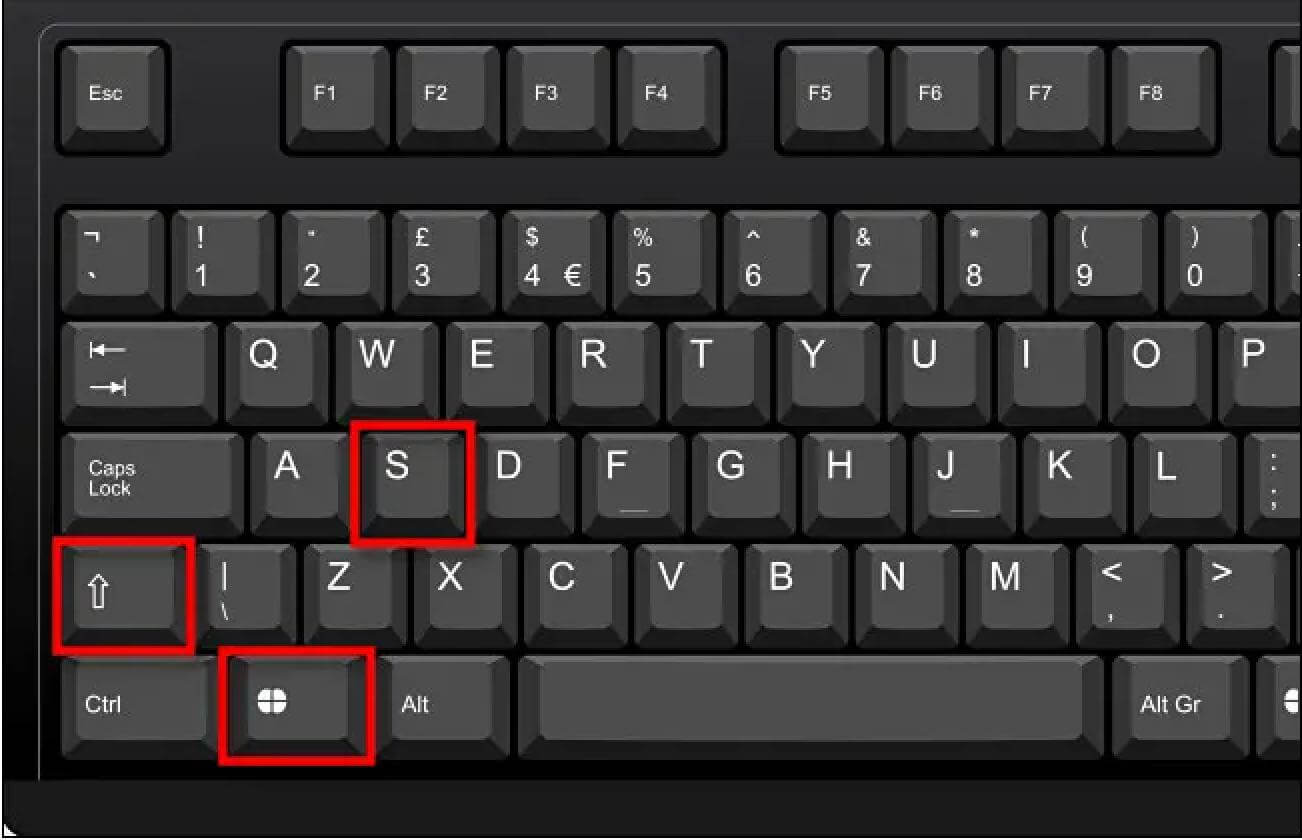
Method 3: Use Windows+Shift+S to capture a portion of the screen to the clipboard
If you want to capture a specific part of the screen of your choosing, you can use a unique Windows 11 screenshot tool. Press Shift+Windows+s on your keyboard anytime.
The screen will dim, and you will see a small toolbar at the top center of the screen. From left to right, the options work as follows:
Rectangular Capture: Select a rectangular free-form area of the screen to capture.
Freeform Snip: Select an irregular shape as a screenshot. When pasting, the area around the rough shape (in a rectangular image) will turn black.
Window Snip: Select an application window and capture only that window.
Full-Screen Screenshot: This option captures a screenshot of the entire screen, similar to pressing Print Screen alone.

Method 4: Use Print Screen to Open Screenshots
Windows 11 provides a convenient setting. After setting, you can start the screenshot tool by pressing Print Screen instead of Windows+Shift+S. The specific methods are as follows:
Press Windows+i to open Windows Settings. Then navigate to Accessibility > Keyboard. Scroll down and flip the switch next to "Use the Print Screen button to turn on screenshots" to "On." After that, close the settings. Anytime you want to open the screenshot tool to quickly copy a screenshot to the clipboard, press Print Screen on your keyboard.

Method 5: Take a screenshot with the Snipping Tool
Windows 11 provides a screenshot tool, "Snipping Tool," more comprehensively. It can not only take screenshots but also annotate, save or share pictures. The specific operations are as follows:
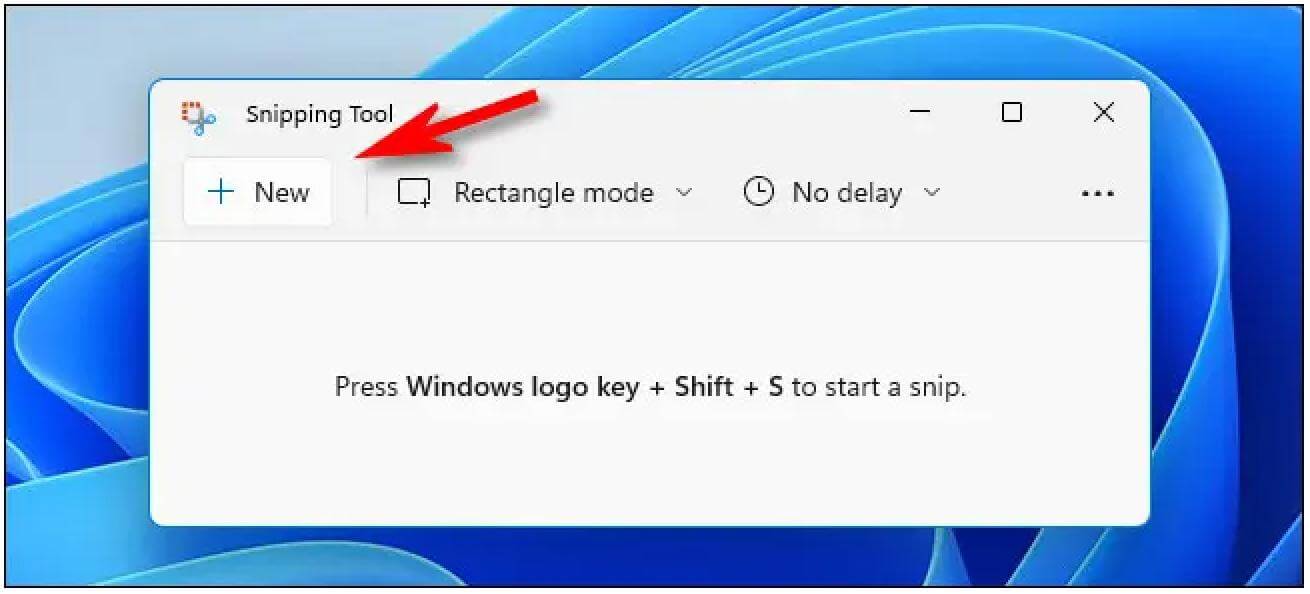
1. Open the Start menu and type "snipping," then click the "Snipping Tool" icon when you see it.

2. When the Snipping Tool opens, click New to start a new capture. When you're done, you'll see a small toolbar at the top of the screen (like the one seen in the "Capturing a Part of the Screen" section above) that allows you to perform rectangle clipping, freeform clipping, window clipping, and full-screen screenshots. The difference here is that these tools don't just copy the screenshot to the clipboard when running the Snipping Tool application. Instead, you can save them to a file.
3. After capturing a screenshot using one of the methods in the toolbar, it will appear in the Snipping Tool window. You will have the opportunity to crop it using the toolbar at the top of the window, annotate it with a drawing pen, save it as a file or share it with others.
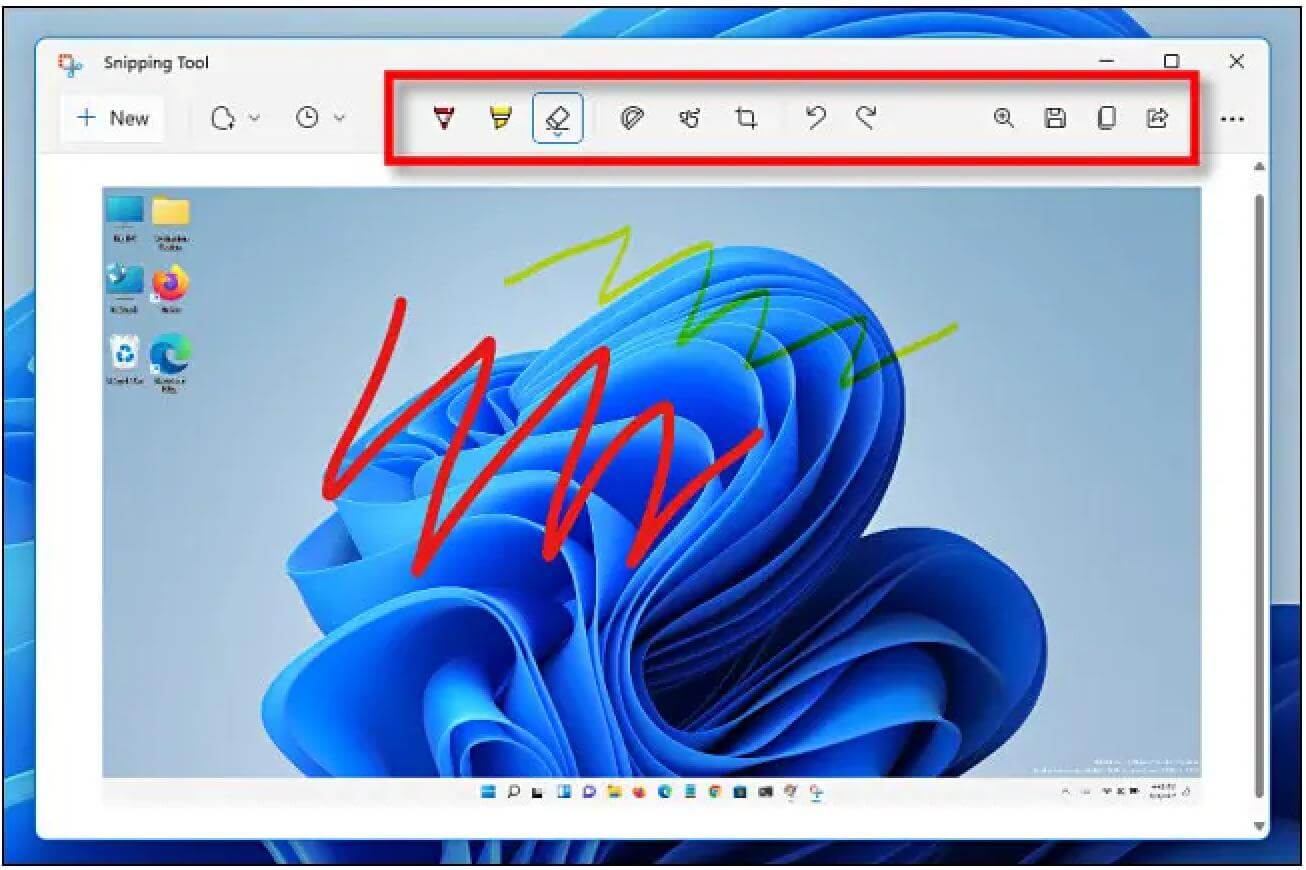
Note: The Snipping Tool is ideal if you need to capture something with a timed delay. Click the clock icon in the toolbar and select the delay time in the drop-down menu that appears. After choosing the time, click the "New" button, and the screenshot will be triggered after the period you selected. To save the file, click the save icon on the toolbar and choose a location to save it.
Method 6: Take a screenshot using the Xbox Game Bar
You can also take screenshots with the Xbox Game Bar. To do this, first, open the Xbox Game Bar by pressing Windows+g on the keyboard. In the Capture window (shown by default in the upper left corner of the screen), click the camera icon to take a screenshot of the current application (or desktop, if there is no active application). If you don't see the Capture window on the Xbox Game Bar screen, click the Widgets button in the toolbar at the top of the screen and select Capture.
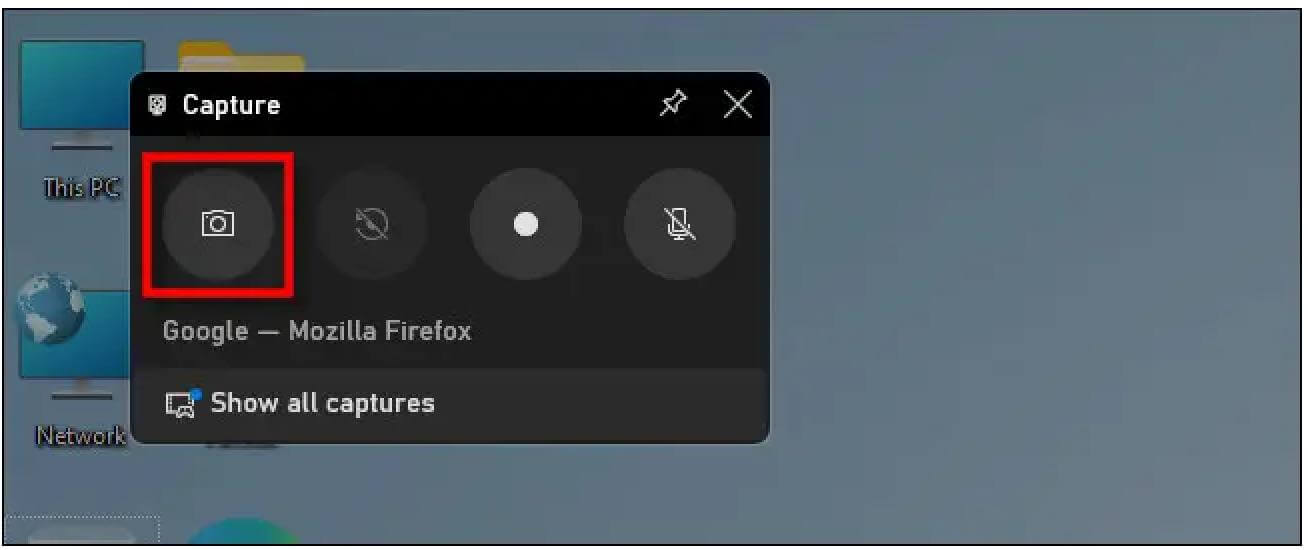
After capture, the screenshots appear in your C:\Users\[username]\Videos\Captures folder. You can also view them in the Gallery widget in the Xbox Game Bar interface itself. When you're done capturing, click any empty area of the screen or press the Escape key to close the Xbox Game Bar.
Related Articles
Donemax Data Recovery
Hot Articles
- Best 10 data recovery software for Windows and Mac OS
- Easy Way to Recover Permanently Deleted Files
- Fix Corrupted SD Card and Recover Lost Images and Videos
- Fix External Device Not Showing Up and Recover Data
- Recover Lost or Unsaved Word Documents
- Recover Deleted or Lost Hard Drive Partition
- Recover Lost Data on Windows 11 PC
- Recover Lost Data from Formatted SSD
- Recover Deleted Photos from Digital Camera
- How to Fix WD Portable Drive Not Showing Up