Written byMariaUpdated on May 19, 2025
Fix External Hard Drive Read-Only on M1 Chip Mac
Approved byGerhard Chou
Before we start: Donemax NTFS for Mac is an easy-to-use NTFS for Mac tool. It can quickly grant full read-write access to any NTFS drive on M1-chip Mac. It also can mount NTFS drive on M1 Mac, reformat external hard drive on M1 Mac and repair damaged drive on M1 Mac.
PAGE CONTENT:
External hard drives are essential tools for storing and transferring large files. However, many users experience the frustrating issue of their external hard drives being read-only on their Mac, especially those with an M1 chip. When a drive is marked as read-only, you can only access its contents but cannot modify, delete, or add any new files. In this article, we'll explore the causes of the read-only status on external hard drives, particularly on M1 Macs, and offer solutions to fix this problem.

Overview: Having a read-only external hard drive can be a significant problem for Mac users. The M1 chip, introduced by Apple, brings a range of benefits, including speed, power efficiency, and enhanced security. However, with these benefits come a few compatibility issues with external drives, particularly regarding the way macOS handles certain file systems. This article aims to help you identify the cause of the issue and provide practical solutions for fixing a read-only external hard drive on a Mac with an M1 chip.
Understand the Cause of Read-Only Issue on M1 Mac
To resolve the problem, it's crucial first to understand why your external hard drive has become read-only on a M1 Mac. Several factors could contribute to this issue:
◾File System Incompatibility
One of the most common causes of a read-only status is file system incompatibility. macOS supports several file systems, including APFS, HFS+, and exFAT. However, macOS does not have native support for writing to NTFS (the default file system used by Windows). As a result, if you connect an NTFS-formatted external drive to your Mac, it will be readable but not writable, meaning it will appear in a read-only state.
◾macOS Permissions and Security Settings
macOS has built-in security features that can restrict access to external drives. One such feature is System Integrity Protection (SIP), which helps protect important system files from being modified by malicious software. SIP can cause external drives to be mounted in a read-only state, preventing any changes to their content. Additionally, the privacy and permissions settings in macOS can also prevent you from writing to certain drives, especially if they were formatted or previously used on a different system.
◾Drive Is Physically Locked or Write-Protected
Some external hard drives come with a physical switch that locks the drive in a write-protected state. If this switch is set to the "lock" position, the drive will be read-only on any computer. Ensure that the lock switch is not engaged if your drive has one.
◾Corrupted Drive or File System Errors
Another common cause for a drive to become read-only is corruption or errors in the file system. If macOS detects issues with the drive’s file system or its structure, it may automatically mount the drive in read-only mode to avoid further damage to the data. In this case, you may need to repair the drive.
Preliminary Checks for Read-only Issue on M1 Mac:
Before diving into more technical solutions, there are a few basic checks you can perform to rule out simple issues:
◾Reconnect the Drive and Try a Different Port/Cable
Sometimes, the problem may be as simple as a loose connection or a faulty cable. Try unplugging and reconnecting the external hard drive. You can also try using a different USB port or a new cable to see if that resolves the issue.
◾Try Accessing the Drive on Another Mac or Windows PC
To confirm that the issue lies with the drive itself and not your Mac, try connecting the external hard drive to another Mac or a Windows PC. If the drive is accessible and writable on another system, then the problem may be related to your Mac's settings or macOS configuration.
◾Check If the Drive Is Encrypted or Formatted for Time Machine
If the drive is encrypted using FileVault or formatted as a Time Machine backup drive, it may be restricted from write access. You can check whether the drive is encrypted or formatted for Time Machine by looking at the drive's details in Disk Utility.
Methods to Fix External Hard Drive Read-only on M1 Mac?
Method 1. Reformat the Drive If Needed
A. How to Check File System Format
To determine whether the drive is formatted with a compatible file system, open Disk Utility on your Mac. Here's how:
- Open Spotlight by pressing Command + Space.
- Type "Disk Utility" and press Enter.
- Select your external hard drive from the list on the left.
- Under the name of the drive, you'll see the format of the drive (e.g., exFAT, HFS+, APFS, NTFS).
![Reformat the Drive]()
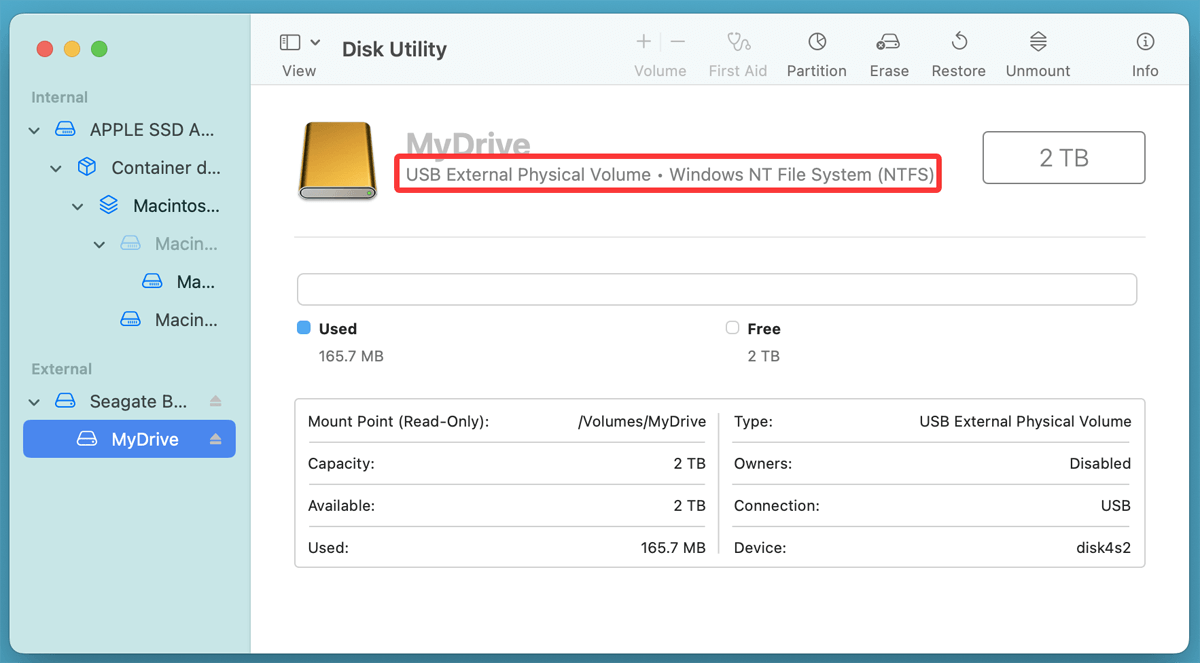
If the drive is formatted with a file system that macOS cannot write to (like NTFS), that's likely why it's appearing as read-only.
B. Reformat the Drive to a Compatible Format
To fix this issue, you may need to reformat the drive to a macOS-compatible file system like exFAT (for both Mac and Windows compatibility), APFS, or HFS+ (if you use the drive exclusively with macOS).
Here's how to reformat the external hard drive using Disk Utility:
- Backup your data: Before reformatting, make sure to back up any important files from the drive, as reformatting will erase all data on it.
- Open Disk Utility.
- Select your external hard drive.
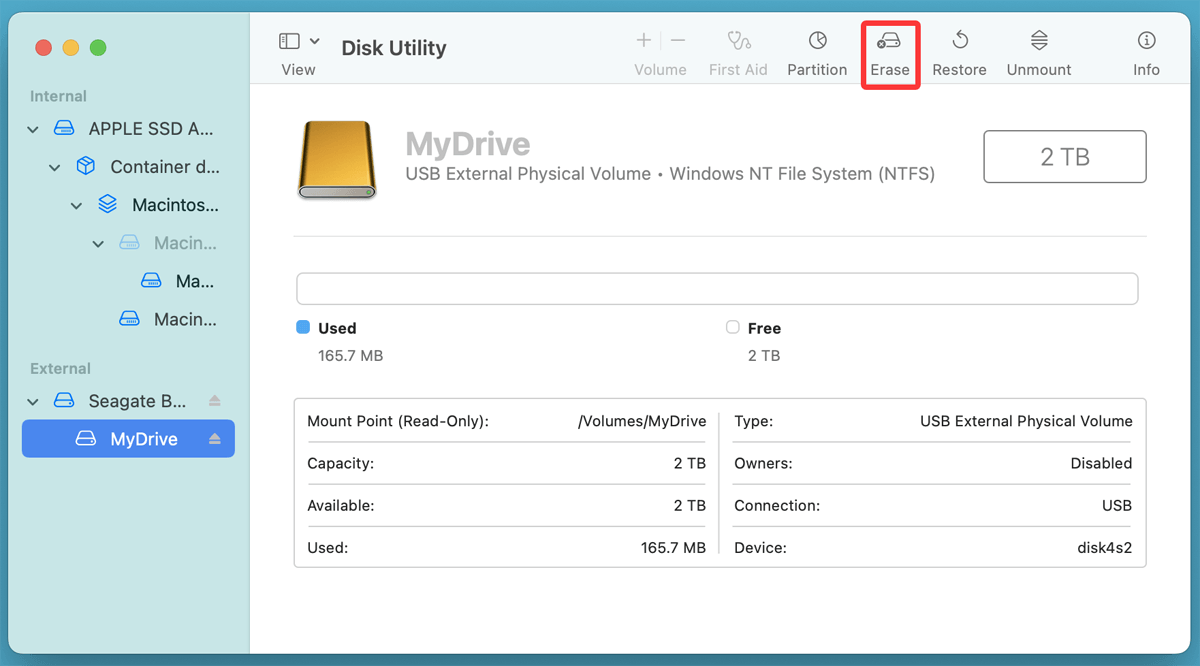
- Click the Erase button at the top.
![Click the Erase button at the top]()
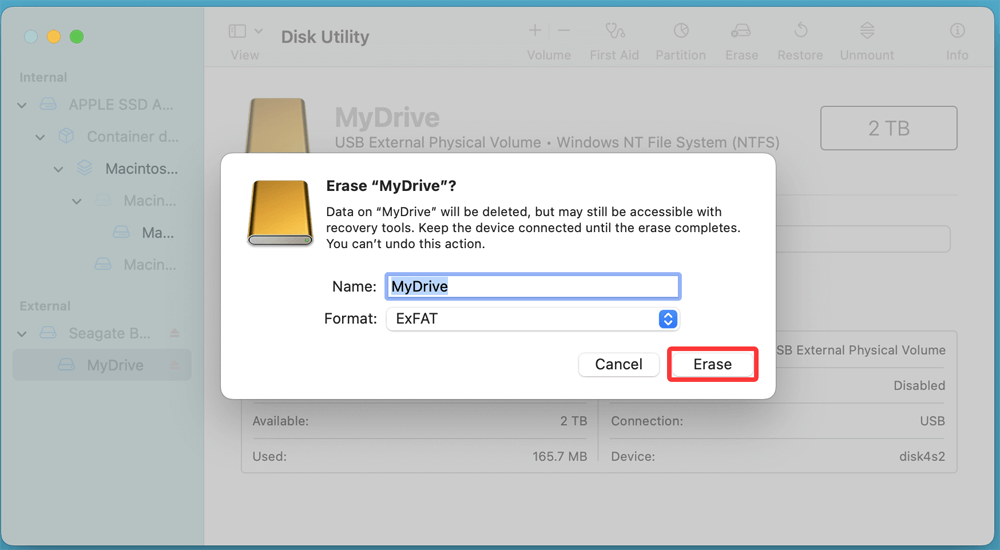
- Choose a format:
- exFAT: If you want to use the drive on both Mac and Windows.
- APFS: If you plan to use the drive only with Mac (recommended for SSDs).
- Mac OS Extended (Journaled): If you need the drive to work on older Macs.
![Choose a format]()
- Click Erase to reformat the drive.
After reformatting, the drive should no longer be read-only.
Note: Please back up important data before formatting the drive. If you've lost data, just use data recovery software - such as Donemax Data Recovery for Mac to get the lost data back.
Method 2. Use Third-Party M1 Mac NTFS Drivers for Write Access
If your external hard drive is formatted as NTFS, macOS will only be able to read it by default. To gain write access, you'll need to install third-party software that allows macOS to write to NTFS-formatted drives.
A. Explanation of NTFS Compatibility
macOS does not natively support writing to NTFS drives due to licensing restrictions. As a result, when you connect an NTFS drive to a Mac, it is automatically set to read-only mode.
B. Recommended Third-Party NTFS Drivers for M1 Mac
Several third-party tools can enable NTFS write access on macOS:
- Donemax NTFS for Mac: One of the most popular and reliable NTFS drivers for macOS. It provides full read/write support for NTFS drives.
- Tuxera NTFS for Mac: Another trusted NTFS driver, providing fast and reliable read/write access to NTFS drives.
C. Installation and Usage Tips
To use these drivers:
Step 1. Download the 100% safe and easy-to-use NTFS for Mac tool - Donemax NTFS for Mac on your M1 Mac.
Step 2. Open Donemax NTFS for Mac, then select the NTFS external hard drive, click on Mount button.
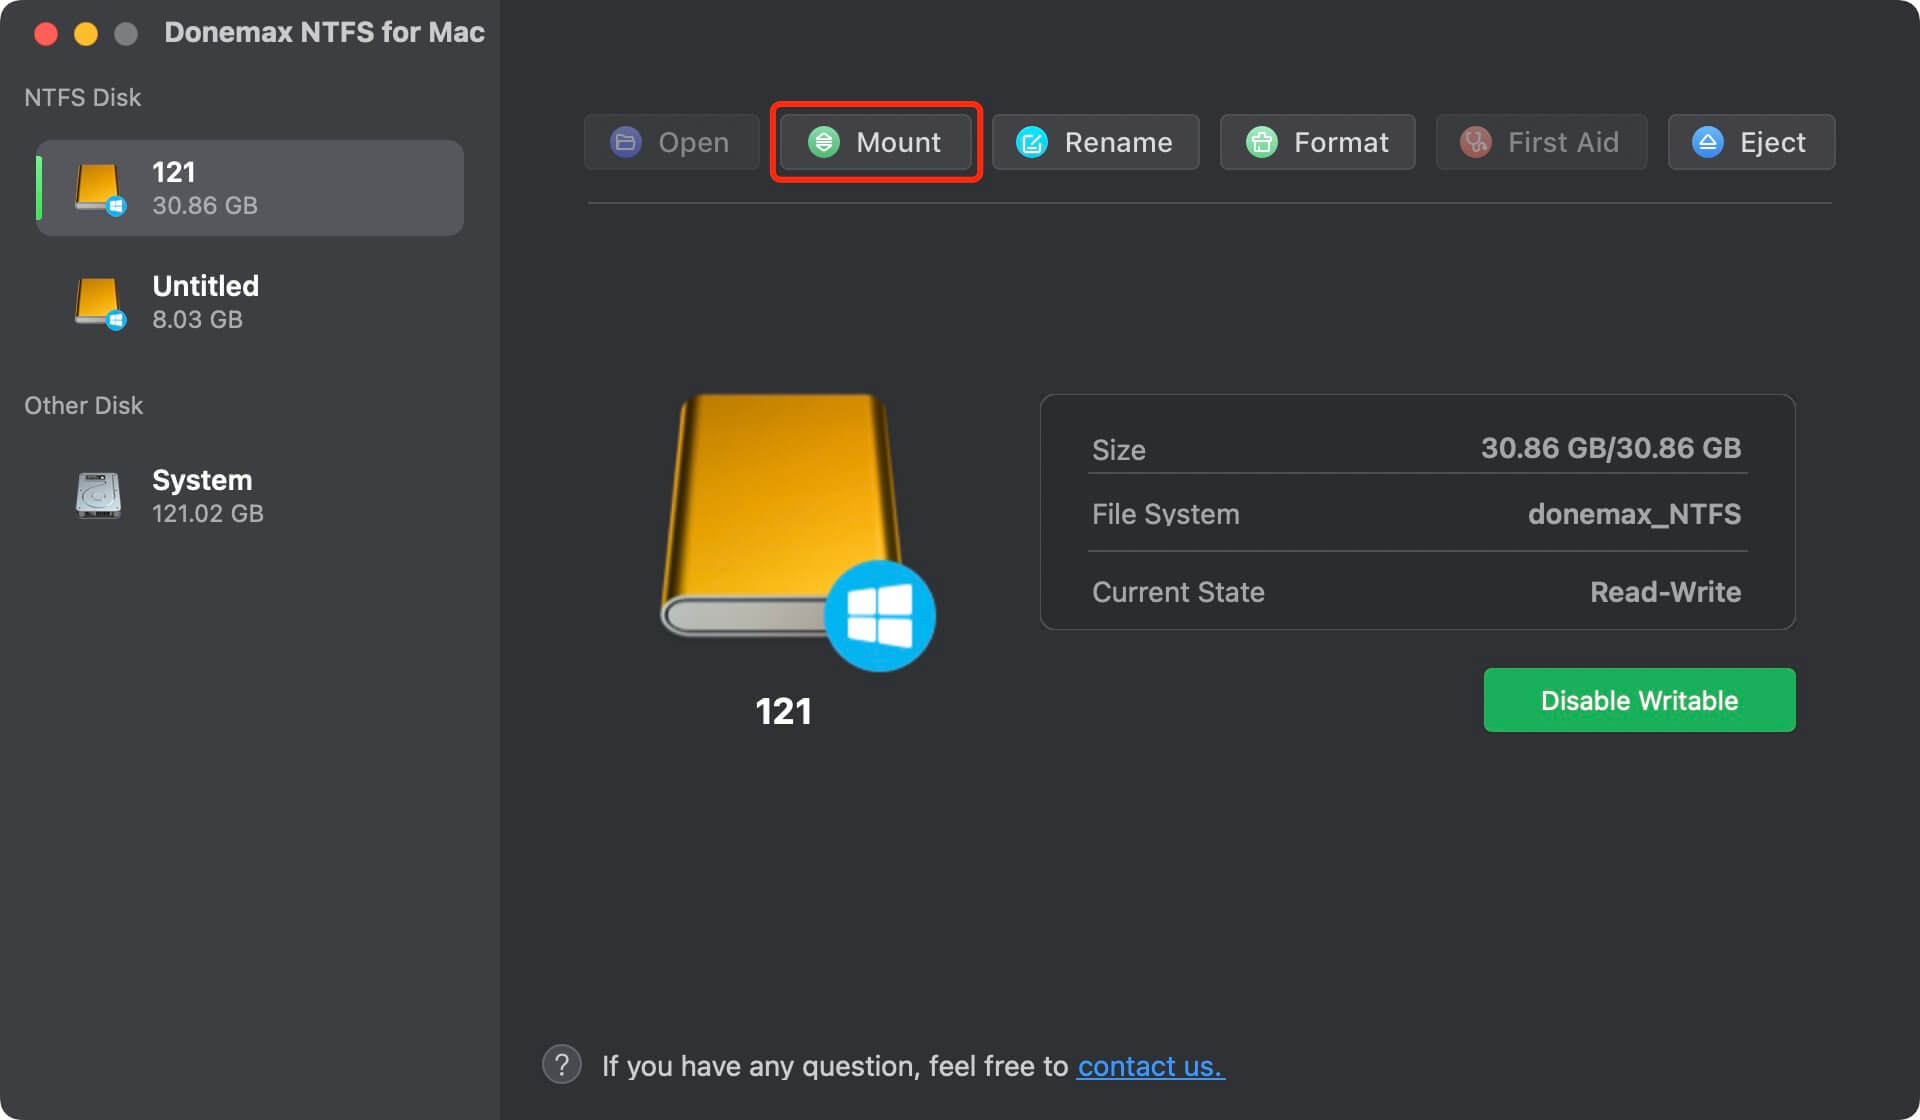
Step 3. Click on Enable Writable button if you want to write data to the NTFS drive on the M1 Mac.

D. Risks and Limitations
While third-party drivers are effective, they can introduce some risks and limitations. Ensure that you're using a trusted driver (such as Donemax NTFS for Mac), as some may cause system instability or data loss. Always back up your data before making changes.
Method 3. Modify Drive Permissions (if applicable)
If the drive is formatted with a compatible file system but remains read-only, the issue might be related to permissions.
A. Use Get Info to Adjust Sharing & Permissions
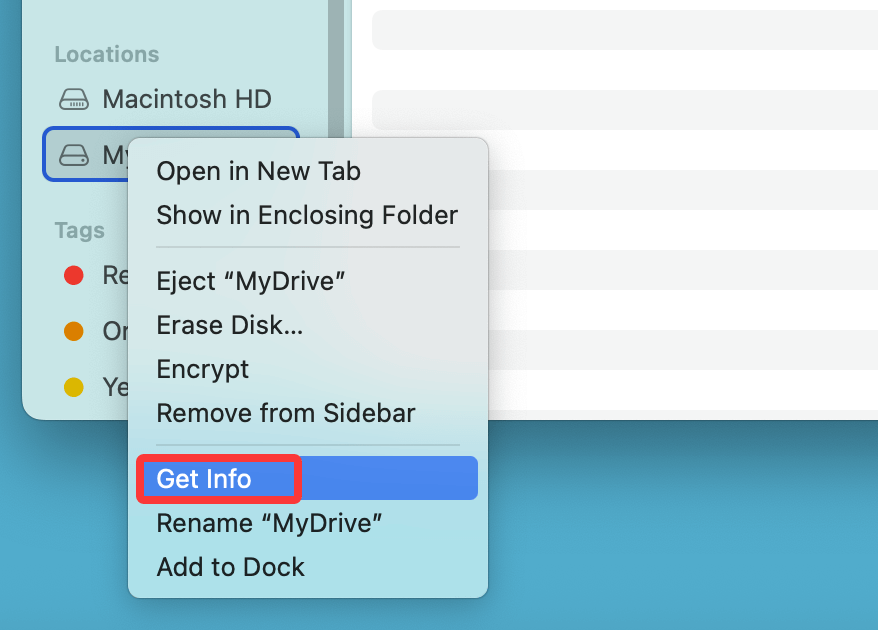
- Right-click on the external hard drive in Finder and select Get Info.
![Right-click on the external hard drive in Finder and select Get Info]()
- In the Sharing & Permissions section, check whether your account has read & write access.
- If not, click the lock icon at the bottom-right and enter your password to make changes.
- Set your account to have Read & Write access.
![Set your account to have Read & Write access]()

B. Use Terminal to Change Permissions
For more advanced users, you can use Terminal to adjust the permissions. Use the chmod and chown commands to change file permissions and ownership of the drive.
sudo chmod -R 777 /Volumes/YourDrive
sudo chown -R $(whoami) /Volumes/YourDrive
Method 4. Repair the Drive Using Disk Utility or Terminal
If your drive's file system is damaged, macOS may automatically mount it in read-only mode. To repair the drive, you can use Disk Utility or Terminal.
A. Use First Aid in Disk Utility
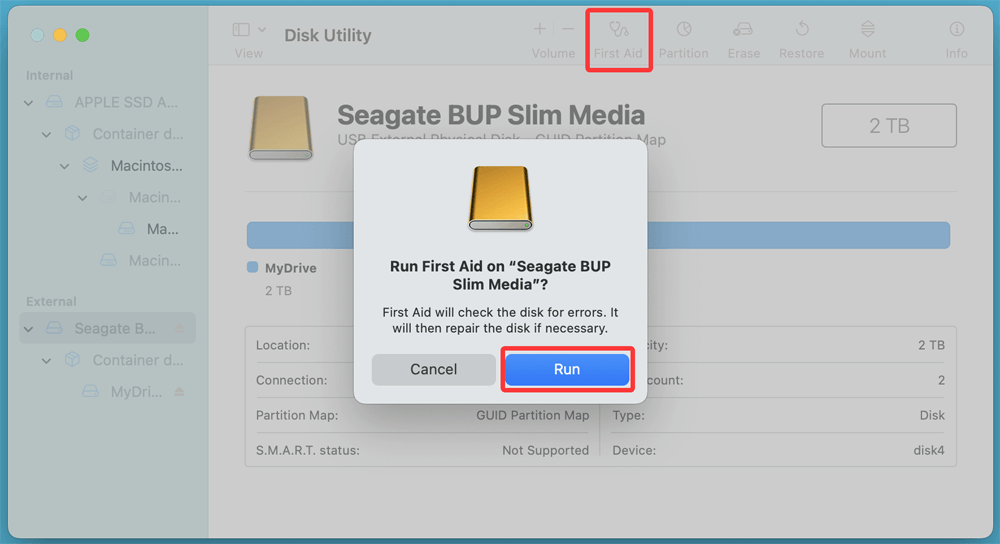
- Open Disk Utility and select your external hard drive.
- Click First Aid in the toolbar and then click Run to repair the drive.
![Repair the Drive Using Disk Utility or Terminal]()
B. Use Terminal
Alternatively, you can use Terminal to repair the drive with the following command:
sudo diskutil repairVolume /Volumes/YourDrive
Conclusion
A read-only external hard drive on an M1 Mac can be a frustrating issue, but with the right troubleshooting steps, you can fix the problem. Start by identifying the cause of the issue, whether it's a file system incompatibility, permissions problem, or corruption. From there, use the appropriate solution, whether it's reformatting the drive, installing third-party drivers (such as Donemax NTFS for Mac), or repairing the drive. Always ensure you back up important data to avoid losing it during the process.
Donemax NTFS for Mac
An easy-to-use NTFS for Mac tool to help you enable writable for NTFS drives on Mac so that you can read-write NTFS drives on Mac without any limitation. It also can help you mount, format, repair, rename, open drive on your Mac.
Related Articles
- Sep 18, 2025Tuxera NTFS for Mac Review and Best Alternative
- Jun 28, 20252025 Paragon NTFS for Mac Review and Better Alternative
- Jun 20, 2025How to Format an SD Card to NTFS on Mac?
- Jun 10, 2025How to Use An NTFS Drive on Mac?
- Jul 22, 2026Seagate NTFS Driver for Mac: Fast Read & Write Access Guide
- Dec 06, 20242025 Best Samsung NTFS Driver for Mac

Contributing Writer
Maria
Maria is one of the senior writers & editors of Donemax who lives and works in Sydney, Australia. She loves PC, Mac and Internet Technology. She has 6 years of writing articles about data recovery on PC/Mac, disk cloning solution, data eraser and computer OS optimization, etc. She is also interested in testing various software and digital products.

Editor in chief
Gerhard Chou
In order to effectively solve the problems for our customers, every article and troubleshooting solution published on our website has been strictly tested and practiced. Our editors love researching and using computers and testing software, and are willing to help computer users with their problems