
Written byCharlesUpdated on Sep 02, 2025
What Is File Sharing on Mac? A Comprehensive Guide
Approved byGerhard Chou
Before we start: File sharing is a method to transfer files between different devices. To keep files safe while sharing them, it's highly suggested to back up the data first. You can use Donemax Disk Clone for Mac to create a full back up of Mac data.
PAGE CONTENT:
File sharing is a crucial aspect of modern computing, enabling users to transfer and access files across devices and networks seamlessly. macOS offers a variety of built-in file-sharing options that allow users to share files with other Macs, Windows PCs, and even mobile devices. Whether you're working in an office, collaborating on projects remotely, or simply transferring files between personal devices, macOS provides efficient ways to share data securely and quickly.
This guide will explore file sharing on Mac, how to enable them, security considerations, troubleshooting common issues, and best practices for effective file management.

Understanding File Sharing on Mac
What Is File Sharing?
File sharing allows users to transfer files between devices over a network or the internet. On a Mac, this can be done using local networks (SMB, AFP, NFS), AirDrop, iCloud Drive, and third-party apps like Google Drive or Dropbox.
Why Use File Sharing?
- Smooth Collaboration – Share work documents across multiple devices and users.
- Convenience – Quickly access files without external storage devices.
- Cross-Platform Compatibility – Exchange files between macOS, Windows, and Linux systems.
- Backup & Storage – Store files on remote servers or networked computers for safekeeping.
macOS makes file sharing intuitive, but understanding the right method for your needs is essential.
How to Enable File Sharing on Mac
macOS has built-in settings that allow users to enable file sharing easily. Here's how you can set it up:
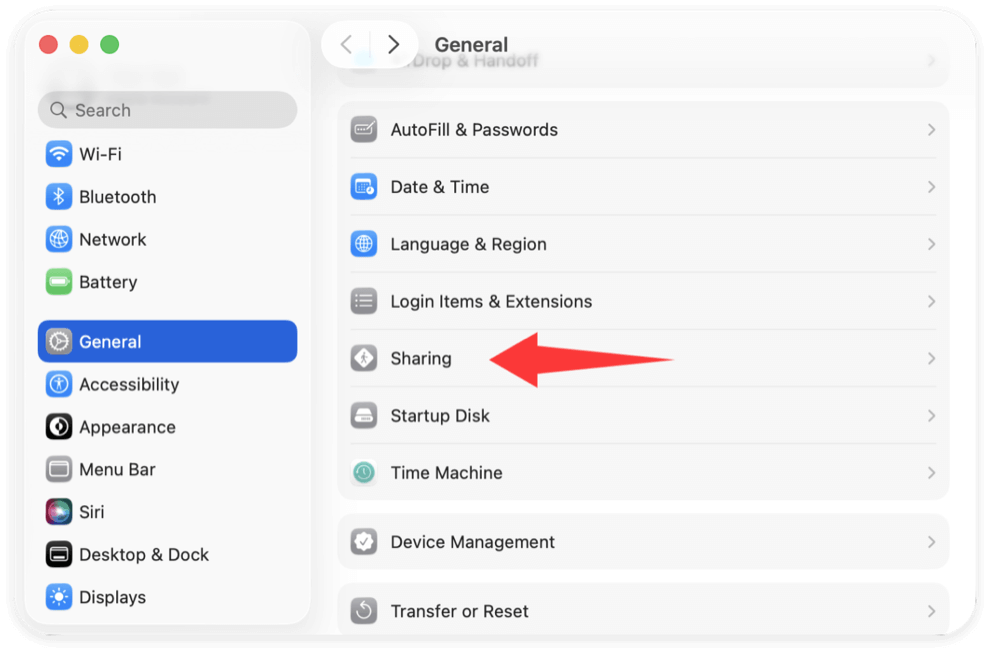
Step 1: Open System Settings
In the upper-left corner, click the Apple Menu. Choose System Settings (or System Preferences). Go to Sharing from General.
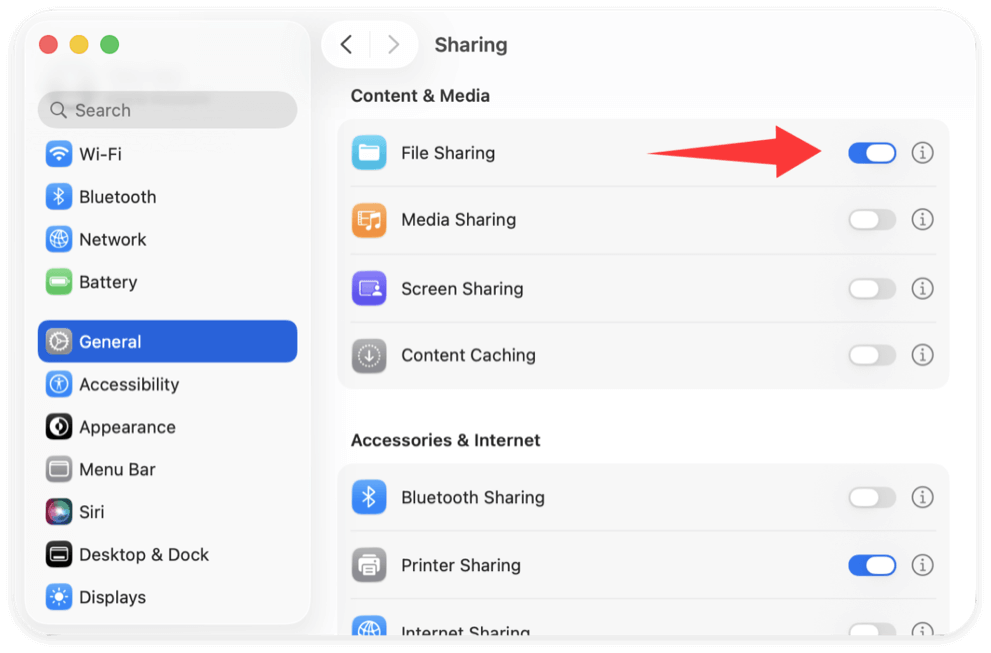
Step 2: Enable File Sharing
In the Sharing menu, locate the File Sharing option. Toggle the switch to ON.
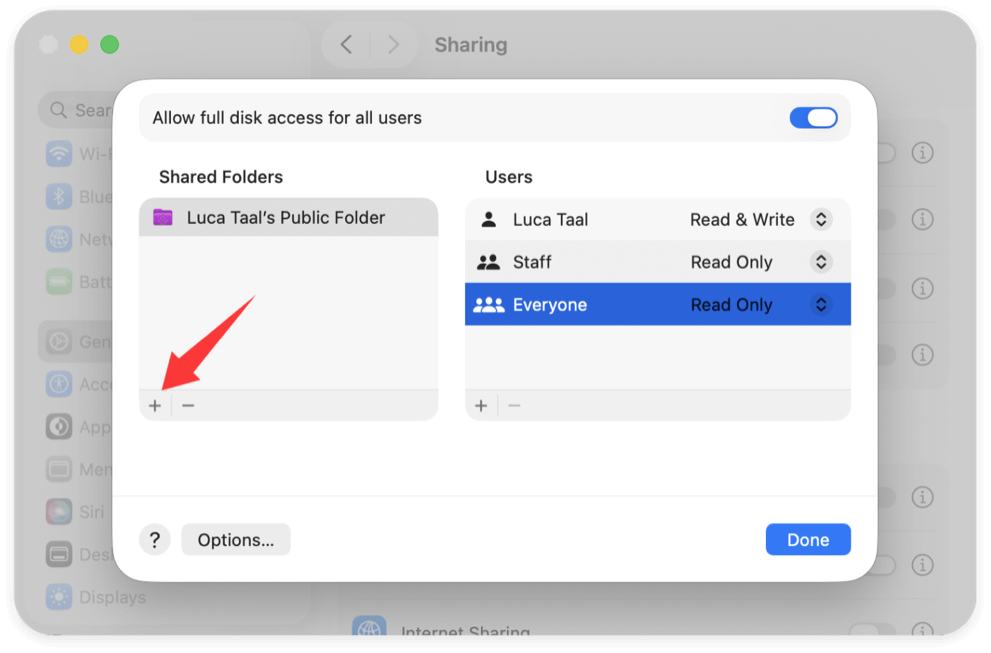
Step 3: Add Shared Folders
Next, click the tiny (i) button to access more settings for macOS File Sharing. Click the (+) button under Shared Folders. Select the folder you want to share.
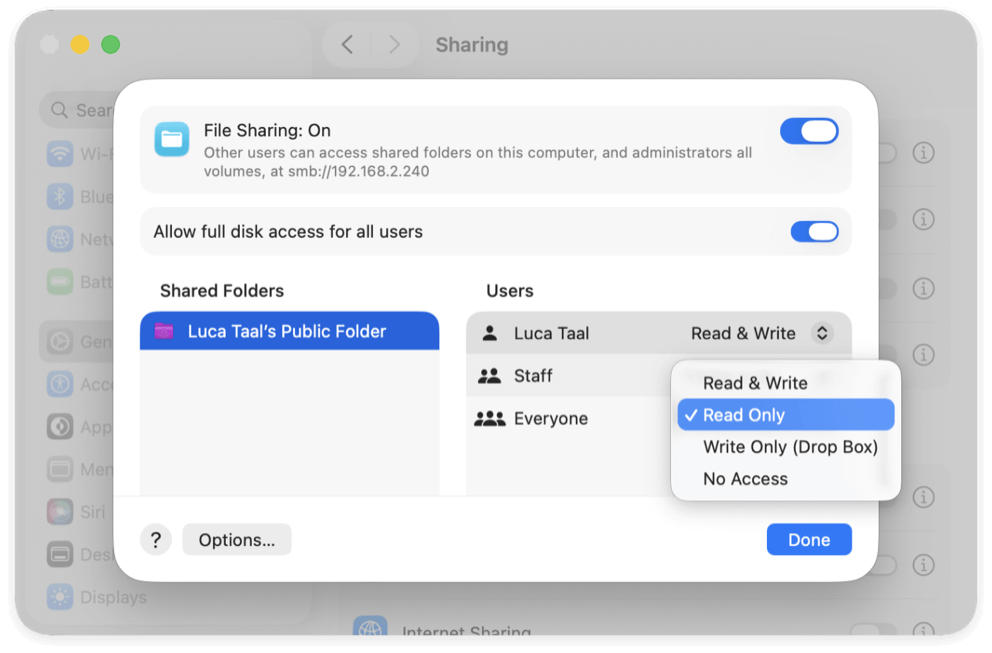
Step 4: Configure User Access
Under Users, define access permissions:
- Read & Write – Full control over files.
- Read Only – Can view but not modify files.
- Write Only (Drop Box) – Can add files but not see existing ones.
- No Access – Blocks access entirely.
Your Mac is now ready for file sharing! But what methods should you use? Let's explore.
File Sharing Methods on Mac
macOS supports multiple file-sharing methods depending on your needs.
1. Local Network Sharing (SMB, AFP, NFS)
These protocols allow Mac users to share files over a local network (LAN).
- SMB (Server Message Block) – Works with macOS and Windows PCs.
- AFP (Apple Filing Protocol) – Optimized for Mac-to-Mac sharing.
- NFS (Network File System) – Used for sharing files between UNIX-based systems.
How to Connect to a Shared Folder via SMB or AFP:
- Open Finder.
- Press Cmd + K to open "Connect to Server."
- Type the address (e.g., smb://192.168.1.100 or afp://Mac-Name.local).
- Click Connect, enter credentials if required, and access shared files.

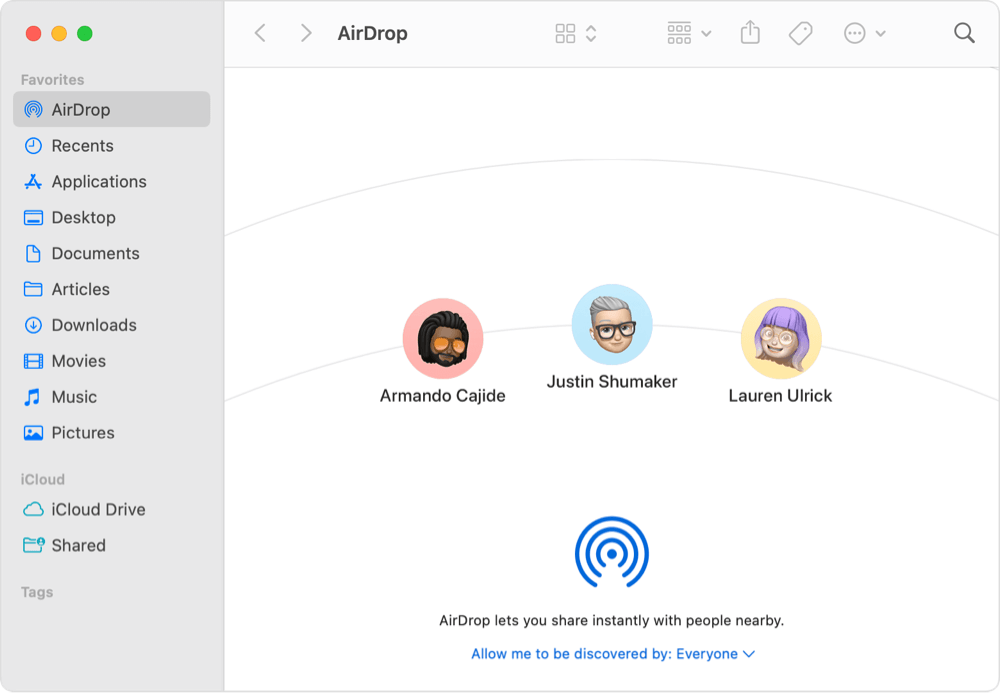
2. AirDrop
AirDrop is the fastest way to share files wirelessly between Apple devices. How to Use AirDrop:
- Open Finder and select AirDrop from the sidebar.
- Ensure Bluetooth and Wi-Fi are enabled.
- Drag and drop files onto the recipient's device.
Pros: Quick, no network needed.
Cons: Only works with Apple devices.
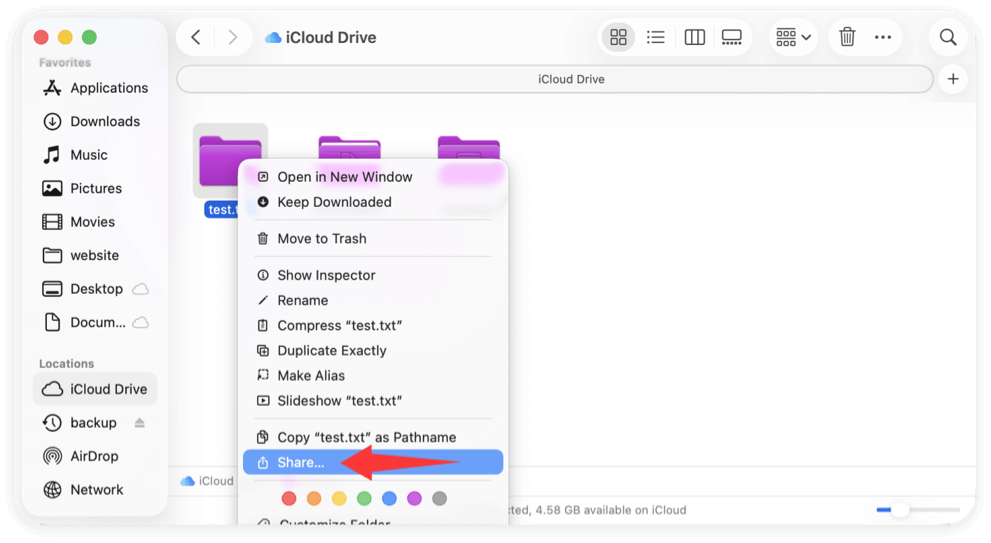
3. iCloud Drive Sharing
iCloud Drive allows users to store and share files in the cloud. How to Share Files via iCloud Drive:
- Open Finder > iCloud Drive.
- Right-click the file and select Share.
- Choose to share via link, Mail, or Messages.
Pros: Accessible from anywhere, cross-device syncing.
Cons: Requires internet and iCloud storage.
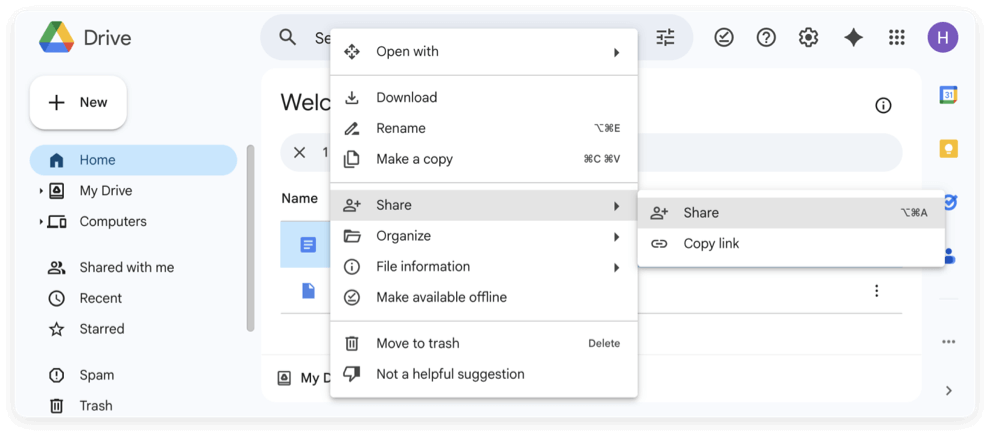
4. Third-Party Cloud Services
Apps like Google Drive, Dropbox, and OneDrive provide additional cloud-based file-sharing solutions. How to Use Google Drive for File Sharing:
- Upload files to Google Drive.
- Right-click and select Share.
- Adjust permissions and share the link.
Pros: Cross-platform, remote access.
Cons: Limited free storage, requires an internet connection.
Security Considerations for File Sharing
File sharing, while convenient, poses several security risks, especially when sharing files over a network. Unauthorized access, data interception, and malware infections are potential threats. To ensure the safety of your shared files and system, follow these security best practices:
1. Set Strong Passwords and User Authentication
If file sharing is enabled, unauthorized users may attempt to access your Mac. To prevent this:
- Use strong passwords for user accounts. A strong password should contain a mix of special characters, digits, and capital and lowercase letters.
- Enable user authentication by requiring a password for access rather than allowing "Guest" access.
- Disable automatic login to prevent unauthorized users from accessing shared files when the Mac starts.
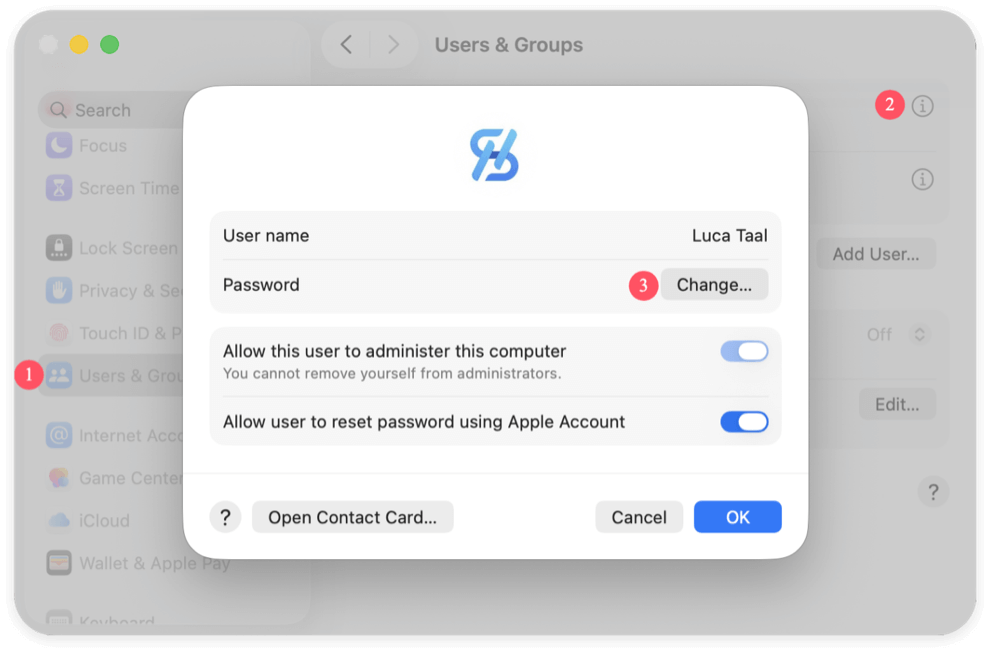
To set strong passwords:
- Go to System Settings > Users & Groups.
- Click on tiny (i) icon after your username and click Change after the Password.
- Make sure your password is hard to figure out.
2. Disable File Sharing When Not in Use
Leaving file sharing enabled when not needed can expose your system to security vulnerabilities. It's good practice to disable it when you're not actively sharing files.
To disable file sharing:
- Go to System Settings > Sharing.
- Toggle off File Sharing.
Alternatively, you can selectively enable or disable specific sharing protocols, such as SMB, AFP, or NFS, to minimize exposure.
3. Use Firewalls to Block Unwanted Connections
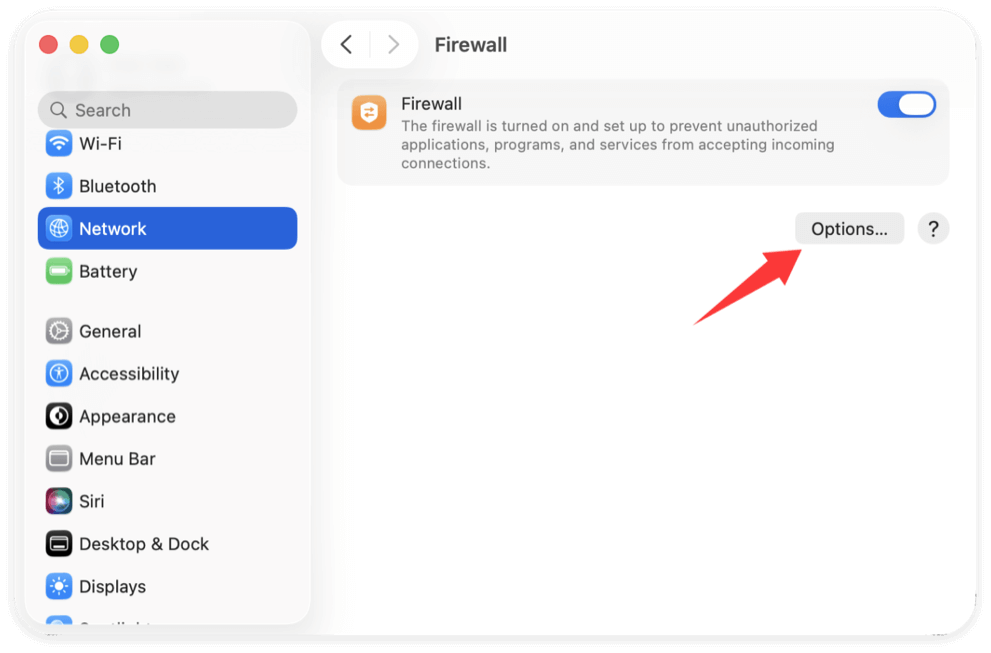
macOS comes with a built-in firewall that prevents unauthorized access to your computer. Enabling the firewall enhances security by blocking incoming connections that are not explicitly allowed.
To enable the firewall:
- Open System Settings and select Firewall from Network.
- Activate the firewall.
- Click Options and configure it to allow only necessary services.
For advanced users, configuring custom firewall rules can provide additional protection.
4. Encrypt Sensitive Files for Extra Security
If you're sharing sensitive or confidential data, encryption ensures that even if an unauthorized person accesses the file, they won't be able to read its contents.
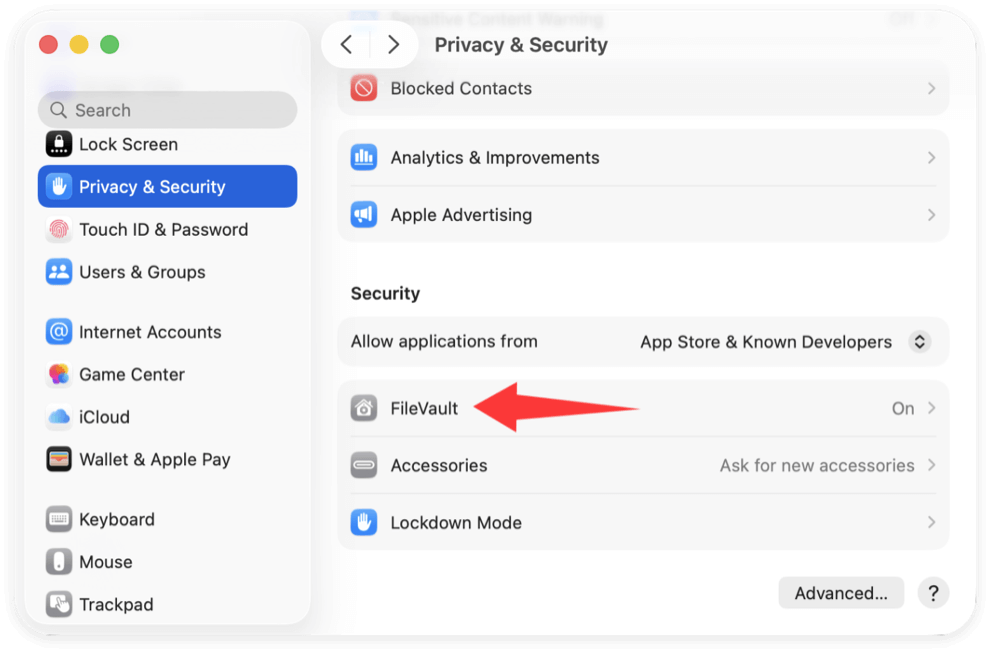
Using FileVault for Full Disk Encryption
FileVault encrypts your Mac's entire drive, protecting all files stored on it.
To enable FileVault:
- Go to FileVault from Security & Privacy via System Settings.
- Click Turn On FileVault and follow the instructions.
![file sharing on Mac]()
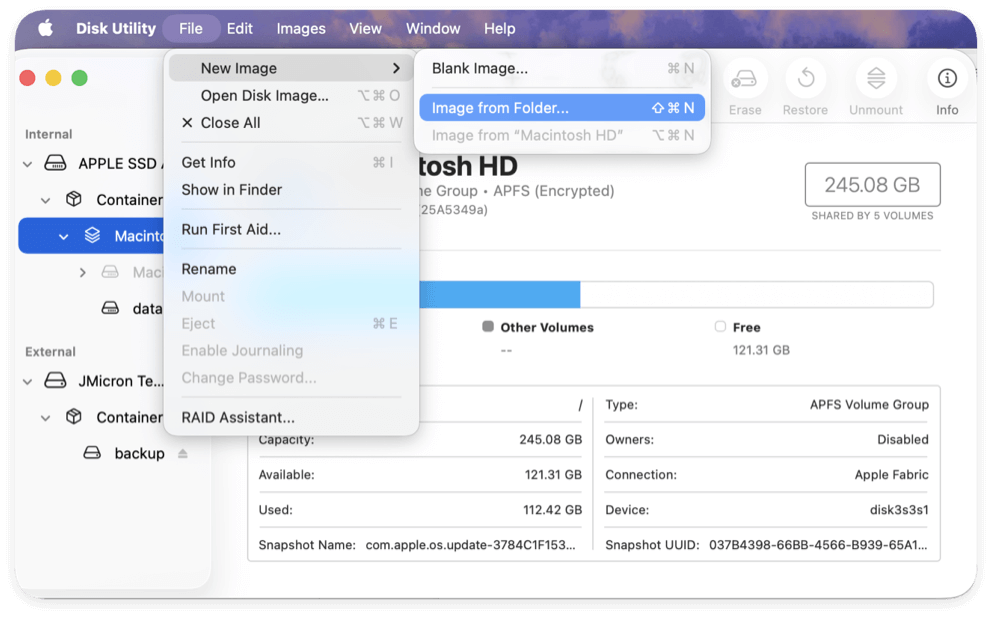
Encrypting Individual Files and Folders
To encrypt a specific file or folder, you can use Disk Utility:
- Open Disk Utility from Utilities via Applications.
- Click Image from Folder from New Image via File.
![file sharing on Mac]()
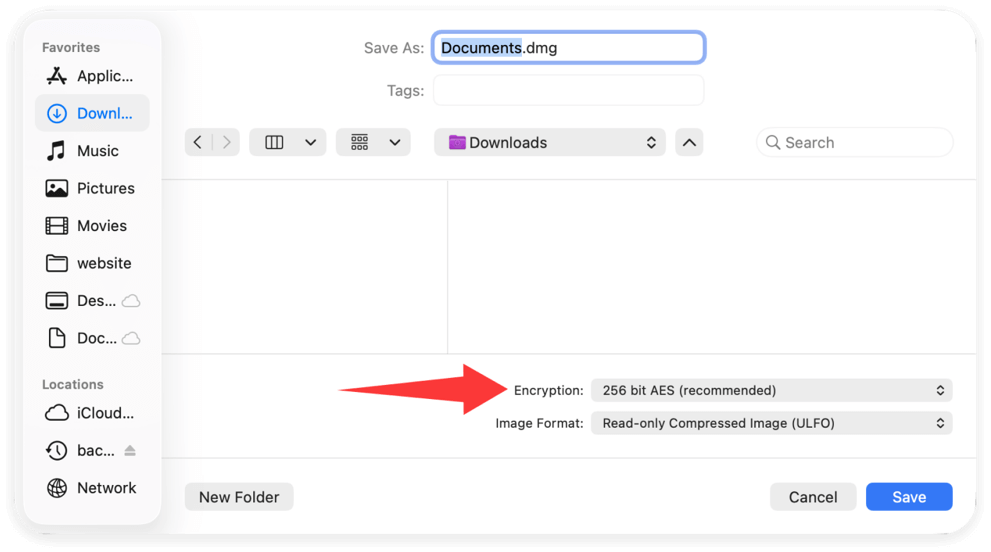
- Decide on 256 bit AES encryption and pick a folder to encrypt.
![file sharing on Mac]()
- Set a secure password and save the encrypted image file.
![file sharing on Mac]()
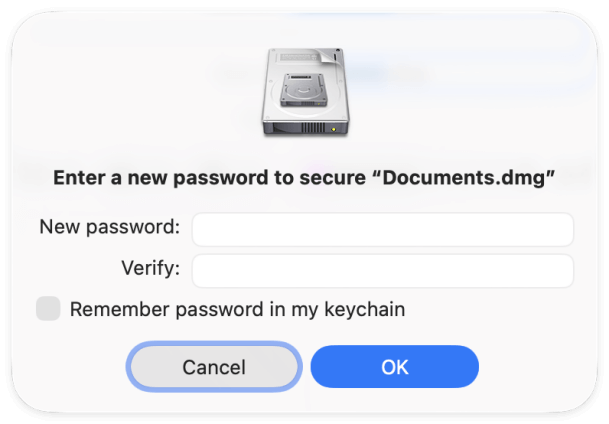
Now, only users with the correct password can access the files.
5. Restrict Access to Shared Files and Folders
By default, macOS allows administrators full access to shared files. However, you should carefully control permissions to prevent unauthorized modifications.
Setting Folder Permissions:
- Go to System Settings > Sharing > File Sharing.
- Select a shared folder and click (i) to view permissions.
- Adjust access for users.
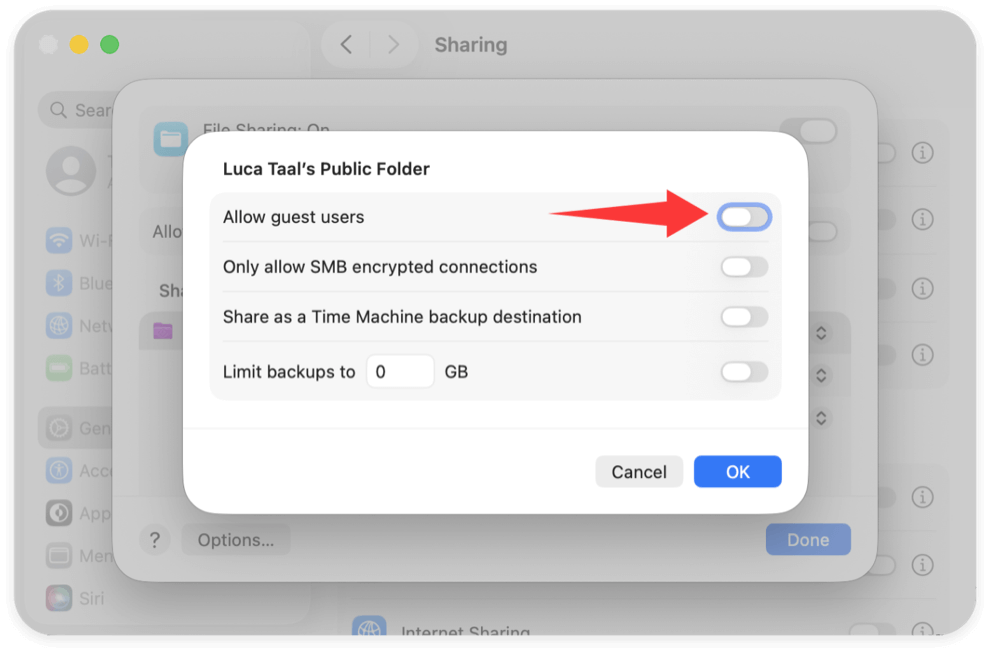
For additional security, disable Guest access by right-clicking the shared folder, then choose Advanced Options, then uncheck "Allow guest users."
6. Secure Network Connections with VPNs and Private Networks
If you're sharing files over an untrusted or public network (like a coffee shop Wi-Fi), your data could be intercepted. By encrypting your internet connection, a virtual private network (VPN) makes it more difficult for hackers to access shared files.
Using a VPN on Mac:
- Open System Settings > Network.
- Click VPN and add a new VPN configuration.
- Connect to a trusted VPN provider before sharing files over public networks.
Additionally, if possible, use a private, password-protected Wi-Fi network instead of open public Wi-Fi.
7. Regularly Monitor File Sharing Activity
To detect any suspicious access, you can check macOS logs and monitor who has connected to your Mac.
Viewing File Sharing Logs:
- Open Console (Applications > Utilities).
- Search for terms like smbd (for SMB sharing logs) or afpd (for AFP logs).
- Look for unauthorized access attempts.
For more control, consider using third-party monitoring tools that alert you when new devices connect.
Troubleshooting Common File Sharing Issues
Issue 1: Can't See Shared Folders
- Ensure File Sharing is enabled.
- Restart your router and devices.
Issue 2: Permission Errors
- Recheck user permissions in System Settings > Sharing.
- Reset file permissions using Disk Utility.
Issue 3: Mac and Windows Connection Issues
- Verify that SMB is enabled in System Settings > Sharing.
- Use static IP addresses to prevent connection failures.
Conclusion
File sharing on Mac is a powerful tool for collaboration, backup, and seamless file transfers across devices. Whether you're using local network sharing, AirDrop, iCloud, or third-party cloud services, understanding the right method for your needs ensures efficient and secure file sharing.
By following security best practices and troubleshooting common issues, you can optimize file sharing for a smooth and reliable experience.
Donemax Disk Clone for Mac
An award-winning disk cloning program to help Mac users clone HDD/SSD/external device. It also can create full bootable clone backup for Macs.
Related Articles
- Apr 13, 2026How to Use CHKDSK to Repair a Disk on Windows?
- Nov 11, 2024Xcode for Mac Overview: What Is Xcode on Mac and Do You Need It?
- Nov 11, 2024What is Mac Safe Mode? How to Use Safe Mode on Mac?
- Dec 19, 2024About SD Cards, SD Card Types, How to Format SD Cards
- Jun 28, 2025Windows.old: What Is It & How to Delete It - Is It Safe?
- Dec 23, 2024What is Boot Camp Assistant?

Contributing Writer
Charles
Charles, who lives in Sydney, Australia, is an editor & writer of Donemax Team. He is good at writing articles related with Apple Mac computers, Windows operating systems, data recovery, data erasure, disk clone and data backup, etc. He loves reading and playing tennis in his spare time and is interested in testing new digital devices such as mobile phones, Macs, HDDs, SSDs, digital cameras, etc.

Editor in chief
Gerhard Chou
In order to effectively solve the problems for our customers, every article and troubleshooting solution published on our website has been strictly tested and practiced. Our editors love researching and using computers and testing software, and are willing to help computer users with their problems
Hot Donemax Products

Clone hard drive with advanced clone technology or create bootable clone for Windows/Mac OS.

Completely and easily recover deleted, formatted, hidden or lost files from hard drive and external storage device.

Certified data erasure software - permanently erase data before selling or donating your disk or any digital device.