Written byStevenUpdated on Sep 10, 2025
How to Wipe Everything but OS in Windows 11/10/8/7?
Approved byGerhard Chou
Before we start: Donemax Data Eraser is a professional tool to wipe data. The software can shred specified files/folders, wipe a drive with all data, and erase deleted/lost data from a drive by wiping the free space.
PAGE CONTENT:
When your Windows PC starts feeling cluttered or slow, or if you're planning to give your computer to someone else, wiping everything but the operating system (OS) can be a smart move. This method removes personal files, installed programs, and unnecessary clutter while keeping your OS intact—ensuring your computer functions smoothly without requiring a full reinstallation.

In this guide, we'll walk you through how to wipe everything but OS in Windows 11, 10, 8, and 7. We'll also explore manual and advanced techniques, as well as precautions to take before starting.
Why Wipe Everything Except OS?
Wiping everything but the OS has several advantages:
- Privacy: Removes personal data before selling or giving away your PC.
- Performance: A lean system without extra apps and files can run faster.
- Stability: Fixes software-related issues without reinstalling the OS.
- Fresh Start: Gives you a clean workspace without going through OS installation.
Unlike a clean install, this method is faster and more convenient—especially for users who don't want to deal with reinstalling drivers or configuring their OS from scratch.
Before Wiping Everything: Precautions and Backups
Before performing any major changes, take the following precautions:
1. Backup Important Files
Use an external hard drive, USB flash drive, or cloud storage (like OneDrive, Google Drive, or Dropbox) to back up:
- Documents
- Photos and videos
- Work-related files
- Software license keys
- Browser bookmarks
2. Note Down License Keys and App Details
Applications like Microsoft Office, Photoshop, or others may require reactivation. Use tools like Belarc Advisor or ProduKey to retrieve license information.
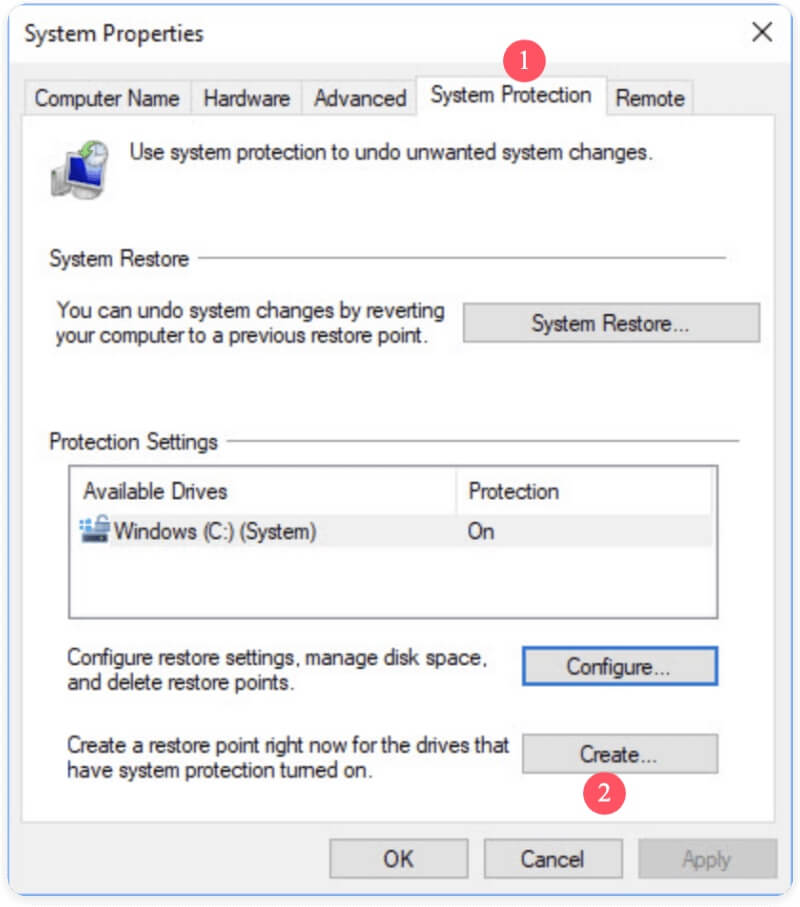
3. Create a System Restore Point (Optional)
If something goes wrong, a system restore point can help bring your system back to its previous state.
- Go to Control Panel > System > System Protection
- Click Create and name your restore point
![wipe everything but OS]()
Built-In Options to Wipe Everything Except OS
For Windows 11/10
Modern Windows versions come with a built-in reset option designed exactly for this purpose.
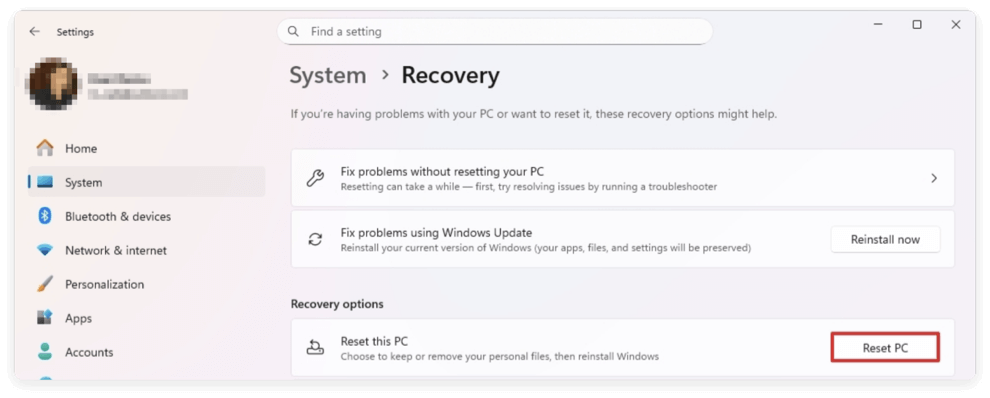
Steps to Reset Without Removing the OS:
- Click Start > Settings. Navigate to System > Recovery. Under Recovery options, click Reset PC.
![wipe everything but OS]()
- Choose Remove everything.
![wipe everything but OS]()
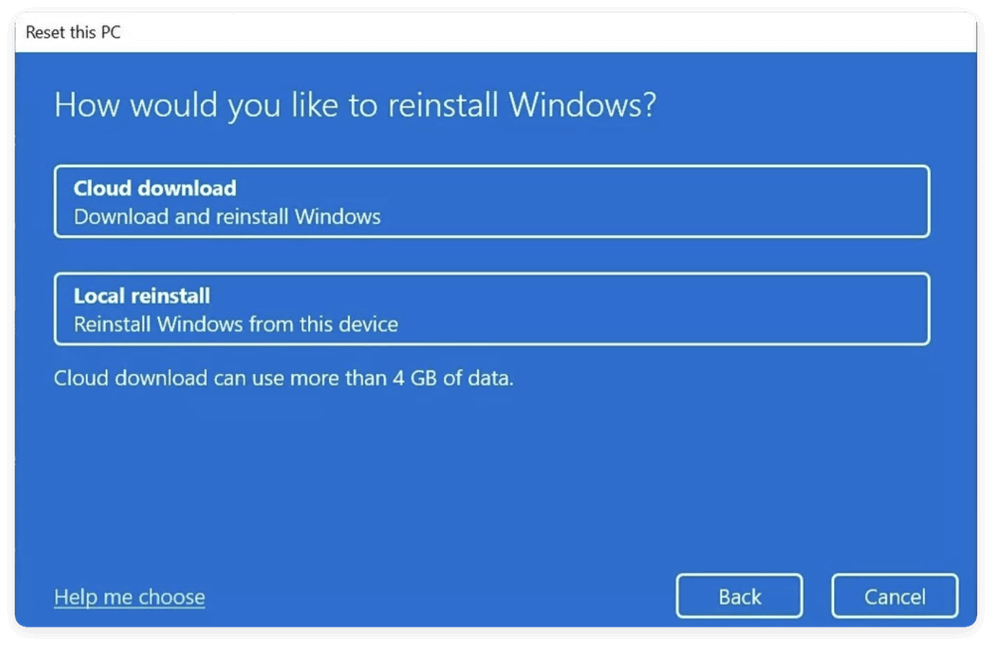
- When asked "How would you like to reinstall Windows?", choose Local reinstall or Cloud download.
![wipe everything but OS]()
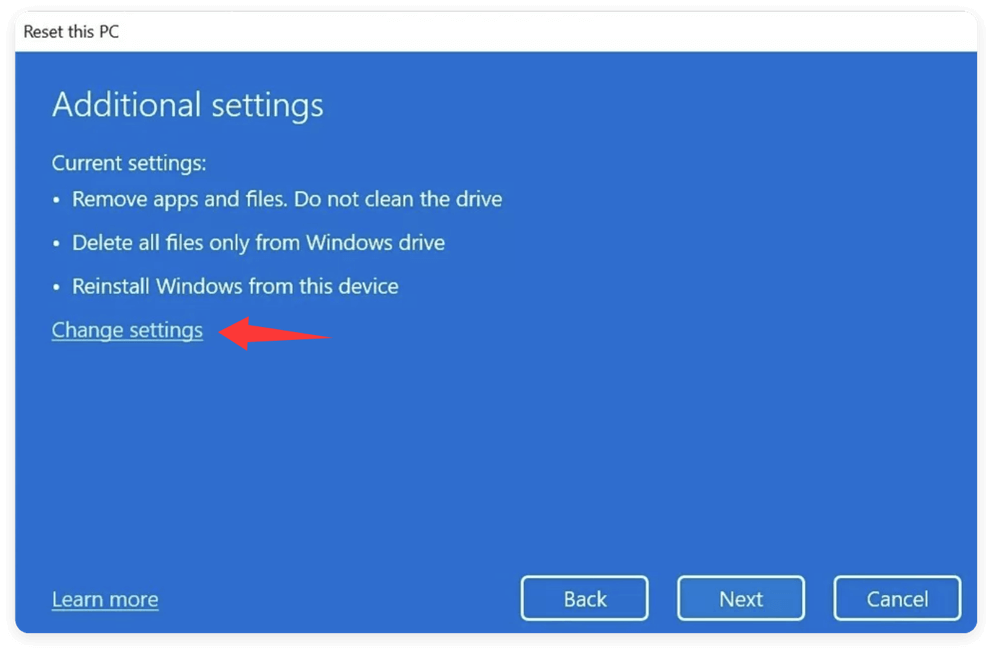
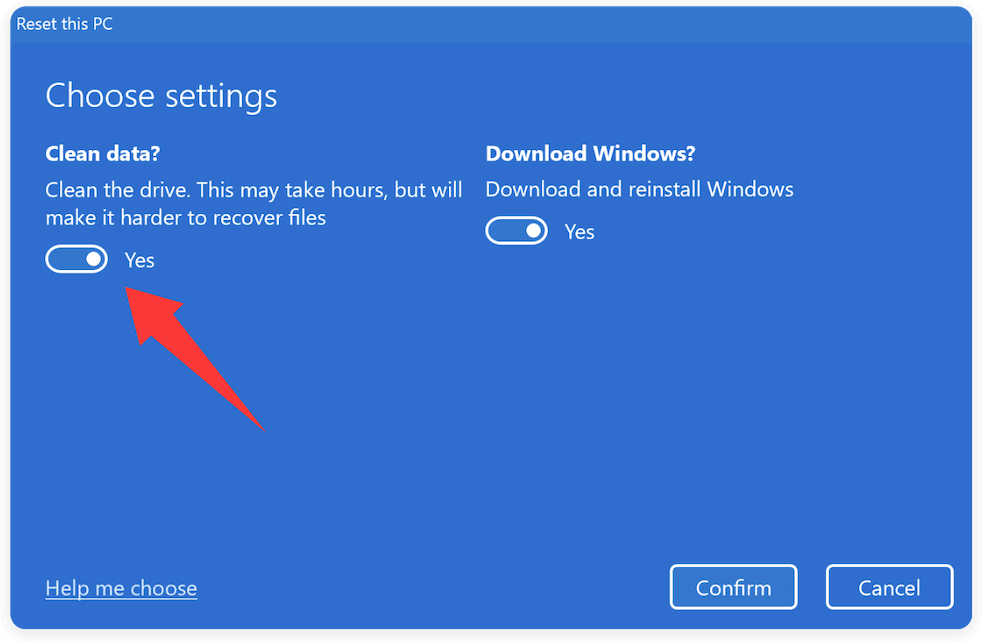
- Click Change settings in the "Additional settings" window.
![wipe everything but OS]()
- Ensure Clean data? is set to Yes if will sell the device for data security.
![wipe everything but OS]()
- Confirm and click Next, then Reset.
![wipe everything but OS]()

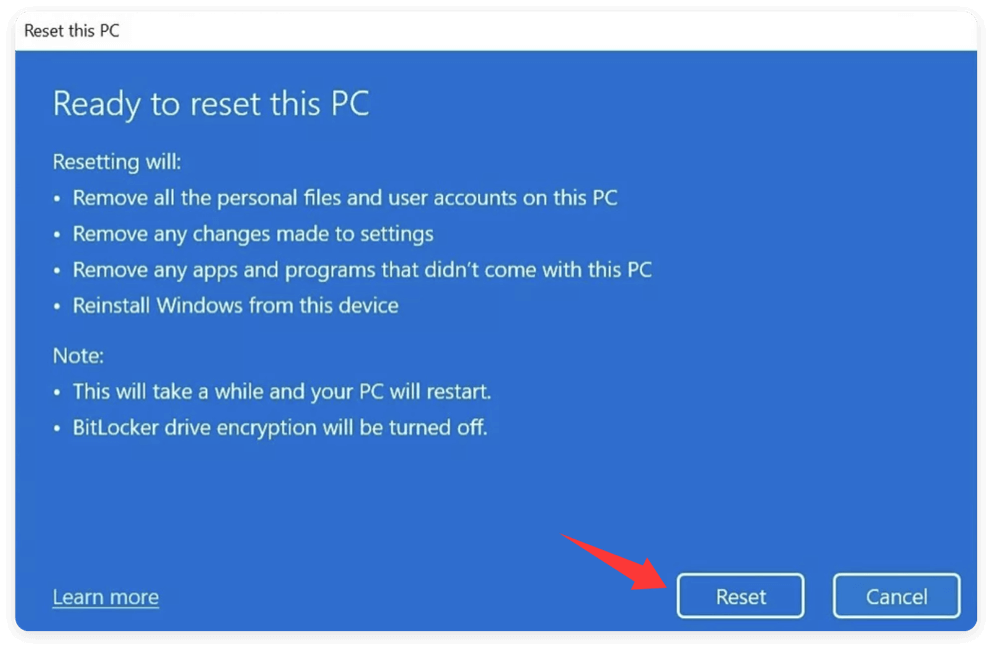
💡 Note: This removes apps and files but keeps your Windows OS functional and activated.
For Windows 8/8.1
Windows 8 introduced the concept of refreshing or resetting your PC.
Steps for Reset in Windows 8:
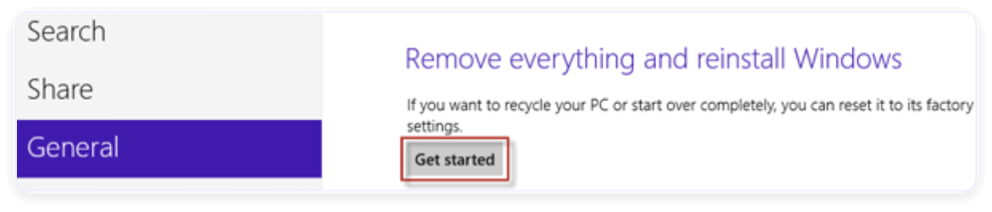
- Open Settings from the Charm bar. Go to Change PC settings > Update and recovery > Recovery.
- Under Remove everything and reinstall Windows, click Get started.
![wipe everything but OS]()
- Select the option to clean the drive. Confirm and proceed.
![wipe everything but OS]()
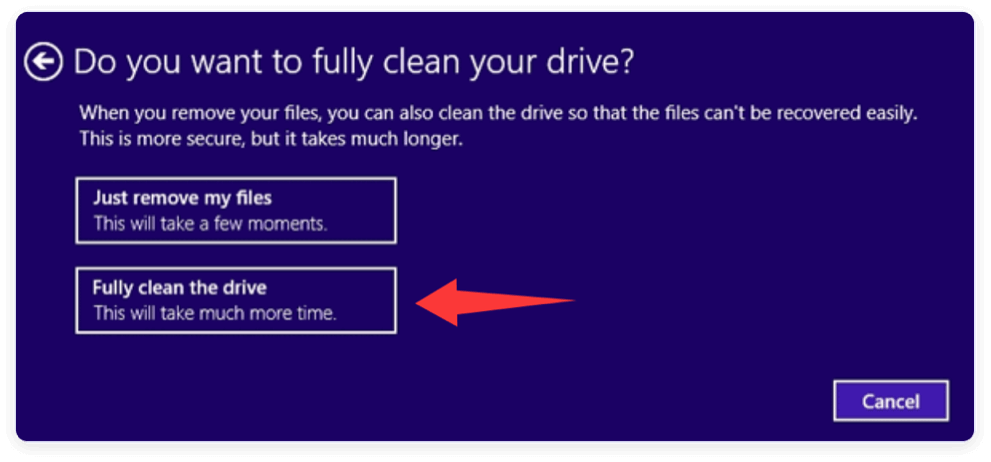
💡 Caution: Like Windows 10/11, this removes personal data and apps but keeps the OS functional.
For Windows 7
Windows 7 lacks a dedicated reset feature. To wipe everything while keeping Windows intact, you'll need to either reinstall the OS or manually clean your files and apps.
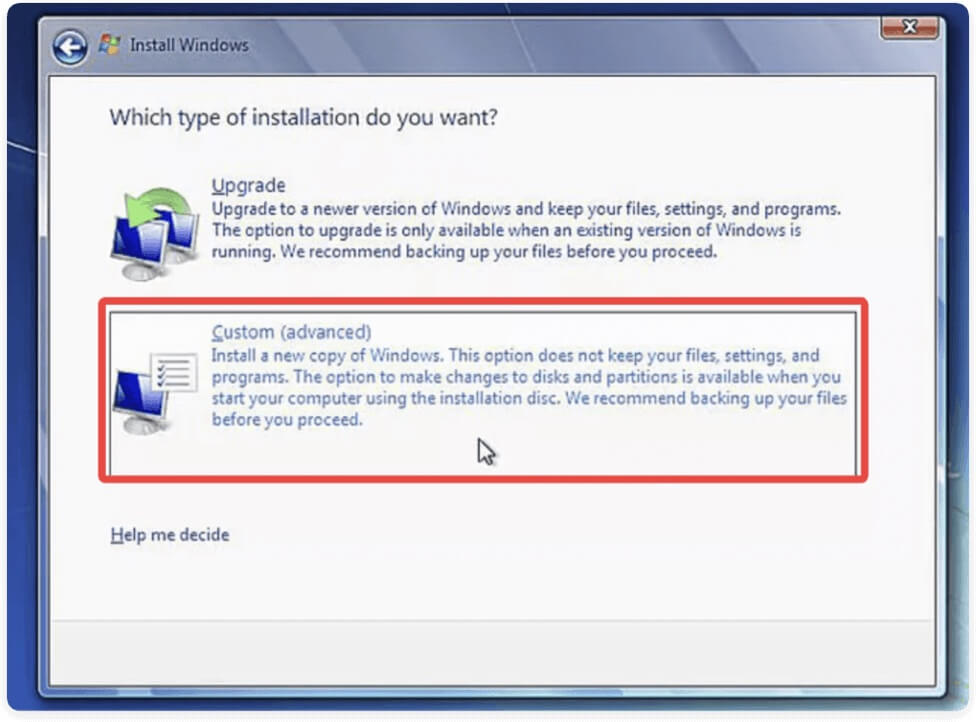
Option 1: Reinstall Windows 7 and remove everything
- Insert your Windows 7 installation media or recovery DVD. Boot from the media.
- On the installation screen, choose Custom (advanced) to reinstall Windows and remove all files, settings and programs.
![wipe everything but OS]()
Option 2: Manual Method (Explained Below)
If you don't have installation media, manually delete files and apps (see the manual cleanup section).
Advanced Methods to Wipe Everything but OS
Manual Cleanup: Wipe User Files and Apps without Affecting the OS
For users who want more control, this manual approach works across all Windows versions.
Step 1: Delete Personal Files
- Open This PC and go through each drive.
- Delete files in folders like Documents, Downloads, Pictures, and Videos.
- Be sure to empty the Recycle Bin afterward.
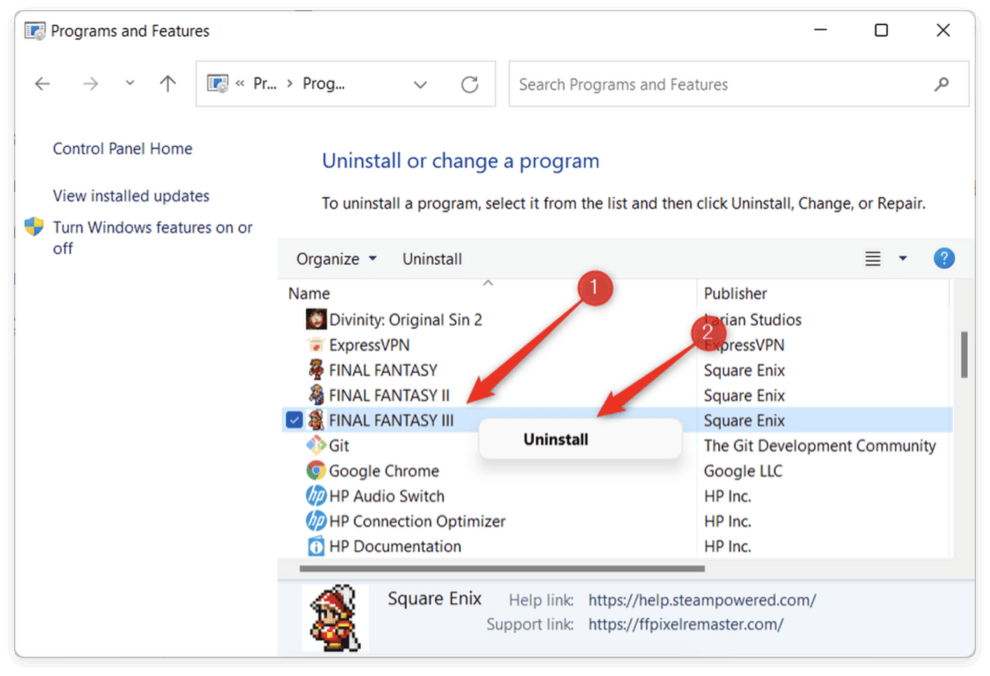
Step 2: Uninstall All Unwanted Applications
- Go to Control Panel > Programs > Programs and Features
- Uninstall all unnecessary or third-party apps
- Restart your computer
![wipe everything but OS]()
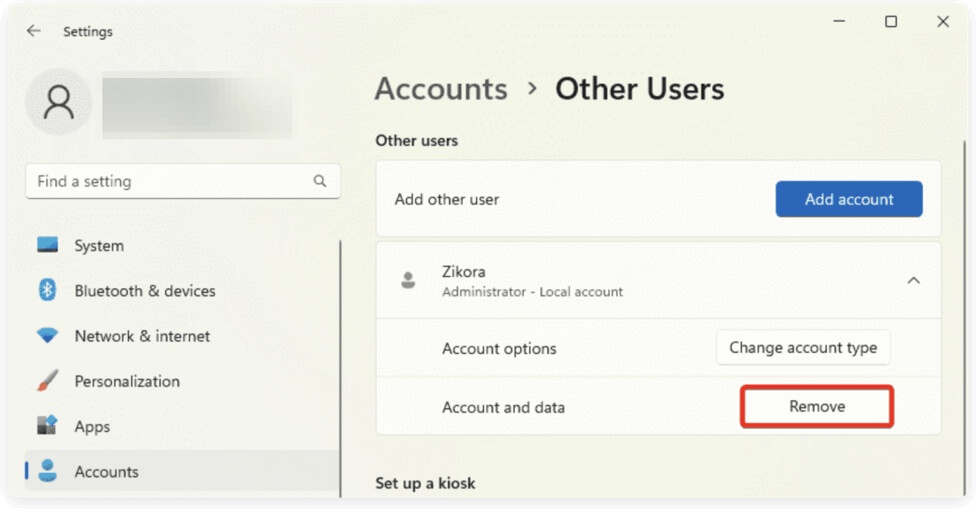
Step 3: Delete User Accounts (Optional)
If multiple user accounts exist, you can remove them (except the one currently logged in):
- Go to Settings > Accounts > Other Users
- Select the account and click Remove
![wipe everything but OS]()
Step 4: Clear Browser Data
In each browser (Chrome, Edge, Firefox):
- Go to Settings > Privacy > Clear browsing data
- Remove cookies, cache, saved passwords, and history
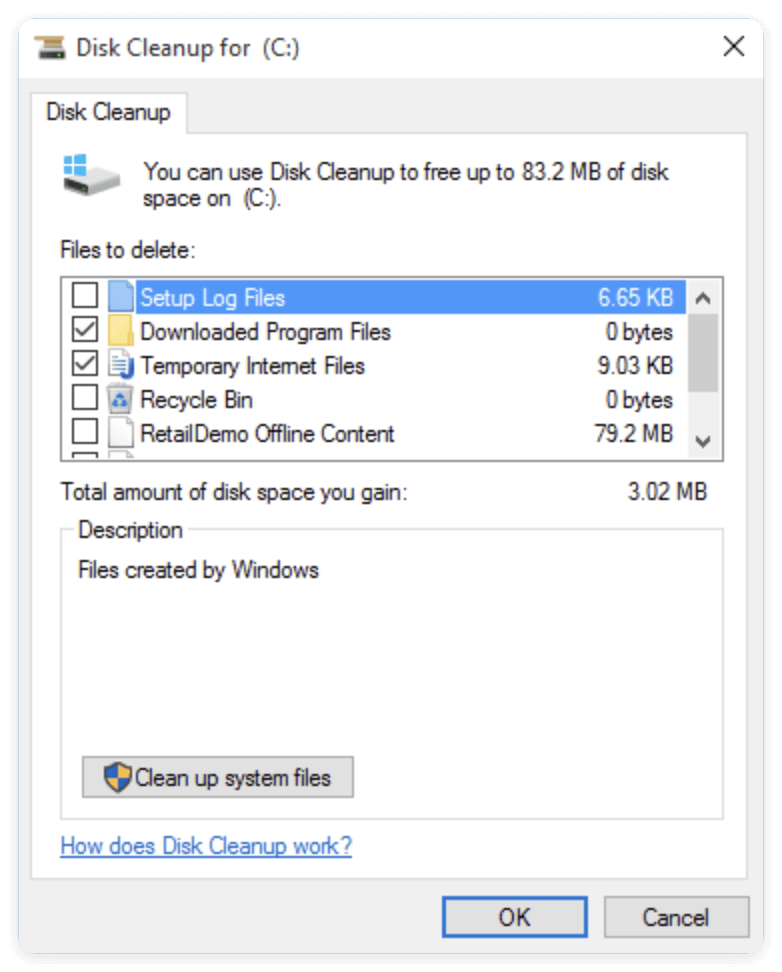
Step 5: Use Disk Cleanup
- Press Windows + R, type cleanmgr, press Enter.
- Select your OS drive (usually C:).
- Check all options, including Temporary files, System files, Recycle Bin, and Downloads.
- Click OK to delete.
![wipe everything but OS]()
Use of Third-Party Tools for Secure Cleanup
While Windows' built-in tools are useful for basic cleaning, they often leave traces behind—such as temporary files, registry entries, log files, or recoverable deleted data. If you're looking for a deeper clean or preparing your system for resale, third-party tools can help you securely and thoroughly remove all unnecessary files without affecting the OS. If you want to ensure files can't be recovered (for privacy or selling your PC), consider these tools:
Secure deletion of sensitive files or folders. Also, it can wipe a drive along with all data. If you have deleted files, you can also wipe the drive free space to ensure the deleted files will no longer be recoverable.
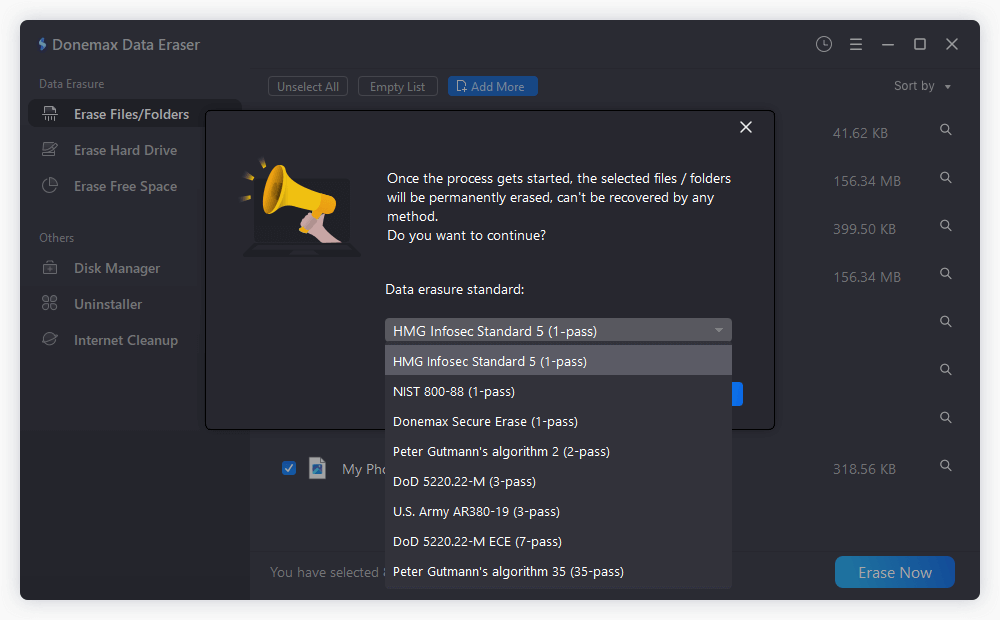
- Offers multiple deletion methods, including DoD 5220.22-M and Gutmann (35 passes)
- Three modes to shred files or wipe data in different cases
- Allows right-click integration for quick secure deletion
- Easy-to-use with simple interface and interactions
How to Use:
Step 1. Download Donemax Data Eraser and install it on your computer.
Donemax Data Eraser
- Professional data wiping tool for Windows and Mac.
- 100% safe to shred files and wipe data permanently.
- Easy-to-use and wipe data within a few clicks.
Step 2. Open the program and choose Erase Files/Folders mode. Choose the files or folders you want to securely delete.
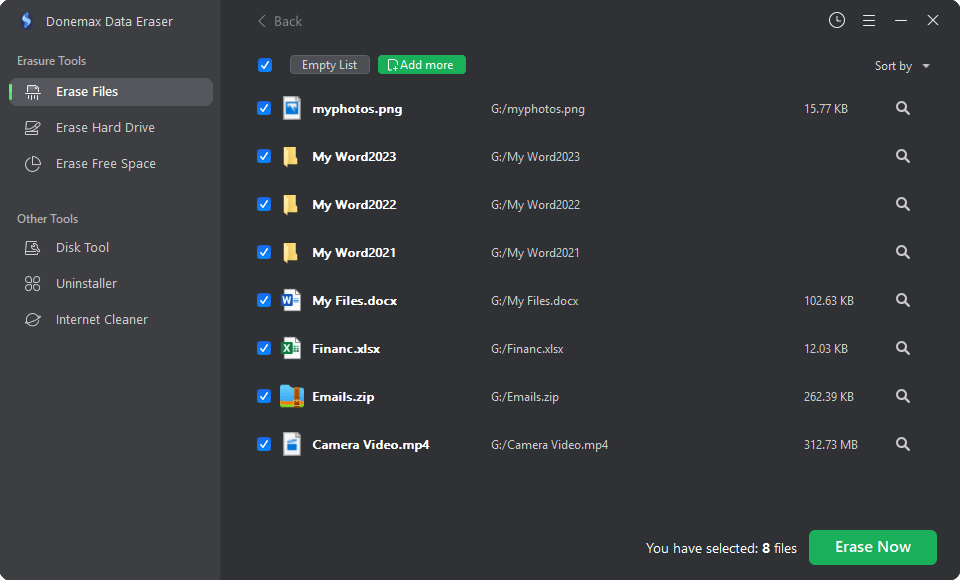
Step 3. Select the method of erasure. All the offered methods can ensure to destroy the selected files permanently.
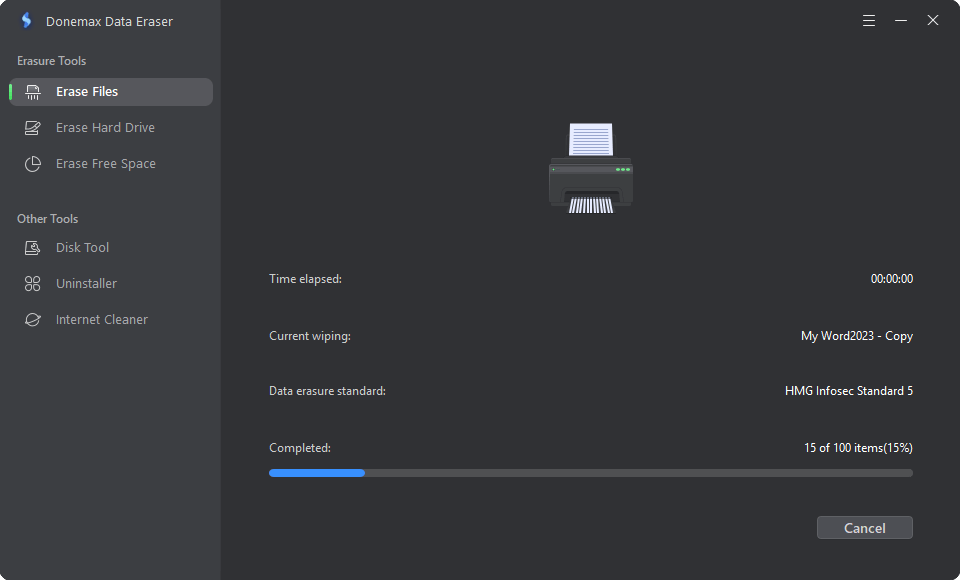
Step 4. Run the wiping process to begin secure deletion. After the process is done, all the selected files/folders will be gone forever and no longer recoverable.
💡 Tip: Use Donemax Data Eraser to securely delete data from folders like Downloads, Desktop, or Documents before giving away your computer. Also, it can be used to wipe an entire drive or the free space of a drive.
2️⃣ CCleaner
General cleanup, registry optimization, secure file deletion
- Deletes junk files from system folders and third-party apps
- Removes temporary internet files and browser data
- Clears Windows logs, clipboard data, DNS cache, and memory dumps
- Offers a secure drive wiper (up to 35 passes)
- Can uninstall programs and disable startup entries
How to Use:
- Download and install CCleaner. Open the application and go to the Custom Clean tab.
- Select the items you want to clean (Windows components, browsers, applications). Click Analyze, then Run Cleaner.
- For a secure wipe, go to Tools > Drive Wiper, choose Free Space Only, select your drive, and start the wipe.
💡 Tip: Use the Registry Cleaner with caution and always back up changes when prompted.
3️⃣ BleachBit
Open-source, privacy-focused deep cleaning
- Removes cache, cookies, and temporary files from over 70 applications
- Shreds files to prevent recovery
- Offers a "Deep Scan" mode
- Lightweight and doesn't require installation (portable version available)
How to Use:
- Download BleachBit and install it. Launch the application and review available cleaning options (Firefox, Chrome, Windows Explorer, etc.).
- Check the items to clean, then click Preview to estimate cleanup. Click Clean to start.
- For secure deletion, use File Shredder or Wipe Free Space options.
💡 Tip: BleachBit also offers a command-line interface, useful for automation and scripting.
Bonus: Securely Wipe Free Space (for all tools that support it)
Even after files are deleted and the Recycle Bin is emptied, remnants of those files can remain on your drive and may be recoverable using forensic tools. To ensure complete privacy, use the "Erase Free Space" feature:
- This process overwrites the space where deleted files once existed, making them unrecoverable.
- Donemax Data Eraser, CCleaner, and BleachBit all support wiping free space.
- Choose between quick overwrite (1 pass) or multiple passes (more secure, but slower).
Verifying That Data Is Truly Wiped
After cleaning, verify that sensitive data is truly gone:
1. Check All Drives
Open This PC and ensure no personal files remain.
2. Use Disk Management
- Press Windows + X > Disk Management
- Ensure partitions other than the OS are either empty or deleted
3. Use Recovery Tools to Test
Try using tools like Recuva or Donemax Data Recovery to scan and see if files are recoverable. If data still appears:
- Use a file shredder to overwrite free space (e.g., CCleaner's Drive Wiper)
Optional: Create a New User Account and Delete the Old One
To eliminate traces of previous activity, consider this method:
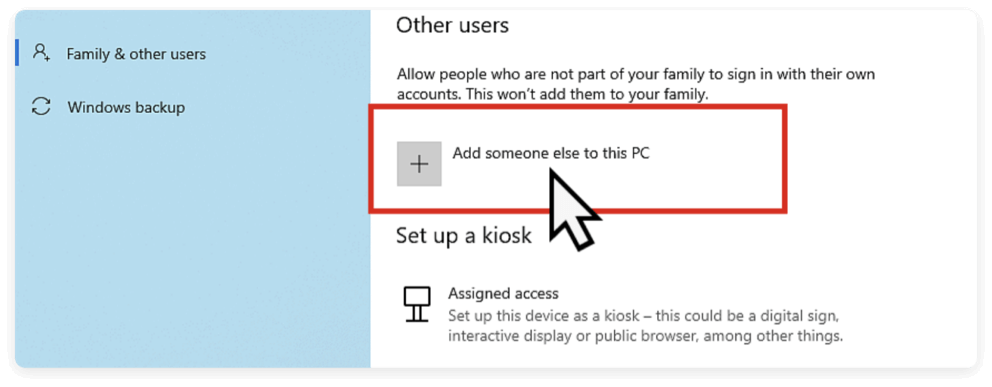
- Go to Settings > Accounts > Family & other users.
- Click Add someone else to this PC and follow the prompts.
![wipe everything but OS]()
- Set the new user as Administrator.
- Log into the new account.
- Return to Accounts, select the old account, and click Remove.
This clears browser history, saved credentials, and user-specific settings.
What Not to Delete
When manually cleaning your system, avoid removing the following unless you're sure:
- Windows System Files: Deleting files from C:\Windows or C:\Program Files may crash your OS.
- Device Drivers: Avoid uninstalling essential drivers.
- Recovery Partition: Many PCs have a hidden partition for factory reset; don't delete this unless backing up externally.
After Wiping Everything on Windows: What's Next?
Once your system is wiped clean:
1. Install Essential Software
You can now reinstall apps you genuinely need (browser, antivirus, office tools, etc.)
2. Update Windows
Check for any pending updates:
- Go to Settings > Windows Update, and install any recommended updates.
3. Check Performance
Open Task Manager (Ctrl + Shift + Esc) and review startup programs, background apps, and system performance.
4. Set Up Windows Defender or Antivirus
Enable Windows Defender or install third-party antivirus software for continued protection.
Conclusion
Wiping everything but the operating system is a practical way to refresh your Windows PC without the hassle of reinstalling Windows from scratch. Whether you're handing off the computer to someone else, trying to reclaim storage space, or just looking for a performance boost, this process ensures your OS remains intact while your personal data and unnecessary apps are safely removed.
Modern versions like Windows 11 and 10 make this process seamless with built-in reset tools, while older versions like Windows 7 require a more hands-on approach. With a combination of system settings and third-party utilities, you can confidently achieve a clean system without compromising your operating system.
Just remember: always back up your data, double-check what's being deleted, and take your time. A well-maintained OS with a clutter-free environment can lead to better performance, security, and peace of mind.
Donemax Data Eraser
One of the best data erasure programs for permanently erase data from PC, Mac, HDD, SSD, USB drive, digital camera and other devices. Once the data is erased, it is lost for good, cannot be recovered by any method.
Related Articles
- Mar 04, 2025How to Permanently Delete a File or Folder from an SSD?
- Jan 28, 2024How to Wipe Toshiba External Hard Drive?
- Feb 28, 2026Best 5 Data Erasure Software for Windows in 2026
- May 30, 2025How to Wipe A Drive with CCleaner?
- Jul 27, 2025How to Wipe FAT32 Drive on Windows or macOS?
- Mar 05, 2026How to Wipe A Hard Drive on Windows 11/10/8/8.1/7?

Contributing Writer
Steven
Steven has been a senior writer & editor of Donemax software since 2020. He's a super nerd and can't imagine the life without a computer. Over 6 years of experience of writing technical solutions and software tesing, he is passionate about providing solutions and tips for Windows and Mac users.

Editor in chief
Gerhard Chou
In order to effectively solve the problems for our customers, every article and troubleshooting solution published on our website has been strictly tested and practiced. Our editors love researching and using computers and testing software, and are willing to help computer users with their problems