
Written byLucienUpdated on Apr 18, 2024
Upgrade Disk of Advent Laptop to SSD
Approved byGerhard Chou
PAGE CONTENT:
Advent laptops used to be a popular choice for people on a budget, but these days, they might be gathering dust in attics or corners. These systems might not be powerful enough for the newest games or software that needs a lot of power, but they can still be surprisingly useful for simple tasks like browsing the web, checking email, and working on papers.
A traditional hard disk drive (HDD) can worsen the user experience because it works slowly. Adding a solid-state drive (SSD) is a cheap and easy way to give your old Advent laptop a new lease on life. It will also make it much faster and more efficient.
This full guide will show you how to upgrade the hard drive in your Advent laptop to an SSD (also clone all data from the HDD to the SSD). We'll go over everything you need to know, from how to determine whether something is compatible to how to physically install it.
Why Upgrade to An SSD on Advent Laptop?
Traditional HDDs use spinning disks and a read/write head to get to data. SSDs, which hold data electronically on flash memory chips, are faster than this mechanical process because of how it works. Getting an SSD is a good idea for many reasons:
- Blazing-Fast Speeds: With an SSD, your computer will start up faster, apps will open faster, and files will move much more quickly. You will have less time to wait and more time to do things.
- Better responsiveness: Normal tasks like opening files, using menus, and doing multiple things will feel smoother and more responsive.
- Reduced Power Consumption: Your laptop's battery may last longer if you use SSDs instead of HDDs because they use less power.
- Less noisy: HDDs no longer make noises like disks spinning or clicking. Silently, SSDs work.
- Durability: SSDs are less likely to get damaged than HDDs because they don't have any moving parts.
Compatibility Considerations
Before upgrading, you must ensure that the chosen SSD will work with your Advent laptop. Here are some things to think about:
Form Factor: SATA (Serial ATA) drives that are 2.5 inches are common in Advent computers. To ensure the form factor, check your laptop's instructions or the manufacturer's specs again. These are also the shapes that modern SSDs come in, so they are compatible.
Storage Capacity: The HDDs with Advent computers were most likely between 20GB and 120GB. When picking an SSD, think about how much space you need. A 250GB SSD is a big improvement, but if you want to store many things, you can choose a 500GB or 1TB SSD instead.
Thickness: There may not be much room for the HDD in some Advent computers. Check your laptop's manual or online tools to find the thickest layer it can hold. It's always a good idea to be careful, even though most current SSDs are thinner than HDDs.
Upgrading Your Advent Laptop's HDD to SSD
Step 1: Backup Your Data:
It's important to back up all of your data before you upgrade to avoid losing anything during the move. Make a full copy of your files and papers using backup software, an external hard drive, or a cloud storage service.
Step 2: Power Down and Disconnect:
Shut down your Advent PC all the way.
Remove the power charger from the wall and disconnect any other devices plugged into the laptop. Your Advent laptop may allow you to remove the battery for safety reasons. For specific directions, look at the user manual.
Step3: Access the HDD Compartment:
Find the place on your Advent laptop where the HDD goes. It's normally on the bottom of the laptop and is held in place with screws. Look at your user manual or online tools for specific information about where to go.
The screws that hold the box cover in place can be taken out with the Phillips head screwdriver. With care, could you take off the top and set it down?
Step 4: Choose the Right SSD:
Before buying an SSD for your Advent laptop, ensure it will work by checking the interfaces and form factors your motherboard supports. SATA, PCIe, and M.2 are common ports, and 2.5-inch and M.2 are common form factors. When choosing an SSD, things like storage space, read/write speeds, and the brand's name should be considered.
Step 5: Gather Necessary Tools:
You'll need the following tools to do the SSD upgrade:
- Set of two screwdrivers (Phillips and sharp)
- SATA to USB adapter (not required to move files)
- Cloning software (not needed for moving files)
Step 6: Prepare Your Laptop:
Before you open your laptop, ensure it is turned off and not linked to other power sources. Remove the battery and ground yourself immediately to prevent static electricity from damaging sensitive parts.
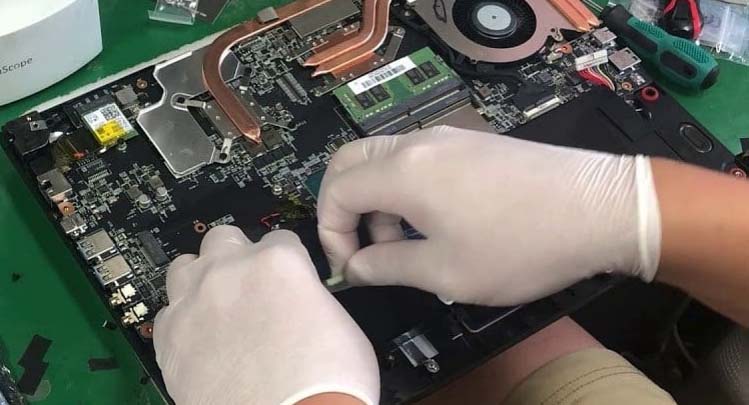
Step 7: Access the Existing Disk Drive:
Find the disk drive section on your Advent laptop. It's usually on the bottom panel that's held in place by screws. To get to the hard drive, carefully take off the panel and screws.
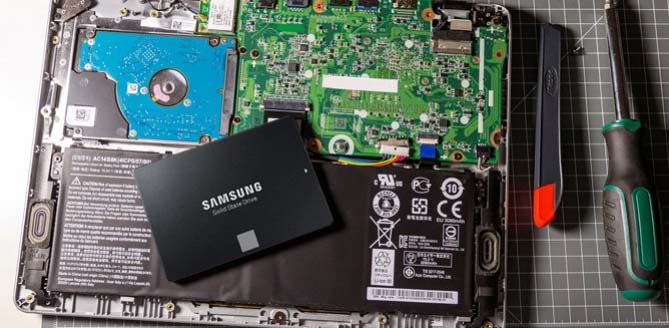
Step 8: Remove the Old Disk Drive:
After getting into the disk drive compartment, remove the HDD's SATA or power cords. Carefully take out the screws that are holding the HDD in place, and then slide it out of the drive bay slowly.
Step 9: Install the SSD:
Put the SSD into the drive bay and use the screws that were taken out of the old HDD to lock it. Make sure the SATA and power cords are securely connected to the SSD.
Step 10: Close Up Your Laptop:
After putting in the SSD safely, put the bottom panel of your laptop back on and fix the screws. If you took the battery out earlier, put it back in the laptop.
Step 11: Data Migration (Optional):
If you want to move your data from the old HDD to the new SSD, you can use cloning software to make an exact copy of your disk drive. Connect the old hard drive to your laptop using a SATA USB adapter. Then, follow the software's directions to start the migration process.
#1 Download and install the powerful disk cloning software - Donemax Disk Clone.
#2 Open Donemax Disk Clone, then choose Disk Clone mode. Select the HDD as the source disk, select the SSD as the destination disk, click Next.

#3 Tick Check the option if the destination is SSD, then click on Clone button to clone all data from the HDD to the SSD.

Step 12: Boot Up Your Laptop:
Turn on your Advent laptop and enter the BIOS settings to ensure the SSD is the main boot device. To finish the upgrade, save any changes you made to the BIOS settings and turn your machine back on.
Check how to set the new SSD as the boot drive >>
Conclusion:
Putting an SSD in your Advent laptop is a smart move that can completely change how you use computers. It's easy to see the benefits: faster boot times, better performance, and higher stability. If you follow the steps in this guide, switching to an SSD will be easy, and your Advent laptop will reach its full potential.
Accept the future of computers and enjoy a better, more streamlined user experience. Make the update now and see for yourself what a difference it makes. You will feel better about it on your Advent laptop.
Related Articles
- Jun 02, 2024How to Clone a Huawei Hard Disk with Disk Cloning Software
- Apr 27, 2024How to Clone a Hard Drive in Windows Vista?
- Jul 03, 2024Best 6 Patriot SSD Cloning Software
- Sep 10, 2025How to Upgrade Acer Nitro 5 Laptop's SSD?
- Feb 24, 2026Top 4 Clone Software for Enterprise and Business
- Oct 17, 2023What Is Sector by Sector Clone? How to Perform Sector by Sector Clone?

Contributing Writer
Lucien
Lucien is a writer and a chief programmer of Donemax software who has worked in the company for 5+ years. He has written much of the content on the site and devotes to providing troubleshooting and solution for Windows and Mac users including disk cloning, data recovery, migration, eraser, error fixes.

Editor in chief
Gerhard Chou
In order to effectively solve the problems for our customers, every article and troubleshooting solution published on our website has been strictly tested and practiced. Our editors love researching and using computers and testing software, and are willing to help computer users with their problems