
Written byCharlesUpdated on Jun 10, 2025
How to Upgrade SSD on ASUS Laptop?
Approved byGerhard Chou
Before we start: Upgrading SSD on ASUS laptop is a quick way to improve the computer performance or increase the storage space. Donemax Disk Clone can clone the drive to upgrade the SSD without reinstalling system on the PC.
PAGE CONTENT:
Upgrading the SSD on ASUS laptop can be one of the most impactful improvements you make to its overall performance. Solid State Drives (SSDs) are known for their fast data read/write speeds compared to traditional HDDs. As a result, upgrading your SSD can make your laptop boot faster, open applications more quickly, and provide a significant performance boost in various tasks like gaming or video editing.

This guide will help you explore the entire process of upgrading ASUS laptop's SSD, from checking compatibility and backing up your data to physically replacing the SSD and optimizing your system afterward.
Why It's Necessary to Upgrade AUSU Laptop's SSD?
Upgrading an SSD can breathe new life into an older laptop, or it can be a way to improve your machine's performance if you're running out of storage space. For ASUS laptop owners, this upgrade is often quite straightforward.
Whether you're looking to increase storage capacity, improve read and write speeds, or simply upgrade to a more modern SSD technology (like NVMe), this article will help you with the entire process.
Preparations before Upgrading SSD on ASUS Laptop
Check Compatibility of ASUS Laptop
Before purchasing an SSD, the first thing you need to do is ensure compatibility with your ASUS laptop. Different ASUS models have varying specifications, and not all laptops support all types of SSDs.
Find Your ASUS Laptop Model
You'll need to know your exact ASUS laptop model to check the specifications. Most ASUS laptops have a model number on a sticker on the underside of the laptop. You can also check in your system settings: Go to Settings > System > About > Device Specifications.
Once you know your model number, you can look up the specific SSD upgrade options for your device.
Determine the Current SSD Type
ASUS laptops typically use either a SATA or NVMe (Non-Volatile Memory Express) SSD. To determine which type your laptop uses, check the following:
- SATA SSD: Older models or entry-level laptops may still use SATA SSDs, which offer slower speeds but still perform better than HDDs.
- NVMe SSD: Newer, high-performance laptops usually come with NVMe SSDs. NVMe offers significantly faster read and write speeds than SATA SSDs, making it ideal for gaming or professional tasks that require speed.
You can also use software like CrystalDiskInfo or check the specifications of your current SSD on ASUS' official website to see what type of SSD is in your laptop.
Check the Maximum Supported SSD Capacity
Not all laptops can support every SSD capacity. While most laptops will support up to 1TB, some older or budget models might only support up to 512GB or 256GB. Refer to your laptop's documentation or ASUS' website to find out the maximum supported SSD capacity for your model.
Upgrading your SSD involves a few essential tools and equipment. Here's a list of what you'll need:
Tools to Replace SSD in Laptop
- Small Phillips-head screwdriver: This is required to open the back panel of your laptop and remove the screws.
- Anti-static wrist strap (optional): Although not strictly necessary, wearing an anti-static wrist strap can help prevent electrostatic discharge, which can damage your laptop's internal components.
New SSD and External SSD Enclosure/Adapter
- Choose an SSD that is compatible with your laptop (SATA or NVMe). Make sure to select a reputable brand like Samsung, Crucial, or Western Digital for reliability.
- You will need an external SSD enclosure or USB-to-SATA adapter to connect your new SSD to your laptop for cloning purposes. This is especially useful if you're cloning the system drive.
Cloning Software
If you want to clone your existing SSD (i.e., transfer all your data, OS, and apps to the new drive), you will need cloning software. Popular options include:
- Donemax Disk Clone
- Clonezilla
These tools allow you to create an exact copy of your current drive to avoid reinstalling Windows and all your programs.
Back Up Data
Before making any hardware changes to your laptop, you should always back up your data. Losing important files or having issues during the SSD replacement process could result in data loss if you haven't taken the necessary precautions.
There are several ways to back up your data:
- Cloud backup: Several Cloud Services allow you to store your files online.
- External hard drive: Use an external hard drive or USB drive to back up your files. You can either manually copy over your data or use backup software to create a system image.
Creating a system image can be particularly helpful if you plan to clone your existing SSD, as it will create an exact backup of your entire system.
Clone Your Existing SSD on ASUS Laptop (Optional)
If you are not doing a clean installation of Windows, cloning your old SSD to the new one is the best option to keep your OS, apps, and files intact. Here's a guide on how to clone your existing SSD:
Step 1. Connect the New SSD
Using an external SSD enclosure or USB-to-SATA adapter, connect the new SSD to your laptop.
Step 2. Download Cloning Software
Install the cloning program of your choice after downloading it. For example, Donemax Disk Clone is a reliable disk copy tool.
Donemax Disk Clone
- Effective disk copy tool for Windows and macOS.
- Make bootable clone for entire system.
- Easy-to-use and reliable to migrate data between drives.
Step 3. Start the Cloning Process
- Open the cloning software and choose Disk Clone mode. Select your source drive (the current SSD) and the destination drive (the new SSD).
![upgrade SSD on ASUS laptop]()
- Preview and modify the disk layout on the new SSD if necessary. Ensure to tick "Check the option if the destination is SSD."
![upgrade SSD on ASUS laptop]()
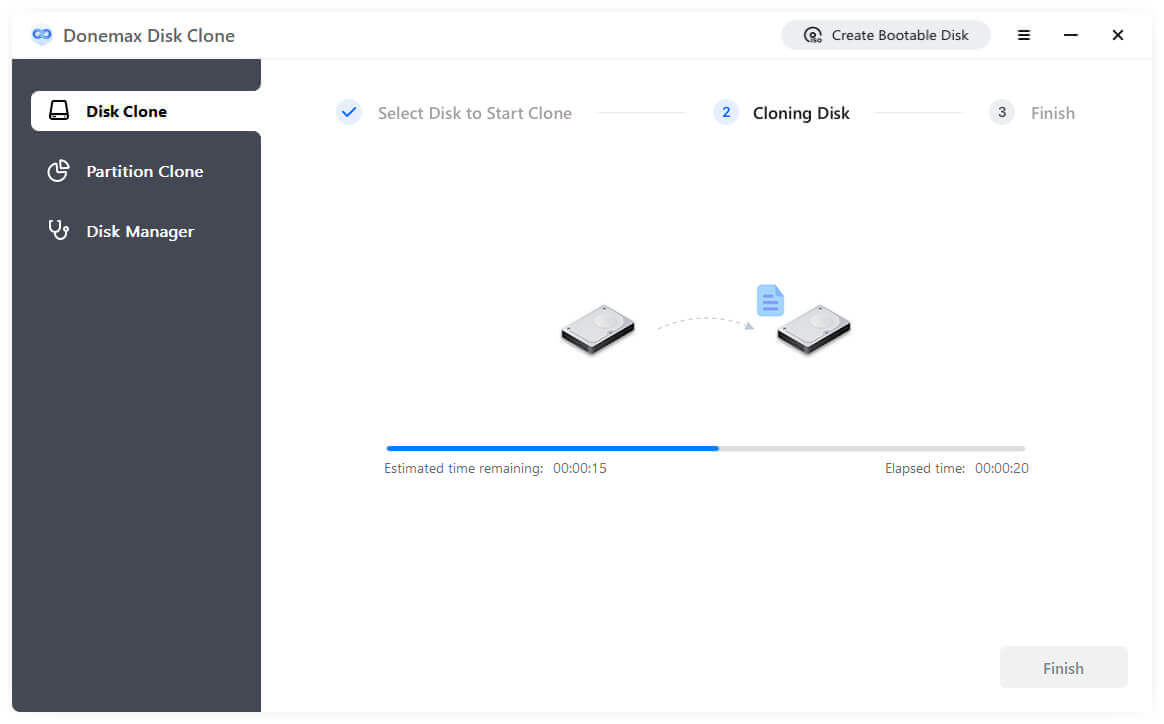
- Begin the cloning process. This may take some time depending on the amount of data you're transferring.
![upgrade SSD on ASUS laptop]()


Step 4. Verify the Clone
After cloning, make sure the clone was successful. You can do this by checking if all files, folders, and apps are present on the new SSD when you connect it.
Upgrade the SSD on ASUS Laptop
Physically Replacing the SSD
Now that you've backed up your data and cloned your SSD (if applicable), it's time to physically replace the old SSD with the new one.
Power Off and Unplug the Laptop
Ensure that the laptop is powered off completely and unplugged from the power source. Remove any connected peripherals such as USB drives or headphones.
Open the Back Panel
Using the Phillips-head screwdriver, remove the screws from the back panel of the laptop. Keep these screws in a safe place as you will need them to reassemble the laptop.
Locate the SSD Slot
Once the back panel is removed, locate the SSD slot. Depending on the model of your ASUS laptop, the SSD might be secured with screws or simply slid into a connector. If there's an existing SSD, gently remove it by unscrewing or sliding it out of the connector.
Install the New SSD
Place the new SSD into the same slot and ensure that it is securely connected. If necessary, screw it in place to ensure it doesn't move around.
Reassemble and Boot
After the new SSD is securely installed, carefully reattach the back panel and screw it back in place.
Now, plug the laptop back in and power it on. To ensure the laptop recognizes the new SSD, immediately press the BIOS access key (usually F2 or Esc) during boot-up. Check the Boot Options in the BIOS to confirm that the new SSD is detected.
Install or Restore Operating System
If you cloned your old SSD, your laptop should boot up normally. However, if you installed a fresh SSD or want to perform a clean installation of the operating system, here's what you need to do:
Clean Install of Windows
- Use the Windows Media Creation Tool to create a bootable USB stick that contains the installation files for Windows 10 or 11.
- Insert the USB drive into your laptop, and boot from it (you may need to select the USB drive as the boot device in BIOS).
- Follow the on-screen instructions to install Windows on the new SSD.
Reinstall Software and Drivers
Once Windows is installed, make sure to reinstall your essential software and drivers.
Optimize Your New SSD
After the SSD is installed and the OS is running, it's essential to optimize it for longevity and performance.
Enable TRIM
TRIM helps maintain the performance of an SSD by periodically cleaning up unused space. You can enable TRIM on Windows by running the following command in Command Prompt (with administrator privileges):
fsutil behavior set DisableDeleteNotify 0
Update SSD Firmware
Check to see whether your new SSD has a firmware update available by going to the manufacturer's website. Updating firmware can improve performance and stability.
Troubleshooting Tips for Issue Upgrading SSD on ASUS Laptop
If you encounter any issues after upgrading your SSD on ASUS laptop, here are some common troubleshooting steps:
SSD Not Detected
Ensure the SSD is properly seated in the connector and that it is compatible with your laptop.
Cloning Failed
If cloning fails, check the cloning software's documentation or use an alternative tool. You may also need to retry the cloning process.
Laptop Won't Boot After Upgrade
Check the boot order in BIOS. If necessary, reinstall the operating system.
Conclusion
Upgrading the SSD on your ASUS laptop is an effective way to significantly enhance performance and increase storage capacity. By following the steps outlined above, you can make the process smooth and straightforward, whether you choose to clone your existing drive or do a fresh installation of Windows. Once the upgrade is complete, you'll notice improved boot times, faster load times for applications, and an overall better experience using your laptop.
Donemax Disk Clone
An award-winning disk cloning program to help Windows users and Mac users clone HDD/SSD/external device. It also can create full bootable clone backup for Windows PCs and Macs.
Related Articles
- Jun 19, 2023How to Move OS to Another Drive without Reinstalling and Data Loss
- Jun 27, 2025Seagate DiscWizard Review: Pros, Cons, How to Use It
- Jun 03, 2026How to Move Windows 10/11 to Another Hard Drive or SSD?
- Dec 31, 2024How to Clone Hard Drive to SanDisk Extreme M.2 NVMe Internal SSD?
- Jun 09, 2023How to Clone A Samsung SSD Hard Drive in Windows
- Jun 16, 2024How to Clone Hard Drive to Samsung 990 Pro SSD?

Contributing Writer
Charles
Charles, who lives in Sydney, Australia, is an editor & writer of Donemax Team. He is good at writing articles related with Apple Mac computers, Windows operating systems, data recovery, data erasure, disk clone and data backup, etc. He loves reading and playing tennis in his spare time and is interested in testing new digital devices such as mobile phones, Macs, HDDs, SSDs, digital cameras, etc.

Editor in chief
Gerhard Chou
In order to effectively solve the problems for our customers, every article and troubleshooting solution published on our website has been strictly tested and practiced. Our editors love researching and using computers and testing software, and are willing to help computer users with their problems