Written byCharlesUpdated on Sep 16, 2025
How to Use TestDisk: Full Guide to Partition and File Recovery
Approved byGerhard Chou
Before we start: If you are not an advanced users, TestDisk seems hard to handle. Here we will show you how to use the tool to recover data/partition step by step. Also, you can use the easy-to-use alternative tool Donemax Data Recovery.
PAGE CONTENT:
Data loss is a nightmare—whether it's due to accidental deletion, partition corruption, virus attacks, or system crashes. While many data recovery tools exist, few offer the depth and effectiveness of TestDisk, a free and open-source utility that specializes in recovering lost partitions and making non-booting disks bootable again.

This article offers a comprehensive guide on how to use TestDisk, explaining its key features, recovery process, and best practices, making it useful for both novice users and experienced technicians.
What Is TestDisk?
TestDisk is a command-line data recovery tool developed by Christophe Grenier and maintained by CGSecurity. It's available for Windows, macOS, and Linux, making it a cross-platform solution trusted by IT professionals and DIY users alike.
Unlike typical file recovery programs that only scan for individual deleted files, TestDisk works at the partition level, helping users:
- Recover lost or deleted partitions
- Repair damaged partition tables
- Rebuild or restore boot sectors
- Undelete files (particularly from FAT, NTFS, and ext2 file systems)
It supports multiple file systems including FAT12/16/32, NTFS, exFAT, ext2/ext3/ext4, and HFS+. Due to its powerful features, it's especially useful when dealing with issues like:
- RAW file system errors
- Disk not showing up or mounting
- Partitions disappearing after OS crashes
Preparing to Use TestDisk
1. Downloading and Running TestDisk
You can download the latest version from the official website:
https://www.cgsecurity.org
TestDisk is portable, which means you don't need to install it. Simply extract the downloaded archive and run the executable:
- On Windows: testdisk_win.exe (run as Administrator)
- On Linux/macOS: Launch via Terminal with sudo ./testdisk
💡 Note: Always avoid installing or extracting recovery software onto the same drive you're trying to recover from. Use a separate drive to avoid overwriting lost data.
2. Safety First: Before You Begin
- Stop using the affected drive immediately to prevent further data loss.
- If you're dealing with a system drive, create a bootable USB or recovery environment to run TestDisk without affecting the OS.
- Prepare a separate drive or partition to save recovered files.
How to Use TestDisk?
Scenario 1: Recovering Lost Partitions
TestDisk's text-based interface may appear daunting at first, but it's well-structured. Here's how to recover a lost partition:
Step 1: Launch TestDisk
- Run the executable.
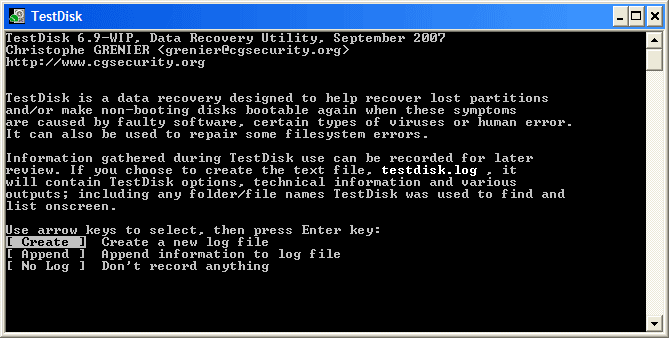
- Choose [Create] to generate a new log file. (Useful for debugging and reviewing the recovery session later.)
Step 2: Select the Drive
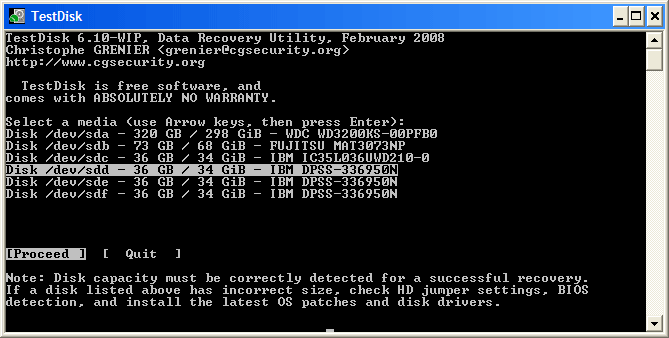
- TestDisk will list available storage devices.
- Use the arrow keys to select the affected disk (not the partition), then hit Enter.
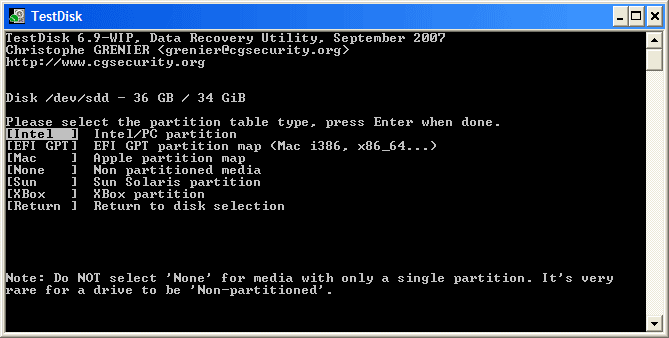
Step 3: Select Partition Table Type
TestDisk usually detects the partition table automatically:
- For BIOS systems: Intel/PC
- For UEFI systems with GPT: EFI GPT
- Others include Mac, Sun, or XBox
Select the appropriate option or accept the default if unsure.
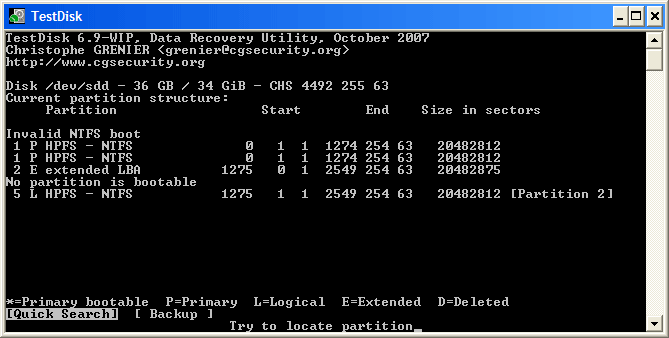
Step 4: Analyze the Disk
- Choose [Analyse] to let TestDisk scan the current partition structure.
![how to use TestDisk]()
- TestDisk will show the existing partitions. Select [Quick Search] to find lost partitions.
![how to use TestDisk]()

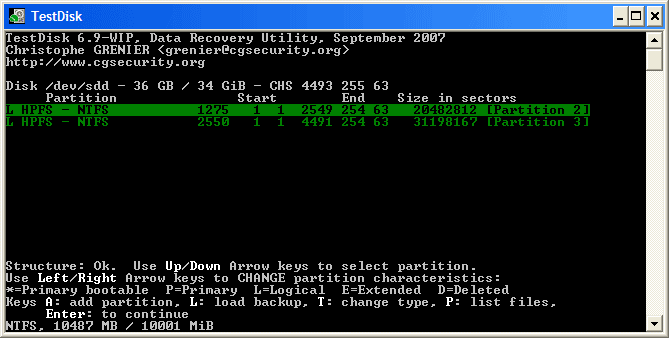
Step 5: Review and Select Partitions
Once the scan is complete:
- Use arrow keys to highlight a partition.
![how to use TestDisk]()
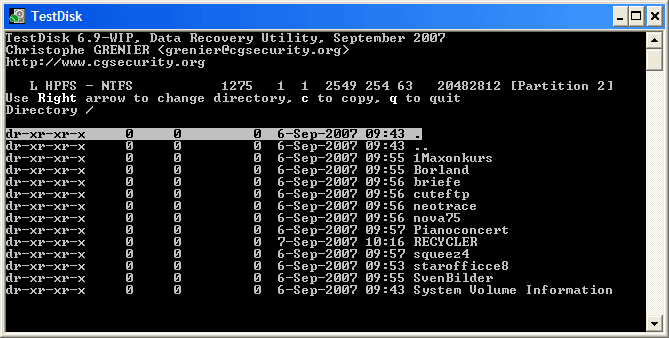
- Press P to list files and verify it's the correct one.
![how to use TestDisk]()
- If the partition is recoverable, select it and press Enter.
- Choose [Write] to write the partition table to disk.
![how to use TestDisk]()
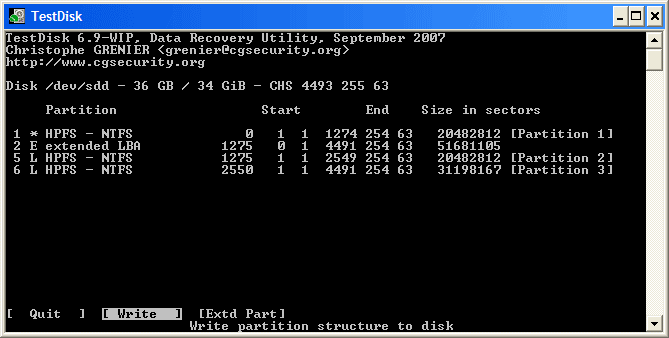
You'll likely need to reboot your system for changes to take effect.
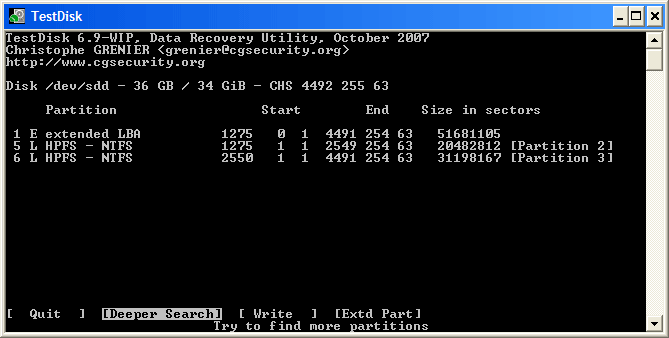
If your partition isn't listed after the quick search, choose [Deeper Search] to perform a more thorough scan. This process may take time depending on disk size.
Scenario 2: Recover Deleted Files
TestDisk can also recover deleted files from supported file systems like FAT, NTFS, and ext2/ext3.
Step 1: Launch TestDisk and Start a New Session
- Open TestDisk (testdisk_win.exe on Windows, or launch via terminal on Linux/macOS).
- Choose [Create] to begin a new session and generate a log file.
- Use the arrow keys to select the storage device where the deleted files existed.
- Confirm the partition table type (usually auto-detected). From the main menu, select [Advanced].
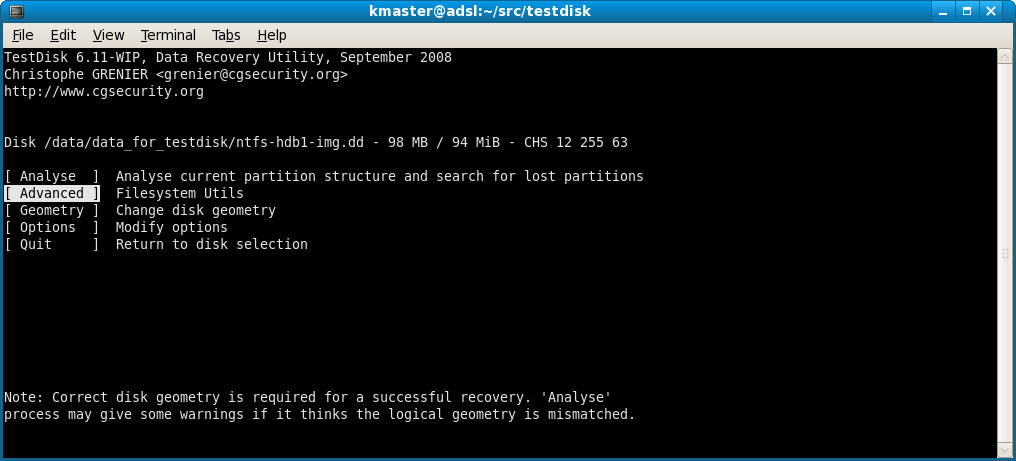
Step 2: Select the Drive and Partition
- Highlight the partition where the deletion occurred, and press [Undelete].
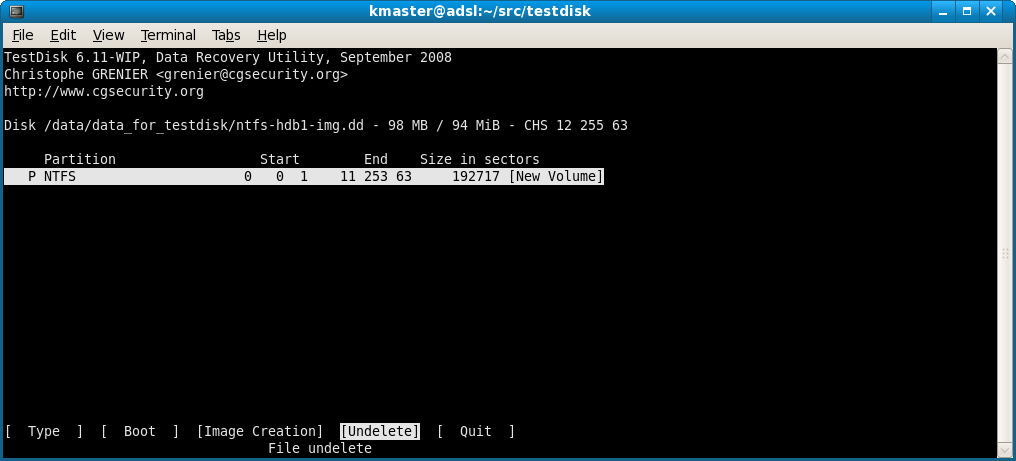
Step 3: Scan and select the deleted files
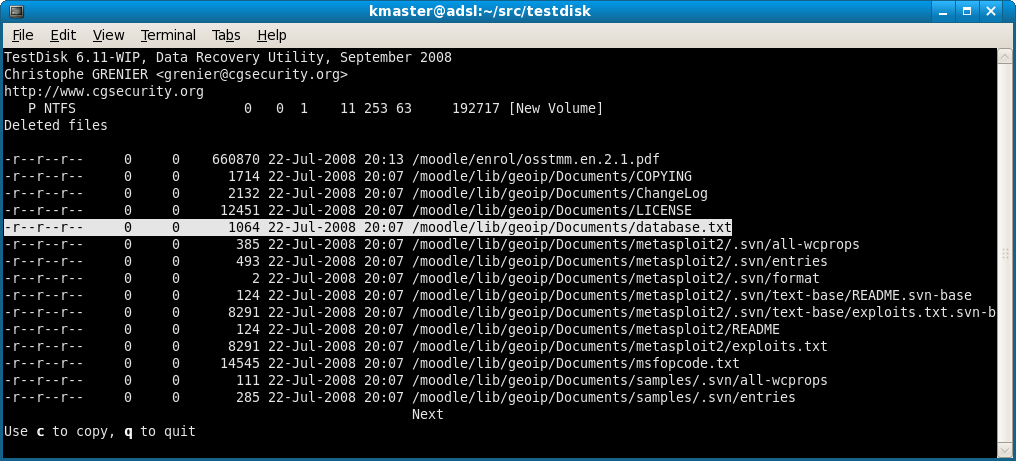
- TestDisk will quickly scan the file system for recently deleted files.
- A list of recoverable files and folders will appear, often in red (or marked as deleted).
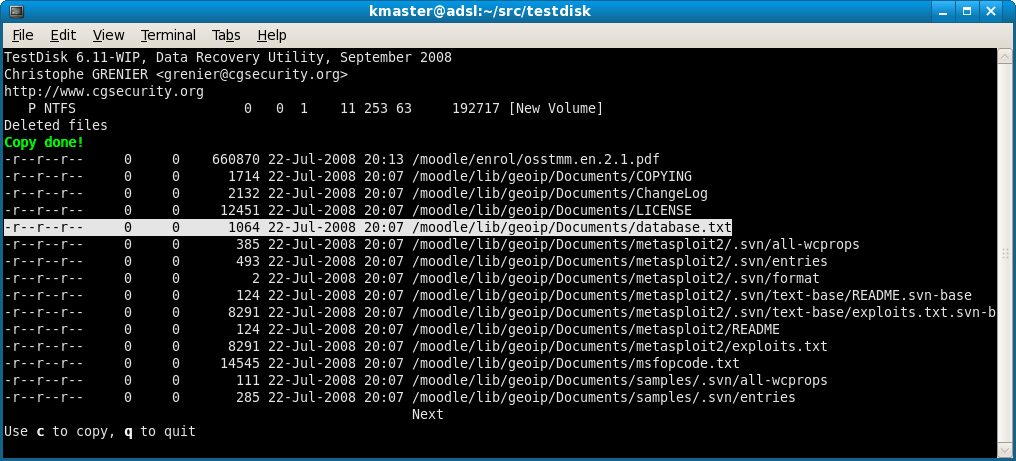
- To select files for recovery, you can Navigate the file list using the arrow keys. Press : to mark individual files or folders for recovery. You can mark all files using the a key if you want to recover everything.
- Once selection is complete, press C (uppercase 'C') to copy the selected files.
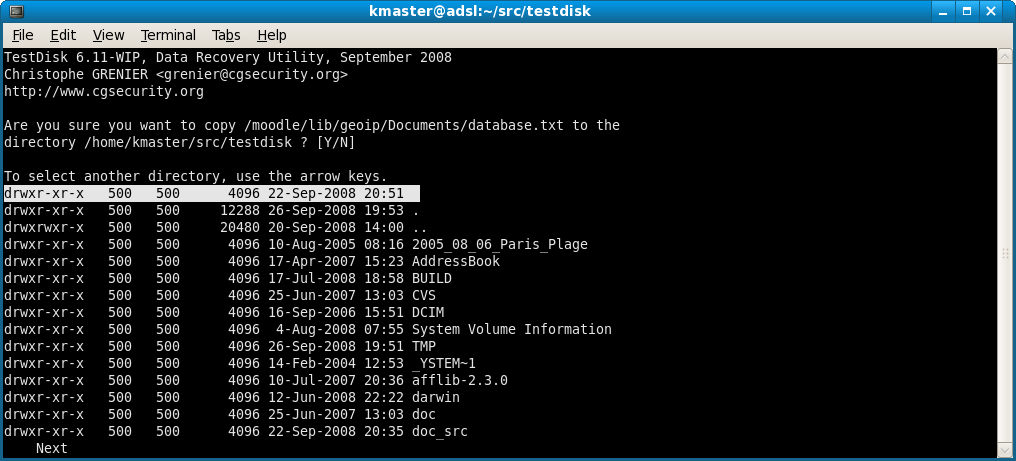
Step 4: Choose a Recovery Destination
- TestDisk will ask you to select a location to save the recovered files.
- Important: Always choose a location on a different physical drive than the source. Recovering files to the same drive can result in overwriting and permanent loss.
- Use arrow keys and Enter to navigate folders, then press C to confirm the destination.
Step 5: Wait for the Recovery to Complete
- The recovery process may take a few seconds to several minutes depending on the number and size of files.
- Once done, TestDisk will return to the undelete interface, allowing you to continue or exit.
Tips for Successful File Recovery
- Act Quickly: The sooner you try to recover deleted files, the better the chances that the data hasn't been overwritten.
- Know Your File System: Undelete works best on FAT32 and NTFS. For other file systems like ext4, TestDisk may not show deleted files. In that case, consider using PhotoRec, which scans sectors for file signatures.
- Previewing Files: TestDisk doesn't offer file previews. If you're unsure about the content of a file (especially with generic names like IMG0001.JPG), recover it to another disk and preview it manually afterward.
- Folder Recovery: TestDisk can recover entire folders. When recovering folders, TestDisk recreates the original directory structure where possible, which helps keep your files organized.
What Types of Files Can Be Recovered?
TestDisk's undelete feature is file system aware, meaning it reads metadata entries (like file names, sizes, timestamps) from the file allocation tables or MFT (Master File Table). Therefore, it can recover most common file types, including:
- Documents: .docx, .pdf, .txt, etc.
- Images: .jpg, .png, .bmp
- Audio: .mp3, .wav
- Videos: .mp4, .avi, .mov
- Archives: .zip, .rar
💡 Good to Know: Unlike tools like PhotoRec that don't recover original filenames, TestDisk often does—especially for FAT and NTFS volumes. This can be a big advantage when you need organized and labeled data.
Limitations of File Undelete in TestDisk
Despite its strengths, TestDisk's undelete feature has a few limitations:
- No file preview: You can't view the content of a file before recovery.
- Limited to specific file systems: Doesn't support file-level recovery from ext4, exFAT, or HFS+ partitions.
- No deep signature scan: If file system metadata is lost or severely corrupted, TestDisk may not find the deleted files at all.
- Not ideal for formatted drives: If the file system was reformatted, you're better off using PhotoRec.
Scenario 3: Repairing Boot Sectors and Non-Bootable Disks
In addition to partition recovery, TestDisk is excellent for repairing boot sectors and making unbootable drives work again.
Features Include:
- Rebuild NTFS boot sectors
- Restore FAT boot sectors from backup
- Fix MFT (Master File Table) errors
- Restore bootability for drives showing "Operating system not found"
Steps for NTFS Boot Sector Recovery:
- Go to [Advanced] > Select the NTFS partition. Choose [Boot].
- Select [Rebuild BS] if the boot sector is damaged.
![how to use TestDisk]()
- You can also compare the current boot sector with its backup using [Backup BS].
![how to use TestDisk]()
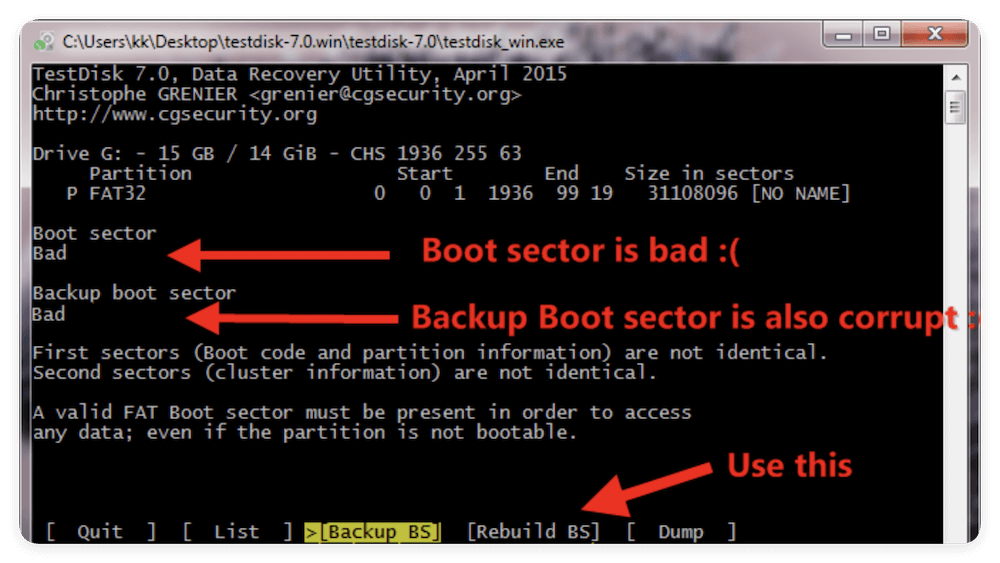
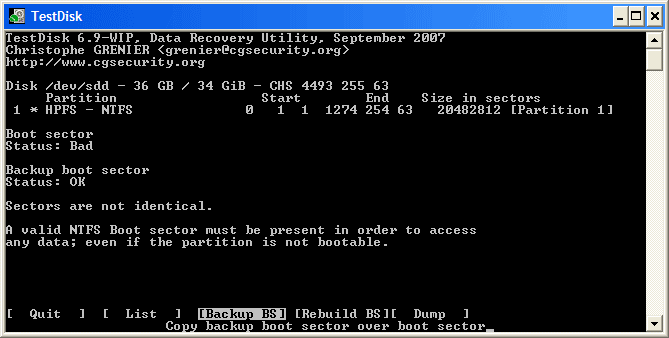
If the backup is valid, TestDisk will prompt you to restore it. This often resolves non-bootable disk errors.
TestDisk Limitations
Although powerful, TestDisk has its limitations:
- Command-Line Interface (CLI): Intimidating for non-technical users.
- No file previews: Unlike GUI tools, you can't preview files before recovery.
- Limited file recovery: It's better at recovering structures like partitions than individual files across all formats.
- Doesn't support encrypted drives or severely damaged hardware: For such cases, professional recovery services may be required.
For recovering multimedia files and documents, its companion tool Donemax Data Recovery is more suitable.
Pro Tips for Safe and Effective Use
- Use a Read-Only Recovery Environment: Boot from a live Linux USB when dealing with a system drive.
- Backup Before Writing: Always back up the TestDisk log and image your drive if possible before writing changes.
- Log File is Your Friend: The testdisk.log file contains details of your session and is useful for analysis or getting community help.
- Use on Clones for Critical Recovery: Clone the failing disk with tools like ddrescue and run TestDisk on the image file.
- Label Restored Partitions Clearly: Once restored, consider renaming or labeling partitions to avoid confusion.
Best Alternatives to TestDisk
If TestDisk feels too complex or doesn't suit your needs, here are alternatives:
Top 1. Donemax Data Recovery [Recommended]
- More advanced features and a user-friendly interface
- Suitable for large-scale or commercial recovery
- Preview before recovery feature available
Top 2. PhotoRec
- Made by the same developer of TestDisk
- Recovers files by signature
- Ignores file system and works on damaged or reformatted disks
Top 3. Recuva (Windows)
- GUI-based file recovery
- Easy to use but less powerful than TestDisk
How to Recover Data Easily with TestDisk Alternative?
If you want to recover data easily and effectively, you can use the powerful and easy-to-use tool Donemax Data Recovery. It can recover data in different data scenarios within a few clicks. Here is how to recover data with the software:
Step 1. Download and install the software Donemax Data Recovery on your computer. If you lost data from an external device, ensure to connect it to the computer.
Donemax Data Recovery
- Best alternative software to TestDisk
- Powerful and easy-to-use recovery tool.
- Support different devices and file types.
Step 2. Run the software and then choose the drive where you lost data.

Step 3. Scan the drive deeply to search for the deleted or missing files.

Step 4. Check and preview the found files, recover the files to another drive.

For a combination of power and accessibility, many users run TestDisk for partition fixes and PhotoRec for file recovery. Just need a simple and recover a few files? You can just try the software Recuva.
Conclusion
TestDisk remains one of the most trusted tools in the world of data recovery—thanks to its powerful capabilities, cross-platform compatibility, and zero cost. While it may look intimidating due to its text-based interface, its structured flow and robust features make it ideal for fixing serious disk problems like lost partitions or boot issues.
Whether you're a tech-savvy user or just someone trying to get back that lost partition, TestDisk is a tool worth learning. If you pair it with caution, backup practices, and a bit of patience, it can help you recover from some of the worst-case scenarios in data loss.
Final Tip: Always back up your data regularly to avoid relying on recovery tools in the first place!
Donemax Data Recovery
Powerful, safe & easy-to-use data recovery software. Easily and completely recover deleted, formatted, or other lost data. The tool supports PC, Mac, HDD, SSD, USB drive, camera, SD card, RAID and other storage devices.
Related Articles
- May 19, 2025How to Recover Files Which Are Deleted from Recycle Bin?
- Nov 04, 2025Recover Deleted or Unsaved Notepad File
- Jun 06, 2025How to Recover Deleted 3GP Video Files?
- Jan 29, 2024How to Unformat Toshiba Hard Drive?
- Jun 28, 2025Will System Restore Recover Deleted Files on Windows 11/10?
- Jun 13, 2025How to Recover Deleted KDC File: A Complete Guide

Contributing Writer
Charles
Charles, who lives in Sydney, Australia, is an editor & writer of Donemax Team. He is good at writing articles related with Apple Mac computers, Windows operating systems, data recovery, data erasure, disk clone and data backup, etc. He loves reading and playing tennis in his spare time and is interested in testing new digital devices such as mobile phones, Macs, HDDs, SSDs, digital cameras, etc.

Editor in chief
Gerhard Chou
In order to effectively solve the problems for our customers, every article and troubleshooting solution published on our website has been strictly tested and practiced. Our editors love researching and using computers and testing software, and are willing to help computer users with their problems