Written byMariaUpdated on Jun 06, 2025
4 Methods to Recover Deleted AAC File: A Complete Guide
Approved byGerhard Chou
Before we start: Is it possible to recover permanently deleted AAC audio files? Yes, with data recovery tool - such as Donemax Data Recovery, you can easily and completely recover deleted or erased AAC files from local disk, external hard drive, USB flash drive, memory card, music player, etc.
PAGE CONTENT:
Losing audio files - especially your favorite music, podcasts, or recordings - can be incredibly frustrating. AAC files (Advanced Audio Coding), known for their high audio quality and small file size, are a common format used by Apple devices and various music platforms. But what happens when these files get deleted accidentally?
Whether you removed them from your computer, formatted your drive, or experienced a virus attack, this guide will show you how to recover deleted AAC files using proven and safe methods. We'll also cover recovery tools, strategies for external devices, and how to prevent this loss in the future.
What Are AAC Files?
AAC (Advanced Audio Coding) is a lossy audio compression format designed to be the successor of MP3. It delivers better sound quality at similar bitrates and is used by platforms like Apple Music, iTunes, YouTube, and more. These files typically carry the .aac extension and are widely compatible with iOS, Android, and modern multimedia players.

Can You Recover Deleted AAC Files?
Yes, in many cases, you can recover deleted AAC files - but time and method are critical.
When you delete a file, the operating system marks the file's storage location as "free space." The file isn't erased immediately; instead, it's hidden and will remain recoverable until new data overwrites it.
That's why you must avoid adding new data to the storage device after deletion to maximize recovery chances. Shut down unnecessary apps, avoid downloading anything, and proceed with recovery steps immediately.
4 Methods to Recover Lost AAC Audio Files
Method 1: Recover AAC Files from Recycle Bin or Trash
The first and easiest recovery method is checking your system's Recycle Bin (Windows) or Trash (Mac).
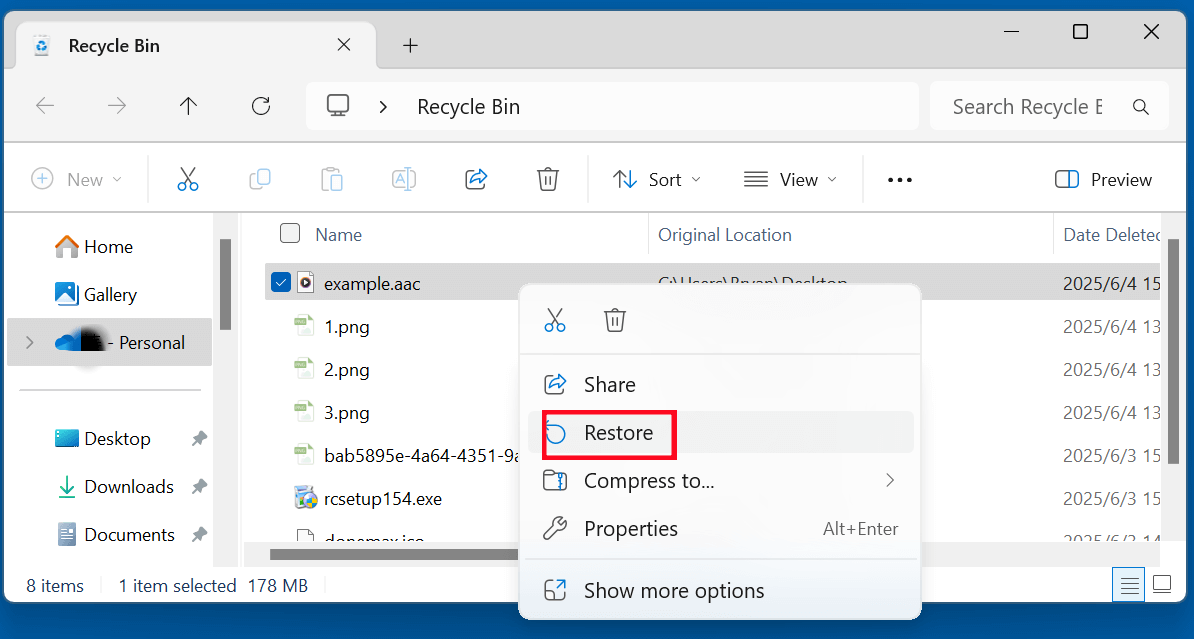
Windows:
- Double-click the Recycle Bin icon on your desktop.
- Locate the deleted AAC file(s).
- Right-click the file and choose Restore.
![how to recover deleted AAC files]()
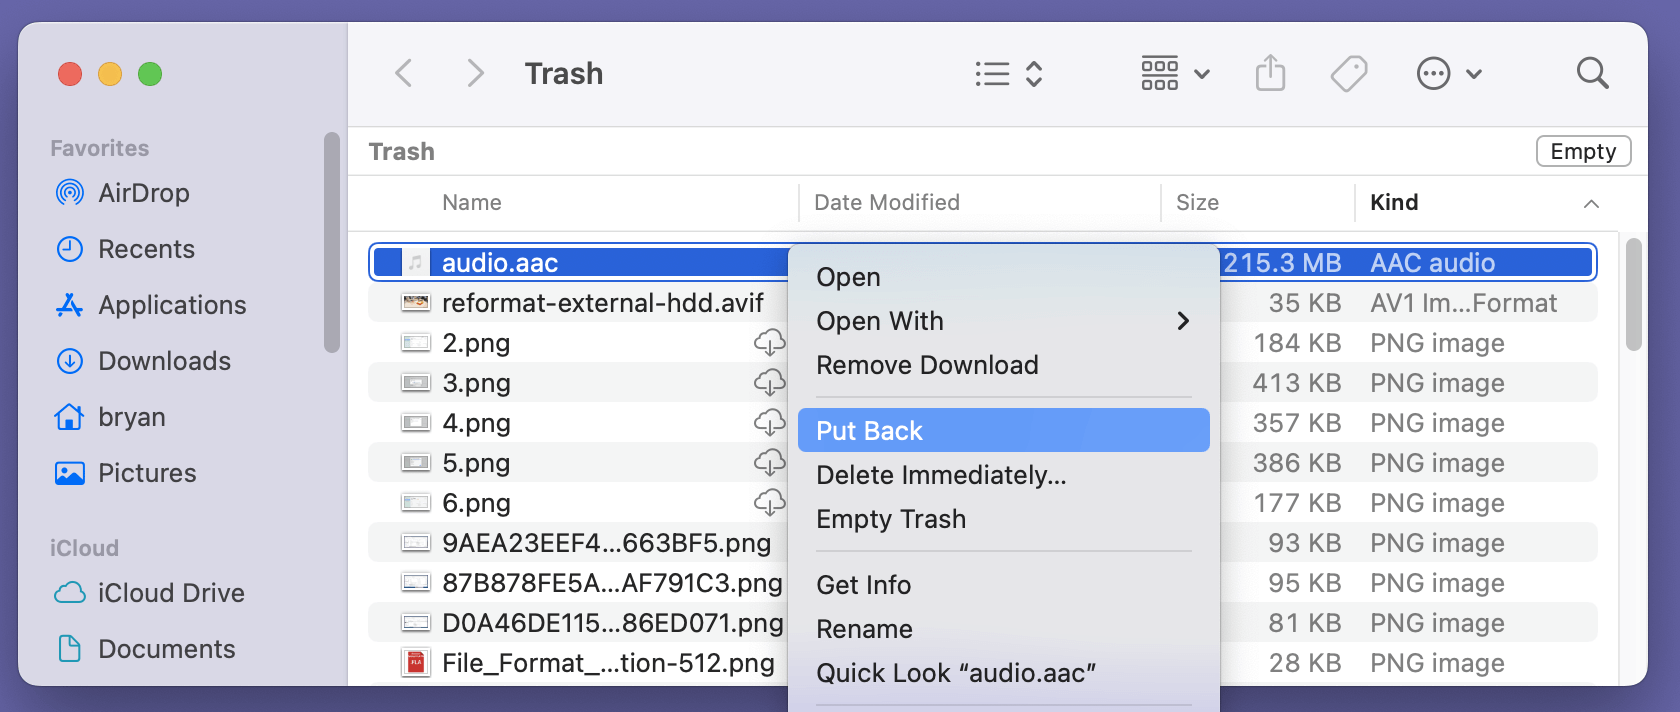
Mac:
- Open Trash from the Dock.
- Find the deleted .aac file.
- Right-click and select Put Back.
![how to recover deleted AAC files]()
If your file isn't in the Recycle Bin or Trash (for example, if it was permanently deleted with Shift + Delete or emptied), proceed to the next method.
Method 2: Use File History or Time Machine Backup for AAC File Recovery
If you've enabled automatic backup tools, recovering deleted AAC files becomes much easier.
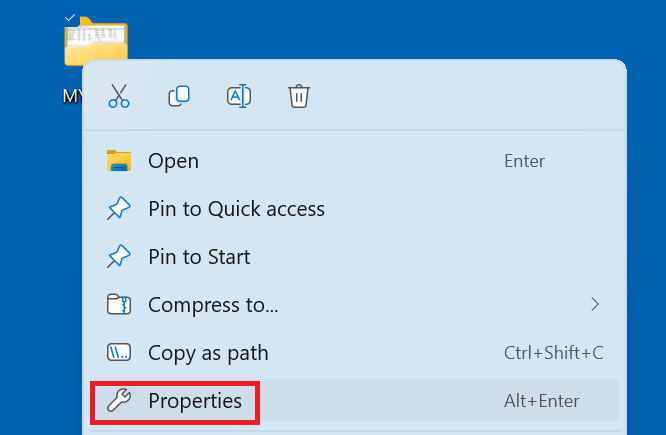
Windows File History:
- Open the folder where your AAC file was originally stored.
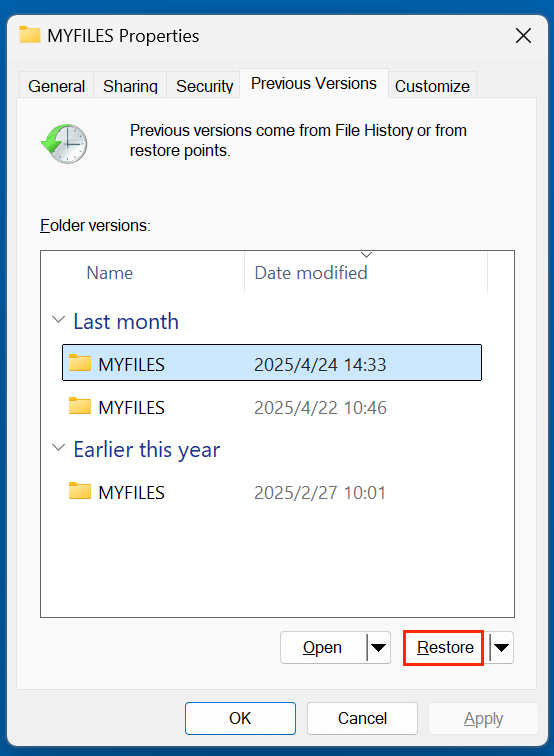
- Right-click and choose Properties > Previous Versions.
![how to recover deleted AAC files]()
- Select a backup version containing your AAC file.
- Click Restore.
![how to recover deleted AAC files]()
💡 Note: File History must be enabled beforehand for this method to work.
macOS Time Machine:
- Connect your Time Machine backup drive (if applicable).
- Open the folder where your AAC file existed.
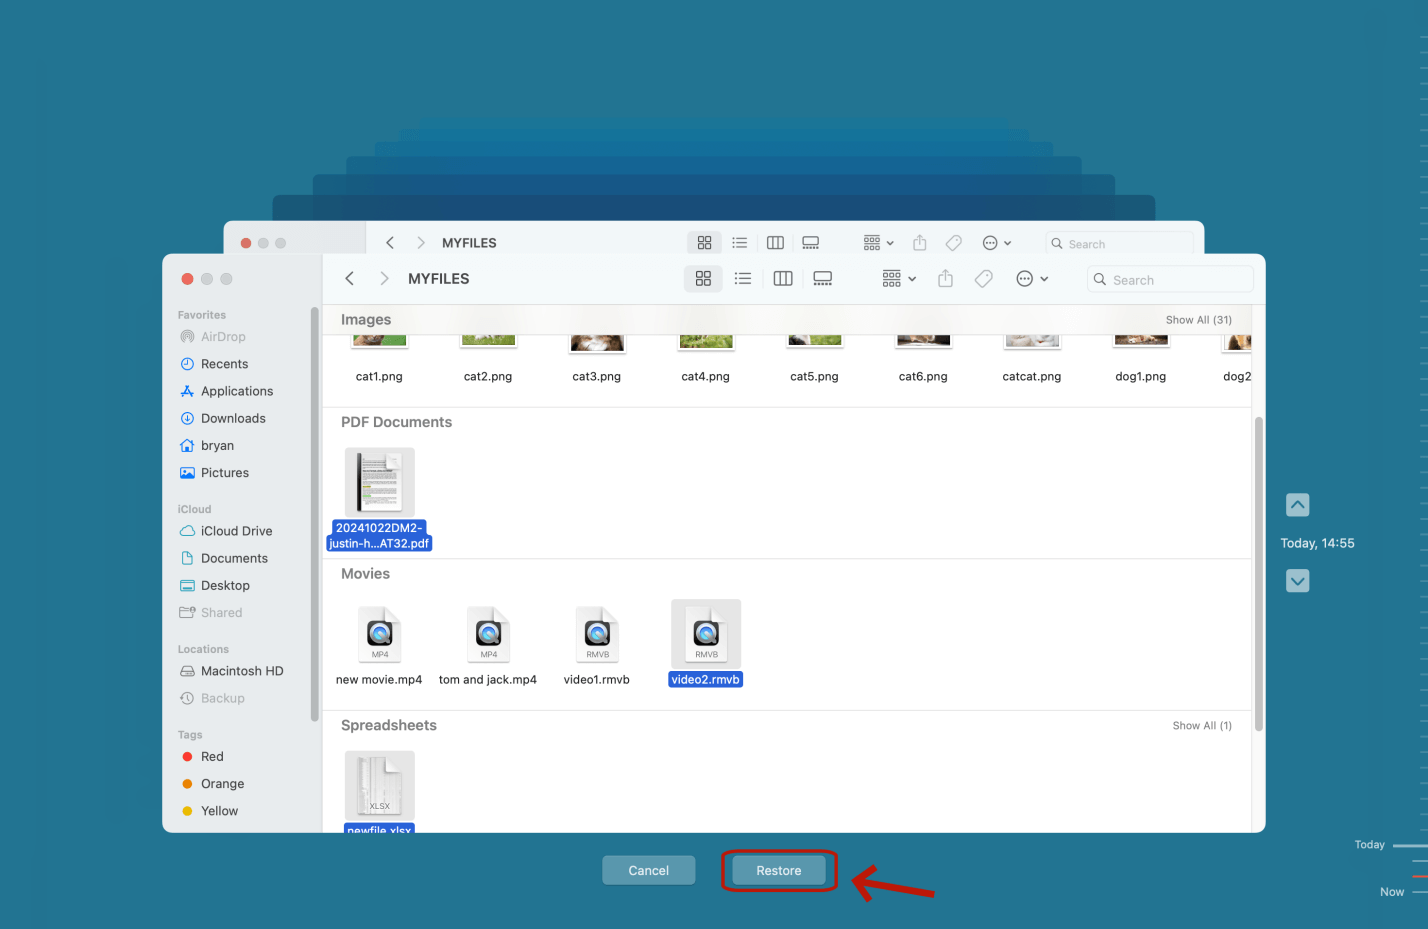
- Launch Time Machine from the menu bar or Applications.
- Use the timeline on the right to locate the file.
- Select the file and click Restore.
![how to recover deleted AAC files]()
No backups? Then data recovery software is your next best option.
Method 3: Recover AAC Files Using Data Recovery Software
If you've already emptied your Recycle Bin, permanently deleted files with Shift + Delete, or lost AAC files due to formatting, system crashes, or malware, then recovery software becomes essential. These tools work by scanning your storage media for traces of deleted files that the file system no longer indexes but haven't been overwritten yet.
How Does Data Recovery Software Work?
Most data recovery programs operate on the principle that deletion does not physically remove data from a storage device. Instead, the space previously occupied by the file is marked as "available," while the actual data stays intact until overwritten.
Recovery tools perform two types of scans:
- Quick Scan: Searches for recently deleted files using file system metadata (e.g., FAT, NTFS, HFS+).
- Deep Scan: Inspects the disk sector-by-sector to locate lost file signatures, even if the file table is damaged or missing.
These tools are particularly useful for AAC file recovery since audio file signatures (e.g., ADTS headers for .aac files) can be uniquely identified during a deep scan.
Recommended Data Recovery Tools:
- Donemax Data Recovery
- Recuva (by CCleaner)
- Disk Drill (by CleverFiles)
- Magoshare Data Recovery
Detailed Recovery Steps Using Donemax Data Recovery (Example)
Step 1. Install Donemax Data Recovery on a drive that does not contain your deleted AAC files.
Step 2. Launch the software and select the drive or partition where your AAC files were deleted.
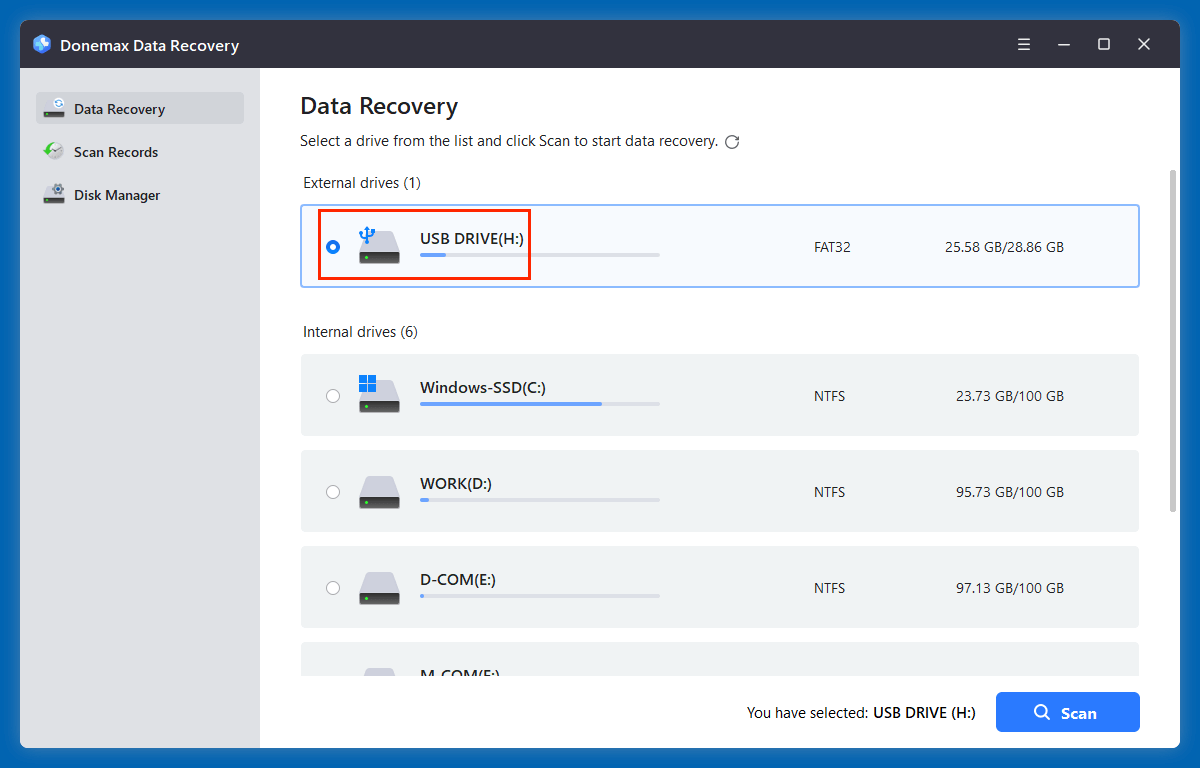
Step 3. Click on Scan. It will start with a quick scan, then a deep scan to find all recoverable files.
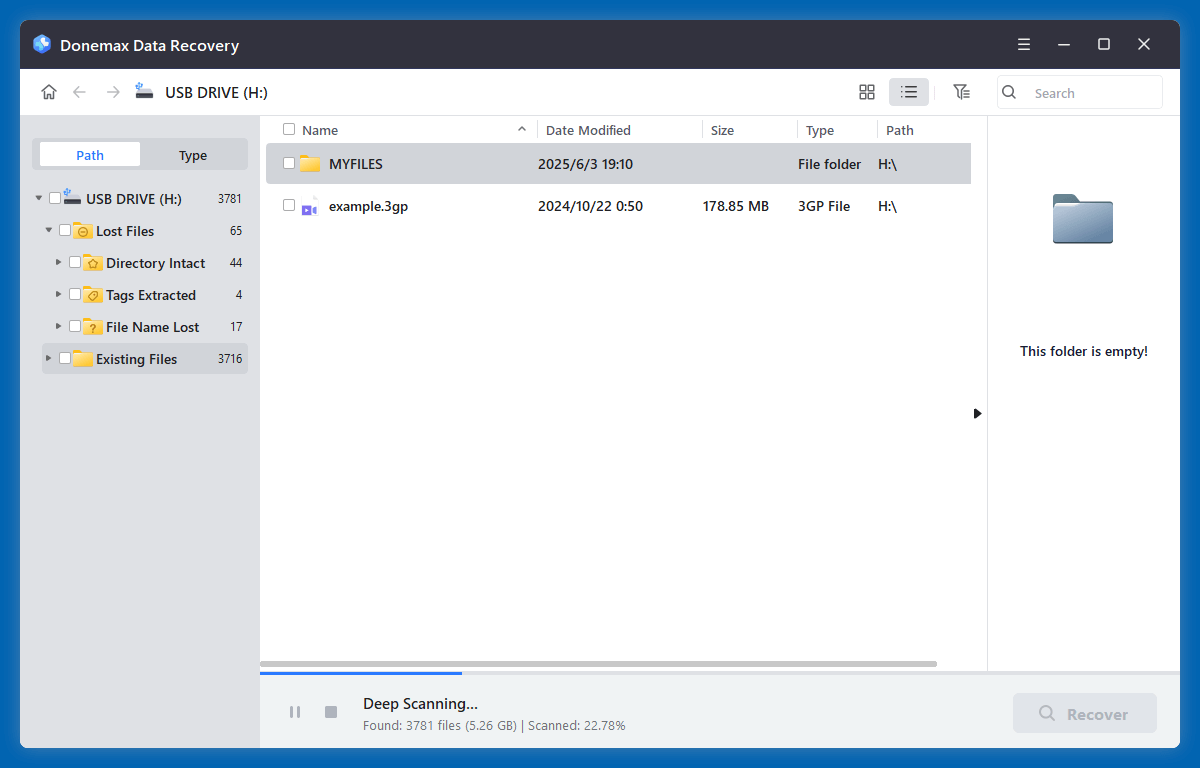
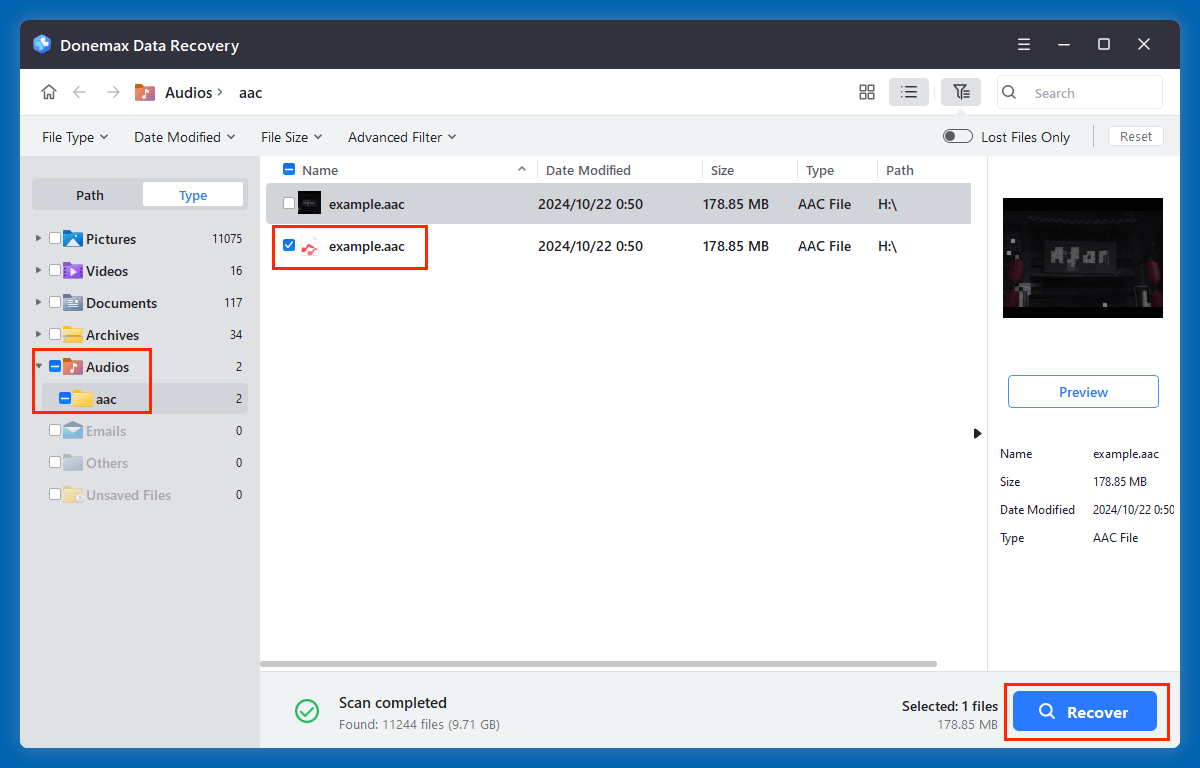
Step 4. Once scanning completes, filter results by file type (Type > Audios > AAC).
Preview files to ensure integrity - playable audio previews help verify the file is intact.
Select your AAC files and click Recover. Choose a different storage location to avoid overwriting any remaining data.
💡 Pro Tip: Even if your files don't show up on the first scan, let the deep scan run fully - it might take longer but finds more fragmented files.
Common Scenarios Where Recovery Software Works Well
- Files permanently deleted from Recycle Bin/Trash.
- ACC files lost after formatting an SD card or external hard drive.
- Data loss after partition deletion or corruption.
- AAC files missing after system reinstallation or update.
- AAC files deleted by antivirus or during malware removal.
What If the Recovered AAC File Is Corrupted?
Sometimes recovered files may be partially overwritten or corrupted. While this lowers sound quality, some tools offer partial repair features. You can also try:
- Audacity: Import the damaged AAC file and re-export it to another format like WAV or MP3.
- FFmpeg: Run terminal/command-line tools to attempt repair:
ffmpeg -i corrupted.aac -c copy fixed.aac
Method 4: Recover AAC Files from External Devices
AAC files stored on USB drives, SD cards, or external hard disks are also vulnerable to loss due to improper ejection, formatting, or physical damage.
Here's how to recover them:
Steps:
- Connect the external device to your computer.
- Launch your chosen data recovery software - such as Donemax Data Recovery.
- Select the external drive from the list of devices.
- Initiate a deep scan to maximize recovery.
- Locate and preview .aac files.
- Recover and save to your local disk - not the original device.
⭐ Important: Do not format or reinitialize the external device after realizing the data loss. This can make recovery more difficult.
Tips to Maximize AAC File Recovery Success
To boost your chances of a successful recovery:
- Stop Using the Drive Immediately: Writing new data can overwrite your deleted AAC files, making them unrecoverable.
- Use Recovery Tools Early: The sooner you start the recovery process, the better the results.
- Save to a Different Drive: Always store recovered files in a different partition or external storage to avoid data overwriting.
- Preview Files Before Recovery: Most recovery tools allow previews - this ensures you're retrieving the correct AAC files.
💡 Note: If the AAC files are erased by data erasure software - such as Donemax Data Eraser, they are lost forever, can't be recovered by any recovery method.
How to Prevent AAC File Loss in the Future?
Prevention is the best cure. Here are practical ways to avoid losing your AAC files again:
1. Enable Automatic Backups
Use File History (Windows) or Time Machine (Mac) to create routine backups of important data.
2. Use Cloud Storage
Cloud services like Google Drive, iCloud, or Dropbox offer real-time backup and cross-device sync.
3. Protect Against Malware
Install reliable antivirus software and perform regular scans to avoid file corruption and ransomware.
4. Eject Devices Safely
Never unplug USBs or SD cards without ejecting them first. Improper removal can corrupt file systems.
5. Avoid Risky Shortcuts
Don't use Shift + Delete unless you're absolutely sure. Regular delete sends files to Recycle Bin, giving you a fallback.
Conclusion
Losing AAC files can feel like a major setback - especially if they're irreplaceable recordings, podcast edits, or cherished music tracks. Fortunately, as we've explored, recovery is often possible using built-in OS features, backups, or third-party recovery tools.
Your action plan:
- First, check the Recycle Bin/Trash.
- If unsuccessful, look for system backups.
- Still no luck? Use a reliable data recovery tool like Donemax Data Recovery or Recuva.
- Act quickly and avoid saving new data to the same drive.
Finally, make it a habit to back up your files and use cloud storage where possible. A little prevention goes a long way when it comes to protecting digital content.
Donemax Data Recovery
One of the best data recovery programs to recover deleted, formatted or lost data from PC, Mac, HDD, SSD, USB drive, SD card, camera, RAID, Sever or other storage devices.
Related Articles
- Mar 03, 2026How to Recover Deleted Videos from GoPro Camera?
- Nov 12, 2025How to Recover Deleted OneNote Files?
- May 29, 2025Best 4 Methods to Recover Deleted EMF File
- Nov 03, 2025How to Recover Deleted QuickTime Files on Windows and Mac?
- Jul 07, 2025[6 Methods] Recover Deleted M4P File: Step-by-Step Guide to Restoring iTunes Music
- Jun 28, 2025What Is a PIN File & How to Recover Deleted PIN Files Easily

Contributing Writer
Maria
Maria is one of the senior writers & editors of Donemax who lives and works in Sydney, Australia. She loves PC, Mac and Internet Technology. She has 6 years of writing articles about data recovery on PC/Mac, disk cloning solution, data eraser and computer OS optimization, etc. She is also interested in testing various software and digital products.

Editor in chief
Gerhard Chou
In order to effectively solve the problems for our customers, every article and troubleshooting solution published on our website has been strictly tested and practiced. Our editors love researching and using computers and testing software, and are willing to help computer users with their problems