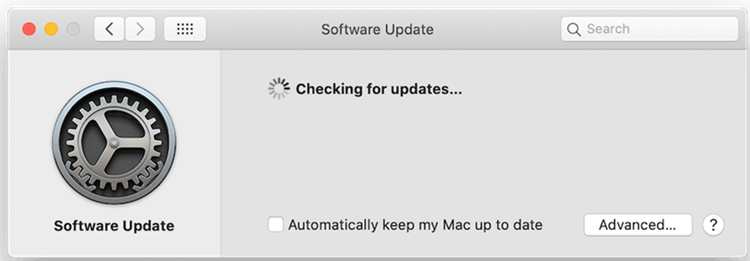
When Mac System Preferences -> Software Update prompts that a new macOS update is available, after accessing it, it is stuck in "Checking for Updates," the wheel spins indefinitely, and nothing happens. I tried restarting the computer several times, but the problem persists. Recently, some Mac users have reported the same issue: how do you get your Mac to perform a standard macOS upgrade? Don't worry; we'll show you how to fix Mac software update stuck "Checking for updates" in this article.
![Fix Mac stuck on check for updates]()
Some possible reasons for the macOS update issue:
There could be several issues causing the error "checking for updates…" loop. A few examples include:- an unstable or slow internet connection.
- Your Mac has limited storage capacity.
- Apple update servers are unresponsive.
- An existing problem that is interfering with the update.
- Software incompatibility.
Solutions to your macOS update problem
1. Disable FileVault
- FileVault is a security tool that helps to prevent unauthorized access to data on Mac's startup disk. However, it may occasionally interfere with the macOS upgrade. It may enter a loop in which it attempts to apply the encryption to your updated operating system.
- It may be possible to disable FileVault when updating macOS.
- Select the Apple logo in your Mac's menu bar, System Preferences, and FileVault under Security and Privacy.
- You will now have the option to turn off FileVault.
Disabling FileVault may allow you to update macOS without difficulty. If you want the security benefits of full-disk encryption, you can reactivate FileVault after the update is finished.
2. Check the status page of the Apple System
If you can still download your macOS installer, it is possible that Apple's server is to blame. When Apple launches a new version of macOS, users are usually eager to get the update. This could put Apple's servers under strain.
You may check the status of Apple's numerous services on the official system status website. When you cannot update macOS, you should proceed to the macOS software update section. If the accompanying icon is green, there is no problem with Apple's server, and your situation may be elsewhere. If you see the red or yellow icon, congratulations, you have found the source of your problem. But unfortunately, you can do nothing much until the servers of Apple are back to normal.
3. Boot to Safe Mode
When macOS stops updating, a third-party application or a corrupted component may interfere with the update process. Safe mode is the best approach to start your Mac with the fewest details required to function. When macOS is reduced to its fundamentals, the hurdles that impede the upgrading process can be removed. To boot into Safe Mode, power down your Mac as usual. Then, while holding down the Shift key, restart your Mac. After a few moments, you will notice that macOS is booting into Safe Mode. You can now proceed with the macOS update as usual. I'm hoping it goes off without a hitch.
4. Reset your NVRAM
Your Mac's NVRAM (Non-Volatile Random-Access Memory) is a small amount of memory dedicated to storing the settings that macOS requires for quick access. This includes information about kernel panics, screen resolution, and speaker volume. When you cannot update your macOS, you may receive a favorable result by streaking the kernel panic information. You must reset the NVRAM in the following manner:
- First, you must turn off your computer. Then wait a few moments to confirm that the fans and hard disc have stopped spinning.
- Next, locate the keys Command + Option + P + R on your keyboard. You'll be needing these keys soon.
- After hearing the startup sound, you must immediately turn on your Mac. Hold the keys you found in the previous step without spending any time.
- Then, keep holding the keys down until you hear your Mac's startup song for the second time.
Finally, let go of the keys.
- The NVRAM must have reset by now. We hope you can now install the macOS update without any further issues.
5. Boot into macOS Recovery Mode
If your update still needs to occur after following the preceding instructions, this step may assist you in downloading a fresh copy of your macOS. This requires you to boot into the macOS recovery mode.
- To begin, typically turn off your Mac.
- After that, restart your Mac and instantly press and hold the Command + R keys (Hold Power button if you use a Apple Chip Mac). You'll notice that your Mac has now entered Recovery Mode.
- When in Recovery Mode, click the Wi-Fi sign in the screen's upper-right corner.
- It would help to verify that you are linked to a dependable and fast network.
- In the box that appears, select “Reinstall macOS.”
- Now you can follow the onscreen directions to download and install a fresh and new copy of macOS.
6. Please turn off your device and turn it on again
This may sound strange, but you must do it. In most circumstances, this resolves the issue. It may also help with your macOS update stuck point. When an update is stuck in the background, rebooting will clear the system and may resolve your issue. To do so, go to the Apple menu and select Restart. After restarting the device, navigate to System Preferences and click on Software Update.
Recover Lost Data on Mac
If you lose data due to macOS update failure or erasing Mac hard drive, just try data recovery software to get lost files back. Donemax Data Recovery for Mac is a powerful data recovery application which is able to completely recover lost files on Mac.
Donemax Data Recovery for Mac
Follow the steps below to recover lost files on Mac:
Step 1. Open Donemax Data Recovery for Mac and then select the hard drive where you delete or lose your files.
![Recover Lost Data on Mac]()
Step 2. Click on Scan button, Donemax Data Recovery for Mac will deeply scan the hard drive and find all recoverable files.
![Recover Lost Data on Mac]()
Step 3. Once the scan is completed, you can preview all recoverable files. Then select the wanted files and save them.
![Recover Lost Data on Mac]()
Wrapping up
The macOS update stuck is a critical and inconvenient issue that must be resolved as soon as possible. If your Mac is outdated, your system may be unable to support the most recent macOS upgrades. Apple plans to support the Mac versions for three years. We hope that the solutions listed above have assisted you in resolving your problem.
If not, try contacting Apple customer service. However, before you execute any system-level updates, be sure you have backed up all of your essential data. When your device updates keep freezing and do not install appropriately through your Apple and Mac server, we always recommend that you have a bootable USB installer available so that you can install the recent Mac version and its updates with the help of that.