Written byChristinaUpdated on Sep 15, 2025
How to Install macOS Sequoia on VMware on Windows?
Approved byGerhard Chou
PAGE CONTENT:
macOS Sequoia is Apple's latest operating system, packed with advanced features, design enhancements, and deeper integration with Apple's ecosystem. However, if you're a Windows user looking to test macOS Sequoia—perhaps for app development, exploring Apple's environment, or just for curiosity—you're in luck. Thanks to virtualization technology like VMware, you can run macOS Sequoia on a Windows machine without a Mac.
This article walks you through installing macOS Sequoia on VMware on Windows PC. We'll guide you step-by-step—from downloading the ISO, setting up the virtual machine, installing macOS, fixing common issues, and optimizing performance.
Preparation for Installing macOS Sequoia on VMware on Windows
System Requirements
Before you begin, ensure your PC meets the minimum system and software requirements.
Hardware Requirements
- Processor: Intel or AMD with virtualization support (VT-x / AMD-V enabled in BIOS)
- RAM: Minimum 8GB (16GB recommended)
- Disk Space: Minimum 100GB of free storage
- Graphics: Integrated or dedicated GPU with decent performance
Software Requirements
- VMware Workstation Pro or VMware Player (latest version)
- macOS Sequoia ISO or pre-made VMDK file
- VMware Unlocker for macOS guest support
- WinRAR or 7-Zip for extracting downloaded files
Download the Necessary Files
You'll need to collect the following files before starting:
- VMware Workstation/Player: Download from the official VMware website
- macOS Sequoia ISO or VMDK: You can create one using a real Mac or search for trusted sources offering pre-built images. (Avoid shady torrent sources.)
- VMware macOS Unlocker: Unlocker enables macOS installation options in VMware. Search for "VMware Unlocker for macOS GitHub" or a trusted forum like InsanelyMac.
Legal and Ethical Considerations
macOS is licensed to run only on Apple hardware. While virtualizing macOS on a Windows PC is popular among tech enthusiasts and developers, it does go against Apple's End User License Agreement (EULA).
If you plan to build or publish macOS apps commercially, use a genuine Mac or Apple's cloud-based development environments.
Steps to Install macOS Sequoia on VMware on Windows
Step 1. Install VMware Workstation on Windows
- Download the installer for VMware Workstation Pro or Player.
- Run the installer and follow the on-screen instructions.
- Once installed, do not launch VMware yet. You'll first need to apply the macOS unlocker.
Step 2. Apply VMware macOS Unlocker
Since VMware does not officially support macOS guest systems, you need to patch it.
- Close VMware completely.
- Extract the Unlocker zip file.
- Choose Run as Administrator from the menu when you right-click the win-install.cmd file.
- The script will patch VMware and add the option to create macOS VMs.
- After completion, launch VMware and ensure "Apple macOS" is available in the guest OS list.

Step 3. Create a New macOS Virtual Machine
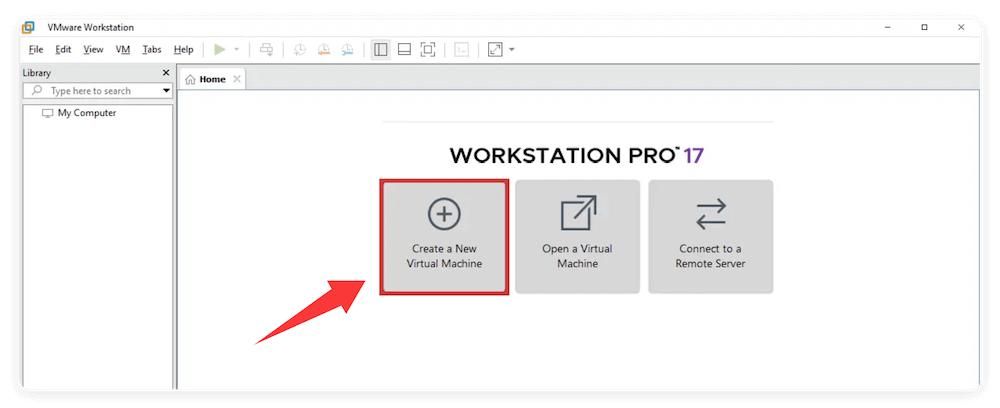
- Click Create a New Virtual Machine after launching VMware.
![install macOS Sequoia on VMware on Windows]()
- Select Typical (recommended) and click Next.
![install macOS Sequoia on VMware on Windows]()
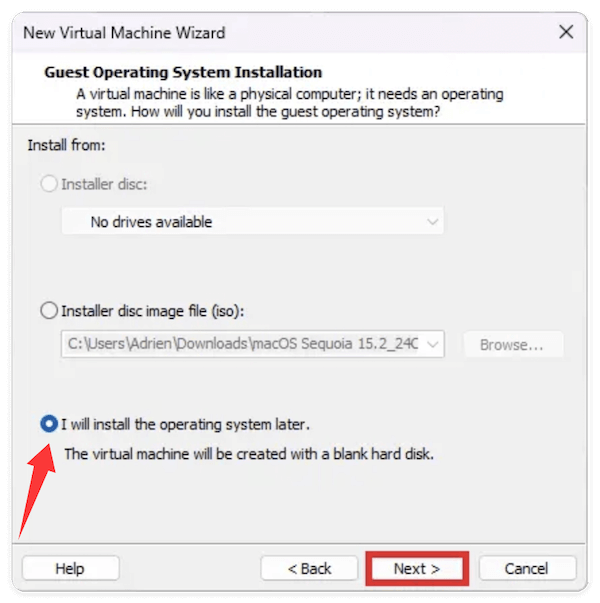
- Choose "I will install the operating system later" and click Next.
![install macOS Sequoia on VMware on Windows]()
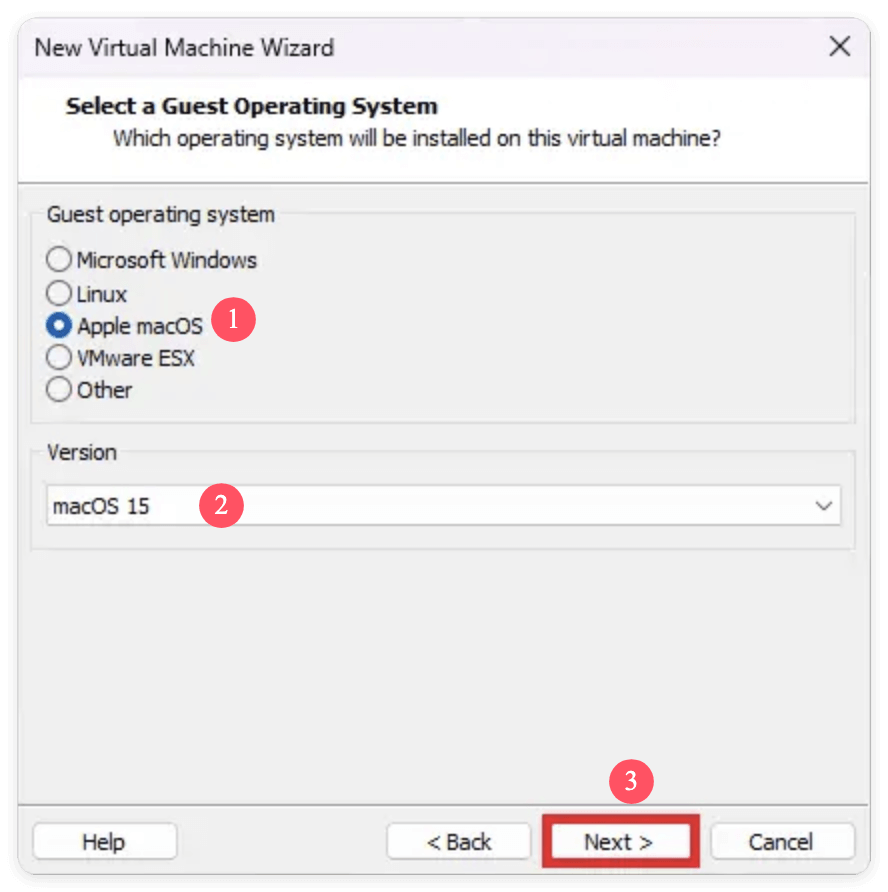
- For guest OS. Select Apple macOS. Version: macOS 15.
![install macOS Sequoia on VMware on Windows]()
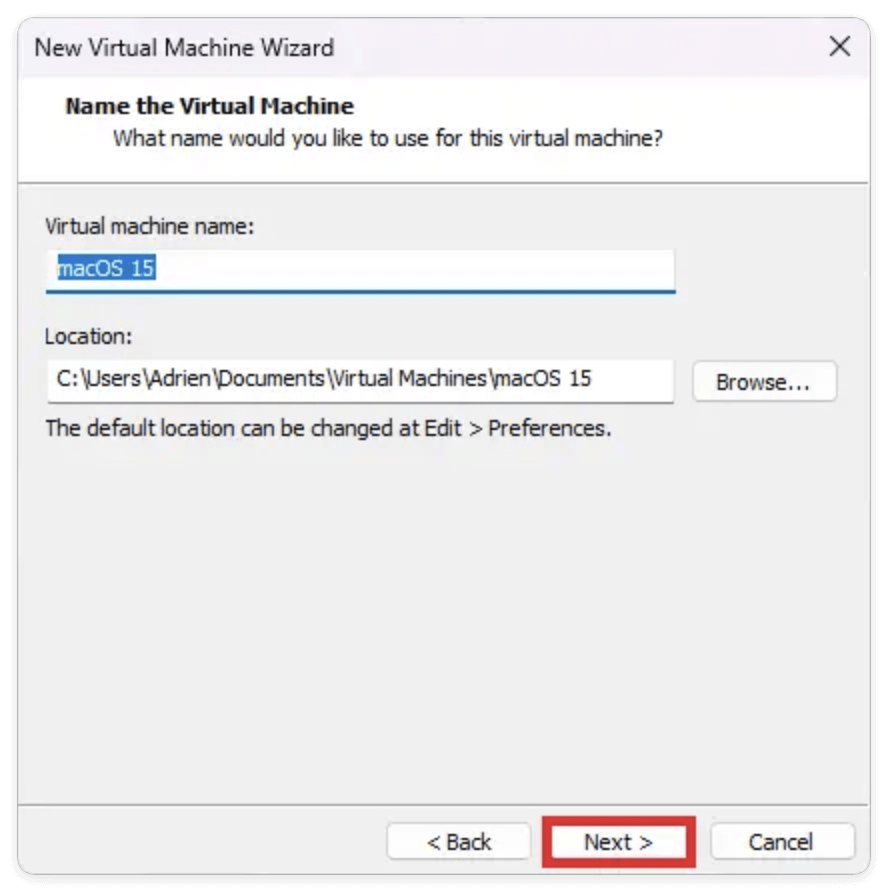
- Name the VM (e.g., macOS Sequoia) and choose a file location.
![install macOS Sequoia on VMware on Windows]()
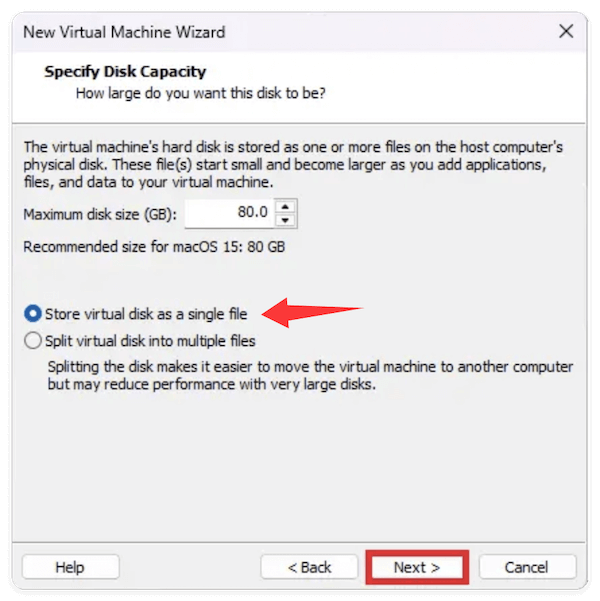
- Specify disk capacity (80–100GB recommended) and choose Store virtual disk as a single file.
![install macOS Sequoia on VMware on Windows]()
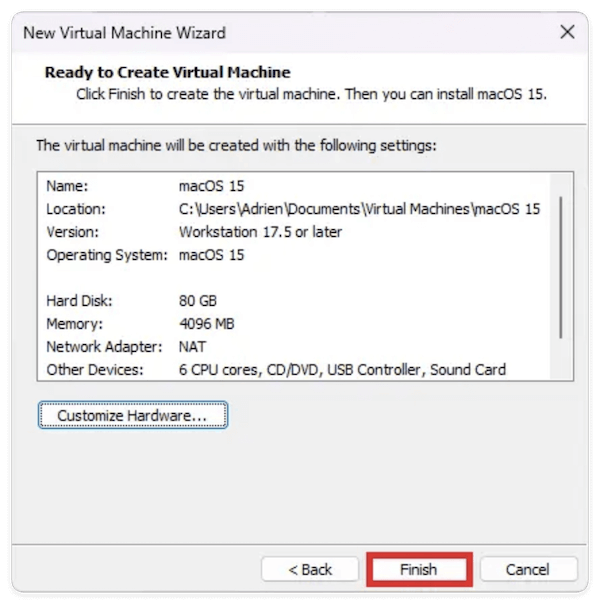
- Click Finish, then go to Edit Virtual Machine Settings.
![install macOS Sequoia on VMware on Windows]()

Step 4. Edit VM Settings for macOS
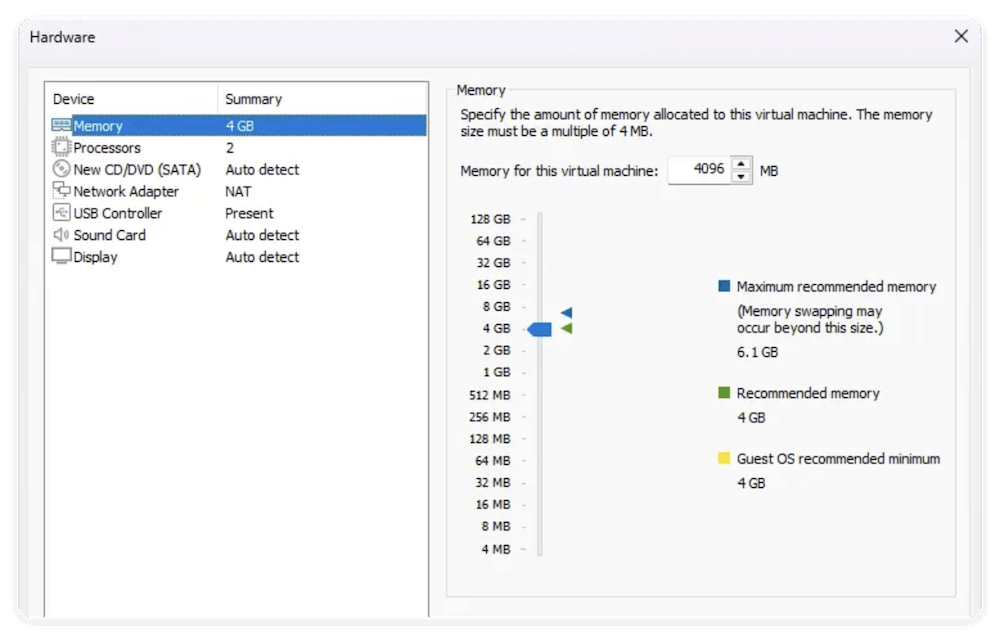
- Memory: Set to at least 4GB (8GB+ recommended)
- Processors: Use 2 or more cores
- Hard Disk: If using a VMDK, replace the existing virtual disk with the downloaded VMDK file
- CD/DVD (IDE): If using an ISO, select Use ISO image file and browse to your macOS Sequoia ISO
- USB Controller: Ensure it's enabled
- Display: Check Accelerate 3D graphics
- Close Settings and save.
Step 5. Modify VMX File (Optional but Recommended)
Navigate to the VM's directory and open the .vmx file with Notepad. Add the following lines at the bottom:
smc.version = "0"
usb.generic.allowHID = "TRUE"
usb.generic.allowLastHID = "TRUE"
This ensures compatibility and fixes potential keyboard/mouse issues.
Step 6. Start the Virtual Machine and Install macOS Sequoia
- Power on the VM.
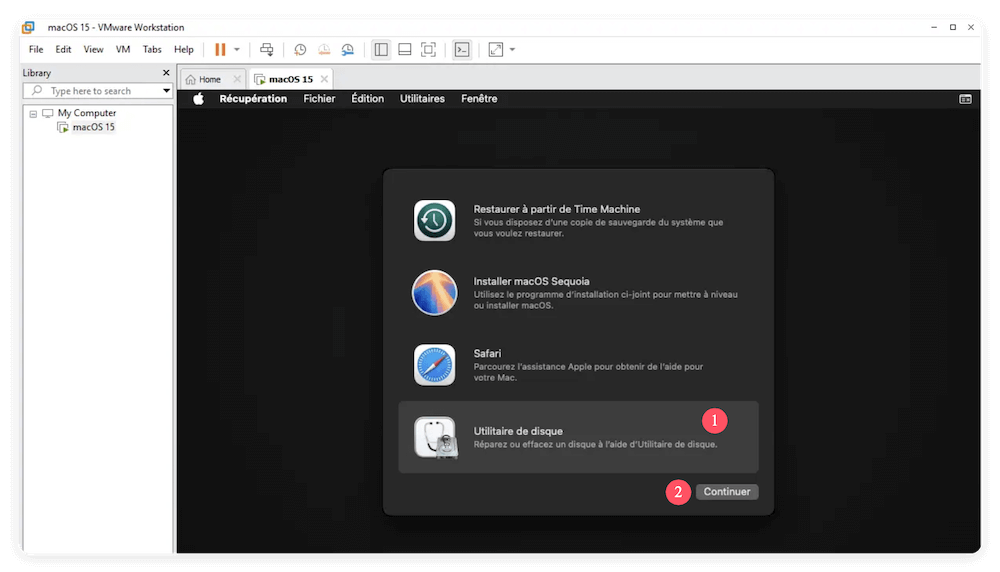
- If using an ISO, you'll boot into the macOS installer. Go to Disk Utility.
![install macOS Sequoia on VMware on Windows]()
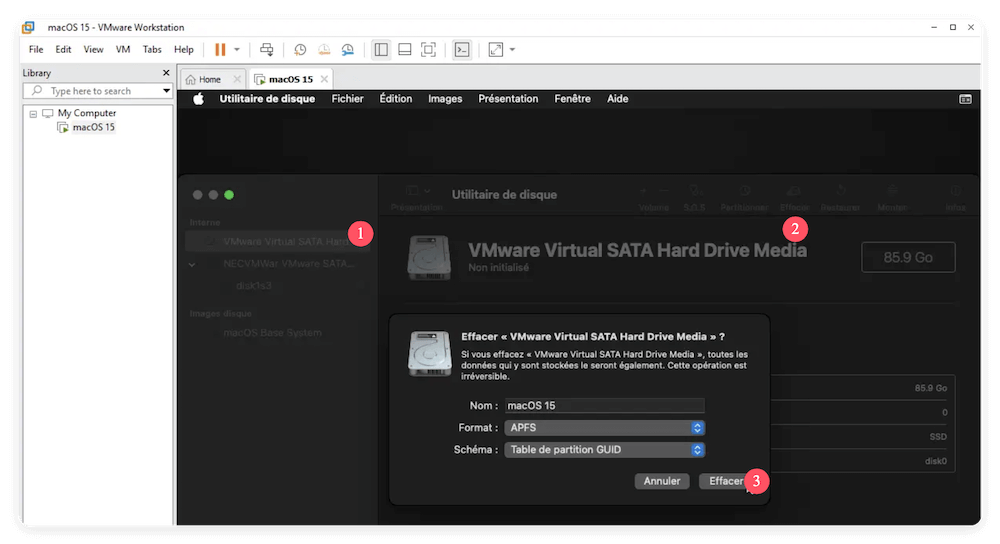
- Select the VMware virtual disk, click Erase, and format as APFS.
![install macOS Sequoia on VMware on Windows]()
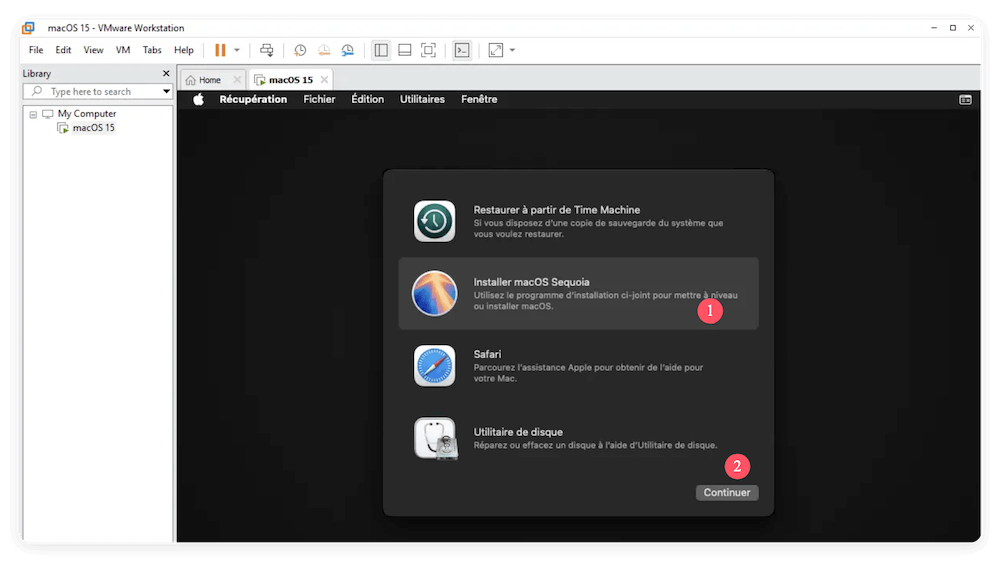
- Once formatted, exit Disk Utility and select Install macOS Sequoia.
![install macOS Sequoia on VMware on Windows]()
- The installation may take 30–60 minutes depending on your PC.
The VM may restart several times—this is normal. Don't interfere unless it freezes for over 30 minutes.
Initial macOS Setup
Once installation completes, macOS will reboot to the setup assistant.
- Select language and region.
- Choose "Not Now" for Apple ID (or sign in if you have one).
- Set up local user account (username, password).
- Choose default settings or customize system preferences.
- Finish setup and enter macOS Sequoia.

Congratulations! You now have macOS Sequoia running on Windows via VMware.
Step 7. Install VMware Tools (Darwin.iso)
Once macOS Sequoia is installed and running on VMware, you'll notice that some essential features like full screen resolution, seamless mouse integration, clipboard sharing, and drag-and-drop between your Windows host and macOS guest are not working out of the box. That's where VMware Tools comes in.
What is VMware Tools?
VMware Tools is a suite of utilities that enhances the performance and usability of your virtual machine's guest operating system. For macOS, this comes in the form of Darwin.iso, a specially packaged installer.
Benefits of installing VMware Tools on macOS:
- Full screen and dynamic resolution resizing
- Improved mouse tracking and pointer integration
- Shared clipboard (copy-paste text, files between host and guest)
- Drag-and-drop support
- Time synchronization between host and VM
- Ability to share folders between Windows and macOS
Steps to Install VMware Tools (Darwin.iso)
- If you're using VMware Workstation Pro, the Darwin.iso file may already be present in the VMware installation folder:
C:\Program Files (x86)\VMware\VMware Workstation\tools\
If it's not available or you're using VMware Player, you can download it from a trusted GitHub repository, InsanelyMac or similar macOS virtualization forums
💡 Be cautious: use only trusted sources to avoid malware.
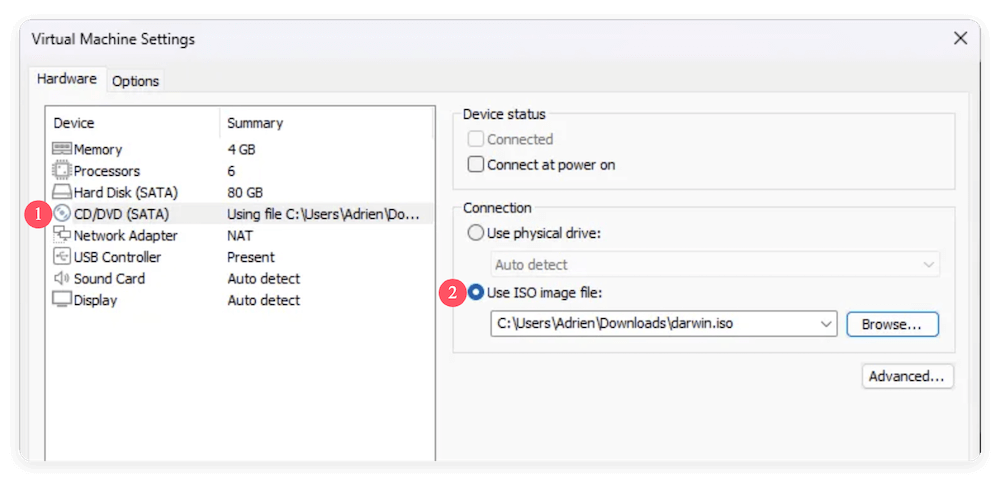
- Open VMware and power off the macOS Sequoia VM. Go to Edit Virtual Machine Settings. Click on CD/DVD (SATA) and choose Use ISO image file, Browse to the downloaded Darwin.iso. Click OK to save the settings.
![install macOS Sequoia on VMware on Windows]()
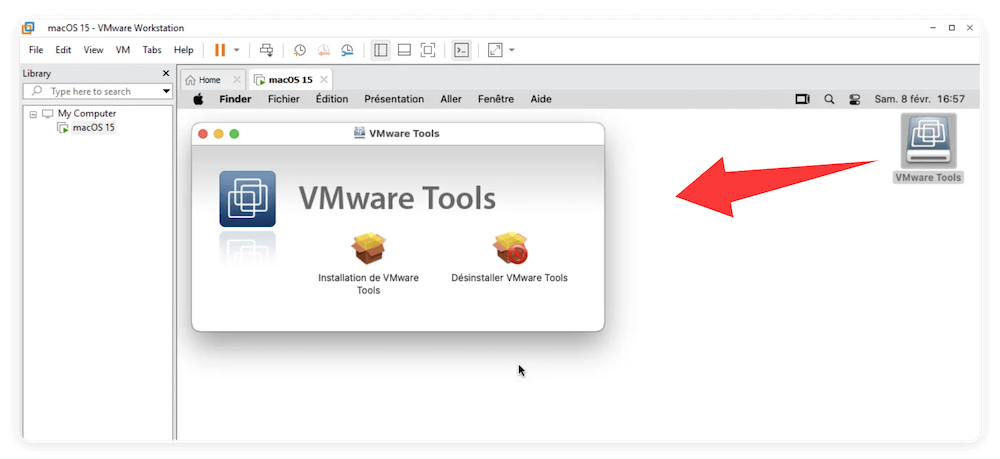
- Power on the VM and wait for macOS to boot. You should see a new mounted disk on the desktop labeled VMware Tools. Open it and double-click Install VMware Tools.pkg. The installer will launch. Click Continue and follow the prompts. When prompted, enter your macOS administrator password to authorize the installation.
![install macOS Sequoia on VMware on Windows]()
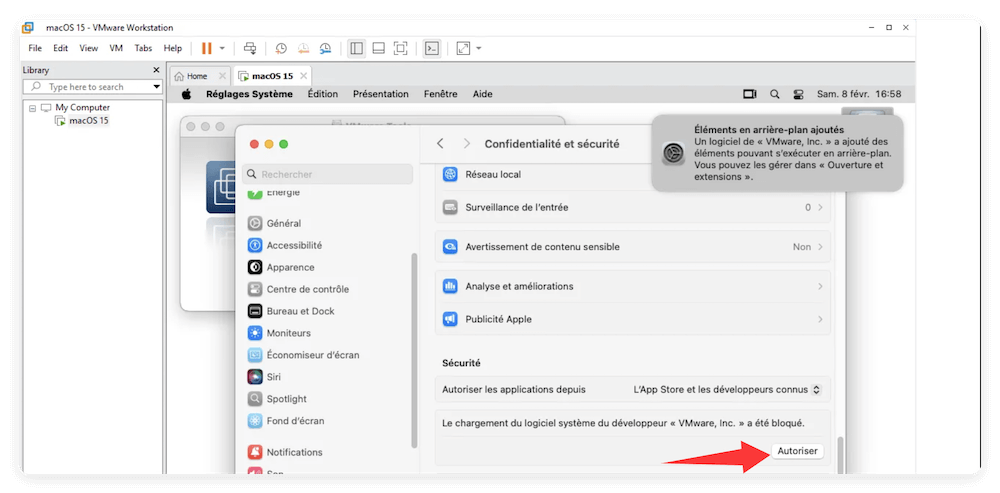
- If you see a warning saying the system extension was blocked: Go to System Settings > Security & Privacy, click Allow next to the VMware Inc. software. After installation completes, restart the VM.
![install macOS Sequoia on VMware on Windows]()
- After rebooting, resize the VMware window—macOS should scale to full screen automatically. Try copying and pasting text between your Windows and macOS VM. Test shared folders if configured. Check system info: Apple menu > About This Mac > System Report > Software > Extensions > Search for VMware Tools-related entries.
Post-Installation Optimization
Here are a few tweaks to improve your experience:
Display Resolution Fix:
- Use VMware Tools or modify screen settings in macOS
Enable Shared Folders:
- Go to VM Settings > Options > Shared Folders > Always Enabled
- Mount the folder in macOS via Finder
Enable Clipboard Sync and Drag-Drop:
- Under VM > Settings > Options > Guest Isolation
- Enable both clipboard and drag-and-drop sharing
Performance Tips:
- Allocate more RAM and CPU if your system allows
- Avoid background tasks on Windows while VM is running
Common Errors and How to Fix Them
1. macOS Not Booting / Stuck at Apple Logo
- Ensure VT-x/AMD-V is enabled in BIOS
- Re-check the VMX file for missing smc.version = "0" line
- Try reformatting the disk in Disk Utility before installation
2. The CPU Has Been Disabled Error
- Caused by missing smc.version = "0"
- Also ensure you're using an Intel/AMD processor with virtualization support
3. Keyboard or Mouse Not Working
- Use USB 2.0 in VM settings instead of USB 3.0
- Add usb.generic.allowHID = "TRUE" in VMX file
4. VMware Tools Not Installing
- Use correct version of Darwin.iso
- Temporarily disable Gatekeeper:
sudo spctl --master-disable
Conclusion
Installing macOS Sequoia on VMware on a Windows PC offers an exciting opportunity to explore Apple's ecosystem without owning a Mac. Whether you're testing software, learning macOS, or just experimenting, this virtualization setup can be a powerful tool when configured properly.
With the steps above, you should now have a fully functional macOS Sequoia virtual machine, along with post-install tweaks and fixes for common issues. Remember to regularly update your VM backup and maintain legal and ethical software usage standards.
Related Articles
- Feb 24, 2025How to Show Hidden Files on SD Card: A Comprehensive Guide
- Nov 11, 2024How to Change Startup Disk on Apple Silicon Mac?
- Dec 18, 2025Full Guide to Install Windows OS on Apple Silicon Mac
- Mar 06, 2026How to Reinstall macOS Tahoe – Complete Guide 2026
- Oct 09, 2025Disable iPhone Apps in macOS Tahoe Spotlight Search
- Jul 03, 2025How to Format a Drive for PS5?

Contributing Writer
Christina
Christina is the senior editor of Donemax software who has worked in the company for 4+ years. She mainly writes the guides and solutions about data erasure, data transferring, data recovery and disk cloning to help users get the most out of their Windows and Mac. She likes to travel, enjoy country music and play games in her spare time.

Editor in chief
Gerhard Chou
In order to effectively solve the problems for our customers, every article and troubleshooting solution published on our website has been strictly tested and practiced. Our editors love researching and using computers and testing software, and are willing to help computer users with their problems