
The best iTunes alternative - reliable and easy-to-use iOS data transfer & data management software.
As we use our phones for longer and longer, we have more and more pictures on our iPhones, taking up a lot of space. However, these photos often preserve many of our fond memories. Besides backing up iPhone to computer, is there any way to back up photos to some portable devices? The answer is yes. We can transfer photos from iPhone to USB for another backup to view these photos anytime and anywhere. If you need this method, our following guide will be helpful to you. This guide will provide six ways to transfer photos from iPhone to a USB flash drive effectively and efficiently.
Part 1: Transfer Photos from iPhone to A USB Flash Drive with Phone Transfer Utility
DMTrans is a free iPhone data management software that is good for transferring photos from iPhone to a USB flash drive. You can transfer various files between iOS devices and computers, such as photos, videos, movies, TV shows, music, etc. Bypassing iTunes restrictions and restrictions, you can also transfer non-purchased items. Apart from data transfer, you can also use this software to manage data on your iPhone. Now, let's see how to transfer photos from iPhone to a USB flash drive using iPhone photo USB transfer software.
Step 1: Download the DMTrans software and install it on your computer, then open the program and connect your device (requires a trusted device)
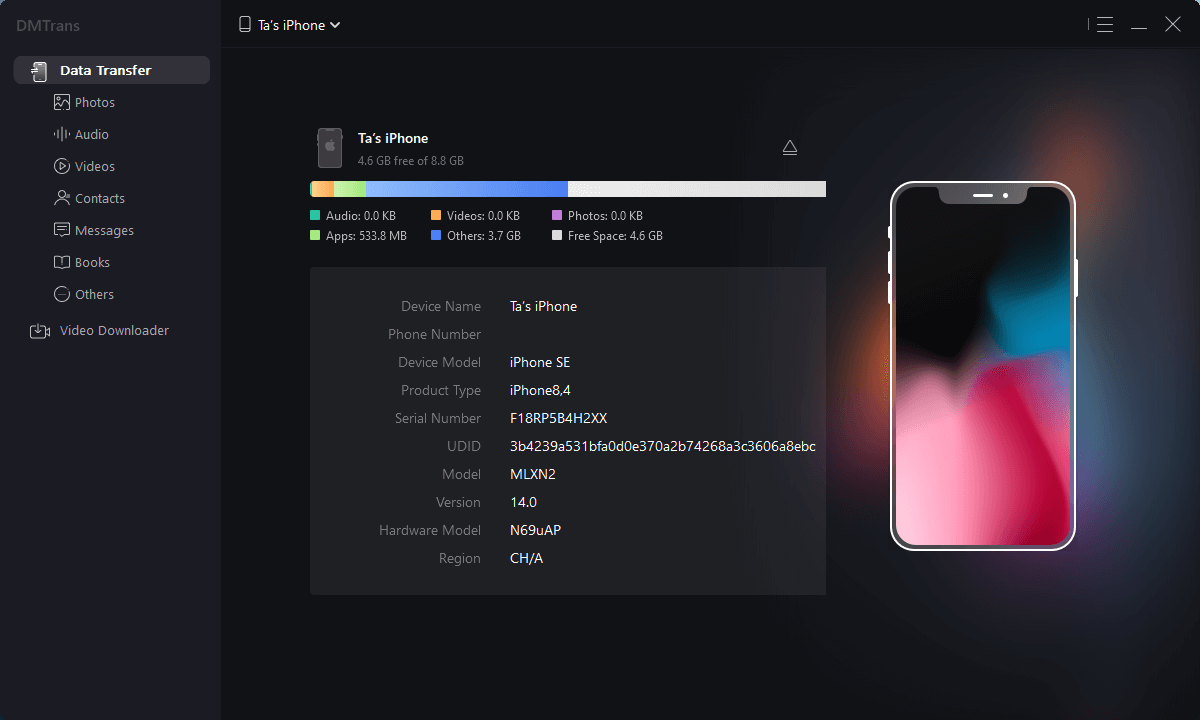
Step 2: Change the transfer export location to the location of your USB flash drive in the settings, click the photos option, select the photos you want to export, click Export to PC, and wait for the execution to complete:

Part 2: Migrate Photos from iPhone to USB Flash Drive with Windows Explorer
You can also try Windows Explorer if you want to transfer pictures from your iPhone to a USB drive on your PC. It doesn't require software installation. Just plug your iPhone into your computer. With Windows Explorer, you can easily access pictures on your iPhone and manage your iPhone photos directly on your computer. One thing to note is that you can only transfer photos and videos through Windows Explorer. If you want to share other files, you have to go back to DMTrans, which gives you more options. Now, let's understand how to transfer pictures from iPhone to a USB flash drive.
1. Insert your iPhone and USB flash drive into the computer. The PC automatically detects the USB flash drive, and your iPhone is also recognized after you approve the prompts on your iPhone.
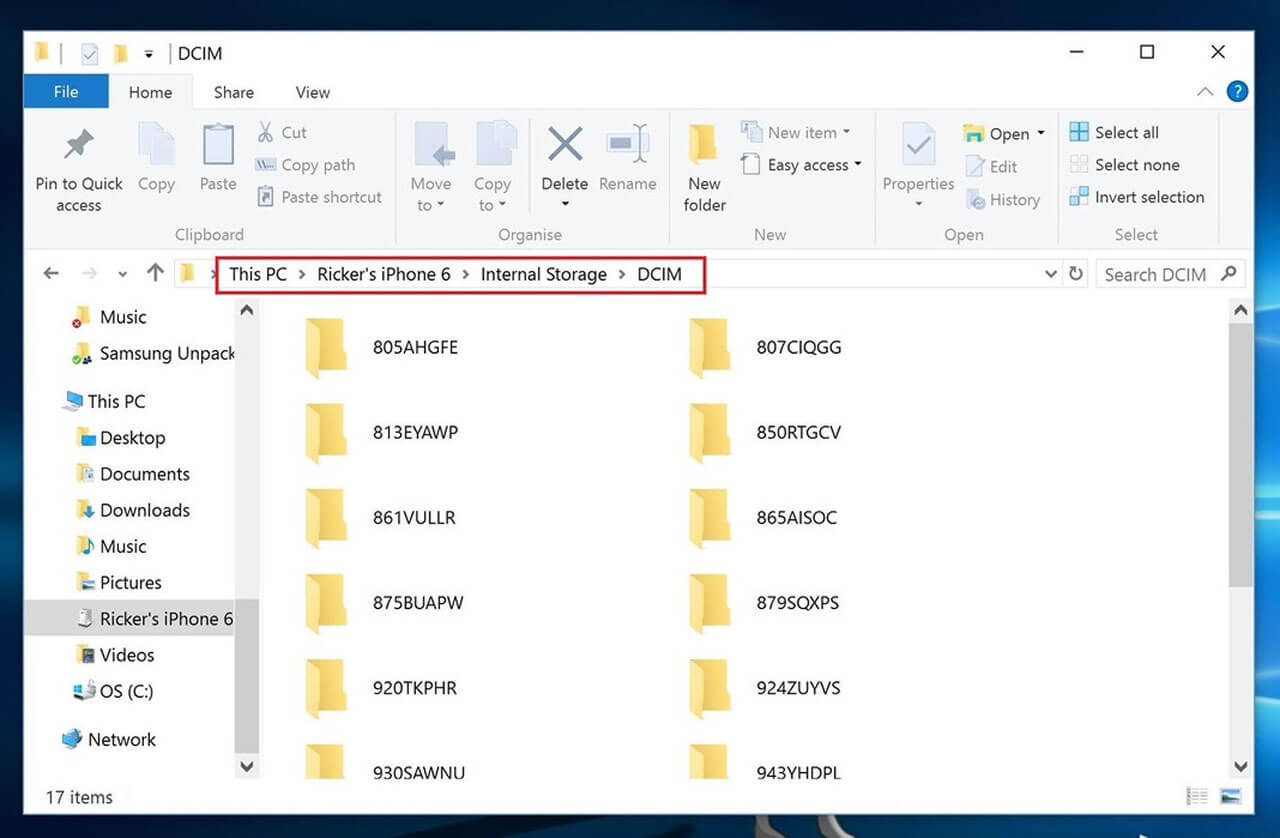
2. Open Windows Explorer and go to "iPhone > Internal Storage > DCIM," where you can view all your iPhone photos.
3. Select the photos you want to transfer from iPhone to USB and press "CTRL + C" to copy.
4. Go to the folder on the USB flash drive and press "CTRL + V" to import photos from iPhone to the USB flash drive.
Part 3: Share Photos from iPhone to USB Flash Drive on Mac using the Photos App
If you have a Mac computer and want to transfer photos from your iPhone to a USB drive on your Mac, the Photos app would be a better choice. With this software, you can manage your iPhone photos and transfer photos directly from iPhone to USB via drag and drop.
Step 1: Connect your iPhone and USB stick to your Mac. Then, launch the Photos app on your Mac.
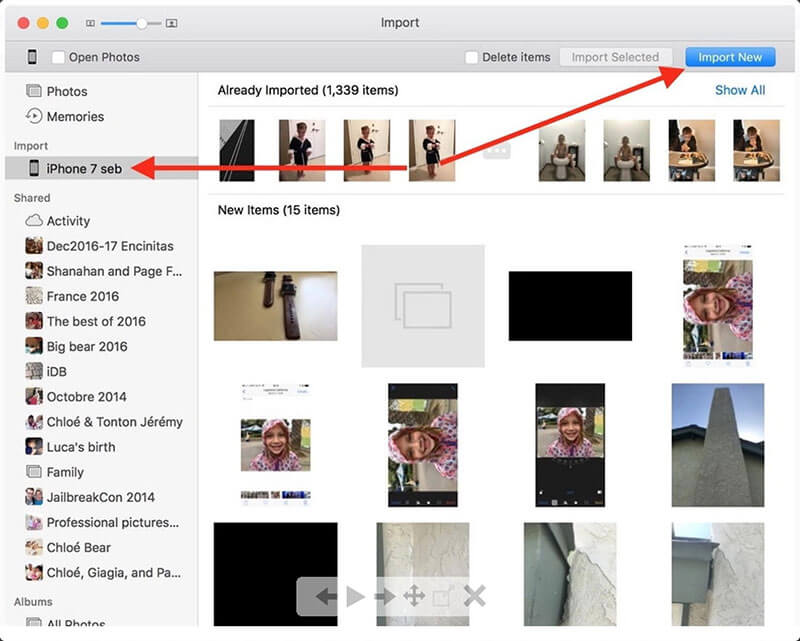
Step 2: After your Mac detects your iPhone, click the Import tab in the top menu bar, then select your iPhone in the left sidebar. Then you'll see all your iPhone photos here.
Step 3: You can select a specific photo by Command-clicking the target photo. Alternatively, you can press "Command + A" to select all images at once.
Step 4: Click the Import All New Photos button in the upper right corner and select the USB flash drive as the destination.
Part 4: Move Pictures from iPhone to USB via iCloud
iCloud can provide a good solution for transferring iPhone pictures to USB. iCloud is not only capable of backing up your iOS device's data, such as photos, videos, mail, calendars, contacts, etc., but also allows you to download these files from iCloud to your computer or USB drive. Follow the steps below to learn how to transfer pictures from iPhone to USB via iCloud.
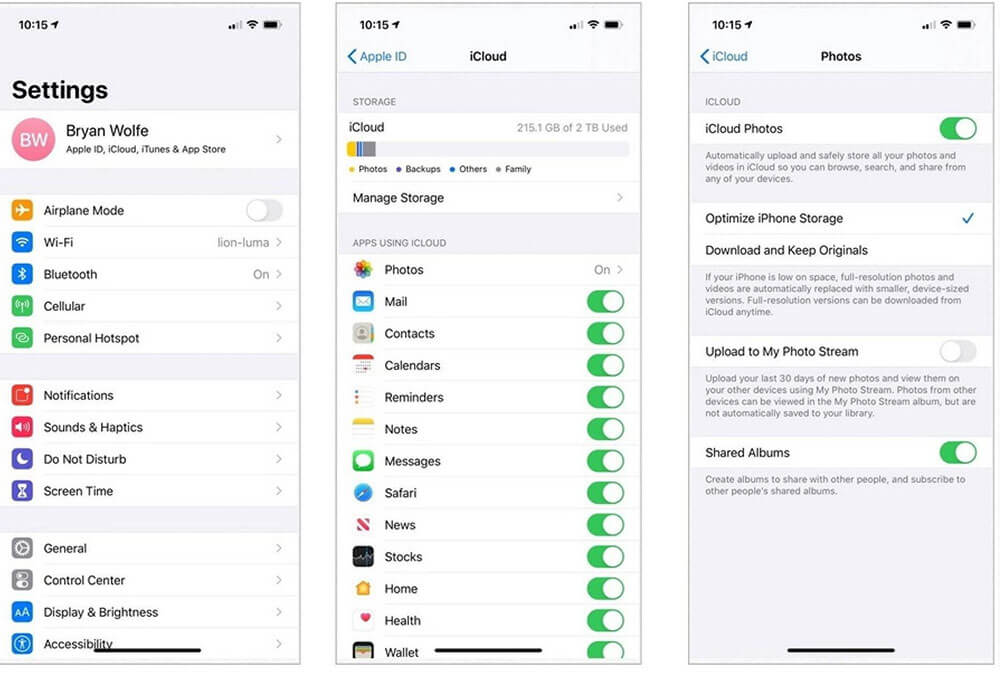
Step 1: On your iPhone, go to Settings > [your name] > iCloud > Photos. Then, scroll down and turn on the iCloud Photo Library option.
Step 2: Insert the U disk into the computer, and then visit the iCloud website on the computer browser to enter the photo module. You can see all the photos uploaded to iCloud. Select the images you want to transfer from your iPhone to a USB flash drive in the main interface.
Step 3: Click the download button in the upper right corner, and a dialog box will pop up. Set your USB stick as the output directory.
Part 5: Transfer Pictures from iPhone to USB Via Email
Another way to transfer pictures from iPhone to a USB flash drive is to use email. However, the attachment size of a single email is limited. An email is a good option if you only have a few photos to back up to a USB drive.
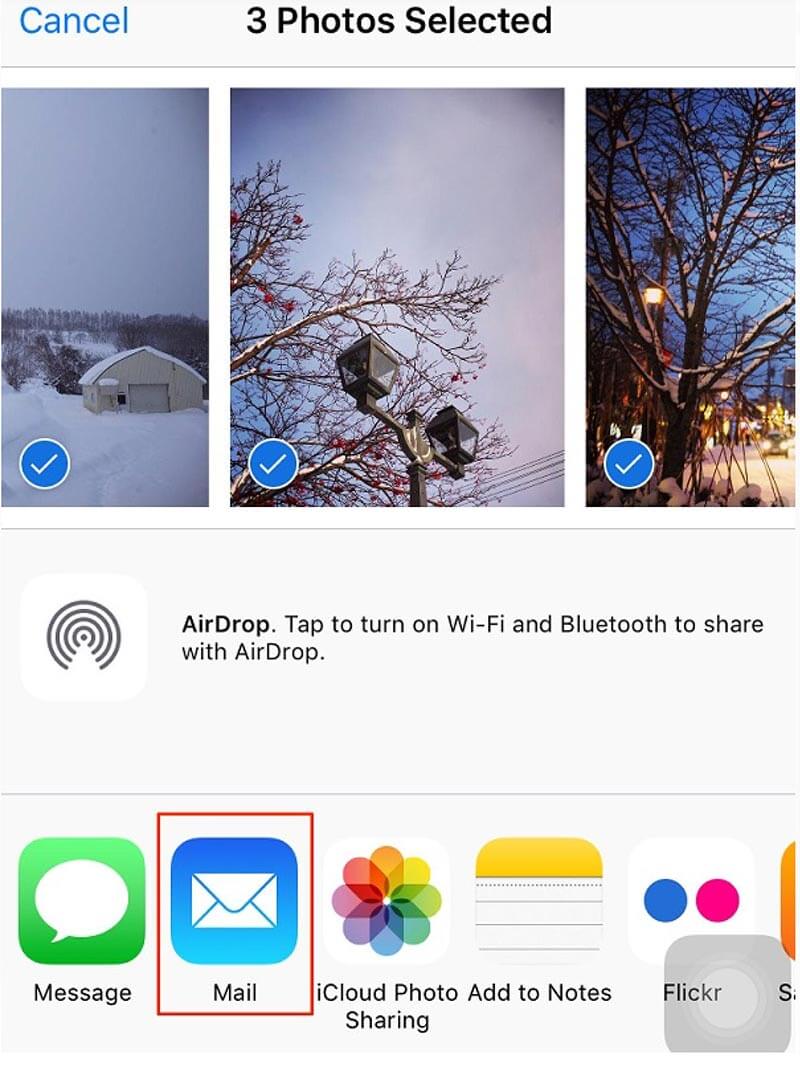
Step 1: Open the Photos app on your iPhone.
Step 2: Select photos to transfer from iPhone to a USB flash drive.
Step 3: Click the Share button and select Mail in the pop-up window. If you are logged into your email on your iPhone, you will be directed to the email editing page. Then, send an email.
Step 4: On your computer, log in to your email or recipient email to download the attached photo.
Step 5: Finally, insert the USB stick into the computer and transfer these photos to the computer.
Part 6: Transfer Photos from iPhone to USB using A USB Adapter
Due to Apple's insistence on the iPhone's Lightning port, a few iPhone-to-USB adapters have appeared on the market. This adapter has a Lightning connector on one end and a standard USB-A port. With an iPhone to USB adapter, you can transfer pictures directly from your iPhone to a USB stick.