
Written byCoco LinUpdated on Sep 01, 2026

Before we start: Factory reset Mac mini can help you remove and clear all the personal data. However, if you will donate or sell your Mac mini, it's not enough. It's important to wipe the data permanently to make the data unrecoverable. Donemax Data Eraser for Mac can help you wipe the data and guarantee the data is no longer recoverable.
PAGE CONTENT:
There are many reasons why you want to reset your Mac mini to its factory settings. For example, if you will sell your Mac mini or give it to another person, you’d better factory reset it and permanently erase all your private files, accounts, etc. You can also use a factory restart to get your Mac mini back to how it was when it was first made and clean up its hard drive.

You might be surprised at how easy it is to do a factory reset on your Mac mini. As we go through this guide, we'll go over the easy steps that can be used to complete this job, making it easy for people of all tech levels. Let's take the mystery out of the process and ensure it's easy to factory reset your Mac mini!
It's important to back up your info before you start the reset process. If you reset your Mac mini, all of its data will be lost, so it's important to have a backup in case you need to get them back later. Ensure your important files are safe by backing them up with Apple's Time Machine or any other way.
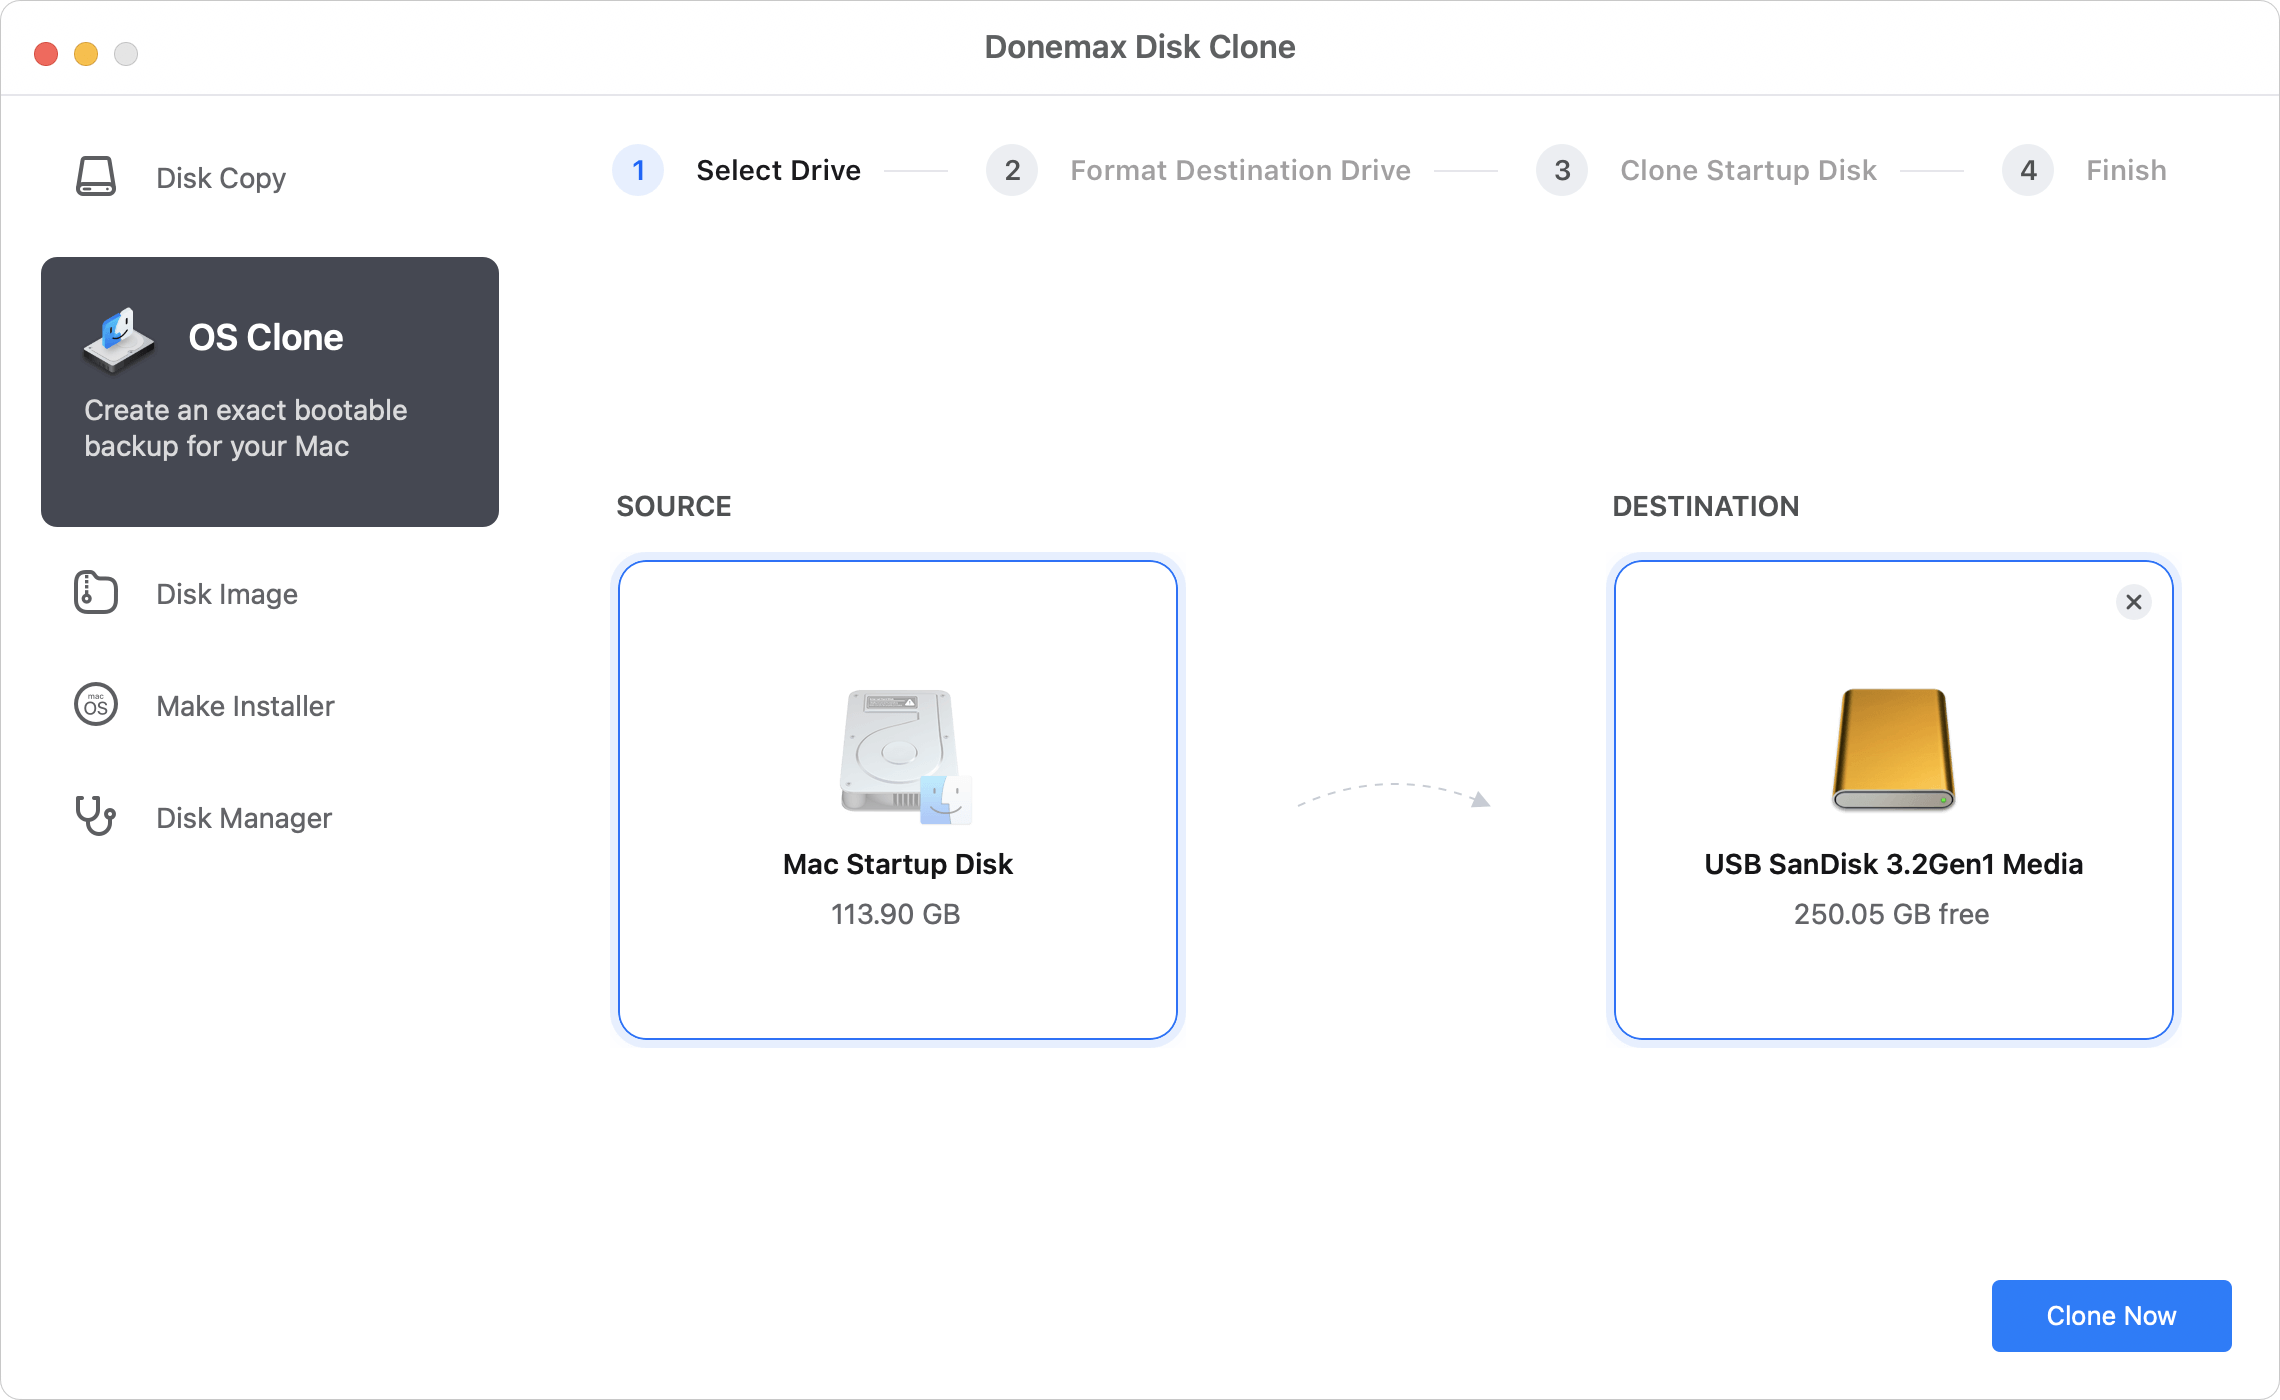
Here, you can use a disk cloning app to clone everything stored on your Mac mini to an external hard drive and create a bootable clone backup.
Step 1. Download and install Donemax Disk Clone for Mac, a powerful and easy-to-use disk cloning application.
Step 2. Connect the external hard drive to your Mac mini and open Donemax Disk Clone for Mac, choose OS Clone mode.
Step 3. Select the external hard drive as the destination drive, click on Clone Now button. It will clone all data including macOS, apps, settings and user files from the Mac mini to the external hard drive, creating a full bootable clone backup.
If your Mac mini is running macOS Ventura, Sonoma, Sequoia, or later (and on Apple Silicon or Intel chips with the T2 Security Chip), Apple provides a built-in reset assistant. This is the fastest and safest way to factory reset your Mac mini without entering macOS Recovery Mode or manually erasing drive partitions.
💡 Note: This feature automatically logs you out of iCloud, disables Find My, turns off Activation Lock, and securely wipes all user data while preserving the current operating system.
Step 1: Open System Settings
Step 2: Open Transfer or Reset
Step 3: Launch Erase Assistant
Step 4: Confirm Erasure & Sign Out
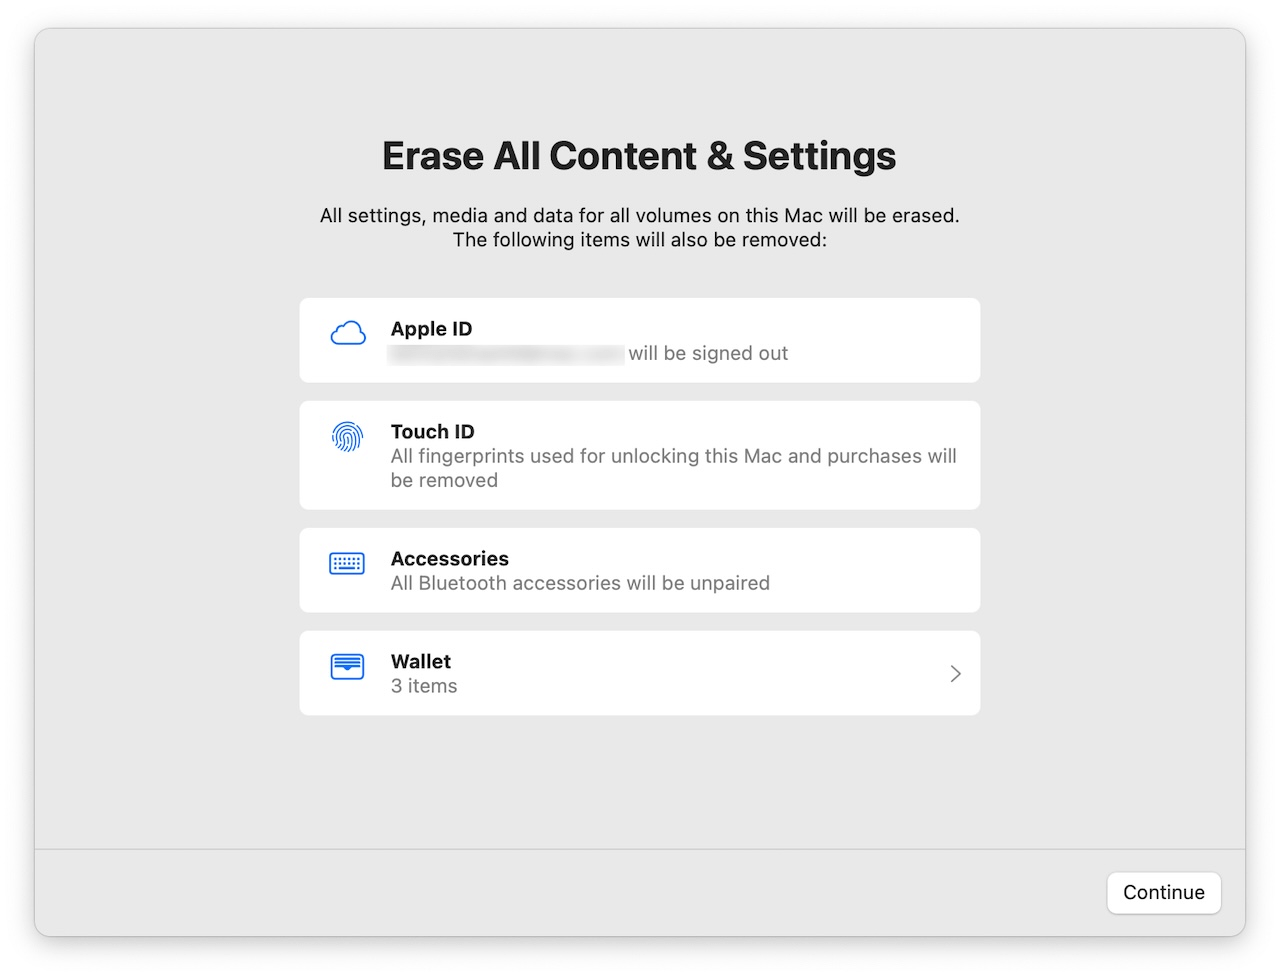
Step 5: Complete the Factory Reset
Your Mac mini will restart and show a black screen with an Apple logo or progress bar. During this process, the Mac mini may restart multiple times. If asked, select a Wi-Fi network or attach an Ethernet cable to activate your Mac mini. Once completed, you will see the "Hello" welcome screen.
If you are selling or giving away your Mac mini, press Command + Q and choose Power Off—the new owner can complete the setup process from scratch.
💡 Tip for macOS Monterey Users:If your Mac mini runs macOS Monterey, open System Preferences from the Apple menu, click System Preferences in the top menu bar, and choose Erase All Content and Settings... from the menu.
Step 1: Sign out of iTunes (for macOS 10.14 or earlier)
💡 Note: If your Mac mini is running macOS Catalina or later, just skip this step.
From the menu bar in iTunes, choose Account > Authorizations > Deauthorize This Computer. Then enter your Apple ID and password and click Deauthorize.

Step 2: Sign Out of iCloud
If the Mac mini is running macOS Ventura or later, just choose Apple Menu > System Settings, then click your Apple ID or name, choose Sign Out.
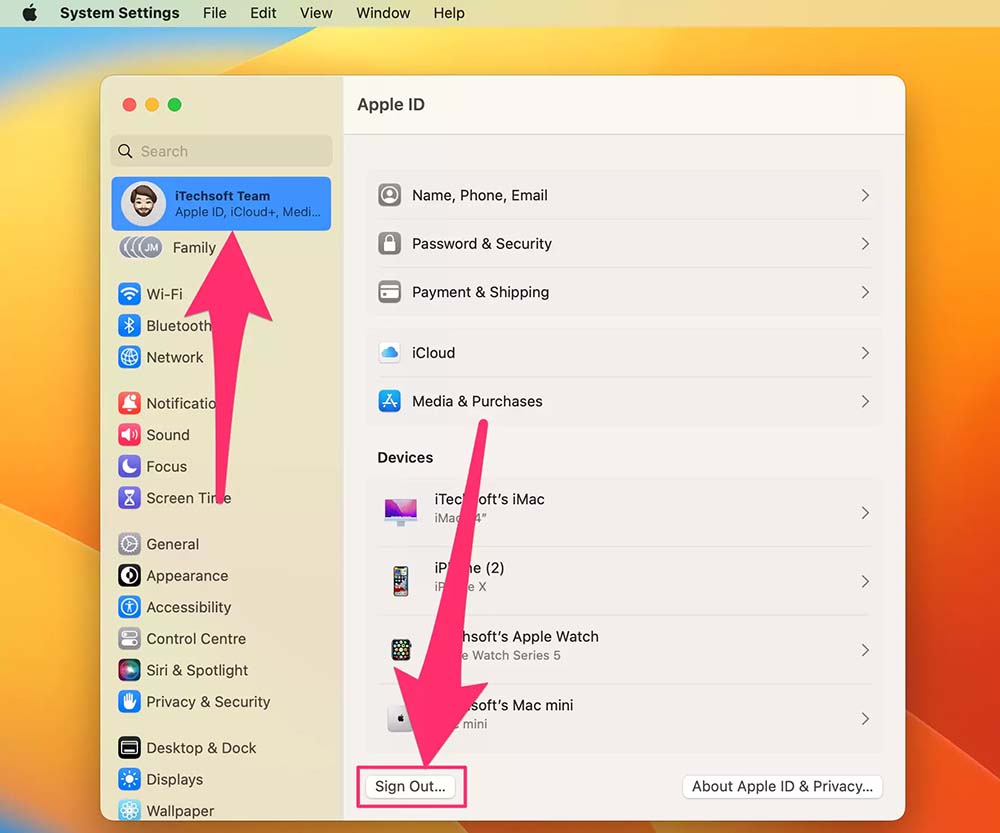
For macOS Monterey, macOS Big Sur, or macOS Catalina: Choose Apple Menu > System Preferences, then click Apple ID, choose Overview and click Sign Out.
For earlier versions of macOS: Choose Apple Menu > System Preferences, click iCloud and click Sign Out.
Step 3: Erase Startup disk and reinstall macOS
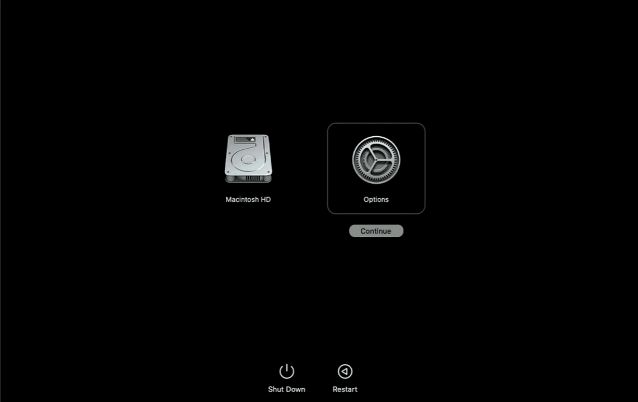
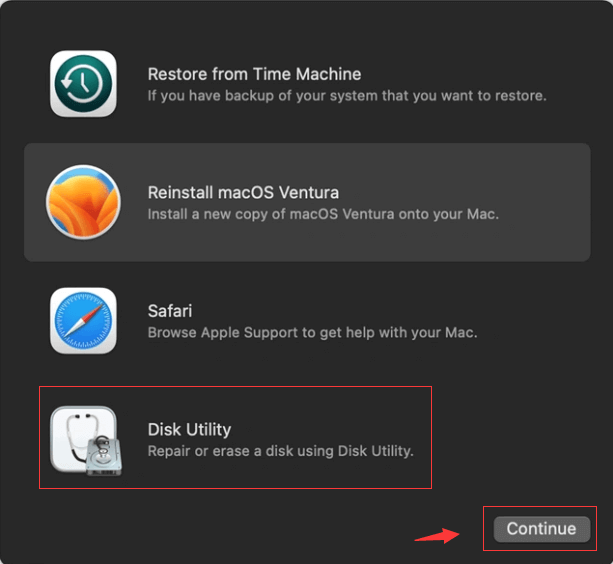
It's time to erase the hard drive on your Mac mini and reinstall macOS. Restart the Mac mini press and hold Power button (for Intel chip, press and hold Command + R until you see the Apple sign) to enter into macOS Recovery mode. Select Options and click on Continue button.
In Utilities window, go to "Disk Utility".
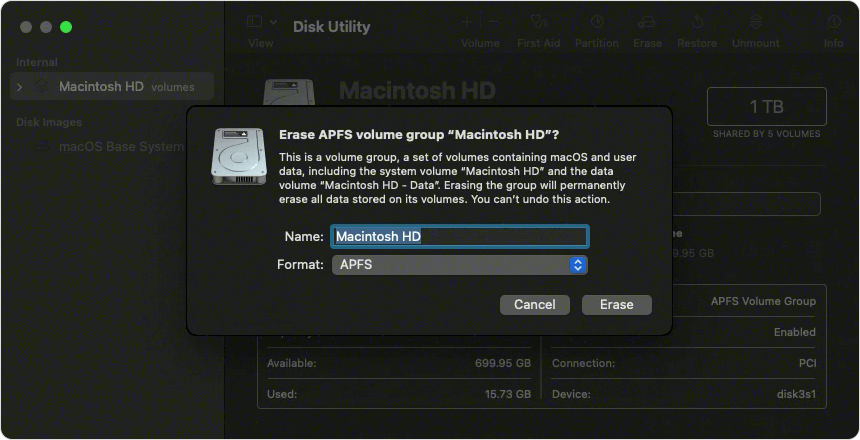
Select the Mac mini's disk. Press "Erase" and pick APFS (macOS 10.13 or later) or Mac OS Extended (Journaled) as the file type. Then erase the disk.
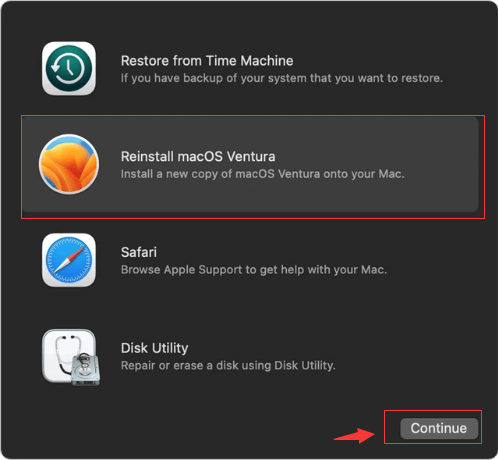
Once the erasing process gets finished, click on Done button. Then back to Utilities window and choose Reinstall macOS to reinstall macOS on the Mac mini.
Now, you have reset the Mac mini to its factory settings. If you want to reuse the Mac mini, do more things as the following:
Step 4: Set up your Mac mini
Now that you've cleared everything, it's time to set up your Mac mini again. Pick a language, connect to a Wi-Fi network, and sign in with your Apple ID by following the steps shown on the screen. You can recover your files during setup if you use Time Machine to make a backup.
Step 5: Restore your data
You can now get your info back if you made a backup with Time Machine or another backup tool. During the setup process, you'll be asked to move your files from a Time Machine backup or another disk. To get your files and settings back, follow the steps given.
Step 6: Update Software and Apps
It's important to update the operating system and any apps you use often after you restart your Mac mini. To see if macOS has any changes, go to the Apple menu, choose System Preferences or System Settings and then click "Software Update." Also, make sure you have the most recent versions of your apps by updating them from the App Store. These versions have bug changes and better security.
Before selling, donating or disposing of your old Mac mini, you should permanently wipe all your private files from the drive. Disk Utility can not permanently erase your data, just try professional data erasure tool - Donemax Data Eraser for Mac.
This software offers certified data erasure standards including Peter Gutmann, U.S. Army AR380-19, DoD 5220.22-M ECE, to help you permanently erase target data, making data recovery be impossible.
It gives you three options to permanently erase data on Mac mini:
Option 1: Erase Files - add the files and folders you want to erase, then click on Erase Now button to permanently erase all of them.
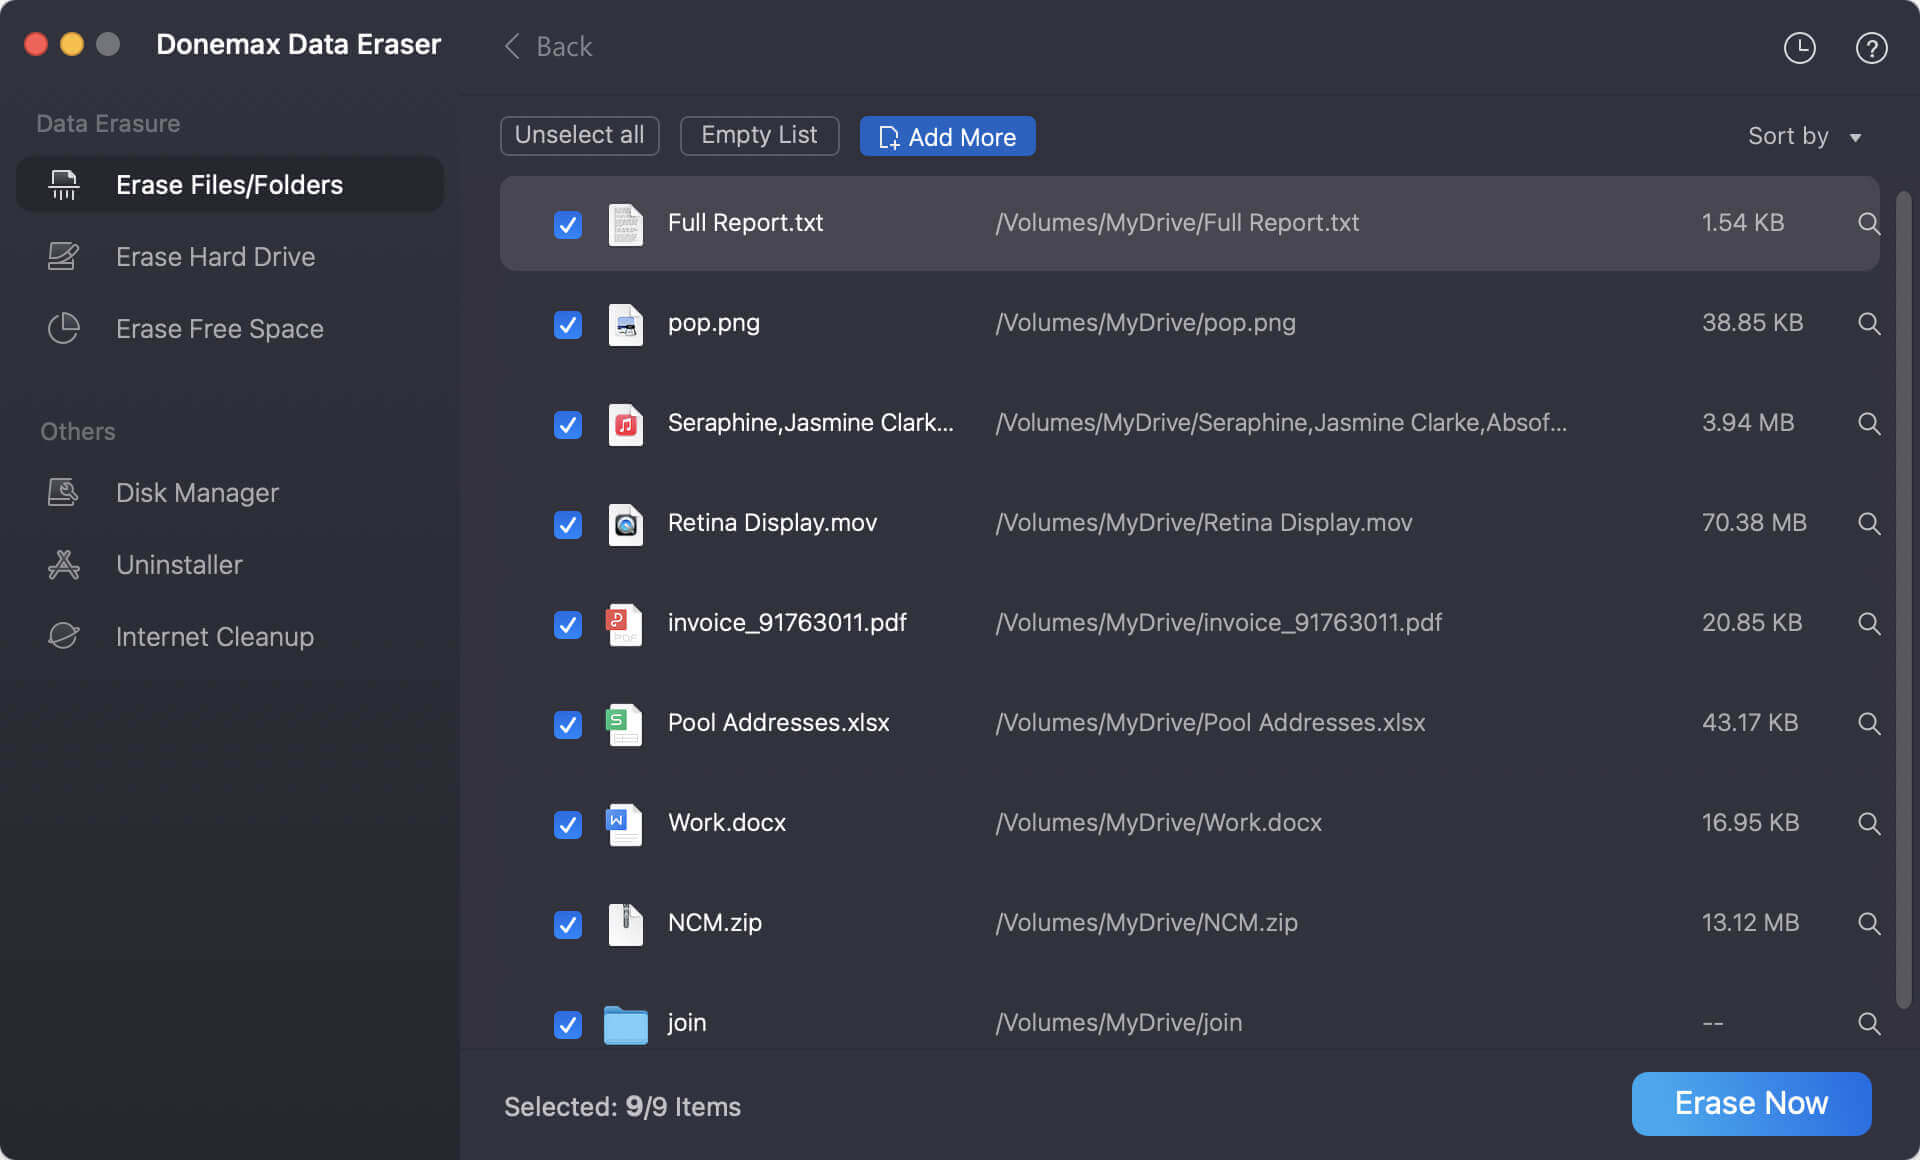
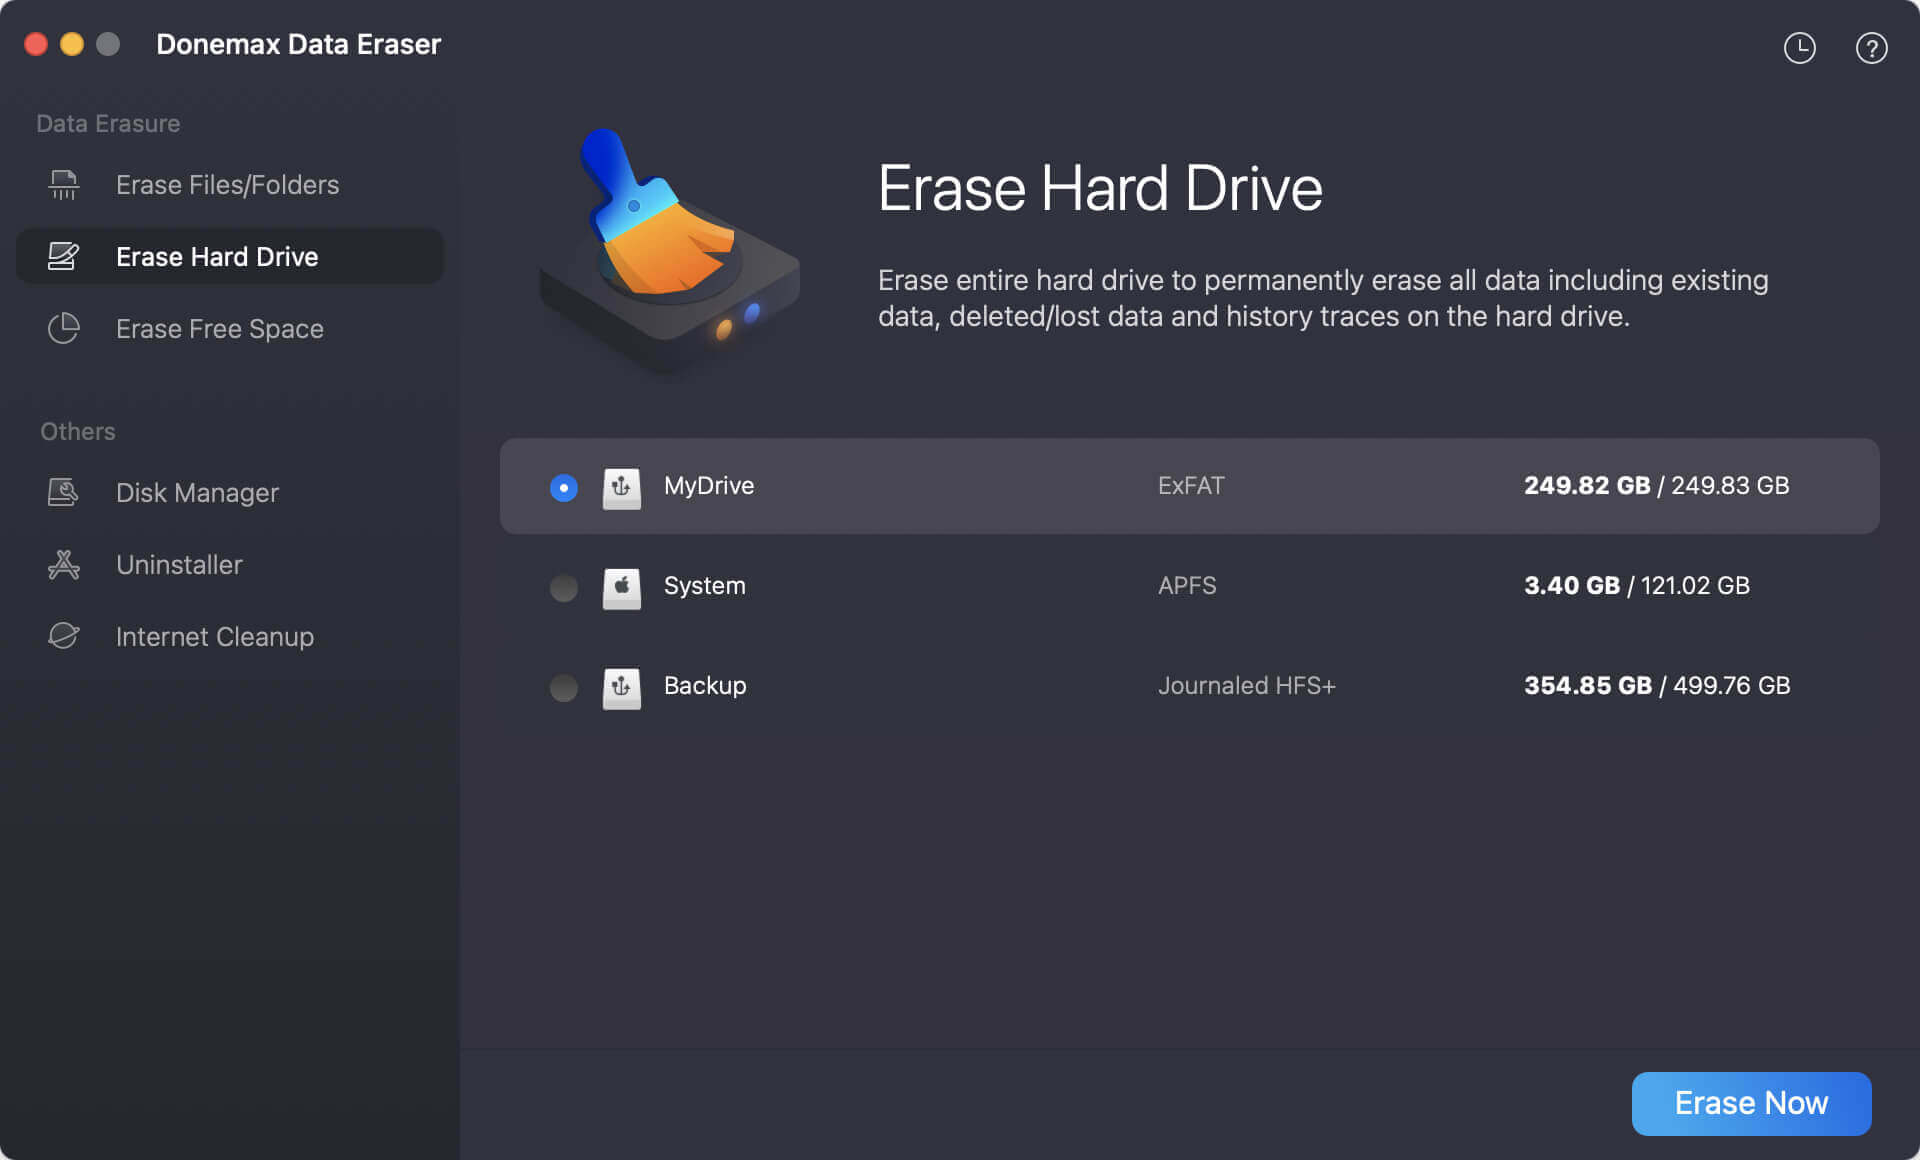
Option 2: Erase Hard Drive - erase all data including existing data, deleted/lost data and hidden data from the hard drive.
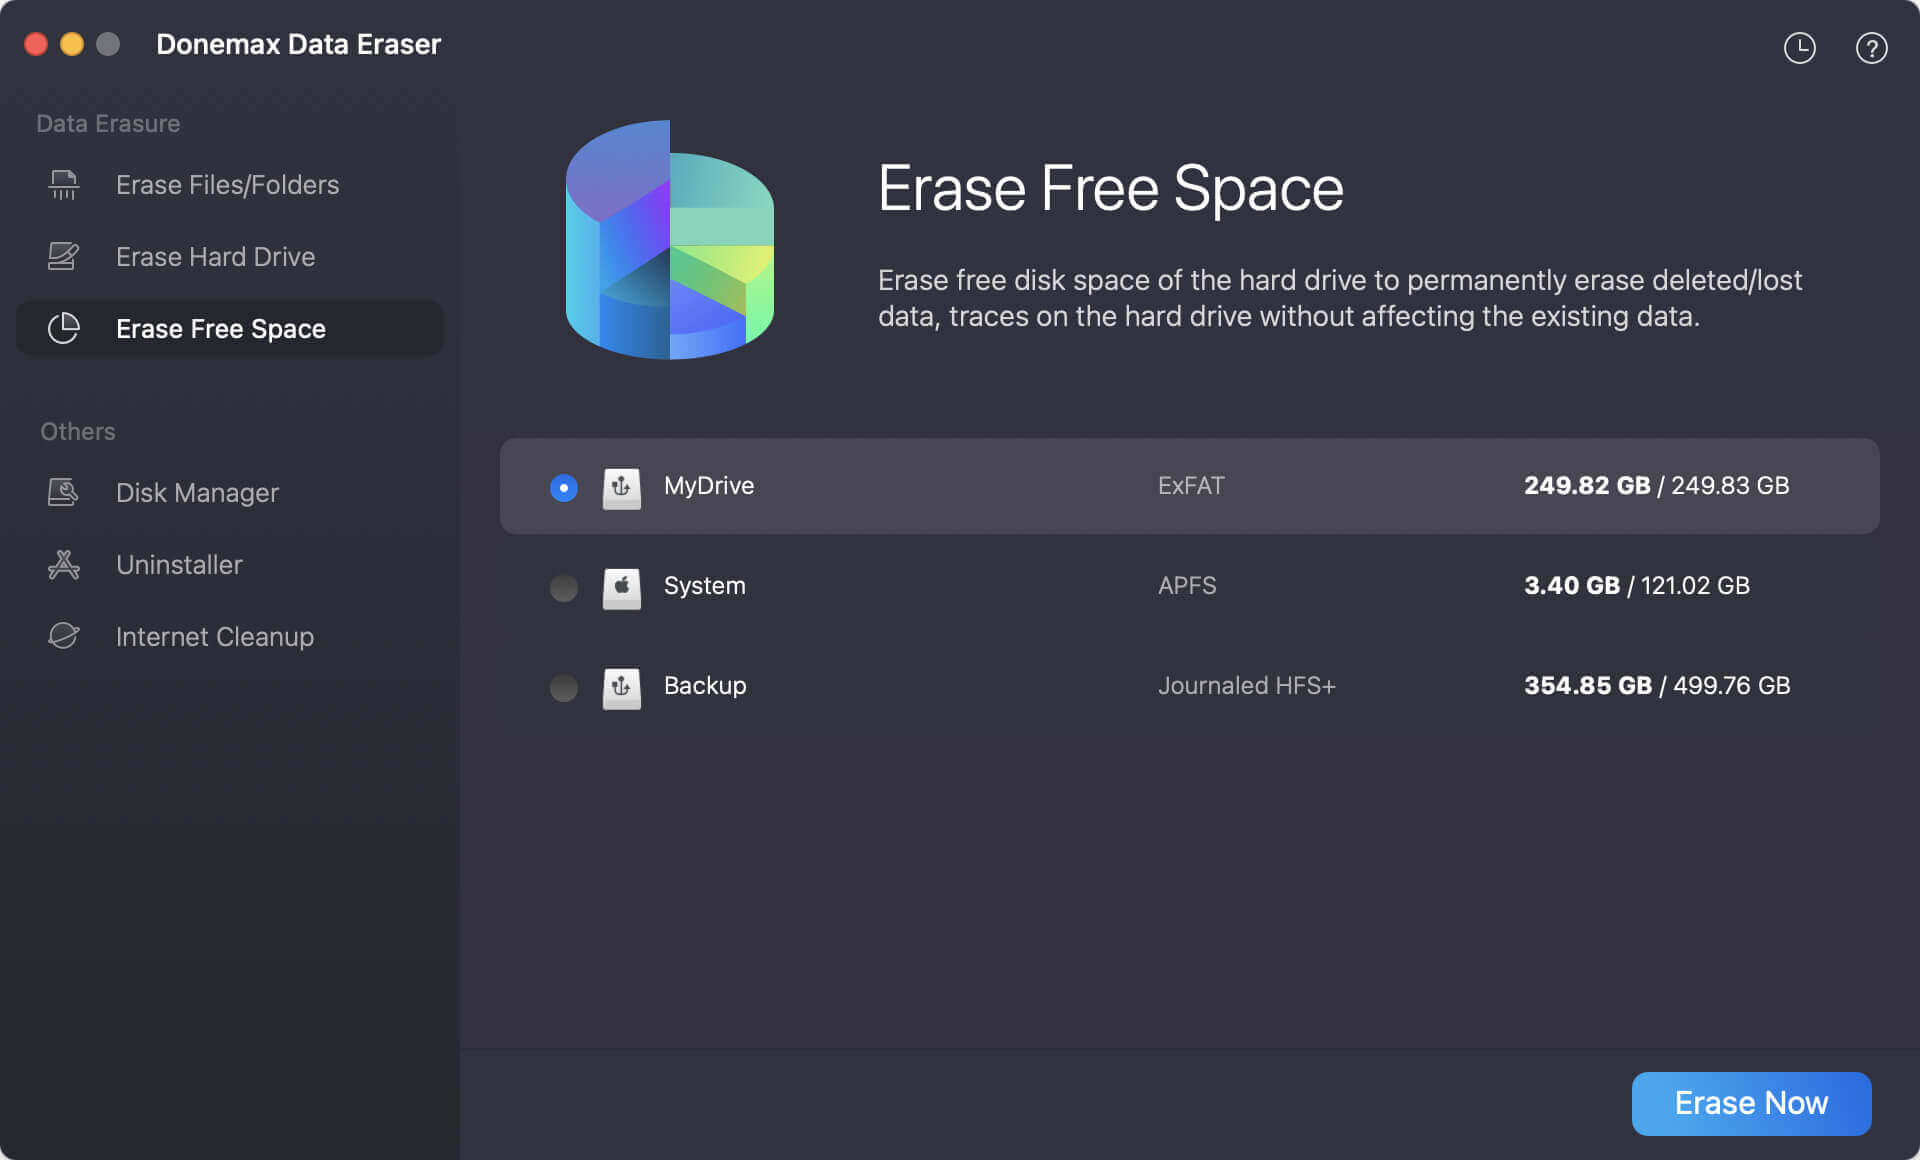
Option 3: Erase Free Space - wipe free disk space to permanently erase all deleted/lost data. Once you have factory reset the Mac mini, just choose this mode to wipe free disk space of the drive to prevent all deleted/erased data on the Mac mini from being recovered by data recovery software.
If you follow these steps, resetting your Mac mini should be easy. Make sure you back up your files, log out of iCloud, and stop iTunes from accessing them before you start the reset. Ensure you carefully follow the steps for setting up your Mac mini, and it will be ready to use immediately. This complete guide will ensure that your Mac mini's restart process goes smoothly, whether you're fixing problems or getting ready to sell the device.
Donemax Data Eraser for Mac
100% safe and powerful Mac data erasure program. It offers certified data erasure standards including U.S. Army AR380-19, DoD 5220.22-M ECE to securely and permanently erase data from Mac HDD/SSD and external storage devices, making data recovery impossible.
Coco Lin
Coco has been a writer and a chief programmer at Donemax software since 2018. Over 10 years of experience of writing troubleshooting articles in the software industry, she is passionate about programming and loves to providing solutions to Windows and Mac users. Also she enjoys music and palying tennis in her free time.
Gerhard Chou
In order to effectively solve the problems for our customers, every article and troubleshooting solution published on our website has been strictly tested and practiced. Our editors love researching and using computers and testing software, and are willing to help computer users with their problems