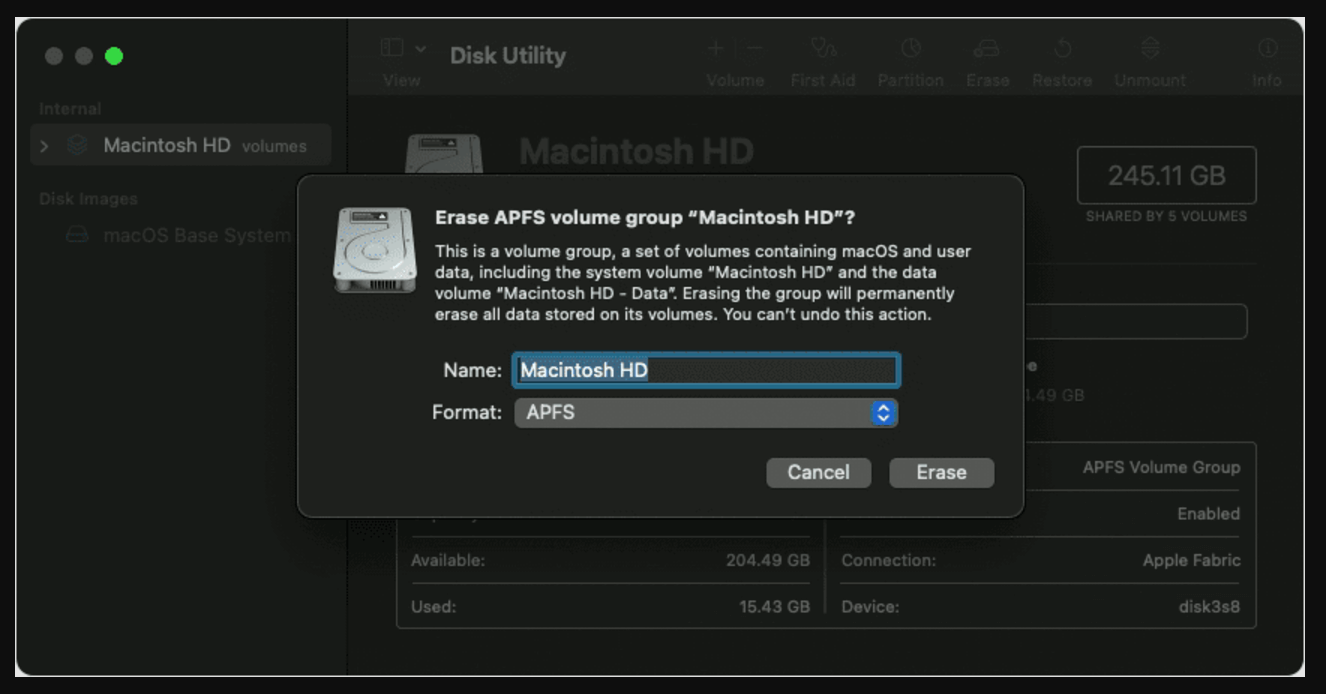
Summary: Before you sell or donate a Mac which is running macOS Monterey, you should permanently erase all sensitive data from the internal disk. Donemax Data Eraser for Mac is a reliable data erasure program. It can help you securely and permanently erase data on macOS Monterey, ensuring the erased data is lost for good, cannot be recovered by any method.
PAGE CONTENT:
In the digital age, data security is of paramount importance. Whether you're selling your Mac, handing it over for repairs, or simply looking to declutter your storage, ensuring your files are permanently erased is vital. With macOS Monterey, users are provided with several robust tools and methods to delete files beyond recovery. This article explores how to securely erase your data on macOS Monterey, ensuring your privacy is safeguarded.

Understanding Data Erasure on macOS Monterey
When you delete a file on macOS, it's not immediately gone - it's moved to the Trash. Even when the Trash is emptied, the data may remain on your storage drive until overwritten by new data. This residual data can be recovered using specialized recovery tools.
Recover Deleted or Lost Files on Mac
Recover deleted or lost files whether the trash bin is emptied or the startup disk has been erased by Disk Utility.
On macOS Monterey, data erasure is influenced by the type of storage:
- HDDs (Hard Disk Drives): Files can be overwritten multiple times to ensure permanent deletion.
- SSDs (Solid State Drives): The TRIM command, which macOS uses, automatically marks deleted data blocks as available for reuse, making data recovery difficult but not impossible in certain scenarios.
To ensure sensitive information is unrecoverable, you need to employ secure data erasure techniques, which we'll outline below.
How to Permanently Erase Data on macOS Monterey?
Ensure you have backed up your important data before erasing or wiping your drive.
1. Use Disk Utility for Secure Erase (Files may be recovered)
Disk Utility is a versatile built-in macOS tool designed to help users manage their storage devices. One of its key features is the ability to erase drives securely. This method is particularly useful when you want to clear an entire drive and ensure that sensitive data cannot be recovered. Here's a deeper dive into how to use Disk Utility for secure erasure, including a detailed explanation of its options and limitations.
Step-by-Step Guide to Securely Erasing Data with Disk Utility:
1. Launch Disk Utility:
- Navigate to Applications > Utilities and open Disk Utility. Alternatively, use Spotlight by pressing Command (⌘) + Space and typing "Disk Utility."
![securely erase your data on macOS Monterey]()
2. Select the Drive:
- From the left-hand sidebar, select the drive or volume you want to erase.
- Be cautious when choosing a drive, as erasing the wrong one can lead to unintended data loss.
3. Click on Erase:
- Once the drive is selected, click the Erase button located at the top of the window. A dialog box will appear.
4. Choose a Format:
- Select a file system format based on your needs:
- APFS (Apple File System): Ideal for modern Macs and SSDs.
- Mac OS Extended (Journaled): Recommended for older Macs or HDDs.
- ExFAT or FAT: Use for cross-compatibility with Windows systems.
![securely erase your data on macOS Monterey]()
5. Enable Security Options (for HDDs):
- Click the Security Options button to customize the erasure process.
- Fastest (Quick Erase): This option is faster but doesn't overwrite data, leaving it potentially recoverable.
- 1-Pass Overwrite: Writes zeros across the entire drive, providing basic security.
- 3-Pass Overwrite: Writes random data across the drive three times, complying with Department of Defense standards.
- 7-Pass Overwrite: The most thorough option, overwriting the drive seven times for maximum security.
![securely erase your data on macOS Monterey]()
6. Confirm and Erase:
- After selecting your preferences, click Erase. The process may take time depending on the security level and the size of the drive.
💡 Note: Some of the erased files still can be recovered after erasing the drive with Disk Utility.
🔗 Related article: recover lost data after erasing disk with Disk Utility
2. Permanently Erase Data on macOS Monterey (Files are lost for good)
The best way to permanently erase data on macOS Monterey is to use data erasure program which is able to securely and permanently erase data with certified data erasure standards.
Donemax Data Eraser for Mac is a reliable data erasure program. It supports to securely and permanently erase data from Mac's internal HDD/SSD, external hard drive, USB flash drive, memory card, digital camera, etc. Once the data is erased, the data is lost for good, cannot be recovered by any method.
Donemax Data Eraser for Mac
- Securely and permanently erase existing data, deleted/lost data on macOS Monterey.
- Certified data erasure standards including U.S. Army AR380-19, DoD 5220.22-M ECE, etc.
- 100% safe and effective data erasure program.
Donemax Data Eraser for Mac offers three data erasure modes for erasing data on macOS Monterey. You can choose one or more modes to help you wipe your sensitive data before you sell or donate your Mac.
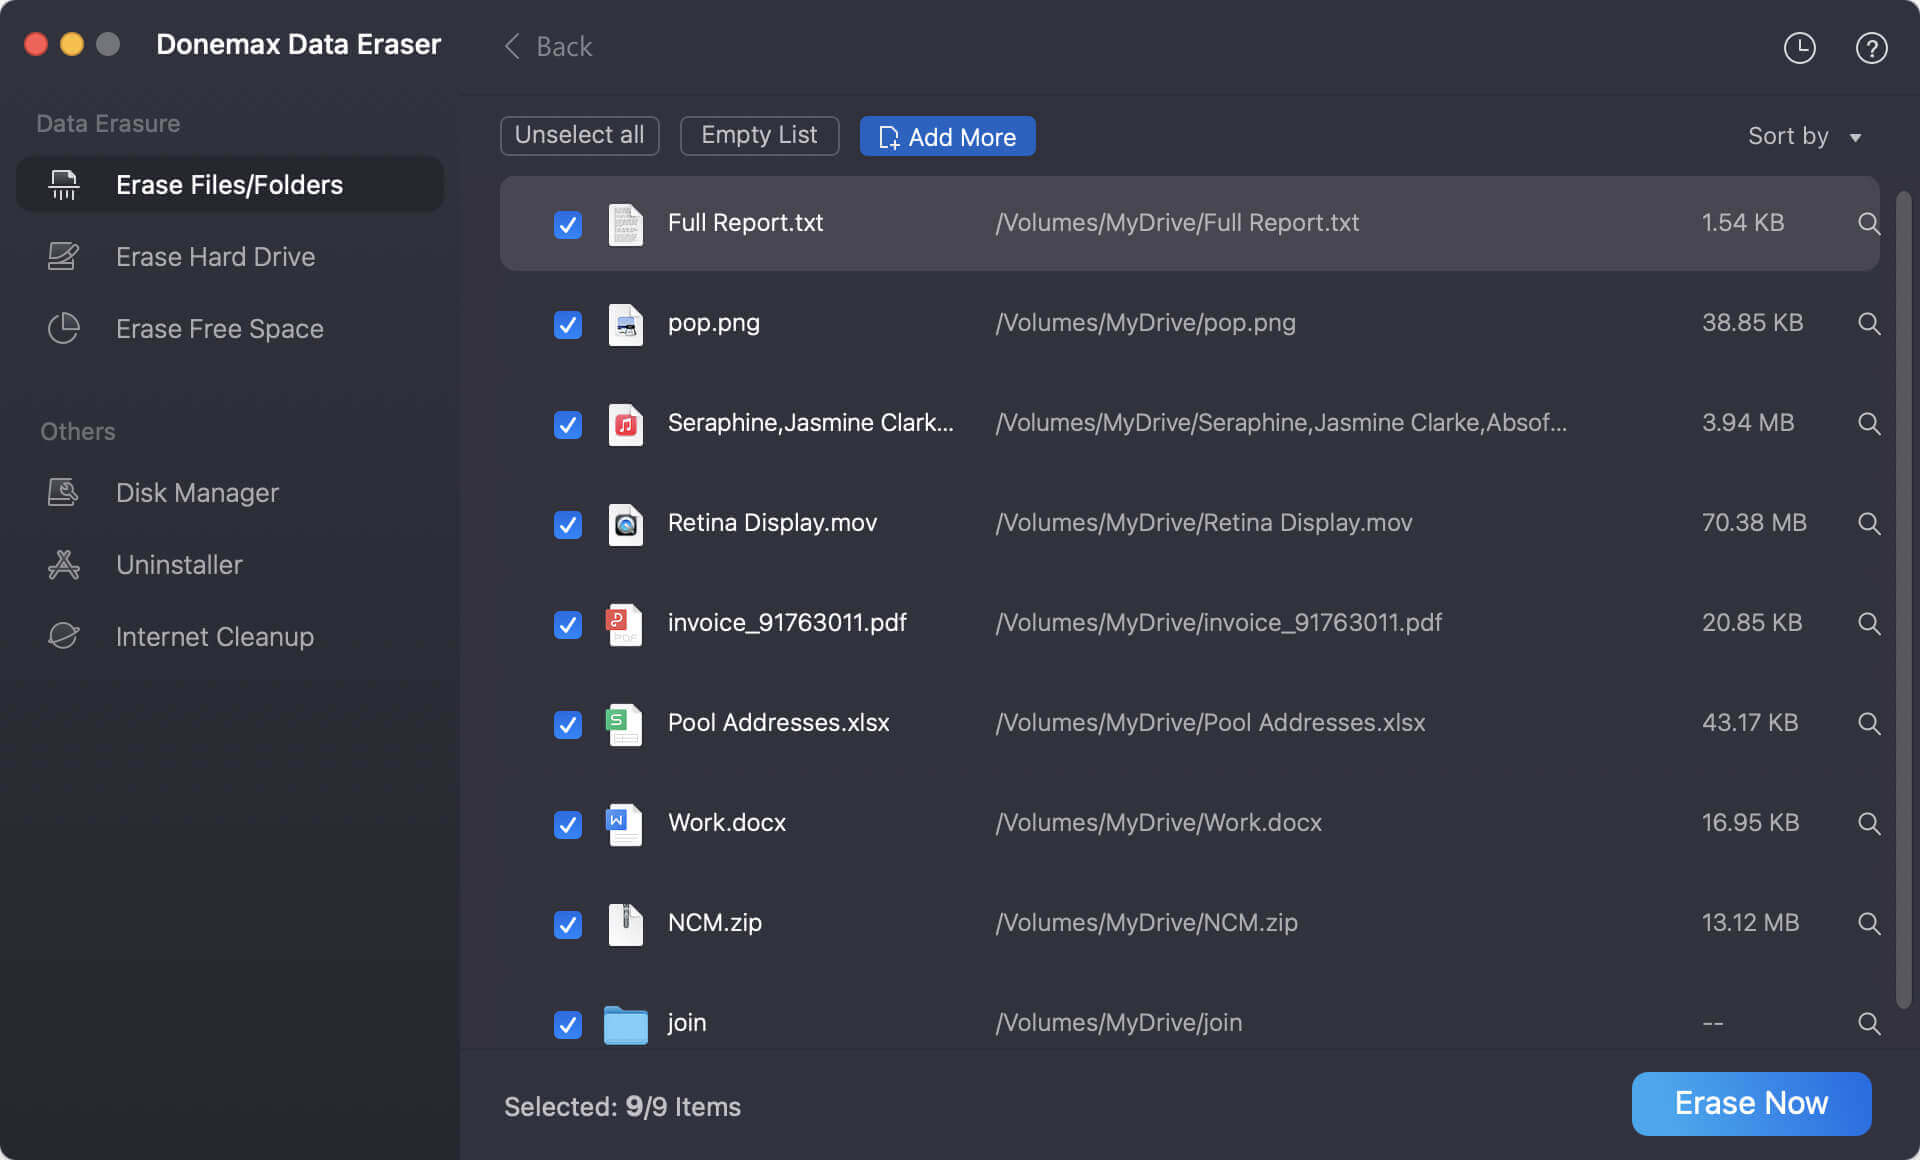
Mode 1: Erase Files
Click Add button to add files/folders to the erasure list, then click on Erase Now button to securely and permanently erase the selected files/folders.
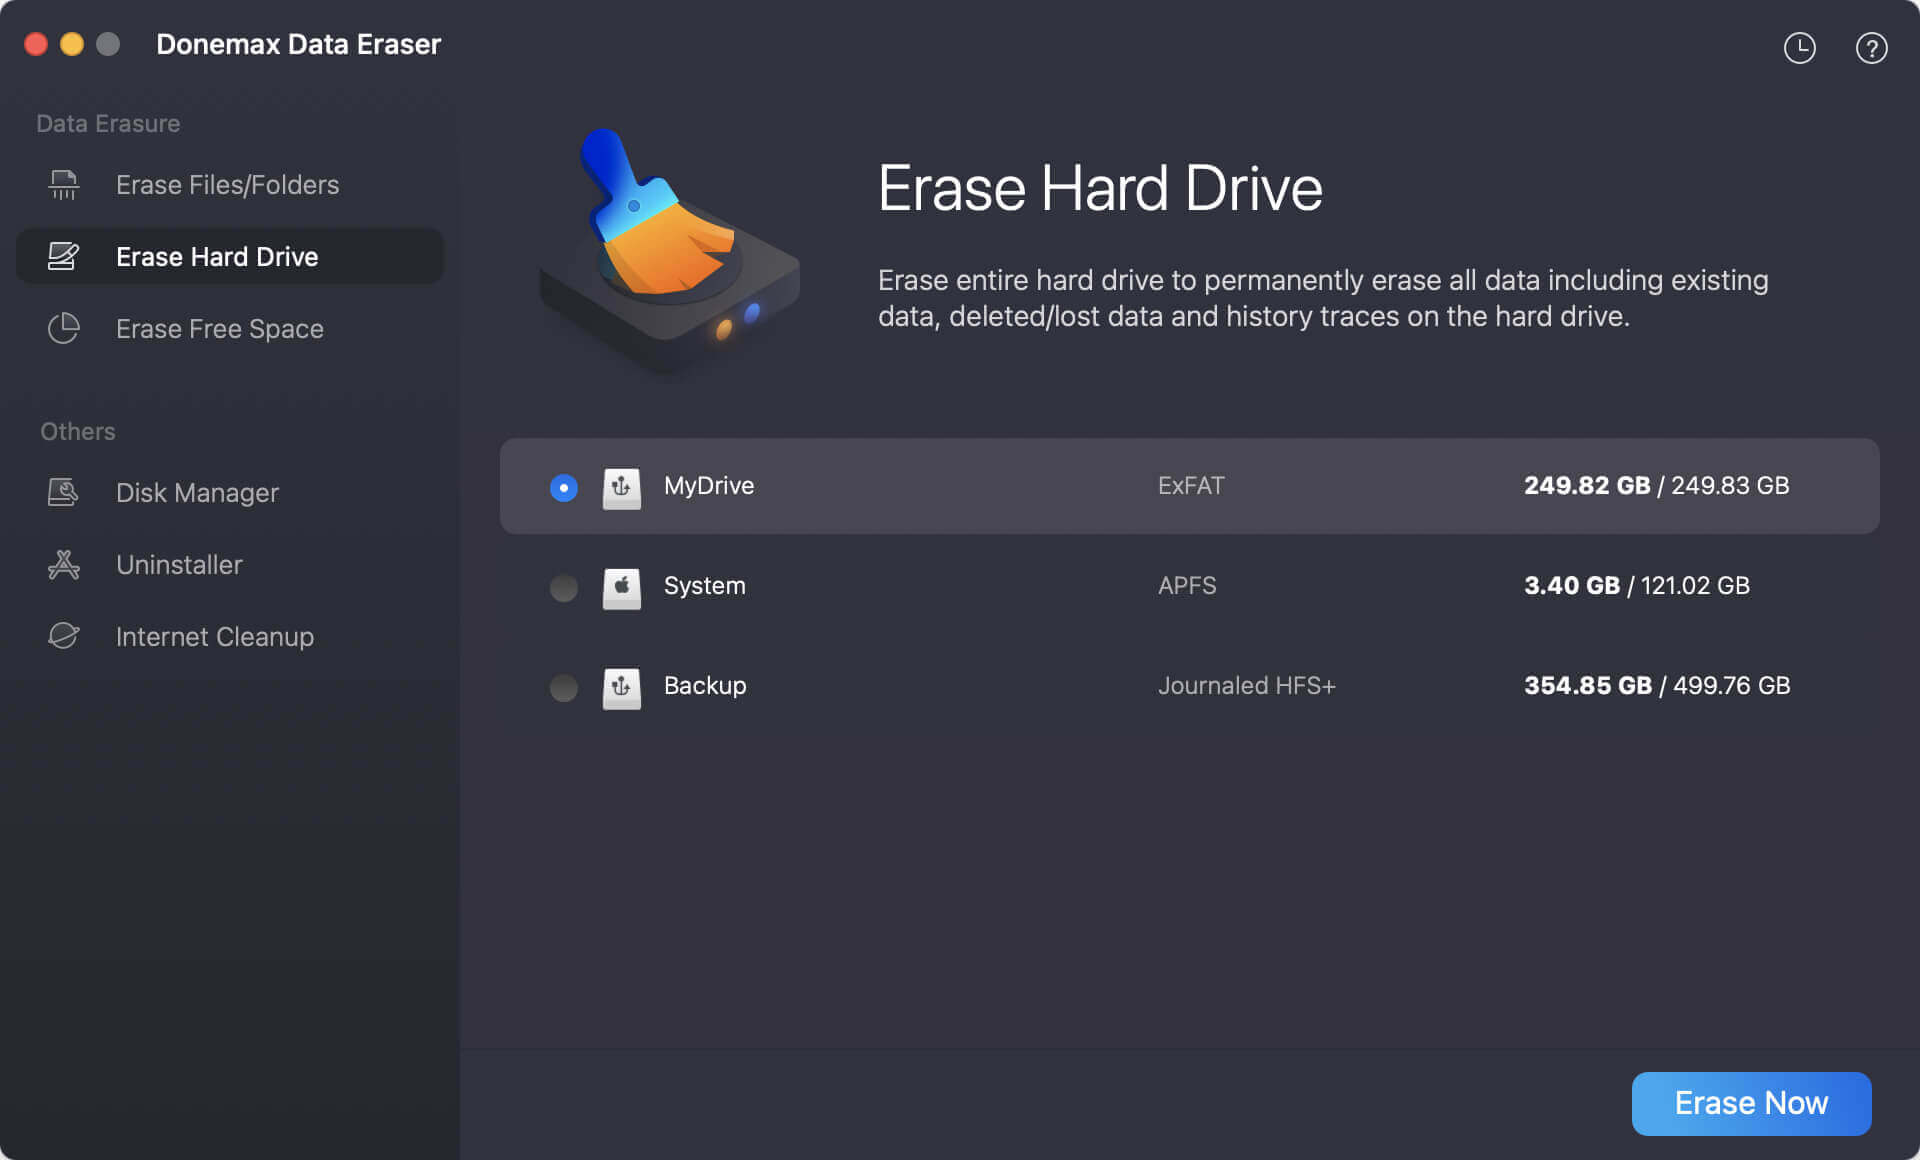
Mode 2: Erase Hard Drive
Securely and permanently erase all data (existing data, hidden data, deleted/lost data included) from the selected hard drive.
Mode 3: Erase Free Space
Securely wipe free disk space of the selected hard drive and permanently erase all deleted/erased/lost data from the drive.
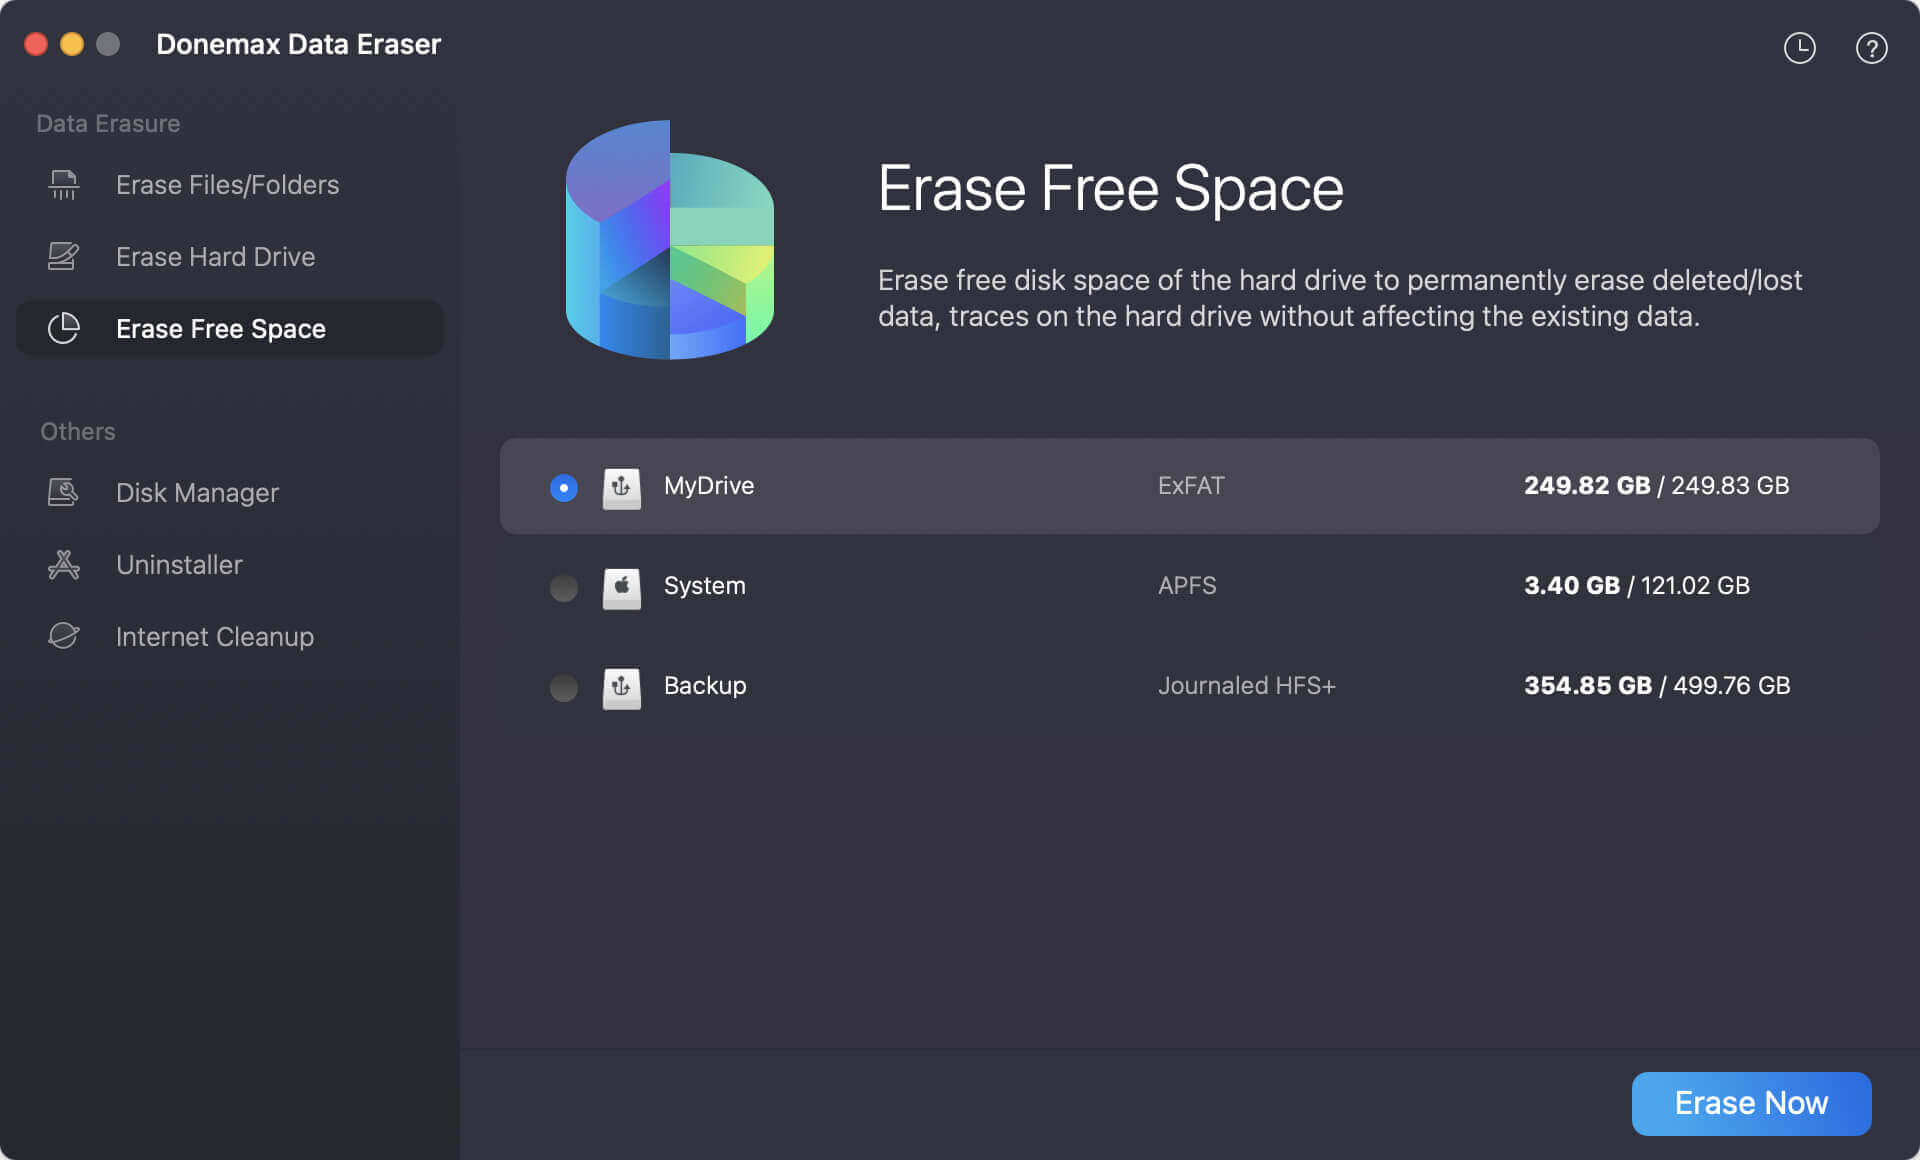
💡 Note: Once the data is erased by Donemax Data Eraser for Mac, the data is lost for good, cannot be recovered by any method.
More Things About Erasing Data on macOS Monterey
Special Considerations for SSDs erasure on macOS Monterey:
For SSDs, Disk Utility doesn't offer secure erase options because of how data storage and deletion work on these drives. Instead, SSDs use the TRIM command, which marks deleted data blocks as available for reuse. While TRIM enhances SSD performance, it doesn't guarantee that data is immediately unrecoverable.
Alternative Approaches for SSDs:
- Use third-party tools such as Donemax Data Eraser for Mac designed specifically for SSD secure erasure.
- Perform a factory reset of macOS Monterey, which can clear personal data from the device.
Troubleshooting Common Issues:
- Disk Not Appearing in Disk Utility:
- Ensure the drive is properly connected to your Mac.
- For external drives, check cables and power supply.
- If the issue persists, try restarting your Mac in Safe Mode and launching Disk Utility again.
- Erase Button is Greyed Out:
- This might occur if the drive is in use. Unmount the drive by clicking Unmount before trying to erase it.
- For system drives, you'll need to boot into Recovery Mode to erase them.
When to Use Disk Utility for Secure Erase:
Disk Utility is ideal for situations where you need to erase entire drives or partitions. It's particularly effective for:
- Preparing an old Mac for resale.
- Clearing data from an external drive before repurposing or disposing of it.
- Resolving disk-related errors by starting fresh with a clean format.
However, if you're working with individual files or an SSD, consider alternative methods like Terminal commands or third-party tools for more precise control over data erasure.
By following these steps and considerations, Disk Utility becomes a reliable ally in ensuring your sensitive data is securely erased on macOS Monterey. This method is user-friendly, efficient, and suitable for most HDD users, while SSD users should explore complementary techniques.
Limitations:
For SSDs, the TRIM functionality makes traditional overwriting methods less effective. Consider alternative methods for SSDs, as discussed below.
Emptying Trash Securely:
The Trash in macOS Monterey acts as a holding space for deleted files. To ensure files in Trash are unrecoverable:
- Manually Empty Trash:
- Right-click the Trash icon in the Dock and select Empty Trash.
- Use Secure Empty Trash:
- Although macOS no longer includes this option natively, older macOS versions allowed overwriting of deleted files. For Monterey, consider third-party tools to achieve this. For example, you can use Donemax Data Eraser to wipe free disk space of the Mac.
Advanced Methods to Permanently Erase Data:
1. Using Terminal Commands
Terminal is a command-line interface in macOS that gives you granular control over system operations. Here’s how to use it for secure erasure:
- Securely Deleting Individual Files:
- Open Terminal (Applications > Utilities > Terminal).
- Type:
srm -v filepath
- Replace filepath with the full path of the file you want to delete.
- The srm command overwrites the file multiple times before deletion, making recovery almost impossible.
- Erasing an Entire Drive:
- Use the diskutil command:
diskutil secureErase level /dev/diskX
- Replace level with a security level (0 for single-pass overwrite, 3 for 7-pass overwrite) and diskX with the identifier of your drive.
- To find the disk identifier, run:
diskutil list
- Use the diskutil command:
Caution: Terminal commands are powerful and can permanently delete files or drives. Double-check inputs before executing.
2. Third-Party Tools
While macOS provides robust built-in options, third-party software can offer additional flexibility and ease of use for secure data erasure. Some popular tools include:
- AweCleaner for Mac:
- Offers a secure shredder feature to delete files beyond recovery.
- User-friendly interface and additional optimization tools.
- Donemax Data Eraser for Mac:
- Implements Gutmann or DoD (Department of Defense) standards to overwrite files multiple times.
- Drive Genius:
- Advanced disk management software with secure erase options for drives and files.
Choose a reputable tool, especially when dealing with sensitive information.
Preparing for Data Erasure:
Before permanently deleting data, it's essential to take some preparatory steps:
1. Back Up Important Files
- Use Time Machine or an external drive to back up critical files before erasing data.
- Ensure backups are encrypted to protect sensitive information.
2. Check Your Drive Type
- Identify your drive type:
- Navigate to Apple Menu > About This Mac > Storage.
- Knowing whether you're working with an HDD or SSD will help determine the most effective erasure method.
Factory Reset for macOS Monterey:
A factory reset is a comprehensive way to erase all data on your Mac and reinstall macOS Monterey. Follow these steps:
- Sign Out of Apple Services:
- Open System Preferences > Apple ID > Overview.
- Click Sign Out to disconnect your Mac from iCloud, ensuring Activation Lock is disabled.
- Boot into Recovery Mode:
- Restart your Mac and hold Command (⌘) + R (for Intel-based Mac) or Power button (for Apple silicon Mac) until it boots into macOS Recovery mode.
![securely erase your data on macOS Monterey]()
- Restart your Mac and hold Command (⌘) + R (for Intel-based Mac) or Power button (for Apple silicon Mac) until it boots into macOS Recovery mode.
- Erase the Startup Disk:
- In Recovery Mode, open Disk Utility.
- Select the startup disk (usually named Macintosh HD), click Erase, and choose the appropriate format.
![securely erase your data on macOS Monterey]()
- Reinstall macOS Monterey:
- Return to the main Recovery menu and select Reinstall macOS Monterey.
![securely erase your data on macOS Monterey]()
- Follow the on-screen instructions to complete the installation.
- Return to the main Recovery menu and select Reinstall macOS Monterey.
Important: A factory reset erases everything. Double-check backups before proceeding.
Why Secure Erasure Matters:
1. Selling or Recycling Your Mac
When selling or recycling your Mac, leaving recoverable data on the device exposes you to identity theft or data breaches.
2. Handling Sensitive Information
If your Mac contains sensitive data, such as financial records or personal photos, securely erasing files ensures they won't fall into the wrong hands.
Conclusion
Permanently erasing data on macOS Monterey is not just a technical task - it's a necessary step to protect your privacy. Whether you're using Disk Utility, Terminal commands, or third-party tools, each method offers a reliable way to ensure your files are irretrievable. By following the steps outlined in this guide, you can confidently secure your Mac for any purpose, from selling to reusing. Always double-check backups before deletion and choose the method that best suits your storage type for optimal results.
Donemax Data Eraser for Mac is a reliable data erasure program. It can securely and permanently erase data from any internal disk or external storage device. Once the data is erased by Donemax Data Eraser for Mac, the data is lost for good, cannot be recovered by any method. If you want to permanently erase data on macOS Monterey, this tool is a good choice.


Donemax Data Eraser for Mac
100% safe and powerful Mac data erasure program. It offers certified data erasure standards including U.S. Army AR380-19, DoD 5220.22-M ECE to help in securely and permanently erase data from Mac HDD/SSD and external storage device, making data recovery be impossible.
Related Articles
- Mar 11, 2025Factory Reset Mac OS X 10.11 El Capitan: Step-by-Step Guide
- Dec 30, 2025How to Erase Startup Disk on macOS Ventura?
- Oct 23, 2024Empty or Wipe Trash Bin on Mac: A Complete Guide to Cleaning Your Mac's Storage
- Oct 16, 2025How to Format USB Flash Drive on Mac?
- Nov 11, 2024How to Reset Apple Silicon Chip - M1/M2/M3/M4 Mac to Factory Settings?
- Jan 07, 2026Permanently Wipe Hard Drive on macOS High Sierra

Christina
Christina is the senior editor of Donemax software who has worked in the company for 4+ years. She mainly writes the guides and solutions about data erasure, data transferring, data recovery and disk cloning to help users get the most out of their Windows and Mac. She likes to travel, enjoy country music and play games in her spare time.

Gerhard Chou
In order to effectively solve the problems for our customers, every article and troubleshooting solution published on our website has been strictly tested and practiced. Our editors love researching and using computers and testing software, and are willing to help computer users with their problems


