
Written byCoco LinUpdated on Jul 08, 2026

Before we start: Wiping a hard drive sounds like a complex technical job, but it is actually very straightforward once you know the exact steps. If you want to wipe hard drive in the latest macOS 27 Golden Gate, Donemax Data Eraser for Mac can help you permanently wipe data to protect your privacy safe.
PAGE CONTENT:
Are you planning to sell, trade-in, or give away your Mac? Or maybe you just want to give your machine a completely fresh start because it is starting to feel a bit sluggish? Whatever your reasons are, learning how to safely wipe a hard drive on macOS 27 Golden Gate is a crucial step to protect your personal privacy and restore system performance.
In this easy-to-follow guide, we will walk you through everything you need to do. We will cover standard built-in formatting methods, total system resets, and advanced military-grade erasure solutions using specialized tools. Let's make sure your private files are permanently gone and completely unrecoverable!
Whenever you delete a file on your Mac by moving it to the Trash and emptying it, the file is not actually erased. Instead, the operating system simply marks that disk space as "available" for new data. Until new files are written directly over that exact spot, your old data remains entirely intact and can easily be retrieved using basic data recovery software.
This creates a serious security risk if you intend to pass your computer along to someone else. If your goal is to wipe hard drive on macOS 27 Golden Gate, you must use methods that write blank sequences over the storage sectors. Doing this guarantees that your passwords, banking information, personal photos, and sensitive documents stay hidden forever.
Additionally, doing a complete clean wipe can fix deep-seated system registry errors, clean out gigabytes of unresolvable cached system junk, and breathe fresh life into an older machine experiencing frequent system crashes.
📍 Important Warning: Wiping a hard drive deletes absolutely everything on it. Once completed, your files, pictures, applications, and accounts cannot be recovered through standard means. Always double-check your backups before you proceed!
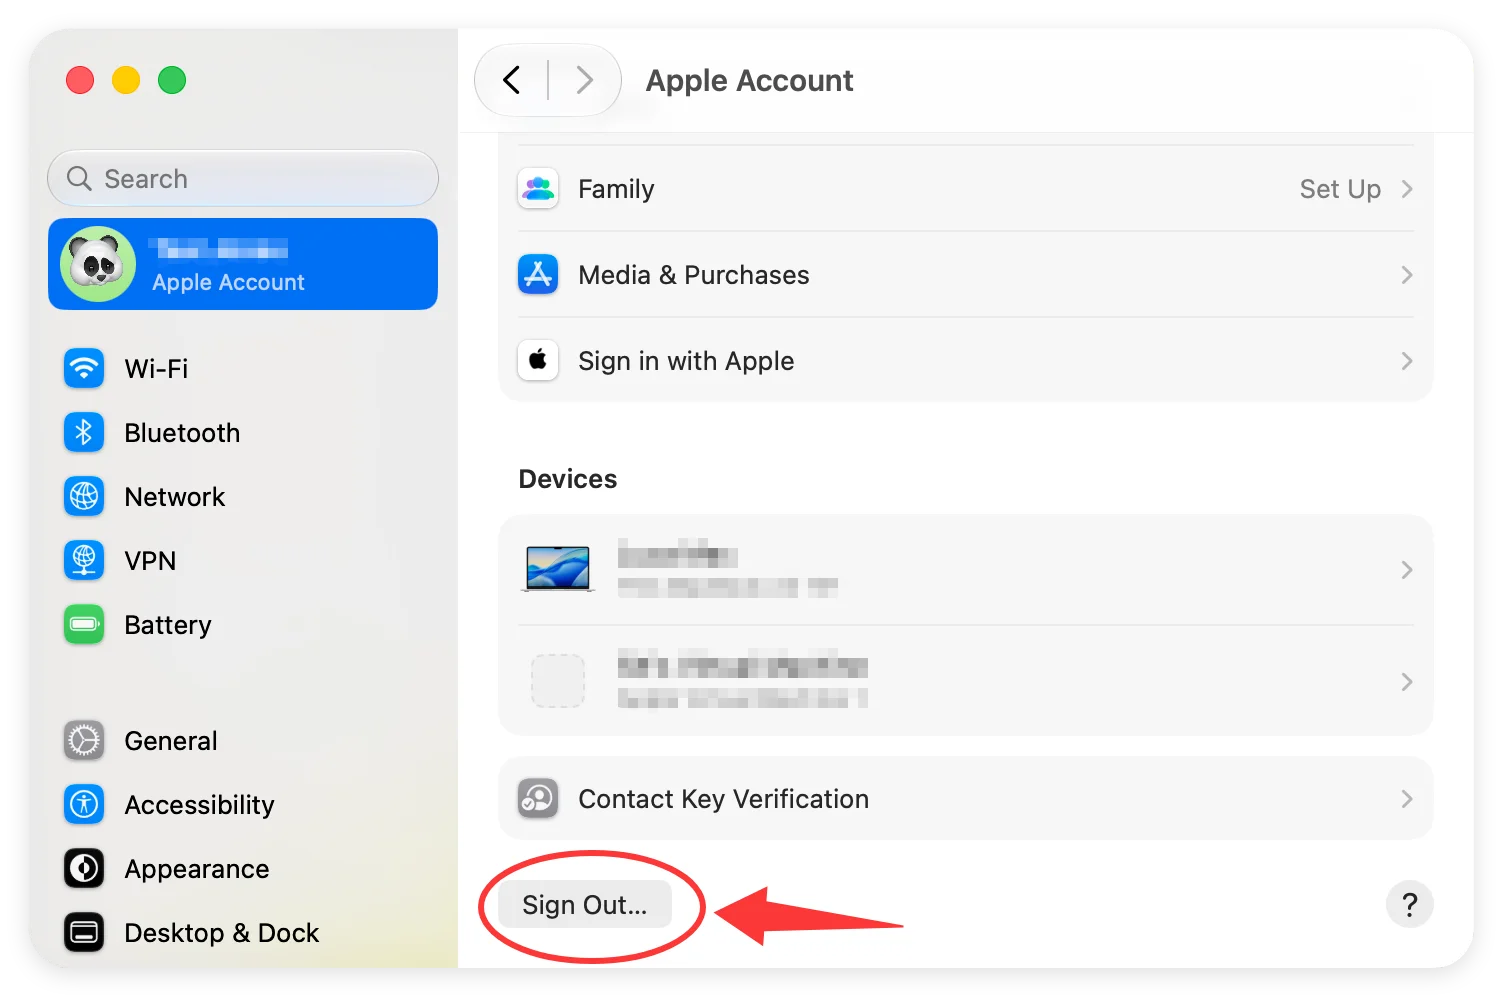
Before you start clicking buttons to format your drive, it is essential to take a few preparatory steps. Taking five minutes to run through this checklist will save you from accidental data loss and painful setup headaches later.
If you own a modern Mac running macOS 27 Golden Gate, Apple has included a fantastic built-in shortcut called "Erase All Content and Settings." This feature works exactly like resetting an iPhone. It completely wipes all your personal files, account info, and app configurations while leaving the core operating system files perfectly intact.
This is the best choice if you are selling your Mac and want it to boot up right into the standard out-of-the-box welcome setup screen for the next user.
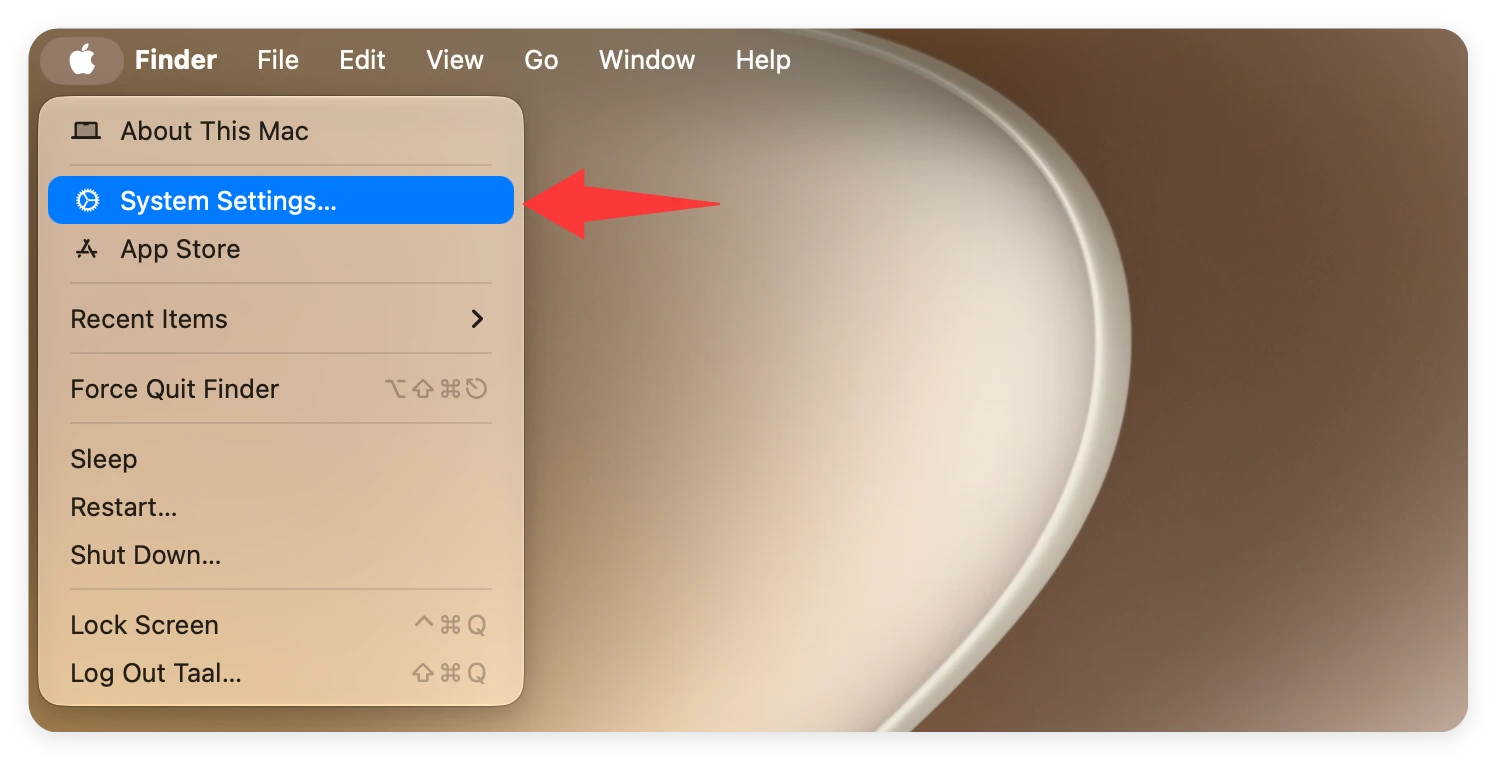
Step 1: Click on the Apple logo located in the top-left corner of your screen and select System Settings.
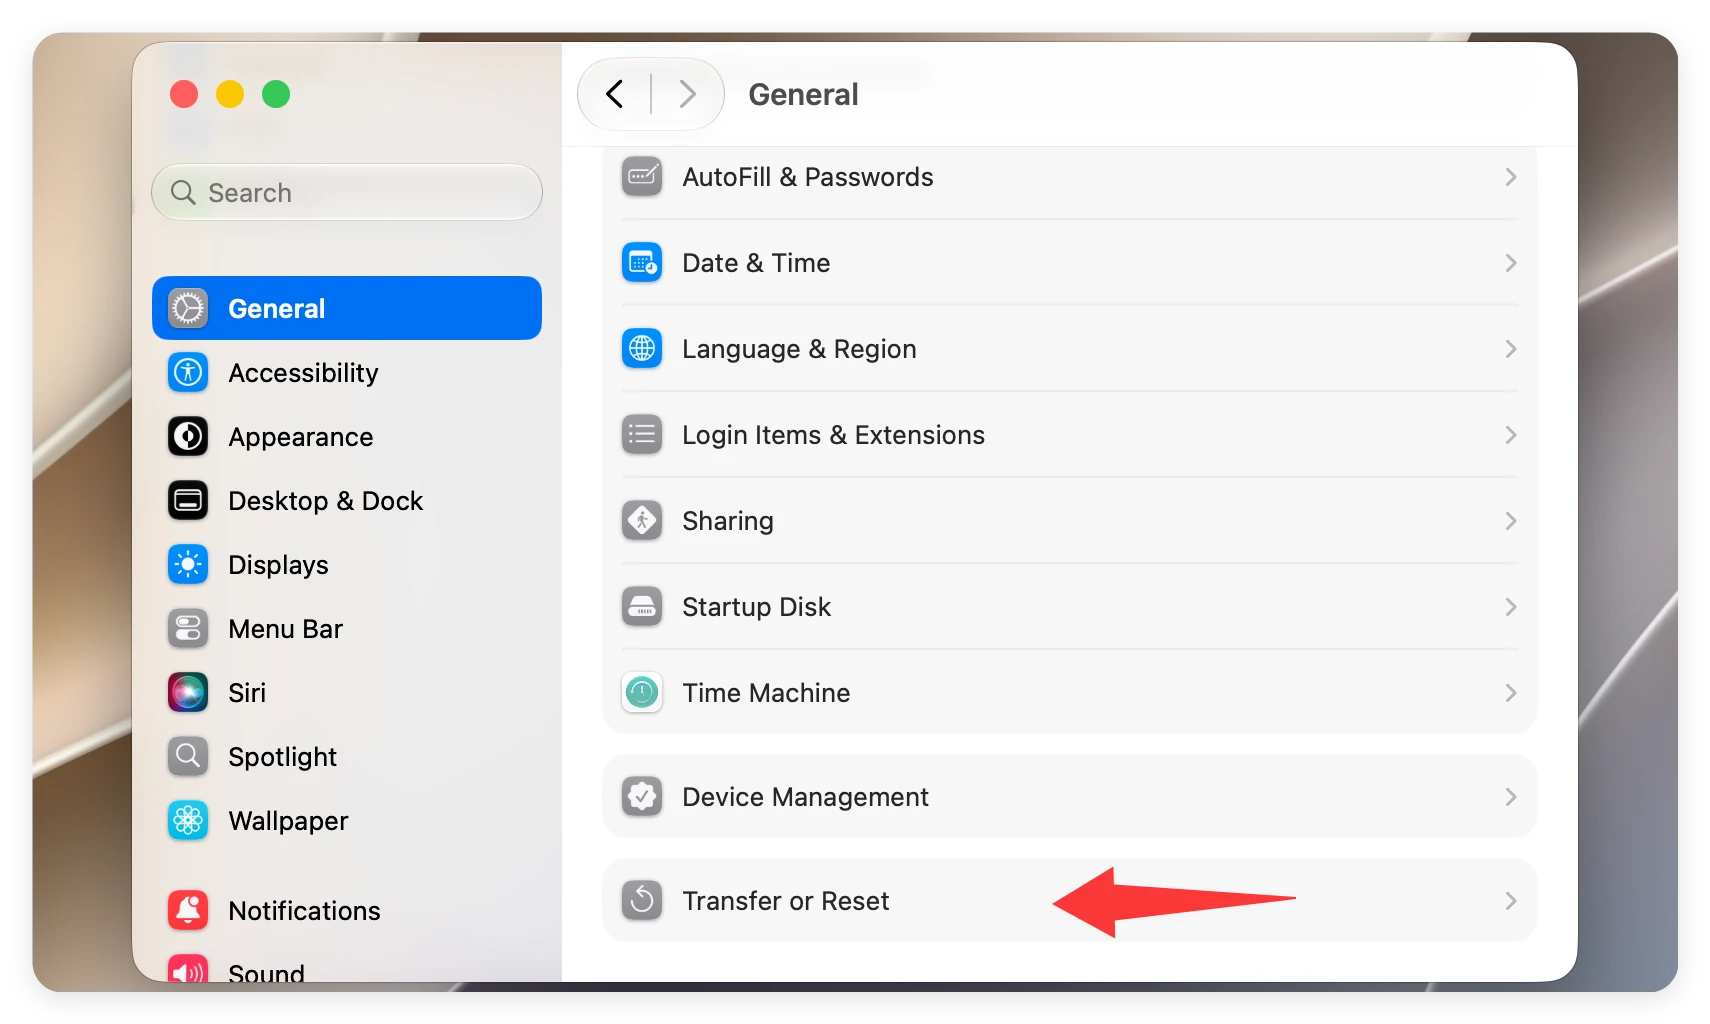
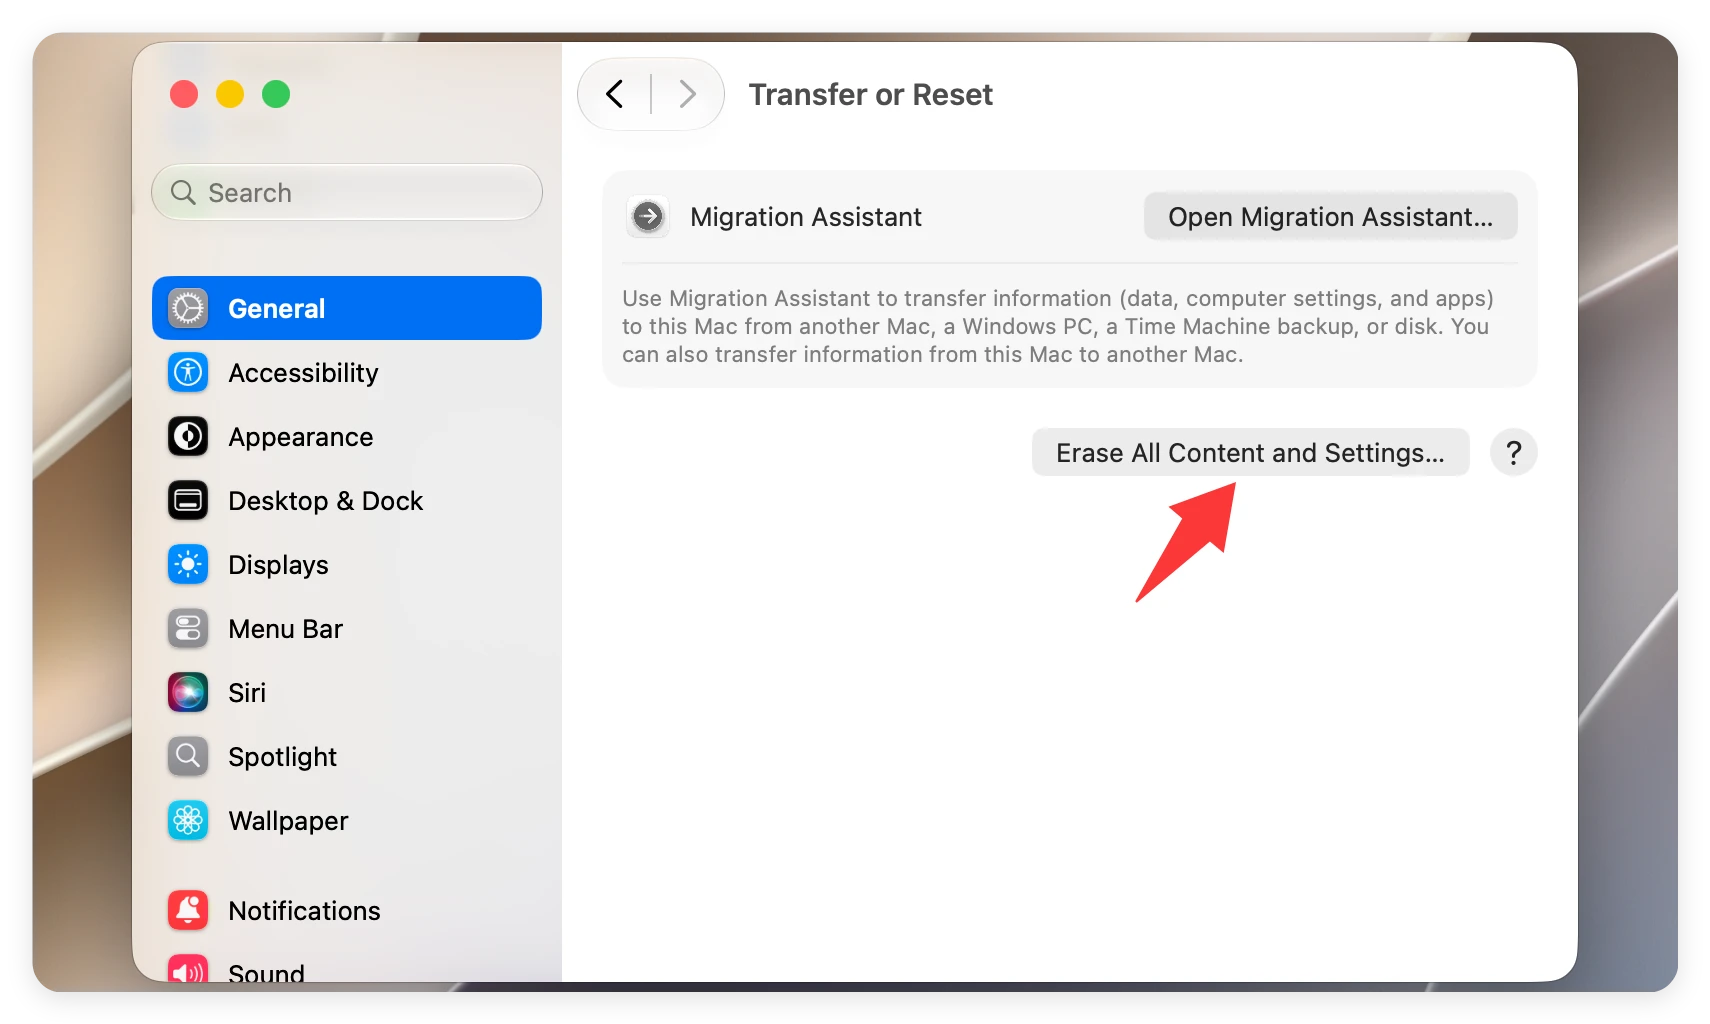
Step 2: In the left-hand sidebar, click on the General category, then select Transfer or Reset from the right-side options menu.
Step 3: Click the button labeled Erase All Content and Settings.
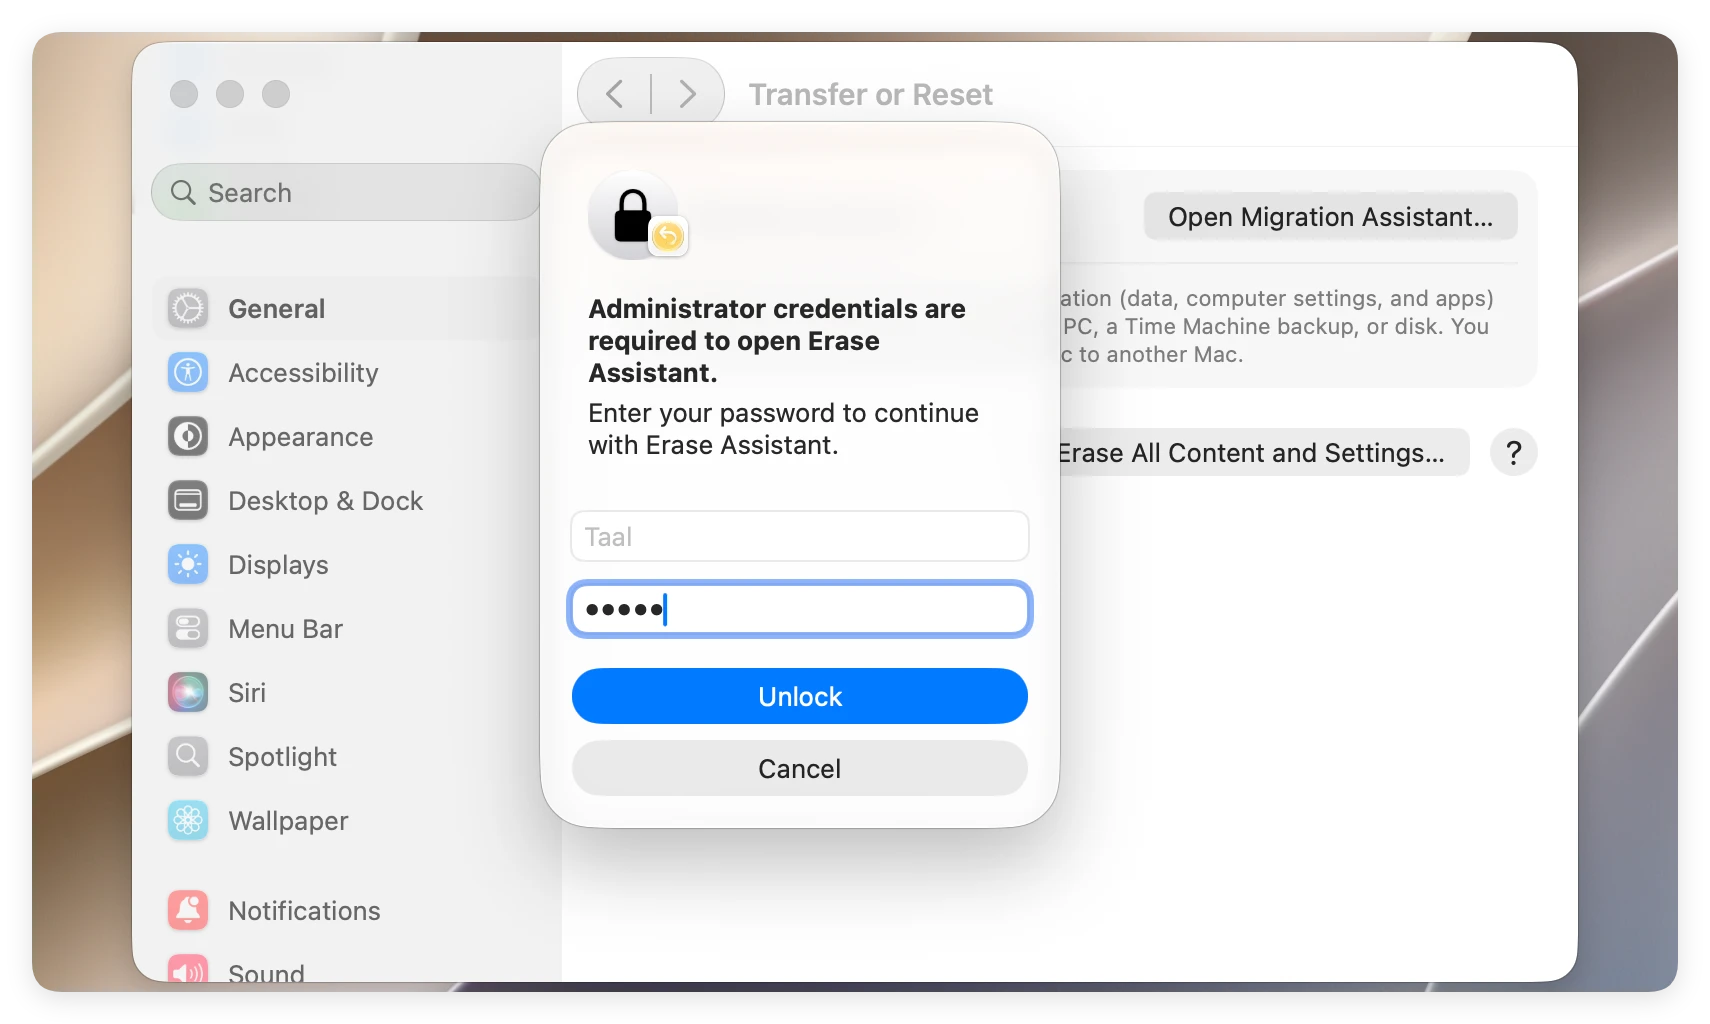
Step 4: Your Mac will ask you to enter your administrator system password. Type it in to grant permission.
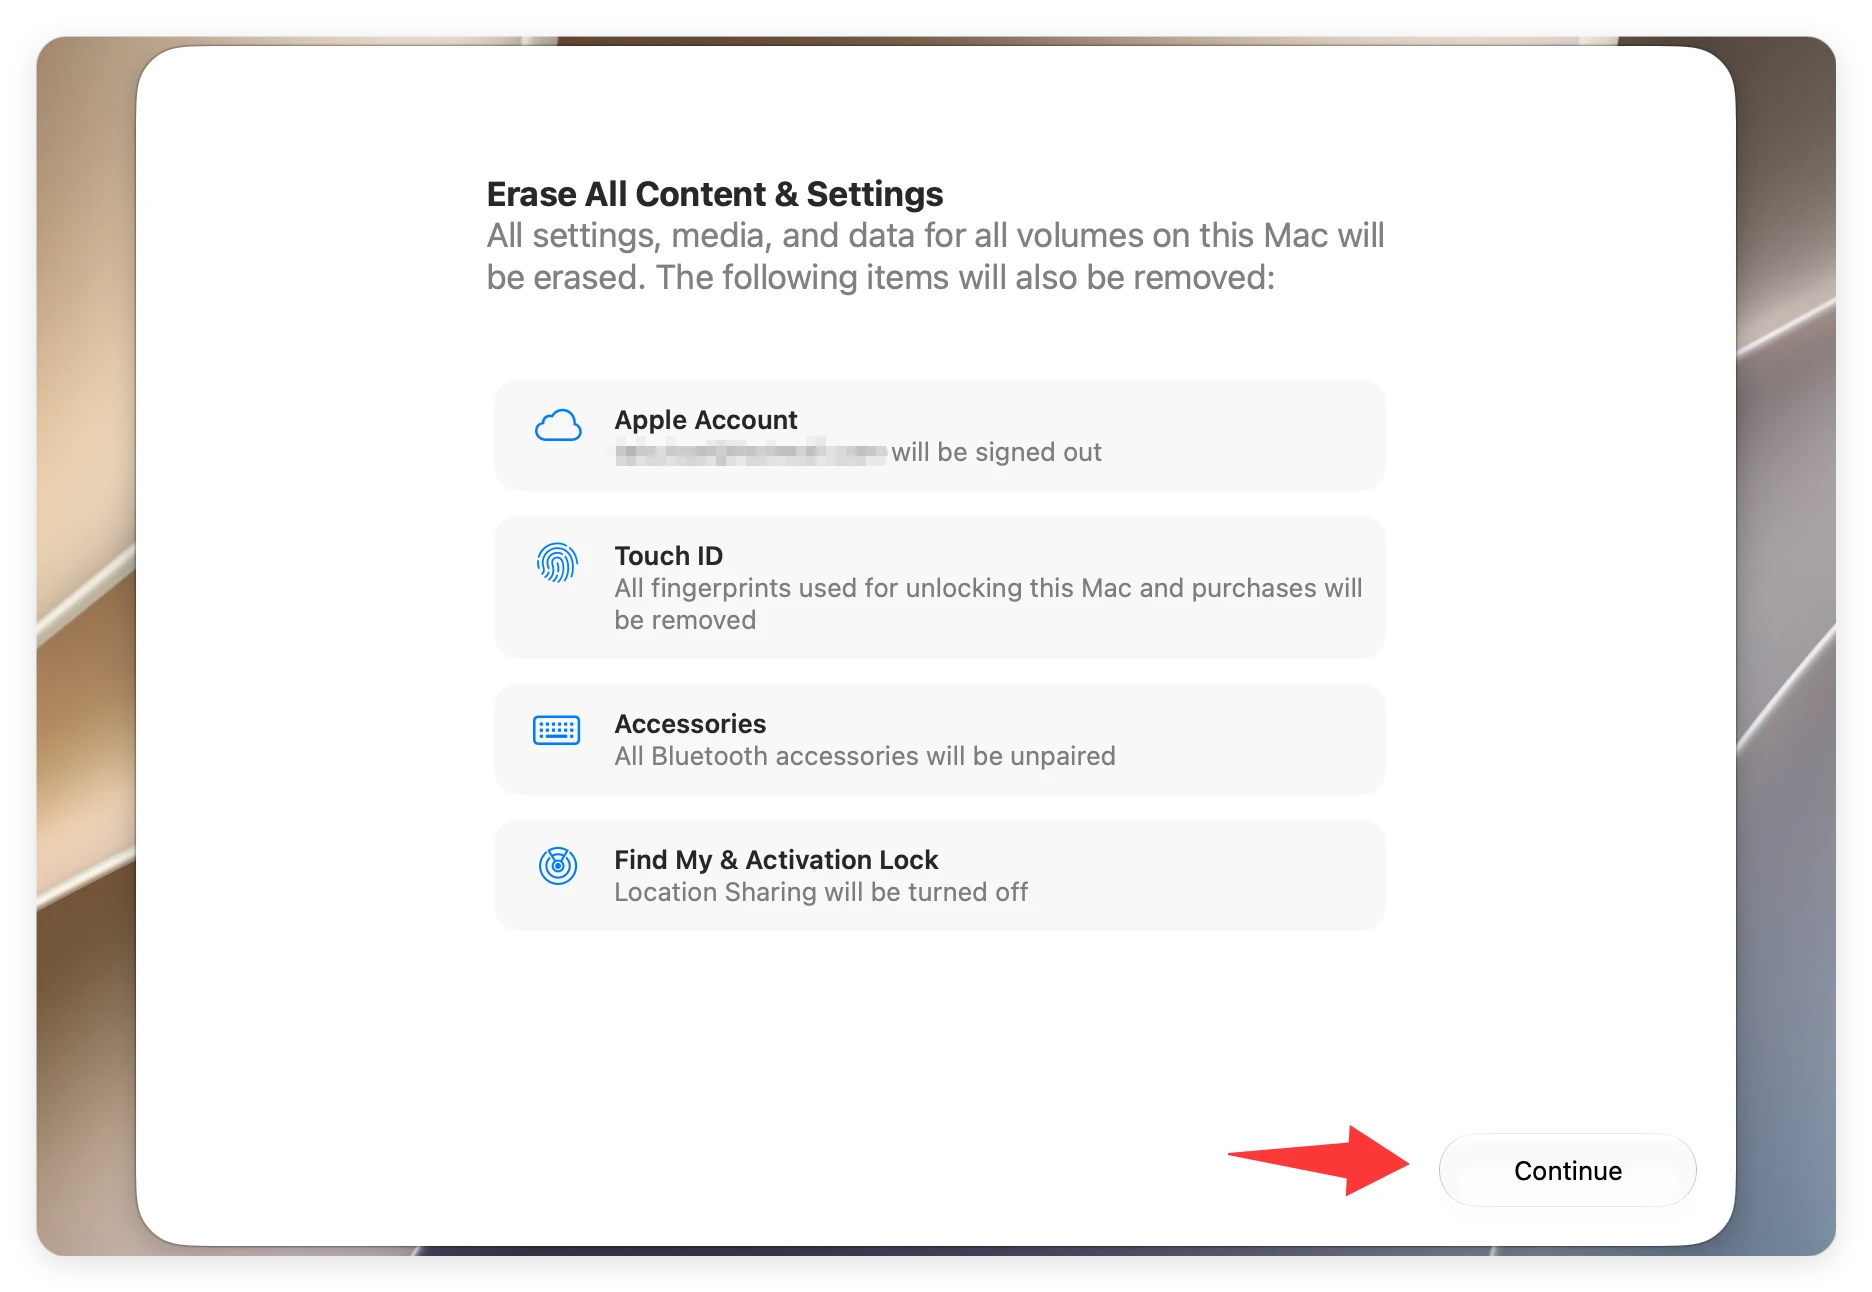
Step 5: A clear list will appear showing exactly what data will be wiped out (including Apple ID accounts, Touch ID fingerprints, and cryptographic keys). Click Continue.
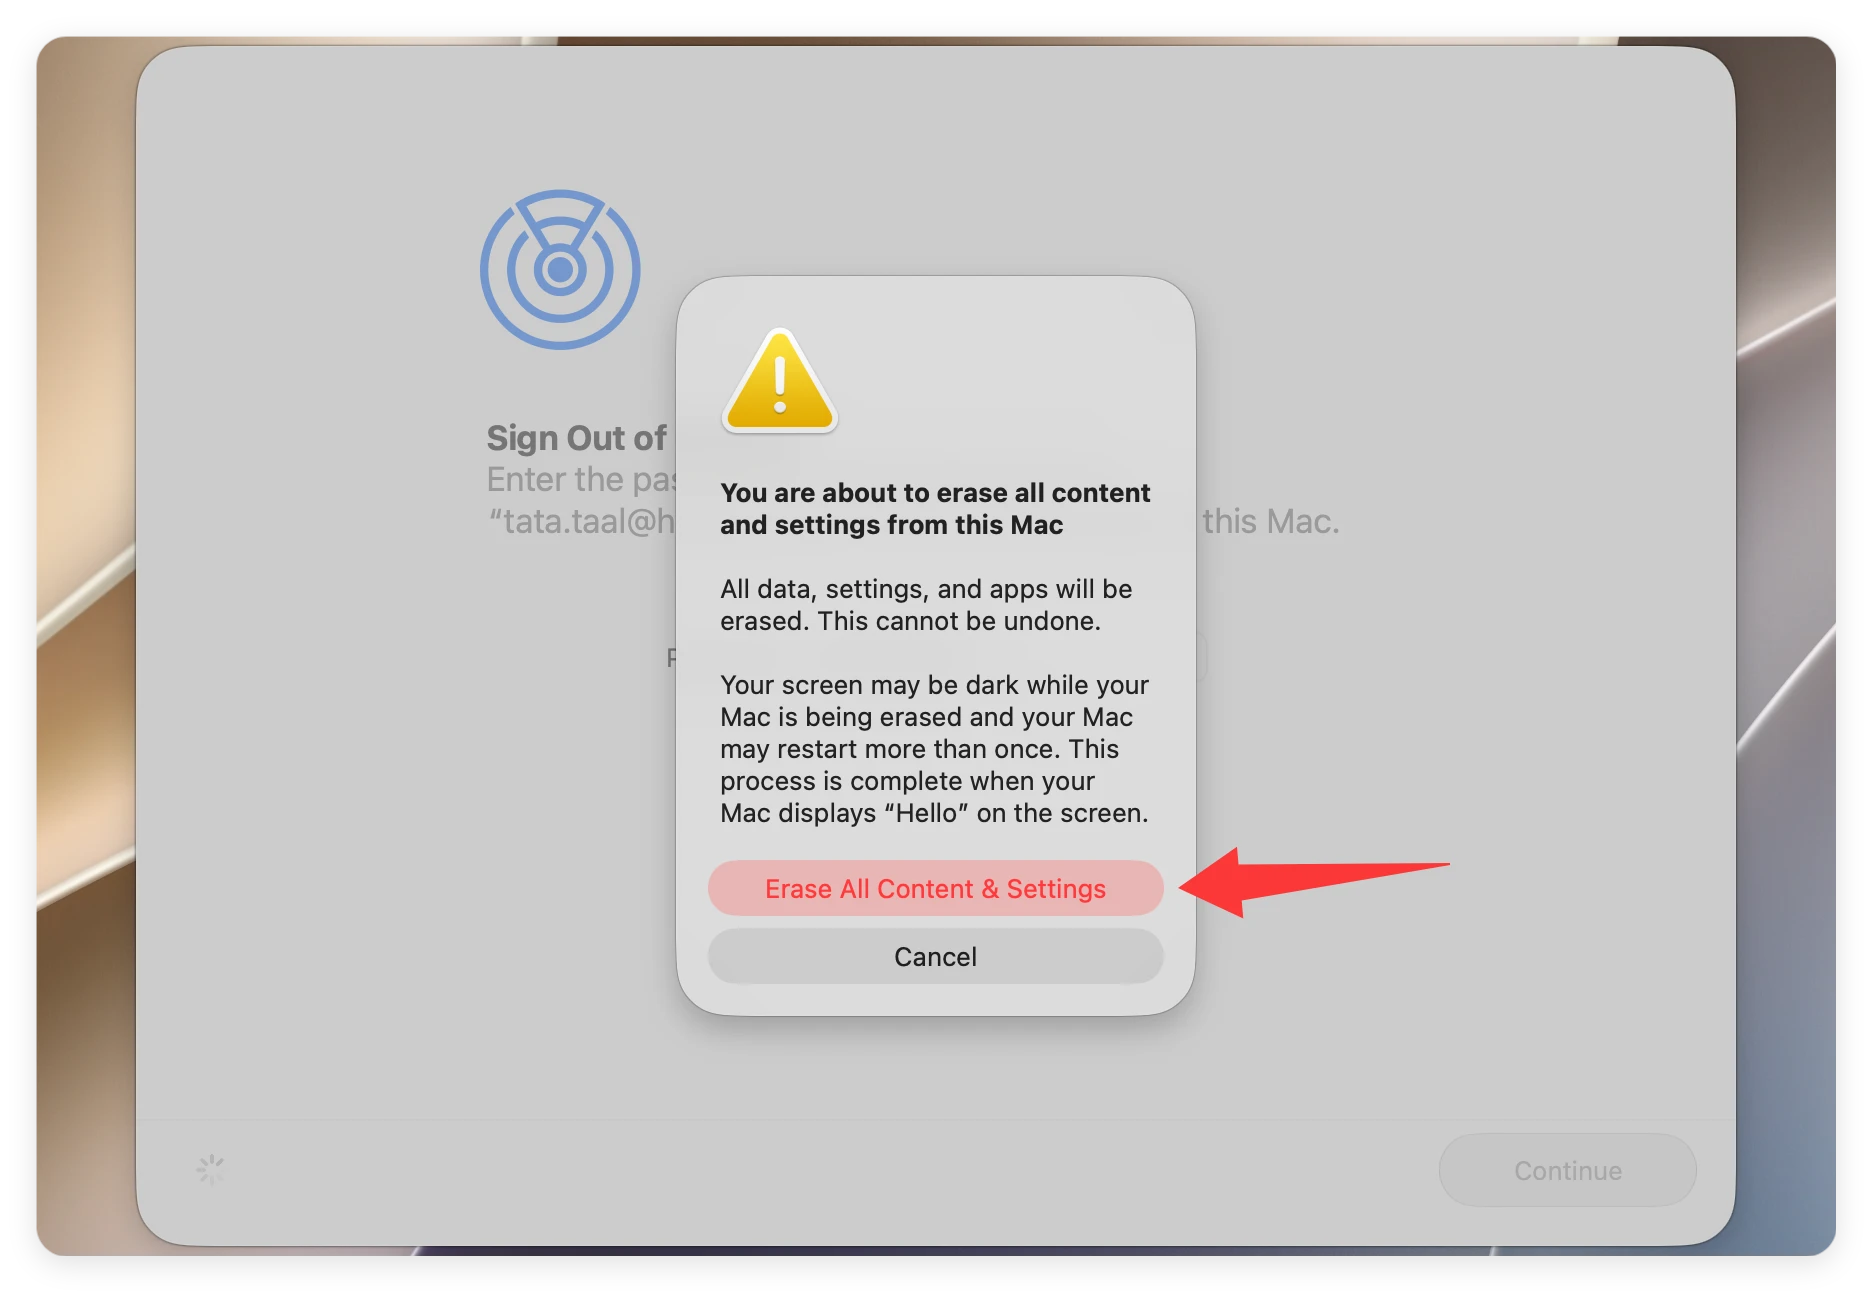
Step 6: A final warning pop-up box will appear. Confirm your action, and your Mac will immediately restart. The screen will stay black for a short while as it completely cleans out your drive. Once finished, it will display the official Hello setup screen.
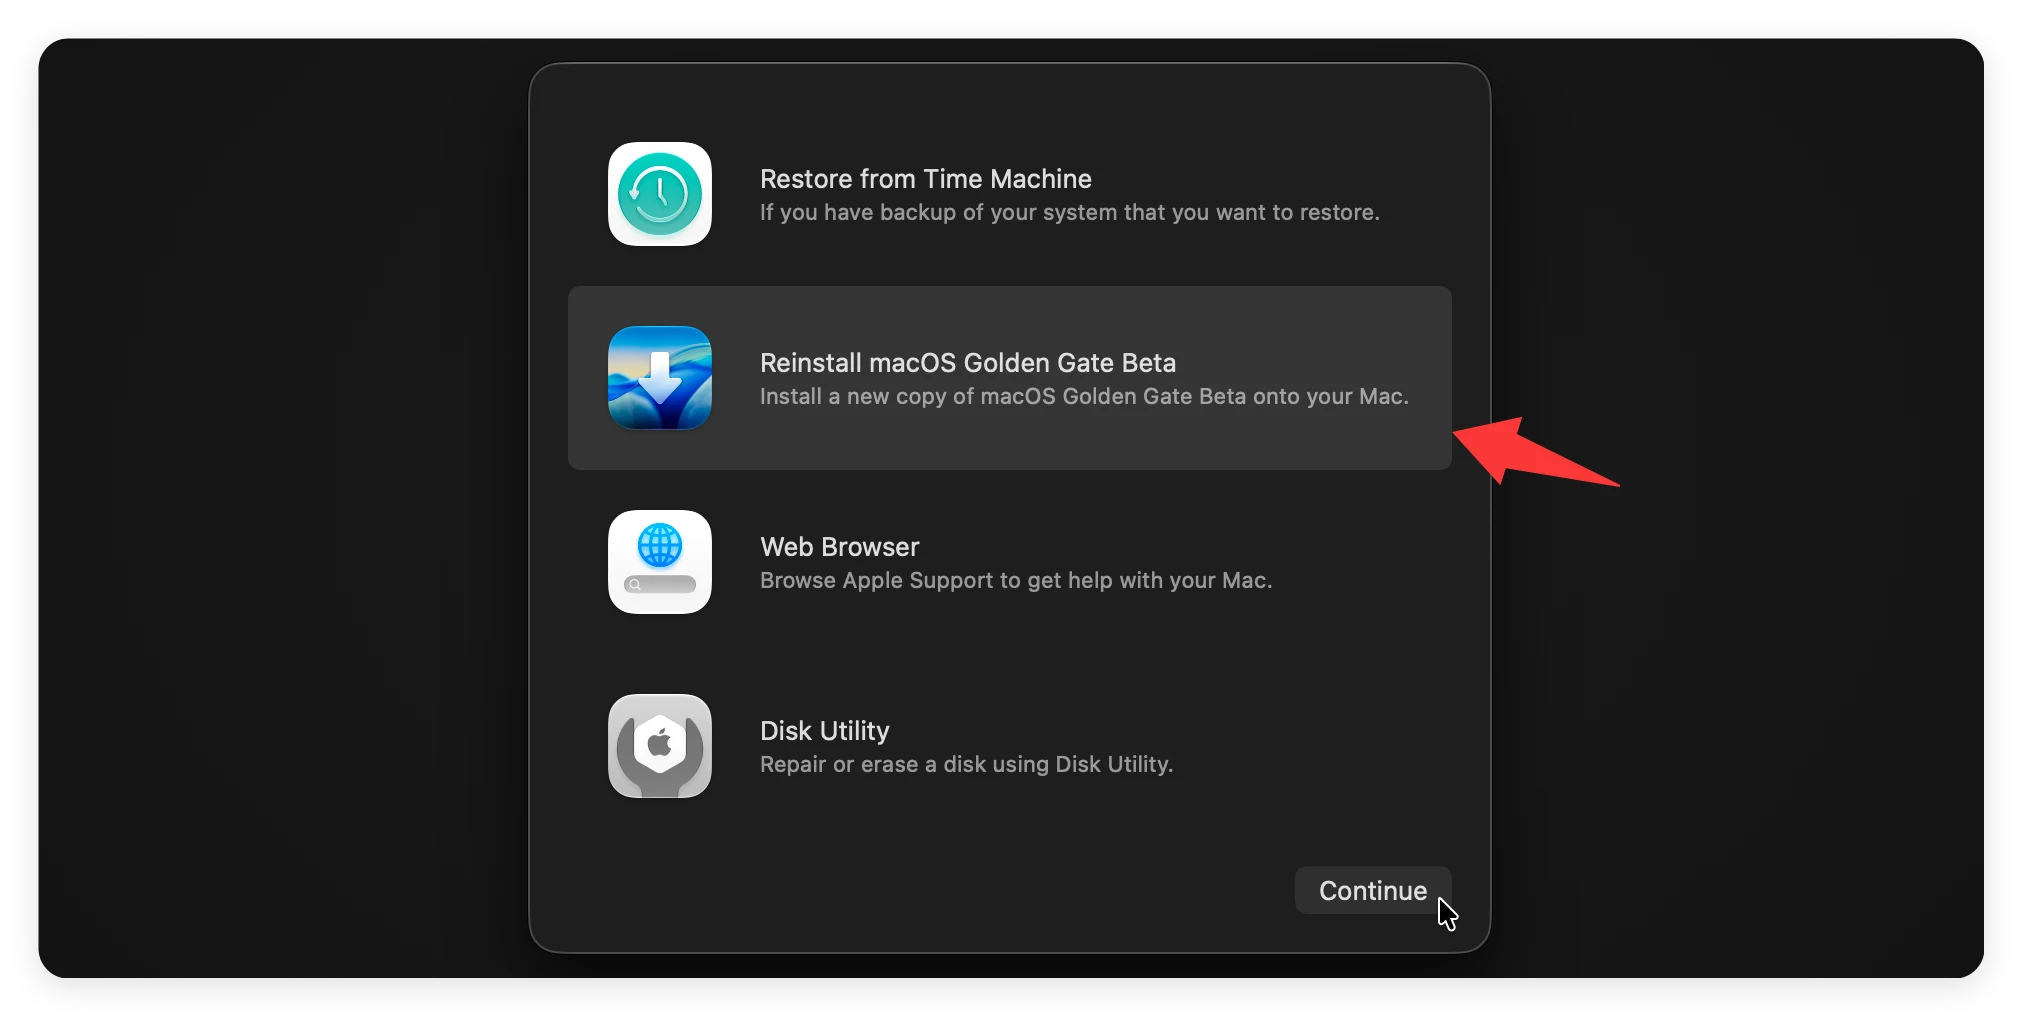
If you are trying to format an secondary external hard drive or perform an absolute clean reinstallation of macOS from scratch, the built-in system setting panel will not be enough. Instead, you need to boot into your Mac's deep Recovery Mode and use the native Disk Utility application.
Step 1: Boot into macOS 27 Golden Gate Recovery Mode
Shut your Mac completely down. Press and hold down the physical Power Button. Keep holding it down until you see the phrase "Loading startup options" appear on your monitor screen. Click Options, and then click Continue.
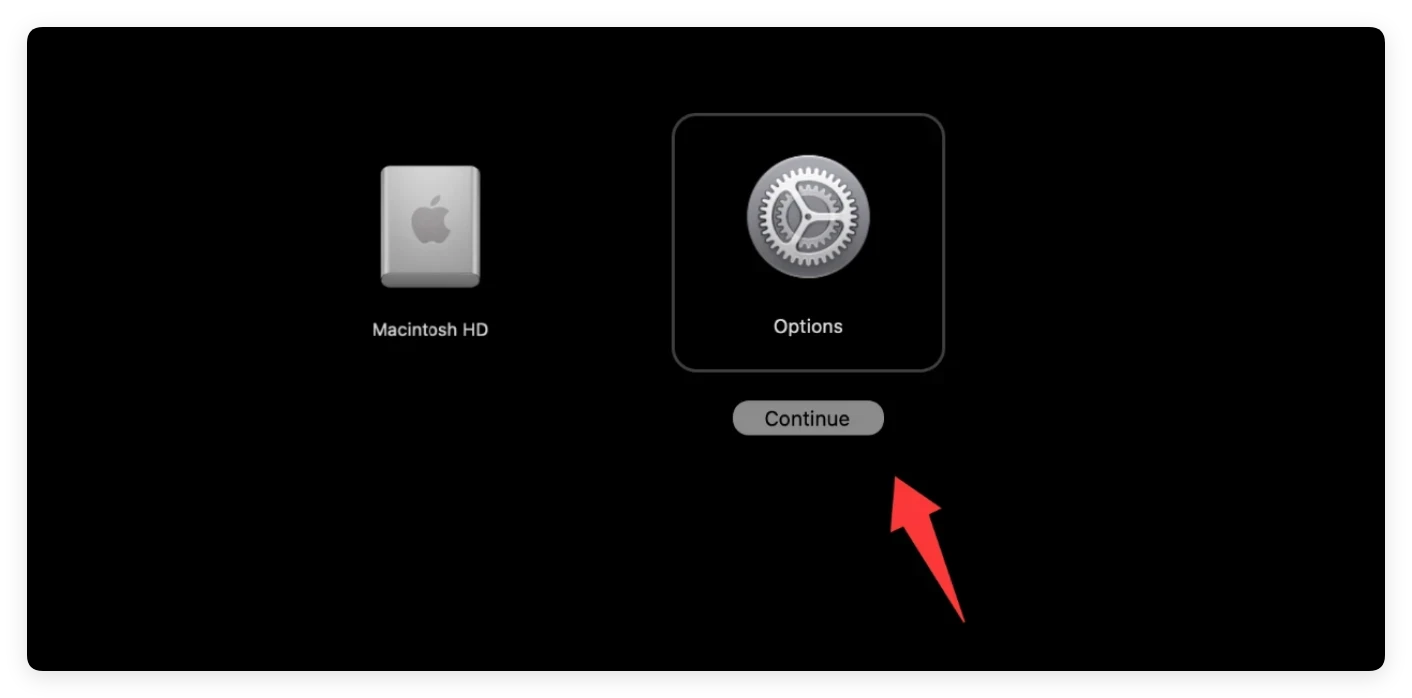
Step 2: Wipe the Hard Drive Using Disk Utility
Once your Mac boots into the Recovery environment screen, follow these directions carefully:
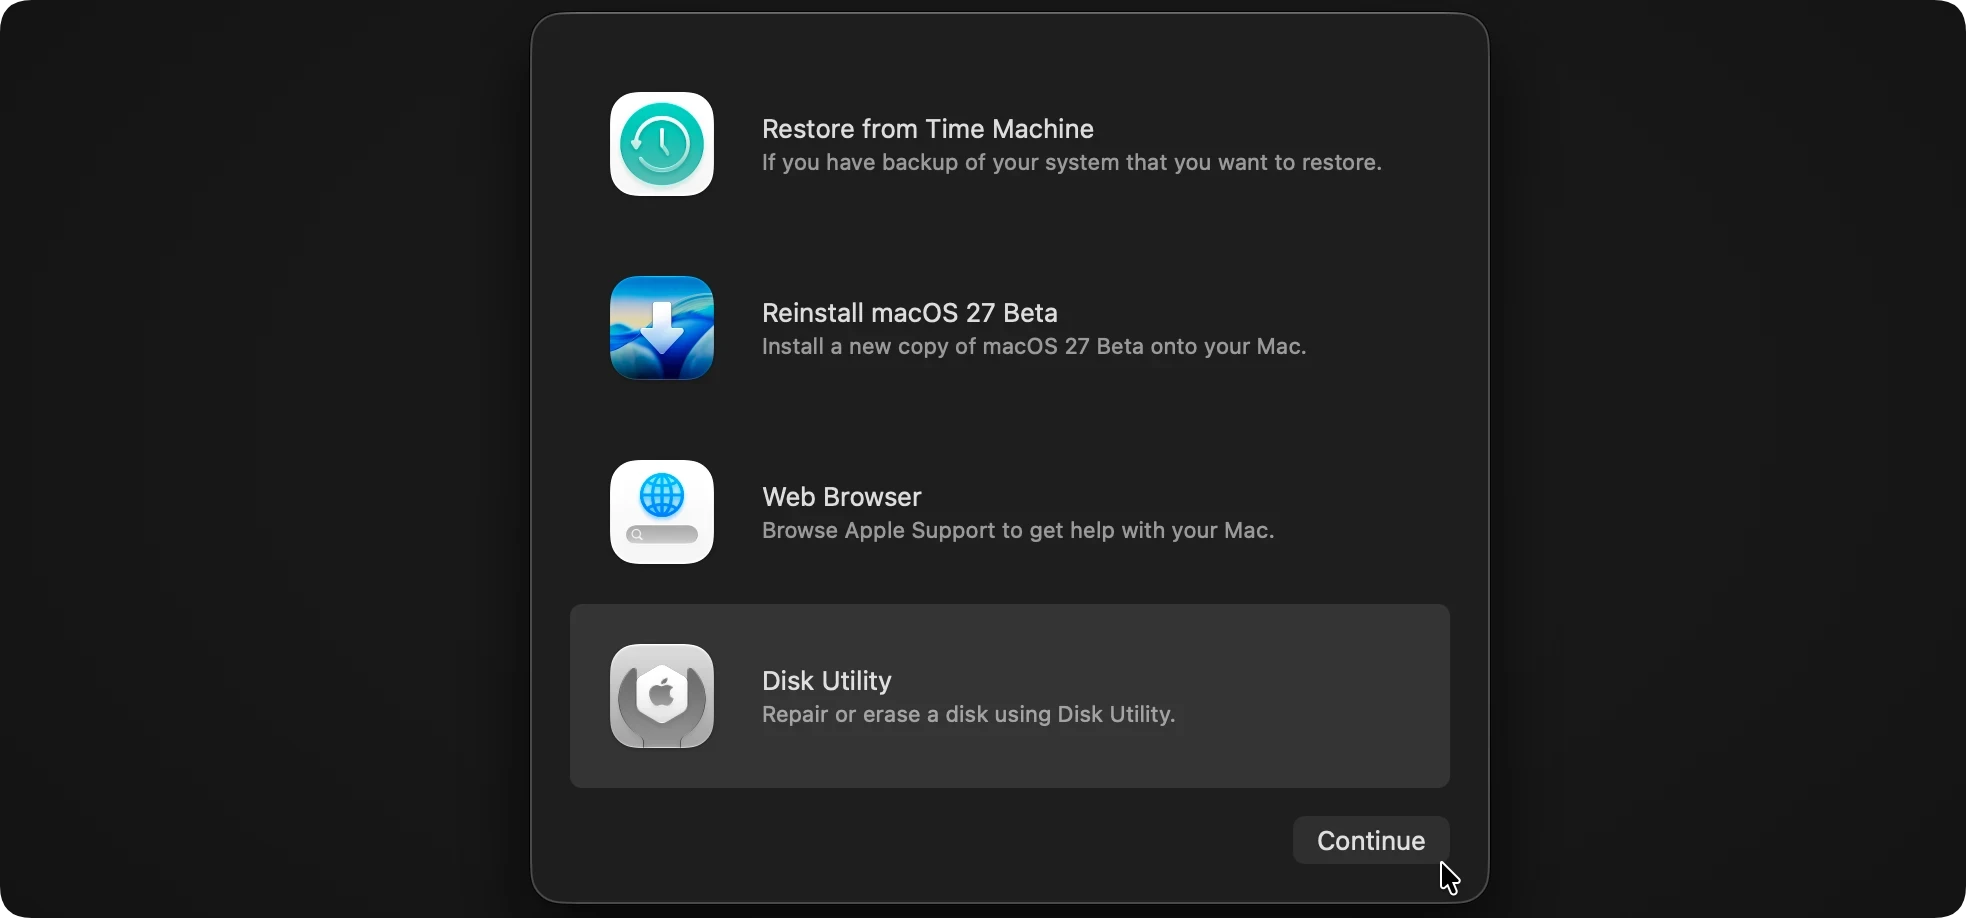
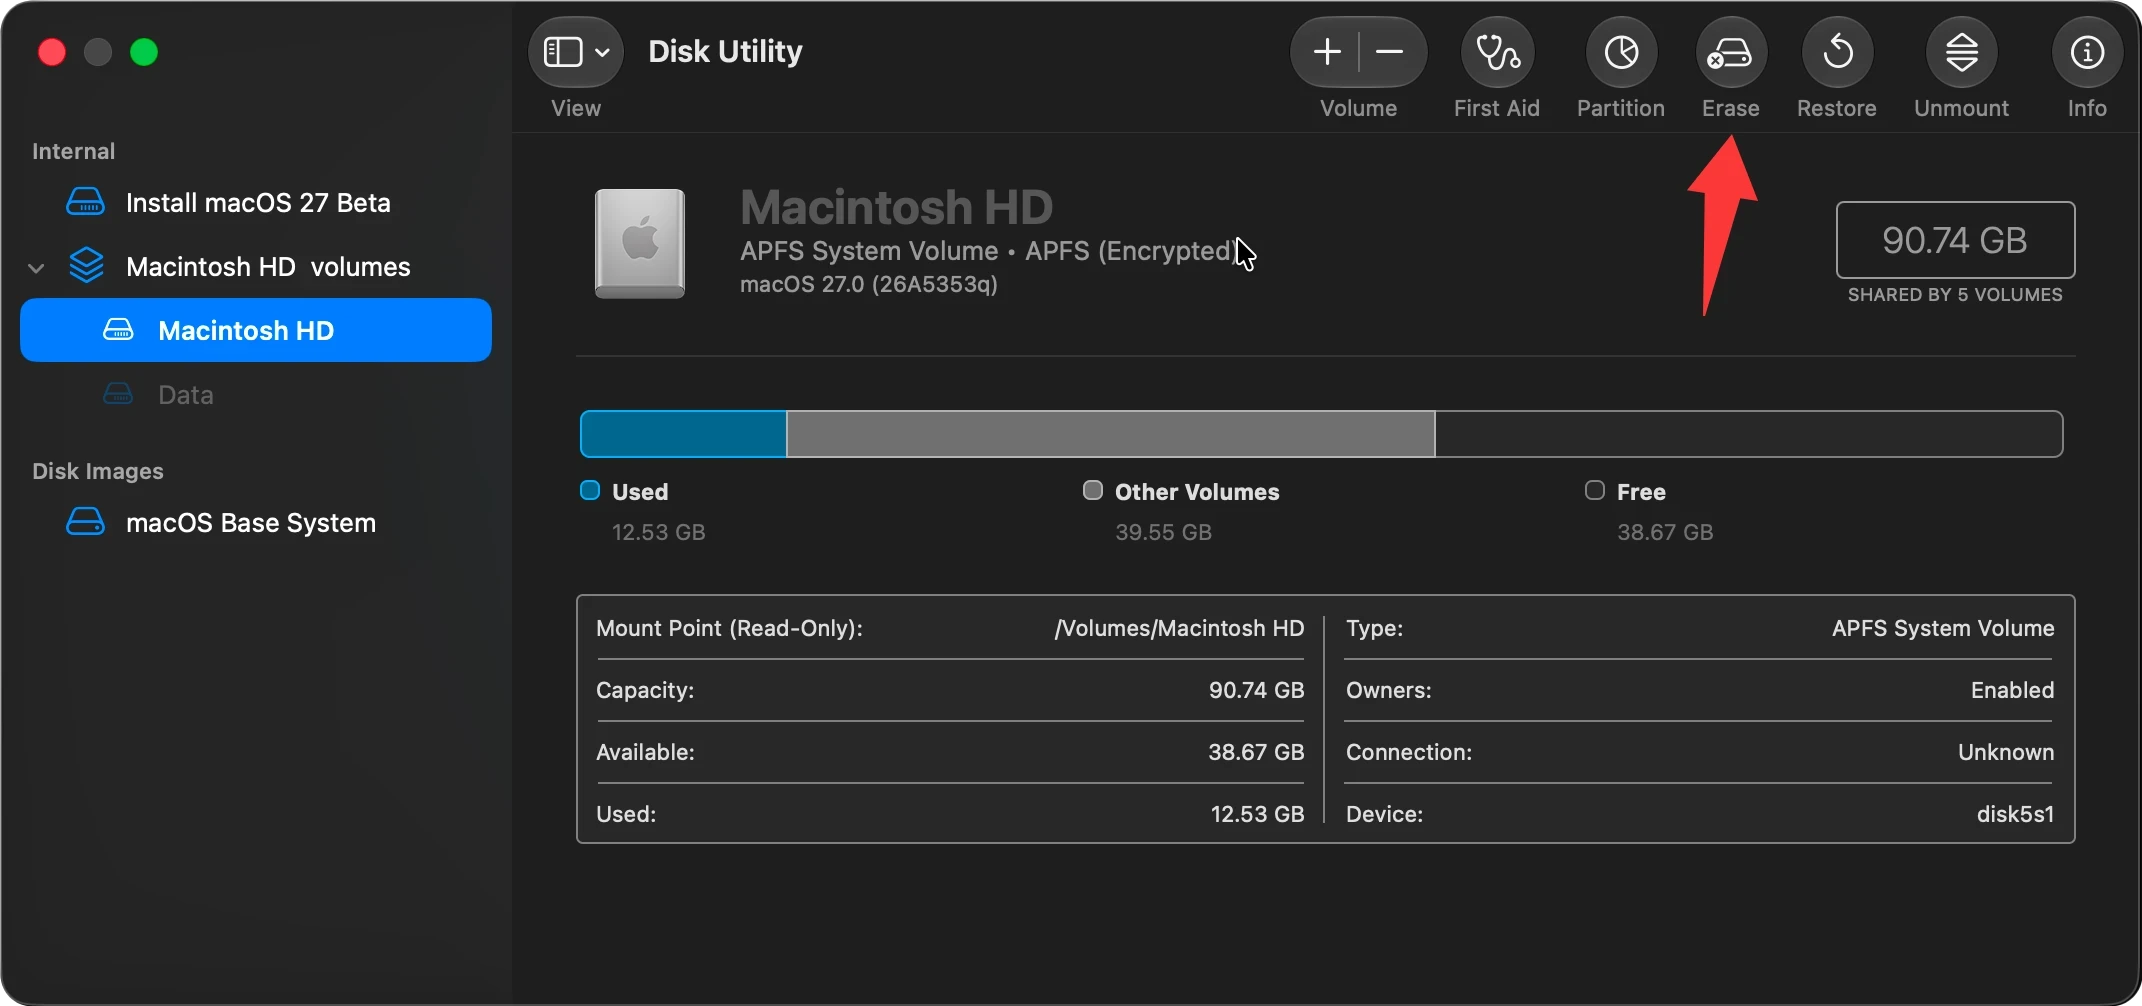
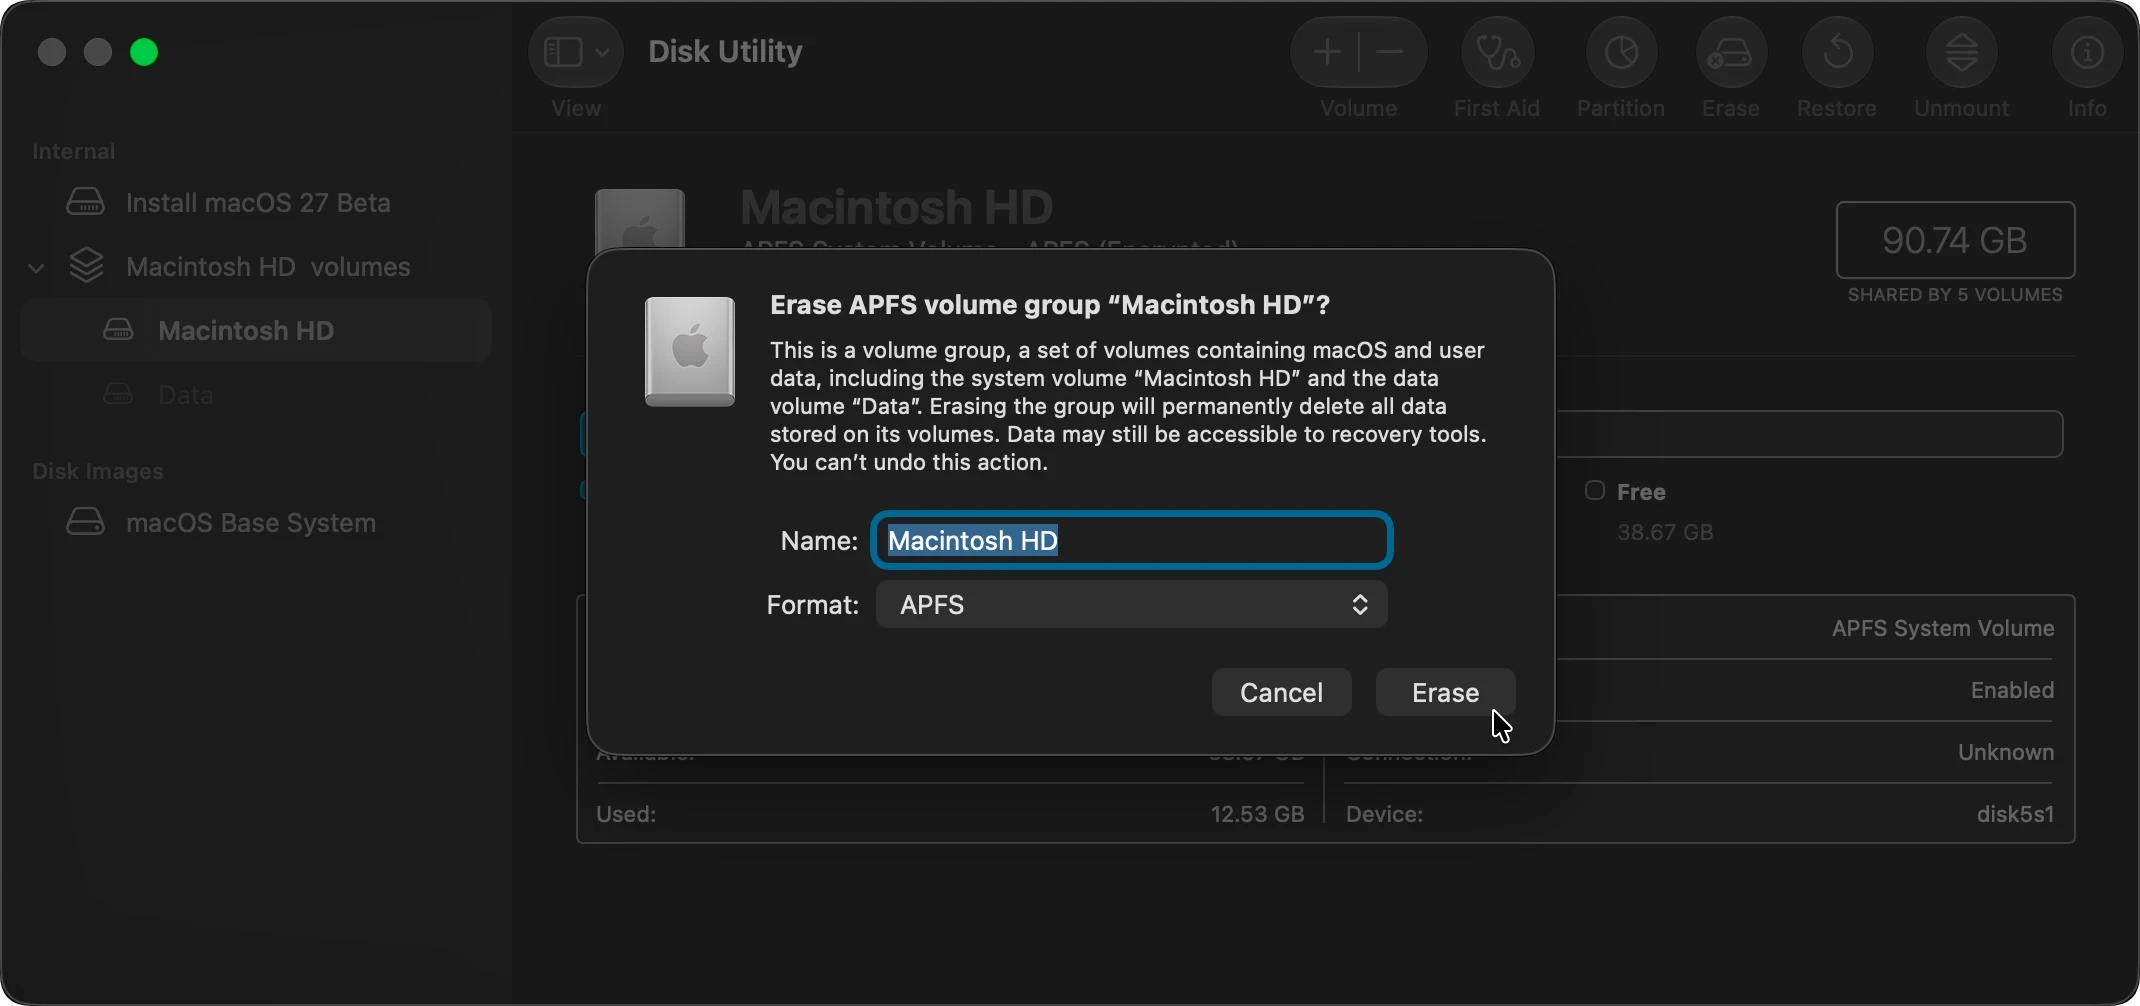
Step 3. Reinstall macOS 27 Golden Gate
Once completed, close the Disk Utility window. You can now select "Reinstall macOS" from the main menu to install a totally clean version of macOS 27 Golden Gate on your fresh drive.
Did you know that standard disk formatting routines through Disk Utility don't always protect your files from advanced, professional-grade data recovery tools? If your hard drive contains highly confidential trade secrets, critical financial records, or highly personal databases, a basic format is simply not safe enough.
To gain total peace of mind, you should use a dedicated, certified software application like Donemax Data Eraser for Mac. This professional data sanitization tool is fully optimized to run flawlessly on macOS 27 Golden Gate. It utilizes state-of-the-art overwrite algorithms (including official standards used by the US Department of Defense) to shred data so thoroughly that even professional data recovery labs cannot retrieve a single bite.
Why Choose Donemax Data Eraser for Mac?
How to Wipe a Secondary or External Hard Drive with Donemax:
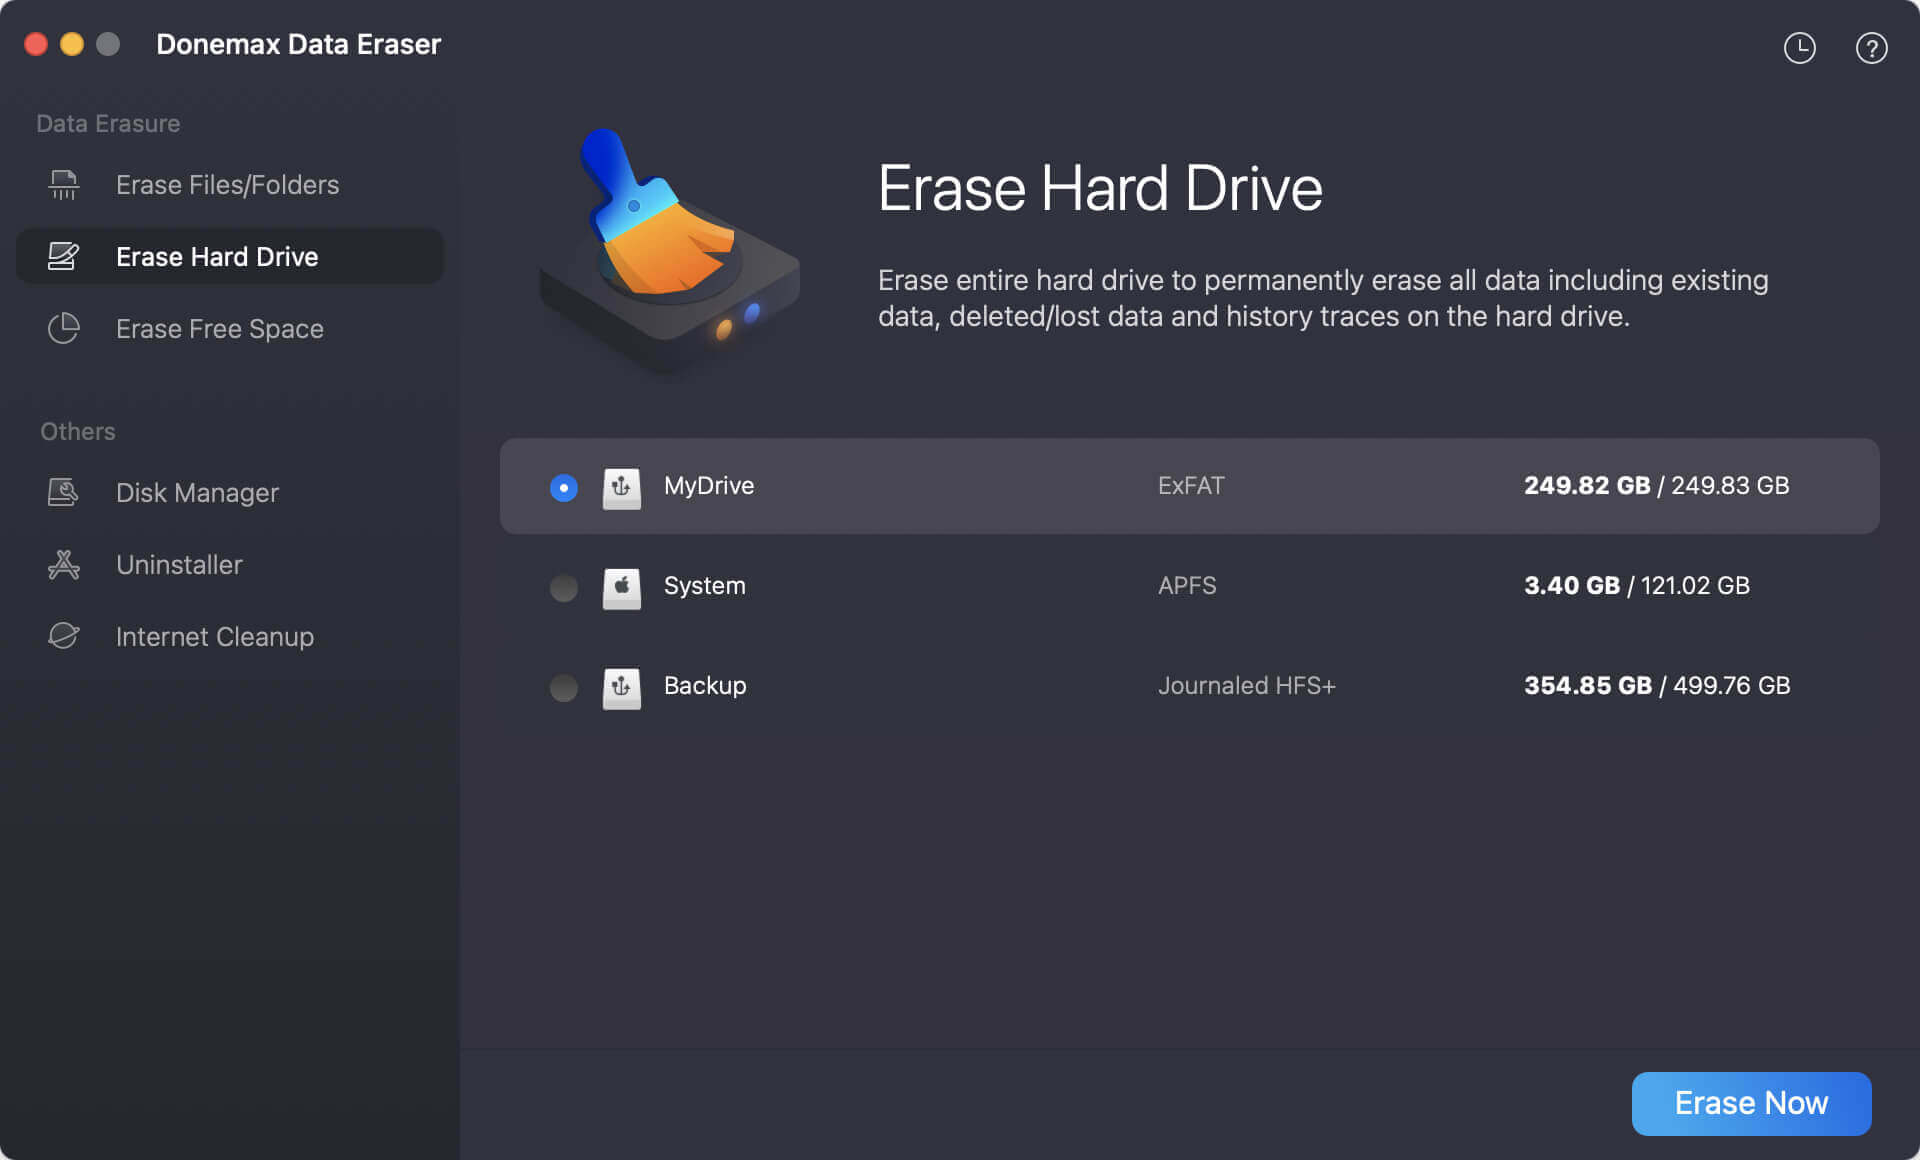
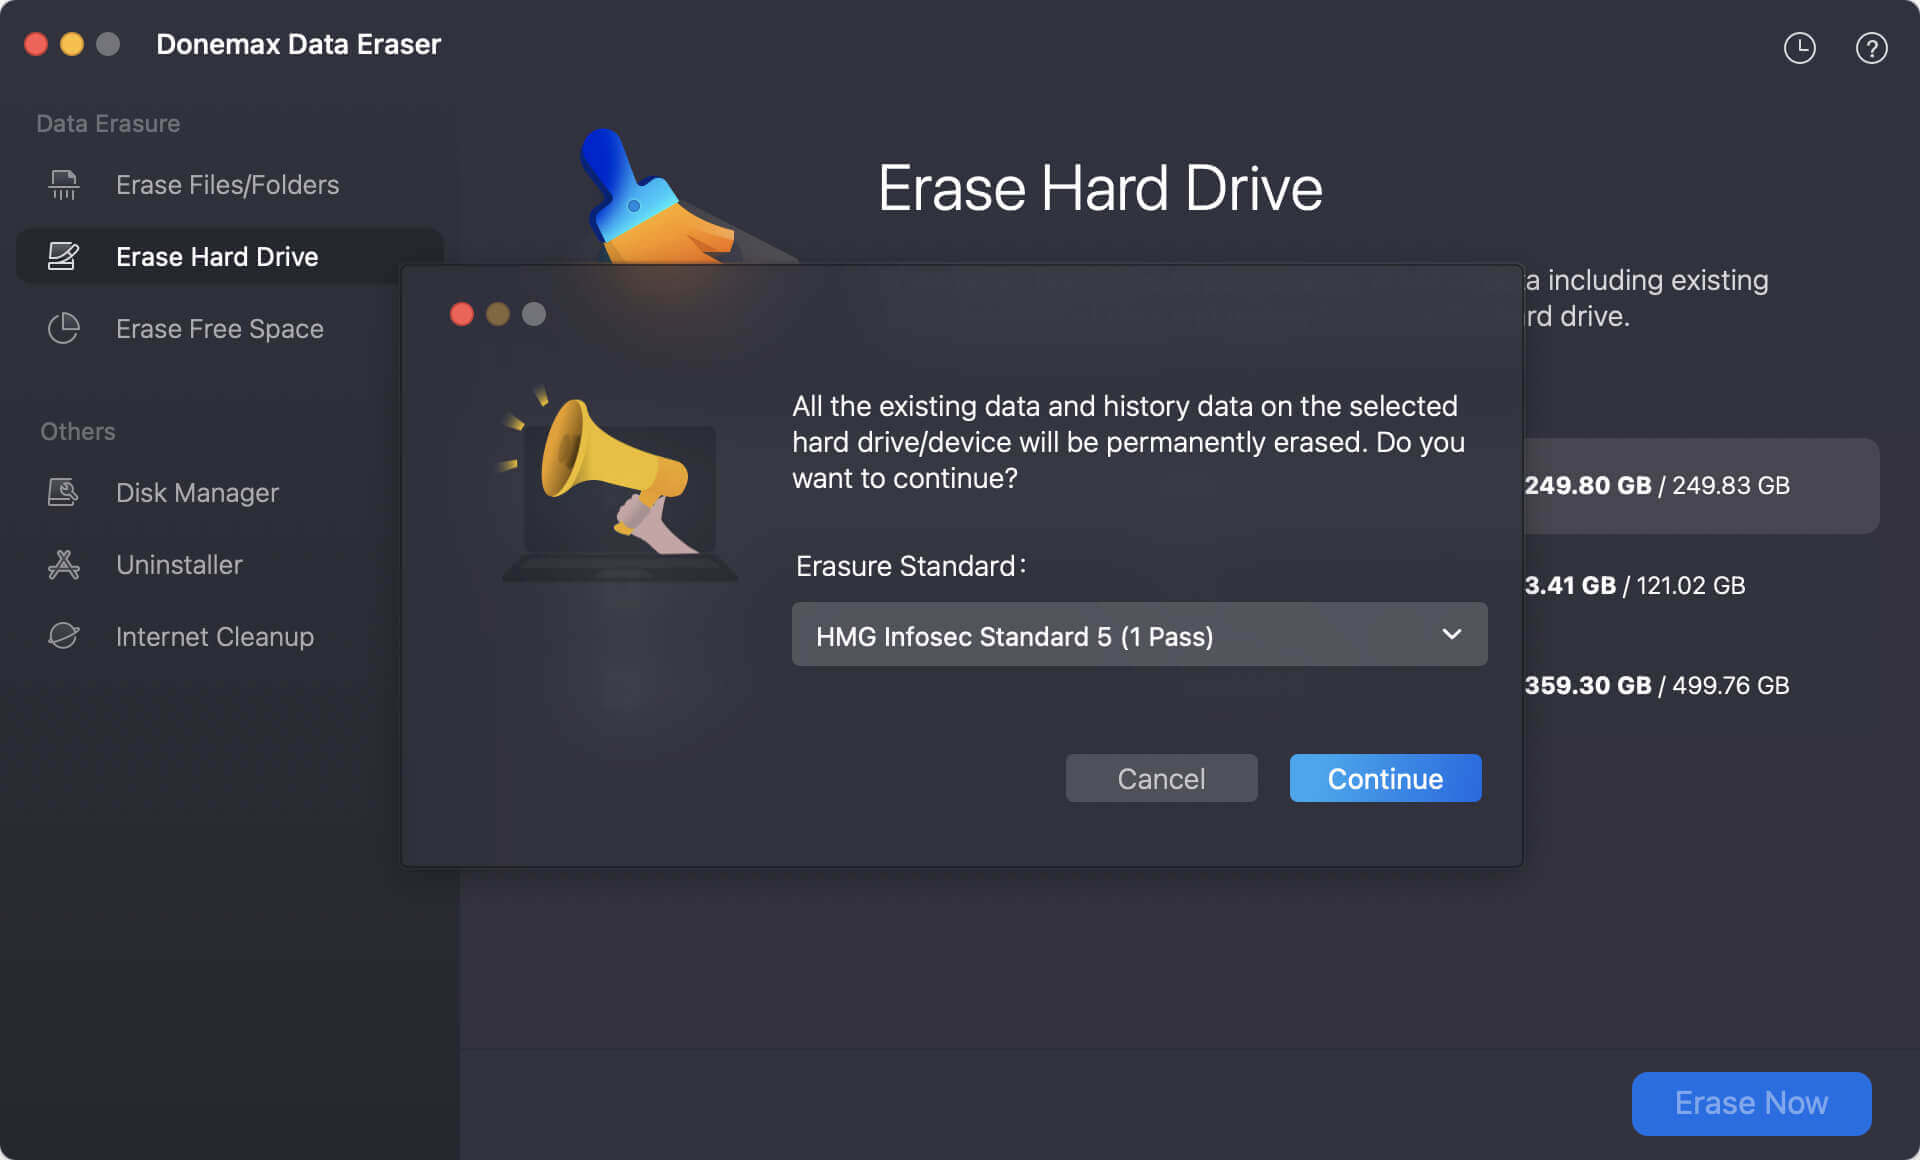
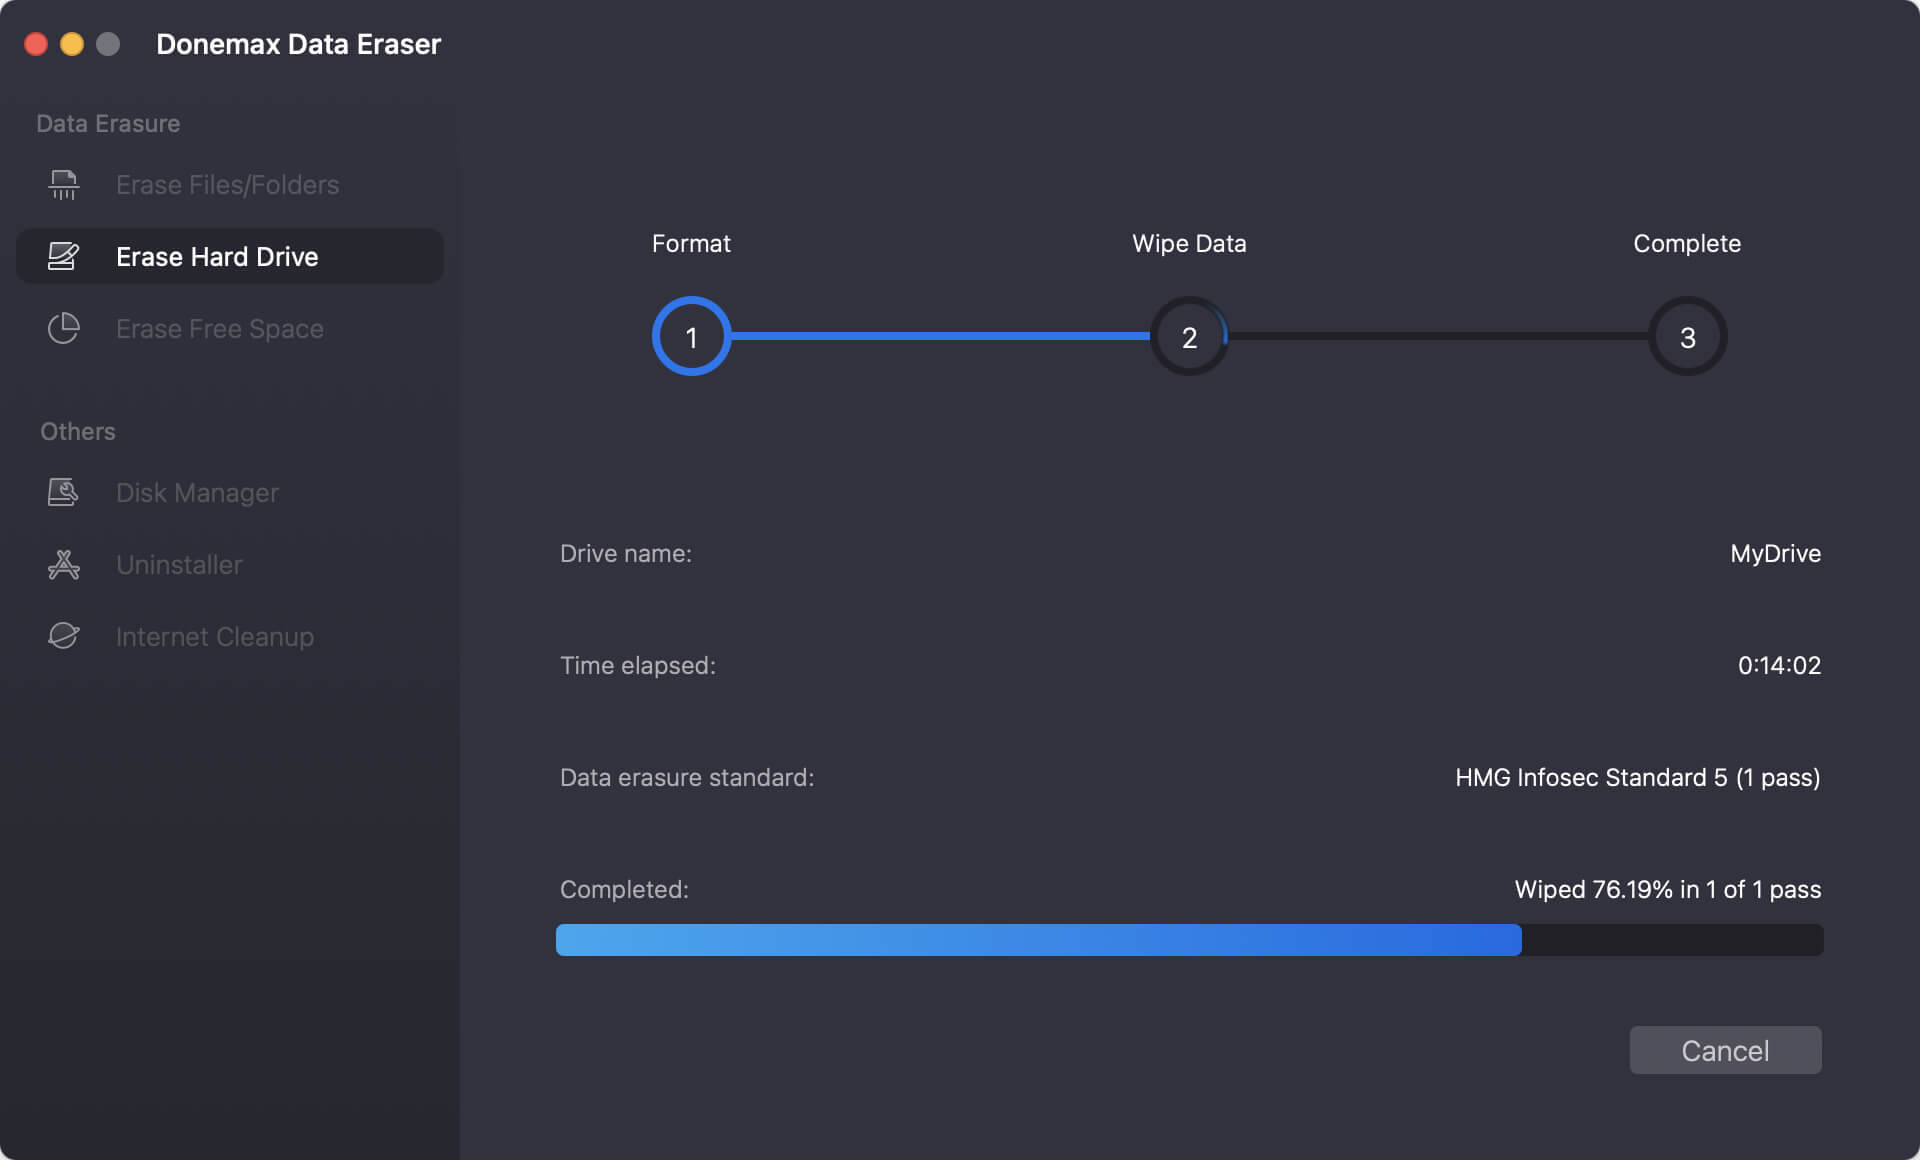
📍 Note: The software cannot wipe the startup disk of Mac directly. You can first run the Method 1 or Method 2, then use the software to wipe free space of the startup disk to make sure the data is unrecoverable.
To help you quickly decide which approach fits your personal scenario, here is a breakdown comparing our top options:
| Method | Best Scenario For | Data Recoverability | Difficulty Level |
|---|---|---|---|
Erase All Content |
Selling or trading in a modern Mac with Apple Silicon. |
Very Low (Keys Deleted) |
Very Easy (No Reinstall) |
Disk Utility (Recovery) |
Fixing system crashes or formatting secondary external storage disks. |
Medium (Standard Recovery Possible) |
Medium (Requires Reinstall) |
Donemax Data Eraser |
Disposing of highly private corporate data or confidential financial info. |
Absolutely Zero (Permanent Destruct) |
Easy (Guided Interface) |
Knowing how to wipe hard drive on macOS 27 Golden Gate is an essential skill to keep your digital life safe and secure. For most regular users who are selling a modern MacBook, utilizing the built-in Erase All Content and Settings shortcut in System Settings provides a fast, efficient, and reliable solution.
However, if you are looking to erase external storage disks, fixing core drive corruption issues, or handling highly confidential personal information, turning to advanced recovery-mode setups or professional utilities like Donemax Data Eraser for Mac is your best bet to guarantee total data destruction.
Be sure to back up your critical documents first, double-check your account configurations, and pick the formatting path that meets your needs. If you want the absolute highest level of secure data destruction, download Donemax Data Eraser for Mac today and enjoy total security!
Donemax Data Eraser for Mac
100% safe and powerful Mac data erasure program. It offers certified data erasure standards including U.S. Army AR380-19, DoD 5220.22-M ECE to securely and permanently erase data from Mac HDD/SSD and external storage devices, making data recovery impossible.
Coco Lin
Coco has been a writer and a chief programmer at Donemax software since 2018. Over 10 years of experience of writing troubleshooting articles in the software industry, she is passionate about programming and loves to providing solutions to Windows and Mac users. Also she enjoys music and palying tennis in her free time.
Gerhard Chou
In order to effectively solve the problems for our customers, every article and troubleshooting solution published on our website has been strictly tested and practiced. Our editors love researching and using computers and testing software, and are willing to help computer users with their problems