
Written byStevenUpdated on Feb 12, 2026
Transfer Data from Old Mac to New Mac: Step-by-Step Guide
Approved byGerhard Chou
Summary: With Migration Assistant or Time Machine, you can transfer accounts, applications, settings, or other data to a new Mac. Using AirDrop, iCloud, external drive, you can transfer individual files manually. If you want to transfer everything, including system data, Donemax Disk Clone for Mac can help you create an exact and bootable copy.
PAGE CONTENT:
Upgrading to a new Mac is an exciting experience, but the process of moving your data, settings, apps, and documents can seem overwhelming. Fortunately, Apple provides multiple ways to transfer data from old Mac to new one — ranging from the automatic and seamless Migration Assistant to manual file transfers via AirDrop or using Mac disk clone software. In this guide, we'll walk you through each method, along with preparation tips, troubleshooting advice, and post-transfer steps.
Preparation Before Transferring Data Between Macs
Before initiating any data transfer, take the following steps to ensure a smooth process:
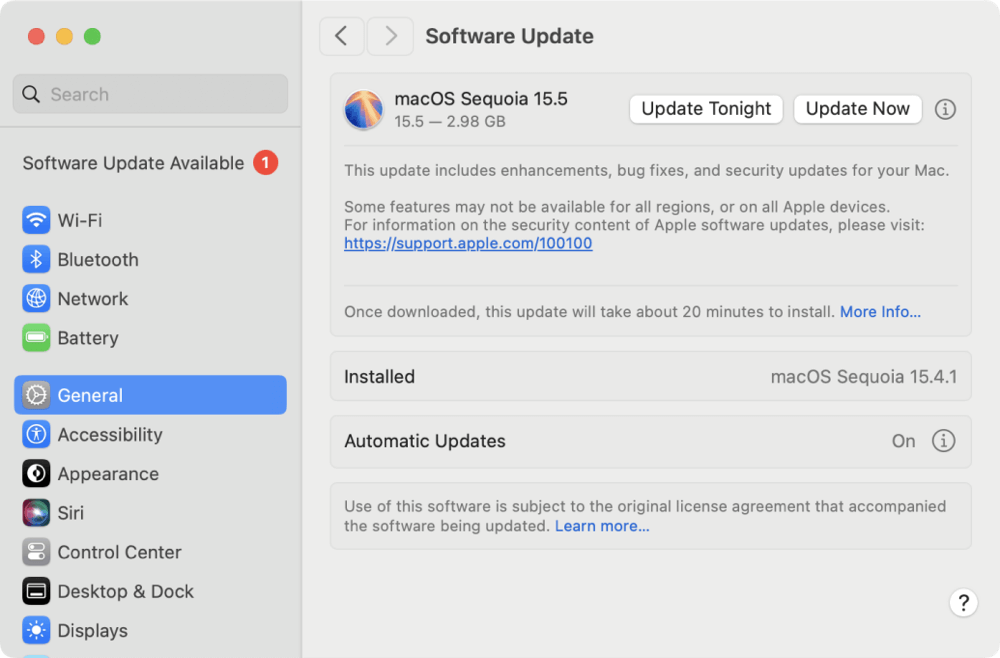
1. Check macOS Compatibility
Ensure both your old and new Macs are running compatible versions of macOS. For best results, update both devices to the latest available version using System Settings → General → Software Update.
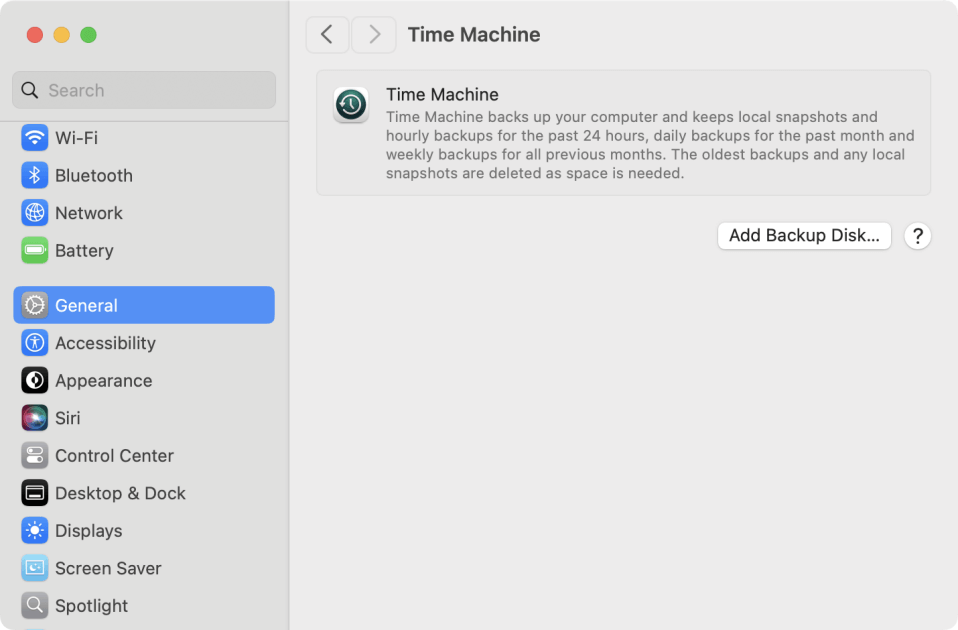
2. Back Up Your Old Mac
Before making any changes or beginning the transfer, it's essential to create a backup using Time Machine, Apple's built-in backup tool, or a third-party backup solution.
- Connect an external hard drive
- Open System Settings → General → Time Machine
- Select your drive by clicking Add Backup Disk.
- Start the backup
![transfer data from old Mac to new one]()
3. Ensure Both Macs Have Power
Keep both devices plugged into power sources to avoid interruptions during the transfer.
4. Connect to Wi-Fi or Use Ethernet
A fast and stable network connection is essential. For large transfers, a direct Ethernet or Thunderbolt cable connection will significantly speed up the process.
6 Method to Transfer Data between Macs
Use Migration Assistant to Transfer Mac Data

Apple's Migration Assistant is the most efficient and seamless tool to transfer everything from your old Mac to a new one. It's built directly into macOS and is designed to copy your files, apps, user accounts, and system settings without manually copying each folder. This method is highly recommended for most users, especially those switching to a new Mac for the first time.
What Can Migration Assistant Transfer?
When using Migration Assistant, you can choose to transfer the following:
- User accounts (including desktop files, documents, photos, videos)
- System settings(Wi-Fi settings, wallpaper, dock layout, etc.)
- Installed applications (App Store and most third-party apps)
- Mail, contacts, calendars, Safari bookmarks
- Keychain passwords and saved Wi-Fi credentials
- iTunes/Music and Photos libraries
- Network and printer settings
💡 Note: Some system extensions, drivers, and incompatible apps may not transfer perfectly if they're not supported on the new macOS version.
How to Use Migration Assistant – Step-by-Step
Step 1: Disable firewall or antivirus software temporarily (this can interfere with device detection). Connect both devices to power and the same Wi-Fi (or ideally, use an Ethernet or Thunderbolt cable for faster transfer).
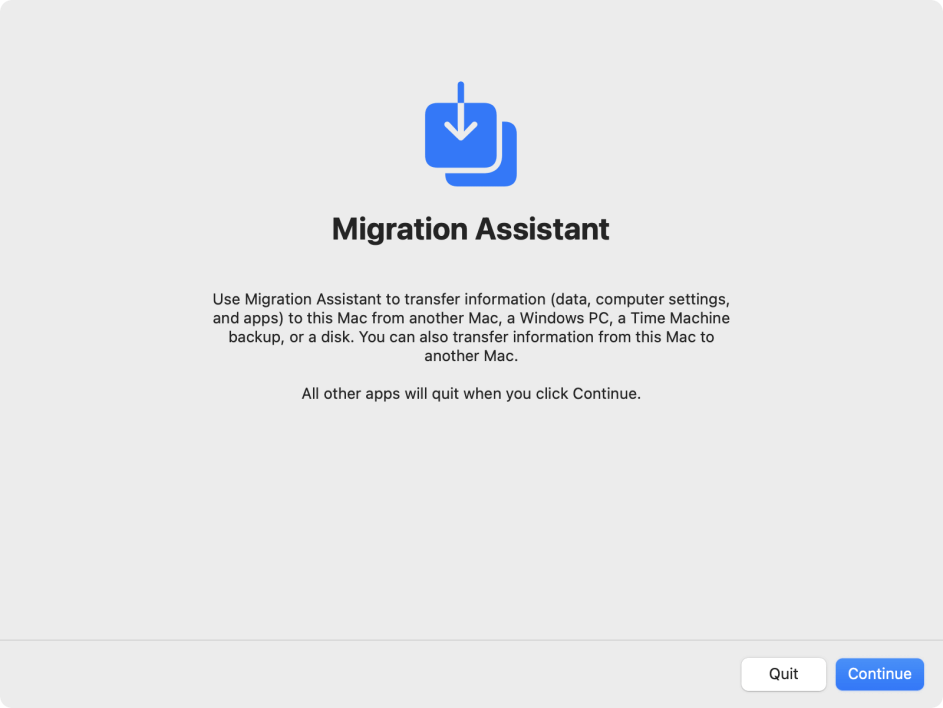
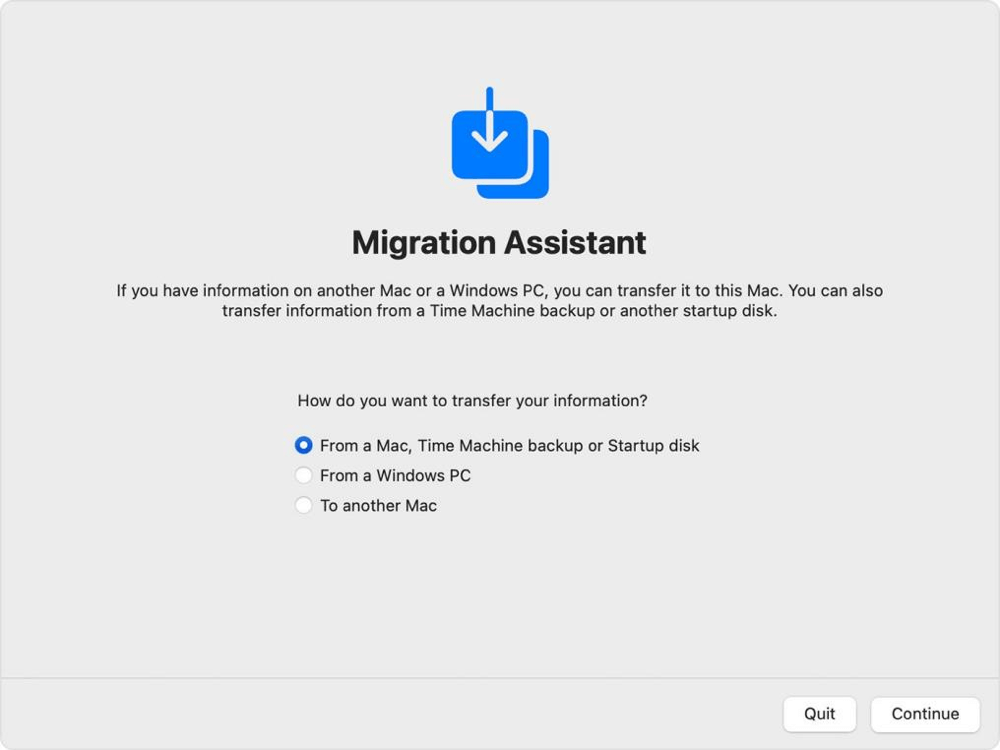
Step 2: Open Migration Assistant on both Macs, go to Migration Assistant from Applications → Utilities. You may be prompted to close all other apps. Click Continue and authenticate as an administrator if asked.
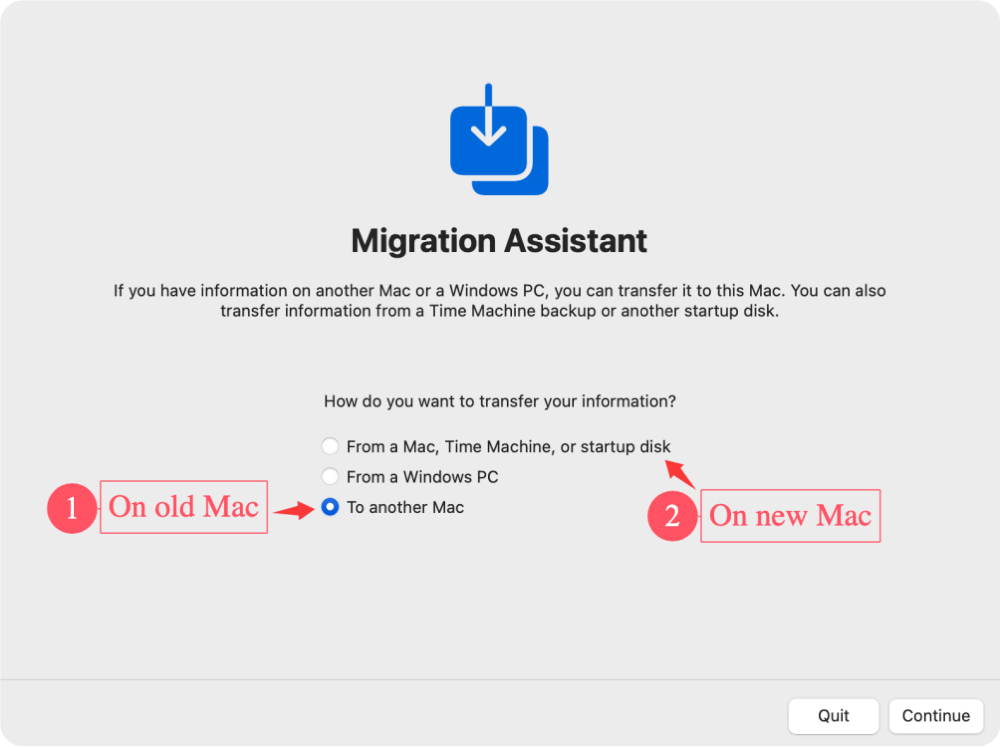
Step 3: Select transfer role. On the old Mac, select "To another Mac". On the new Mac, select "From a Mac, Time Machine backup, or startup disk" Click Continue on both.
Step 4: Connect and authenticate. Wait for the new Mac to detect the old Mac. A security code will appear on both screens. Confirm that the code matches and click Continue.
💡 Tip: If your Macs are not detecting each other, switch to a direct cable connection and ensure Bluetooth and Wi-Fi are turned on for both devices.

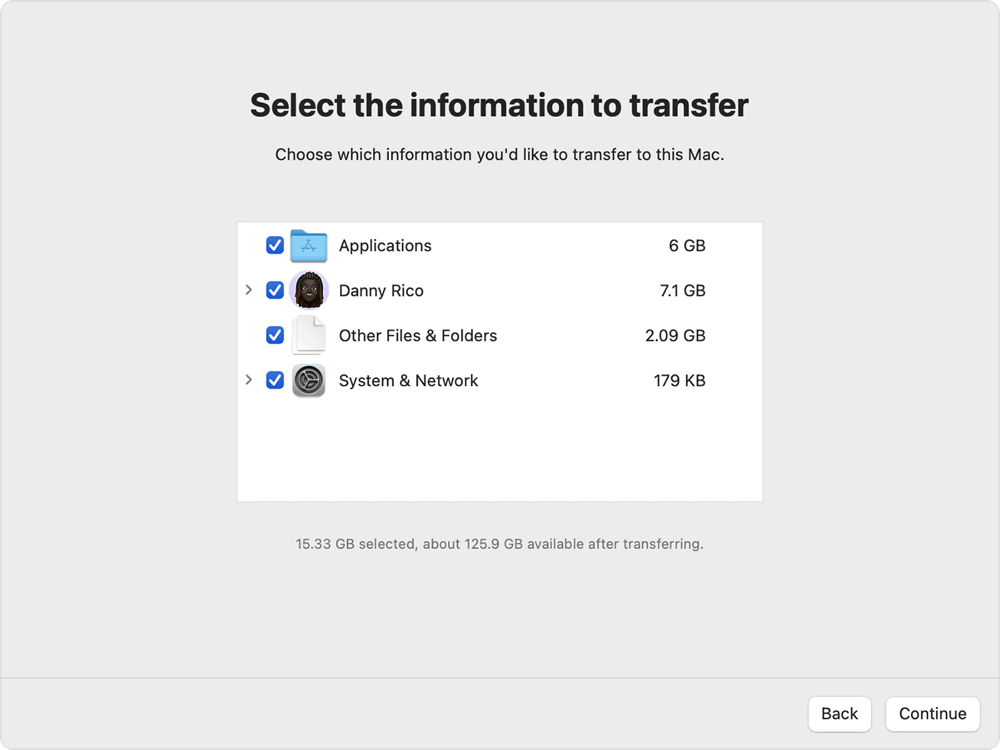
Step 5: Choose what to transfer. After connection, the new Mac will scan the old Mac and present a list of transfer options. You'll see categories like "User accounts," "Applications," "Other files and folders," "Computer and network settings." You can select or deselect anything you don't want to transfer.
💡 Tip: Deselect large folders (like Movies or Downloads) if you're short on space or want a quicker migration.
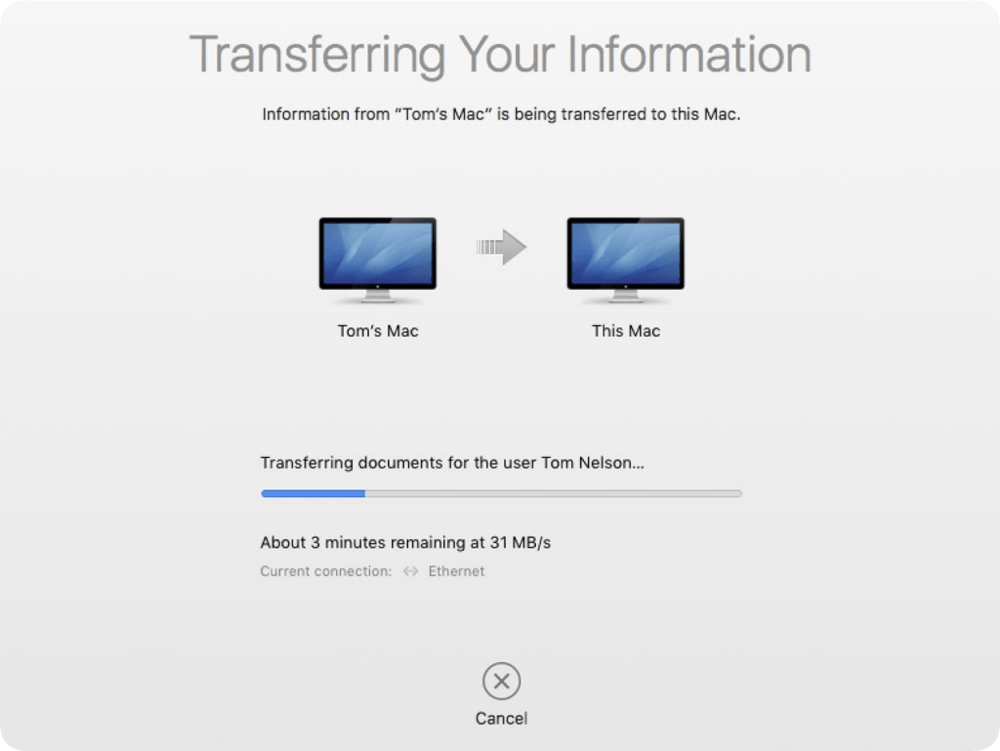
Step 6: Start the migration. For the transfer to start, click Continue. The process may take anywhere from 30 minutes to several hours, depending on: data size, connection speed, number of user accounts and apps. Your old Mac will display the estimated remaining time.
💡 Tip: Avoid interrupting the transfer. Don't close the lid, unplug the devices, or restart them.
Step 7: Complete and restart. Once the transfer is complete, the new Mac will restart automatically. You'll be prompted to log into your user account (migrated from the old Mac).
Review your desktop, files, apps, and settings to ensure everything has been transferred successfully.
Pro Tips for Migration Assistant
- Use a Thunderbolt 3 cable if possible – it's significantly faster than Wi-Fi.
- If you're upgrading to an Apple Silicon Mac, ensure the old Mac isn't running outdated Intel-only software.
- Only one user account can be active at a time during transfer—additional users will be added automatically.
- Don't log into iCloud or other accounts until after the migration completes to avoid conflicts.
What If You Already Set Up Your New Mac?
You can still use Migration Assistant after the initial setup. Just follow the same steps as outlined above. It will add the transferred user account as a separate login alongside your existing setup.
Use Time Machine backup to Transfer Data to new Mac
If your old Mac is no longer available or you prefer working from a backup, Time Machine offers a reliable alternative.
Step 1: Create a Time Machine backup (If you didn't back up the old Mac before). Connect an external drive to your old Mac. Use Time Machine to back up your system.
Step 2: Plug the drive into your new Mac before you begin the setup process.
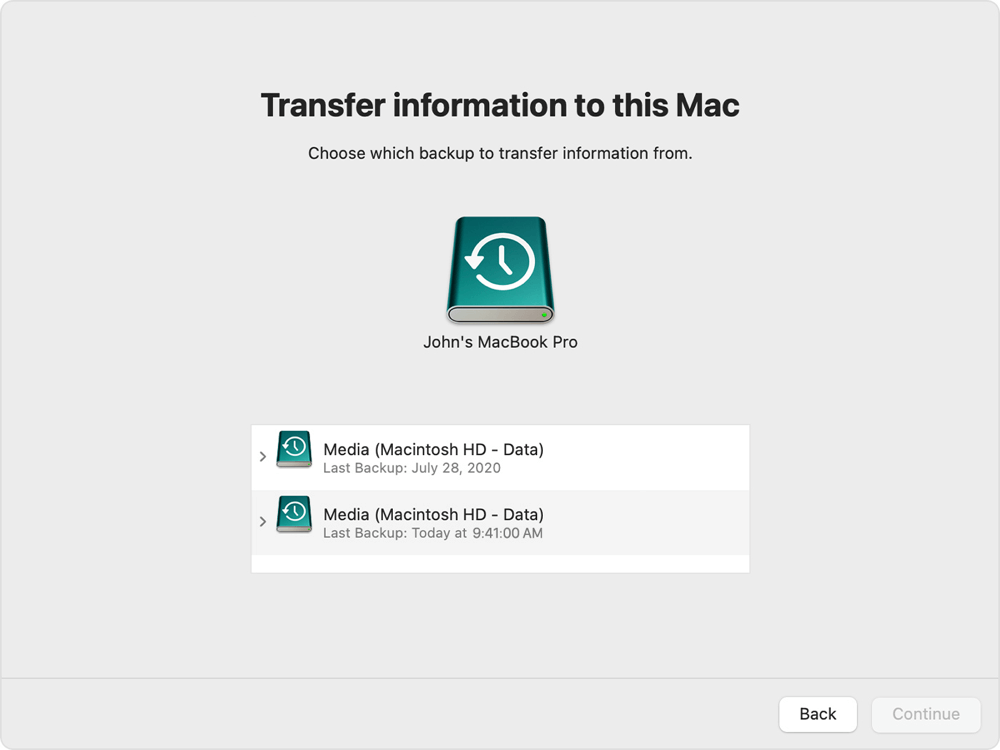
Step 3: When you first turn on the new Mac, proceed through initial setup prompts. At the Migration Assistant screen, choose From a Time Machine backup.
Step 4: Select your external drive and choose a backup. Pick the files, applications, and settings to restore.
Step 5: Once completed, your new Mac will resemble your old setup, with the same files, apps, and user accounts.
Clone the old Mac to the new Mac [Recommended Solution]
For the users who want to migrate everything including the system, applications, settings and personal data, it's better to clone the old Mac to the new Mac directly. It can ensure to make the new Mac exact as the old Mac.
To ensure the new Mac will boot up normally, it's essential to use a reliable disk clone tool for Mac. Here we recommend Donemax Disk Clone for Mac. Then software can make a bootable clone for the old Mac and then you can use the cloned drive to boot the new Mac without a problem.
Donemax Disk Clone for Mac
- Professional disk clone software for macOS.
- Make an exact and bootable copy of the Mac.
- Securely clone everything on Mac.
Steps to clone the old Mac to new Mac:
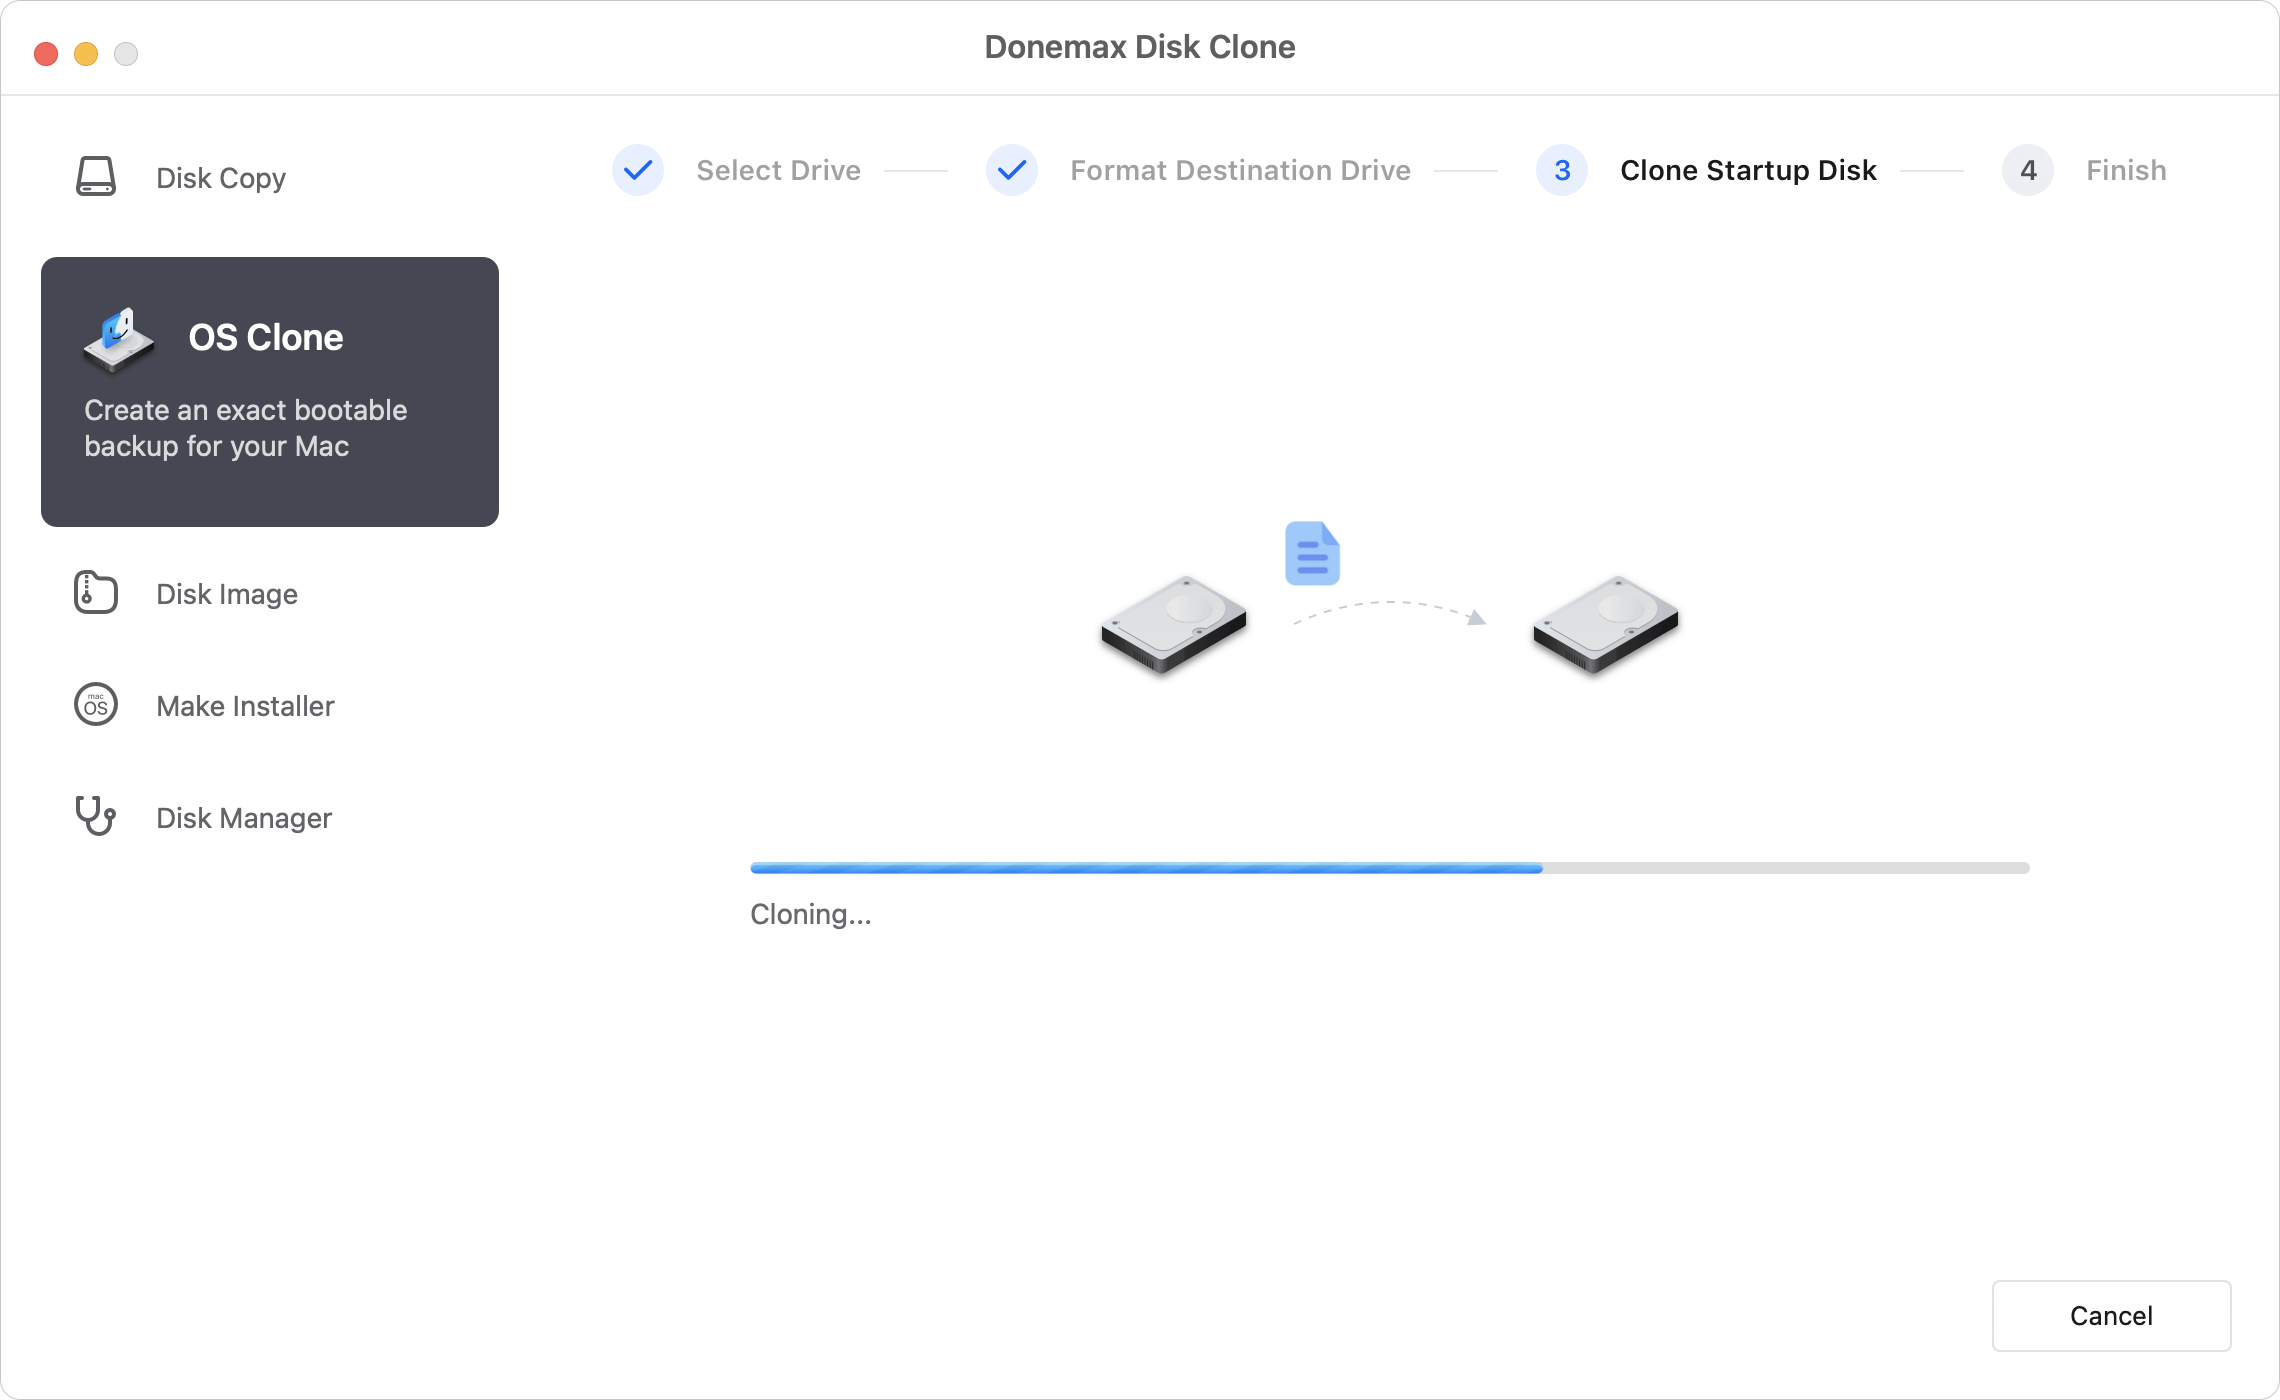
Step 1. Run the software and connect an new disk to the old Mac. Start the software and choose OS Clone mode. The system disk will be selected as source by default. Just select the new empty disk as destination.

Step 2. After clicking on Clone Now button, the software will start to clone everything from the old Mac to the destination disk.
Step 3. Once the clone is done, you can disconnect the cloned disk from the old Mac. Then connect the disk to the new Mac and set it as startup disk. Then you can boot the new Mac from the cloned disk.

Best Use Case:
Want to use the same system and ensure everything on the new Mac is the same as the old Mac.
Use AirDrop for selective transfers
If you only need to move a few files and don't want to copy your entire system, AirDrop is a fast and wireless option.
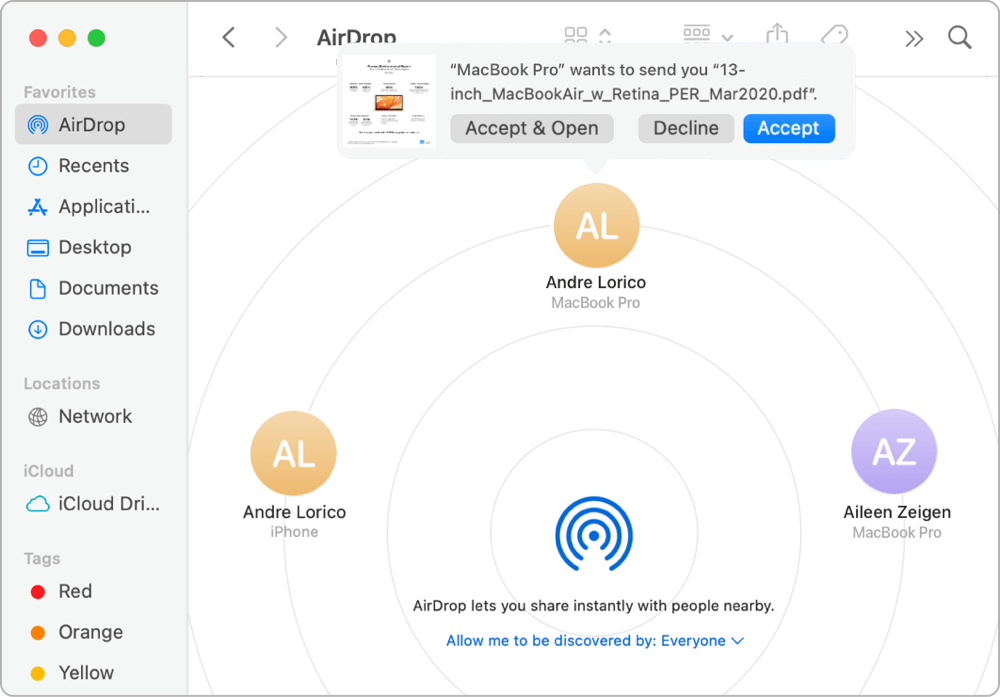
Step 1: Enable AirDrop on both Macs: Open Finder. Click Go → AirDrop, set both devices to be discoverable by Everyone or Contacts Only.

Step 2: Drag the files from your old Mac's Finder window to the AirDrop icon representing your new Mac. Accept the transfer on the new Mac.
Best Use Case:
AirDrop is perfect for transferring a few photos, documents, or small folders—not for system-wide migration.
Use iCloud or other cloud services
Cloud storage services offer another convenient, cross-device solution.
1. iCloud:
- Enable iCloud Drive on the old Mac via System Settings → Apple ID → iCloud.
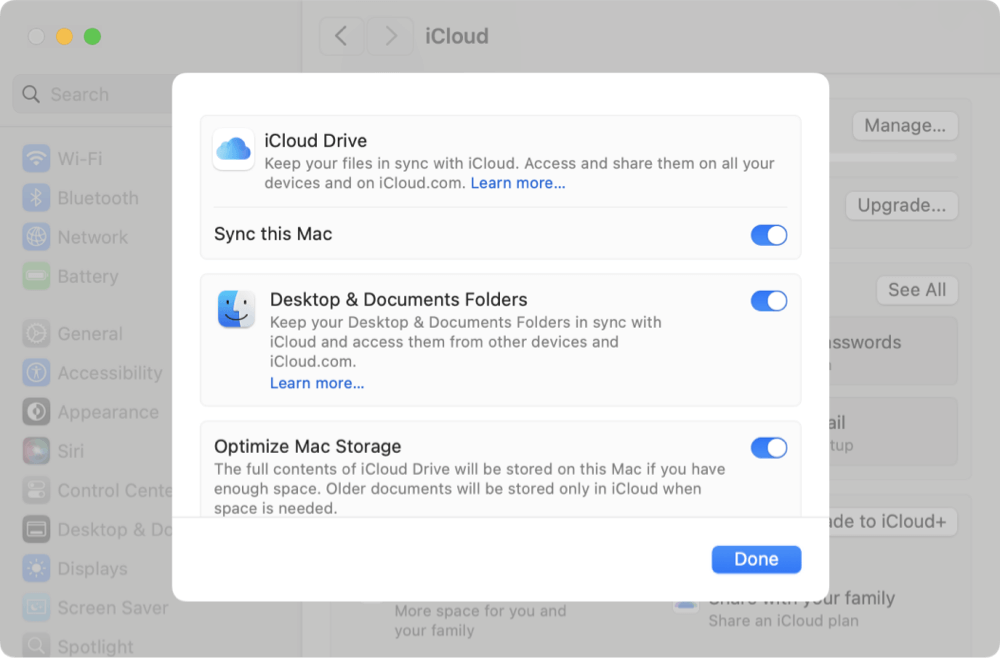
![transfer data from old Mac to new one]()
- Click Drive and switch on Sync this Mac and choose the items you want to sync.
![transfer data from old Mac to new one]()
- Sign into the same Apple ID on your new Mac to access everything.
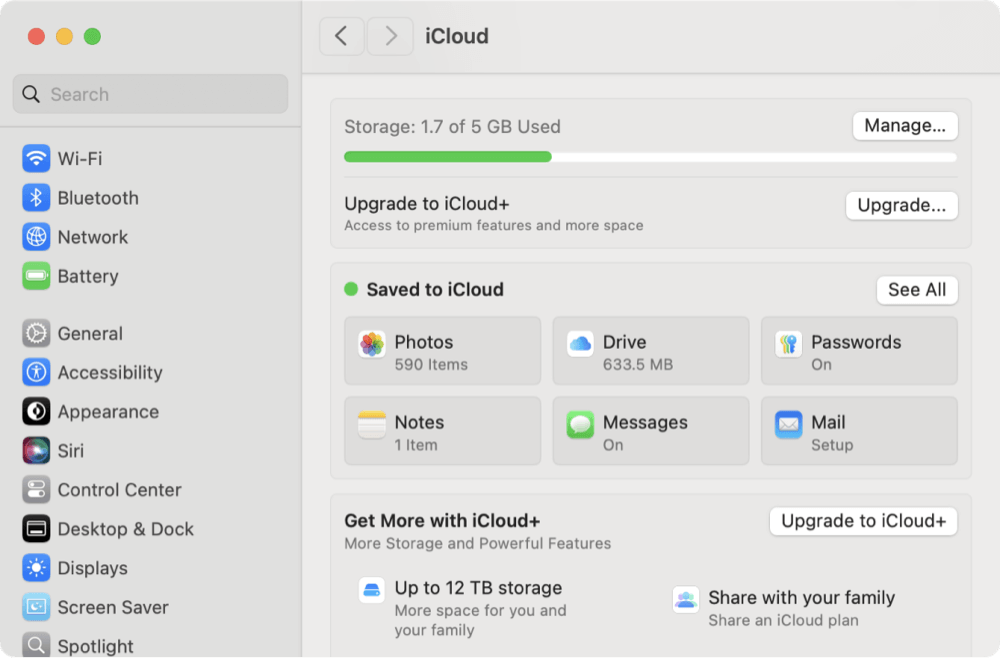
💡 Note: Ensure you have enough storage—free iCloud accounts offer 5GB by default.
2. Other Cloud Services:
You can also use:
- Dropbox
- Google Drive
- Microsoft OneDrive
Install the apps on both Macs, upload your files from the old Mac, and then download them on the new Mac.
Transfer Data using External Drive on Mac
For users who prefer manual control or are transferring large amounts of data offline, external storage is a dependable method.
Step 1: Use a USB, Thunderbolt, or SSD drive formatted in exFAT or Mac OS Extended (Journaled).
Step 2: Open Finder.Drag files, folders, or entire directories (Documents, Downloads, etc.) onto the drive.
Step 3: Plug the drive into the new Mac. Copy files to the appropriate locations.
Best Use Case:
Ideal when migrating specific folders, or when internet access is unavailable.
Troubleshooting Common Mac Data Transfer Issues
Despite Apple's robust migration tools, issues may arise. Here are common problems and solutions:
1. Migration Assistant Can't Detect Old Mac
- Ensure both Macs are on the same network.
- Restart both devices.
- Temporarily disable firewall or antivirus software.
2. Slow or Stuck Transfer
- Use a wired connection (Ethernet or Thunderbolt) instead of Wi-Fi.
- Reduce the amount of data being transferred.
3. Transferred Apps Not Working
- Some apps (especially 32-bit ones) may not be compatible with macOS Ventura or later.
- Check for updated versions on the App Store or developer website.
4. Missing Files or User Accounts
- Double-check what was selected during transfer.
- Consider restoring again using Time Machine for completeness.
Post-Checklist after Transferring Data from Old Mac to New Mac
Once your data is on the new Mac, it's time to finalize setup and ensure everything runs smoothly.
Verify Data Integrity:
- Open critical documents.
- Check Photos, iTunes (Music), and Mail libraries.
Reinstall or Update Applications:
- Some apps may require reactivation.
- Download the latest versions from the App Store or developer sites.
Reconnect iCloud and Apple ID:
- Go to System Settings, click the account (or Apple ID) and ensure all services are active.
Reset System Settings (if needed):
- Reconfigure Trackpad, Display, Notifications, and other preferences if they didn't carry over.
Sync with Devices:
- Re-pair Bluetooth accessories.
- Authorize your new Mac in Music → Account → Authorizations → Authorize This Computer.
Conclusion
Transferring data from an old Mac to a new one doesn't have to be daunting. Apple offers multiple tools, each suited to different scenarios—whether you want to clone your entire system with Migration Assistant or simply copy a few files using AirDrop or external storage.
For the smoothest and most complete migration, Migration Assistant or Time Machine is highly recommended. But if you're a hands-on user or prefer selective transfers, manual methods like iCloud or an external drive offer flexibility. Another software Donemax Disk Clone for Mac offers a reliable way to transfer Mac data by creating a bootable and full clone.
Whichever path you choose, remember to backup first, ensure your macOS versions are up to date, and double-check everything once the transfer is done. That way, you can enjoy your new Mac with all your data right where you left it.
Donemax Disk Clone for Mac
An award-winning disk cloning program to help Mac users clone HDD/SSD/external device. It also can create full bootable clone backup for Macs.
Related Articles
- Jul 15, 2024How to Create A Bootable Clone for macOS Ventura?
- Jul 17, 2025Best Mac Cloning Software for Disk Replacement and Backup
- Jun 16, 2023How to Clone An Existing Hard Drive on Mac?
- Jan 20, 2026Easy Ways to Back up Mac Startup Disk
- Feb 22, 2024How to Clone Mac SSD to A HDD?
- Apr 06, 2025How to Create a Bootable Clone for MacBook Pro? [M1/M2/M3/M4 Supported]

Contributing Writer
Steven
Steven has been a senior writer & editor of Donemax software since 2020. He's a super nerd and can't imagine the life without a computer. Over 6 years of experience of writing technical solutions and software tesing, he is passionate about providing solutions and tips for Windows and Mac users.

Editor in chief
Gerhard Chou
In order to effectively solve the problems for our customers, every article and troubleshooting solution published on our website has been strictly tested and practiced. Our editors love researching and using computers and testing software, and are willing to help computer users with their problems