
Written byStevenUpdated on Jun 09, 2025
How to Open a BitLocker Encrypted USB Drive/External Disk/SD Card on Mac?
Approved byGerhard Chou
PAGE CONTENT:
In today's digital world, encryption is vital for securing sensitive information. One of the most popular encryption tools is BitLocker, a full-disk encryption feature built into Windows systems. However, if you attempt to open a BitLocker-encrypted USB drive, external disk, or SD card on Mac, you might be surprised to find that macOS cannot open it natively.
So, what do you do when you need to access an important BitLocker-encrypted drive on a Mac? This guide will walk you through everything you need to know — from why the issue happens to practical solutions you can use immediately.
Can Mac Open BitLocker Drives Natively?
The short answer is no. macOS does not support BitLocker encryption by default.
BitLocker is a Microsoft-developed feature, tightly integrated with the Windows operating system. It uses a proprietary encryption algorithm and management system, which macOS systems simply cannot interpret without third-party assistance.
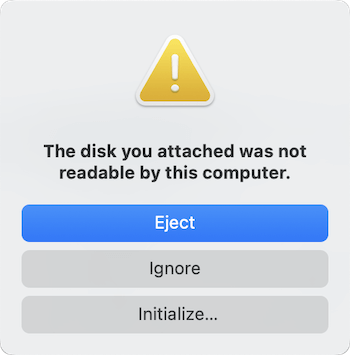
When you connect a BitLocker-encrypted drive to your Mac, you may see a prompt saying the disk cannot be read, or it might not appear at all in Finder. This incompatibility stems from:
- Different file system and encryption standards.
- Lack of built-in BitLocker support on macOS.
This doesn't mean you're stuck. It just means you'll need specialized software or alternative methods to access your encrypted data on a Mac.
Preparations Before Opening a BitLocker Drive on Mac
Before attempting to unlock or access a BitLocker drive on your Mac, it's wise to make some quick preparations:
1. Check the Drive's Health
If the drive is physically damaged or corrupted, no tool will successfully unlock it. Connect it to a Windows PC and ensure it's healthy.
2. Have Your Password or Recovery Key Ready
Without the correct BitLocker password or 48-digit recovery key, you won't be able to decrypt the drive, even with third-party software.
3. Backup Data If Possible
If you still have access to a Windows machine, consider backing up the data first. Accessing encrypted drives always carries a small risk of corruption.
4. Ensure Enough Space on Mac
If you plan to copy files from the drive to your Mac, ensure you have enough available storage for smooth data transfer.
Methods to Open BitLocker Encrypted Drives on Mac
Now, let's dive into the practical solutions for accessing BitLocker-encrypted drives on macOS.
Method 1. Use a Professional BitLocker Reader for Mac
Recommended for most users, using a professional BitLocker reader is by far the easiest, safest, and most efficient way to open a BitLocker-encrypted USB drive, external disk, or SD card on a Mac.
Since macOS does not natively recognize BitLocker encryption, specialized third-party software acts as a "bridge" that allows you to unlock, mount, and access the encrypted drives without having to format or permanently decrypt them.
These programs offer user-friendly interfaces and strong security protocols, ensuring you can access your sensitive data without risking file corruption or security breaches.
Popular BitLocker Reader Software for Mac
Here are some top programs commonly recommended:
- BitLokcer Genius on Mac: Reliable, intuitive, and supports both read and write operations.
- BitLockerGoMac: User-friendly with full access support and strong password/key encryption.
- MacOS Bitlocker Reader: Good for both personal and enterprise users, offering multiple unlocking methods.
Most of these programs offer a free trial that allows you to preview or access a limited amount of data before requiring a full license purchase.
👀 Tip: Always download BitLocker software from the official websites or reputable sources to avoid security risks.
Step-by-Step Guide: How to Unlock BitLocker Drives Using Reader Software
Follow these simple steps to unlock your BitLocker-encrypted drive:
Step 1. Download and Install the BitLocker Reader
- Visit the official website of the reader software.
- Download the Mac-compatible version.
- Install it by following the guided installation instructions (you might need to allow the application in System Settings > Privacy & Security).
Step 2. Connect the BitLocker-Encrypted Drive
- Insert your USB stick, external disk, or SD card into your Mac's port.
- If a system pop-up appears saying "The disk you inserted was not readable by this computer," do not click "Initialize." Simply close the window.
Step 3. Launch the BitLocker Reader Application
- Open the installed program.
- It will automatically detect all connected drives, including the encrypted one.
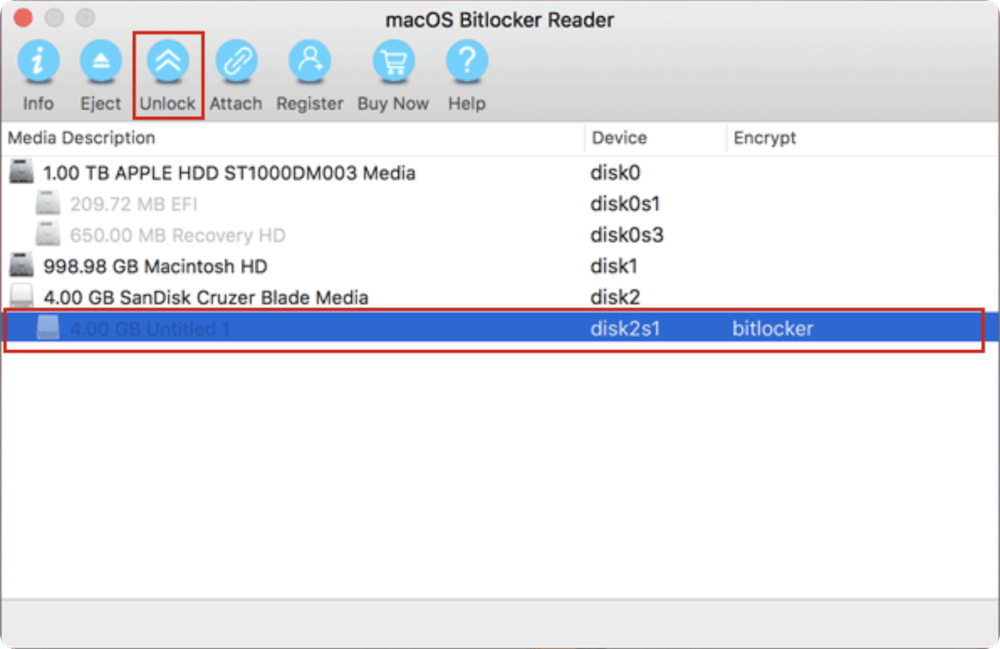
Step 4. Select the Encrypted Drive
- In the program interface, select the drive you wish to unlock.
- Make sure you are choosing the correct volume if you have multiple devices connected.
Step 5. Enter Your Password or Recovery Key
- You will be prompted to enter the BitLocker password you set when encrypting the drive.
- Alternatively, you can import the 48-digit recovery key or use the recovery file with the key.

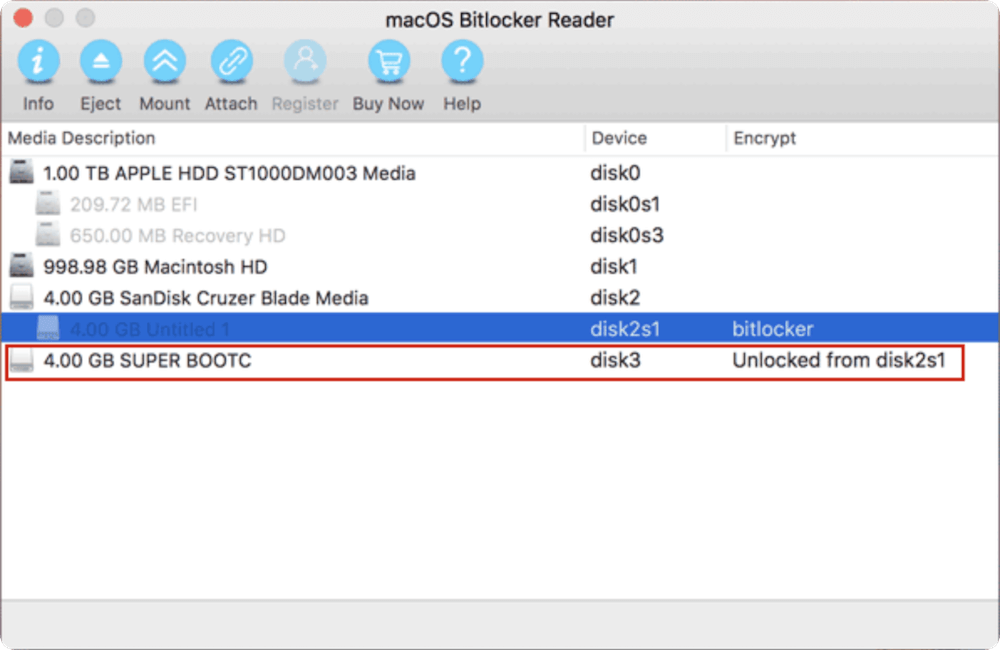
Step 6. Unlock and Mount the Drive
- After successful authentication, the drive will mount.
- You can now access it just like any other drive on your Mac — opening files, transferring data, or editing documents.
Step 7. Eject the Drive Properly
- After completing your tasks, always use the BitLocker software's "eject" function or right-click the mounted volume in Finder and select "Eject."
- This helps avoid data corruption.
Additional Features Many BitLocker Reader Apps Offer
Modern BitLocker readers do much more than just unlock drives:
- Write Support: Some software allows you to not only read but also write new files to the encrypted drive.
- Password Management: Save frequently used passwords securely within the app (encrypted).
- File Recovery: In some cases, the software can assist in recovering accidentally deleted files from the BitLocker drive.
- Multi-Drive Management: Manage multiple encrypted drives simultaneously if you work with multiple storage devices.
- Cross-Encryption Support: Some apps even allow re-encrypting the drive with Mac-friendly encryption methods (like APFS encryption).
Important Safety Reminders When Using BitLocker Readers
- Always Verify the Source: Only download BitLocker tools from the software maker's official site.
- Keep Your Password Safe: If you lose the password or recovery key, you may not be able to unlock the drive even with these tools.
- Use the Latest Version: Always update the BitLocker reader to the latest version to ensure compatibility with newer versions of macOS.
- Regular Backups: It's good practice to back up your decrypted data separately, especially when using third-party software, just in case something goes wrong.
Pros
- Easy and beginner-friendly.
- No need to decrypt or remove BitLocker encryption permanently.
- Maintains drive security.
Cons
- Most full-featured software requires a paid license.
- Limited free trials may restrict file transfer size.
Using a professional BitLocker reader software is the best balance between security, convenience, and practicality for accessing your encrypted data across different operating systems. For most users who want a fast, no-risk solution, this is the clear winner.
Method 2. Access the Drive on a Windows PC and Remove BitLocker Encryption
If you have access to a Windows computer (or can borrow one), another option is to turn off BitLocker encryption altogether.
- Connect the BitLocker-encrypted drive to the Windows PC.
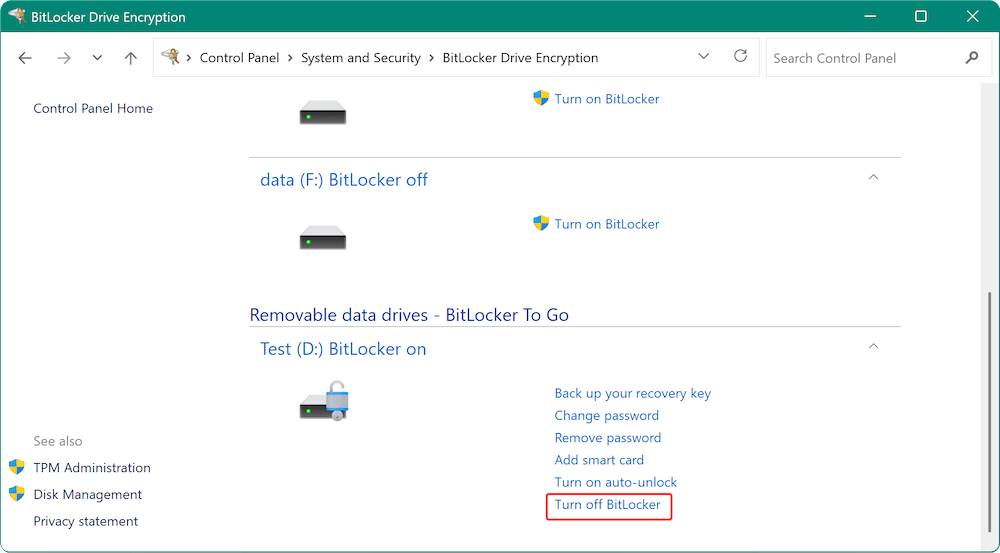
- Open Control Panel > BitLocker Drive Encryption.
- Find your drive, then click Turn Off BitLocker.
- Follow the prompts to decrypt the drive (this may take some time depending on drive size).
Once decrypted, the drive will be readable and writable across both Windows and Mac systems.
When to Choose This Method:
- You no longer need the drive to stay encrypted.
- You prioritize cross-platform compatibility.
- You have access to a Windows machine.
📢 Warning: Removing encryption makes the drive less secure. Make sure it's stored safely or re-encrypt it using a tool compatible with both platforms afterward.
Method 3. Use a Virtual Machine (Advanced Method)
For tech-savvy users, you can run a virtual Windows system on your Mac to open the BitLocker-encrypted drive.
How It Works:
- Install a virtualization tool like Parallels Desktop, VMware Fusion, or VirtualBox.
- Set up a Windows VM.
- Open and unlock your BitLocker drive within the virtual Windows environment.
Pros
- No need to decrypt the drive permanently.
- You can continue using BitLocker encryption.
Cons
- Requires significant storage, memory, and processing power.
- Can be complex and time-consuming to set up.
- Costs involved for some virtualization tools.
This method is ideal if you often work between Windows and Mac systems and want to maintain a fully encrypted workflow.
Common Issues and Fixes
Even when following these methods, you might encounter some issues. Here's how to handle them:
1. Drive Not Recognized on Mac
Solution:
- Check the connection (try another port or cable).
- Ensure the BitLocker reader software is updated.
- Reboot the Mac and try reconnecting.
2. Wrong Password or Recovery Key Error
Solution:
- Double-check for typos.
- Remember that passwords are case-sensitive.
- If forgotten, retrieve the recovery key from your Microsoft account (if set up).
3. Drive Shows as Empty After Unlocking
Solution:
- Use file recovery tools to check if data is hidden or lost.
- Access the drive on a Windows PC to verify if files appear correctly.
4. File Transfer Errors
Solution:
- Ensure your Mac's disk has enough space.
- Safely eject the drive after each session to avoid future corruption.
Tips for Managing BitLocker Drives Across Windows and Mac
If you frequently move between Windows and Mac systems, consider these tips:
- Use Cross-Platform Encryption: Solutions like VeraCrypt offer encryption compatible with both Windows and macOS.
- Keep Recovery Keys Backed Up: Store recovery keys securely in a password manager or secure cloud storage.
- Maintain Updated Software: Whether it's the Mac operating system, BitLocker reader apps, or virtualization tools, staying updated reduces compatibility issues.
- Format New Drives Thoughtfully: If you plan to use a drive across systems, consider formatting the drive as exFAT (universal file system) before applying encryption.
Conclusion
Accessing a BitLocker-encrypted USB drive, external disk, or SD card on a Mac might seem daunting at first, but with the right tools and methods, it's completely doable.
- The easiest and safest way for most users is to use a professional BitLocker reader for Mac.
- If you have access to a Windows machine, you can decrypt the drive there.
- For more advanced users, running a virtual Windows machine on your Mac can also work.
Always remember: encryption exists to protect your data, so it's crucial to approach these processes carefully, using reputable software and best practices. With a bit of preparation, you can bridge the Windows-Mac gap and access your BitLocker drives without hassle!
Donemax NTFS for Mac
An easy-to-use NTFS for Mac tool to help you enable writable for NTFS drives on Mac so that you can read-write NTFS drives on Mac without any limitation. It also can help you mount, format, repair, rename, open drive on your Mac.
Related Articles
- Apr 13, 2026How to Remove/Hide Macintosh HD on Mac Desktop?
- Nov 20, 2024How to Clean Install macOS Big Sur -Step-by-step Guide
- Jul 27, 202510 Fixes for Command+S Not Working on Mac
- Jun 11, 2026How to Empty Trash on Mac Quickly (Shortcut & Auto-Clean)?
- Jun 20, 2025How to Download and Create ISO Image File for macos Sonoma?
- Aug 07, 2024How to Format SD Card on Mac?

Contributing Writer
Steven
Steven has been a senior writer & editor of Donemax software since 2020. He's a super nerd and can't imagine the life without a computer. Over 6 years of experience of writing technical solutions and software tesing, he is passionate about providing solutions and tips for Windows and Mac users.

Editor in chief
Gerhard Chou
In order to effectively solve the problems for our customers, every article and troubleshooting solution published on our website has been strictly tested and practiced. Our editors love researching and using computers and testing software, and are willing to help computer users with their problems