Written byMariaUpdated on Jul 14, 2026

Before we start: With CHKDSK, you can fix some hard drive issues on Windows 11. However, if there are important files on the drive, it's recommended to recover the data first with Donemax Data Recovery before running CHKDSK.
PAGE CONTENT:
Check Disk, commonly known as CHKDSK, is an essential Windows utility for monitoring disk health. It can perform checking disks in various permutations and combinations using several parameters. Overall, CHKDSK is a valuable tool on Windows 11 computers. In this guide, we will explore how to use CHKDSK effectively on Windows 11.
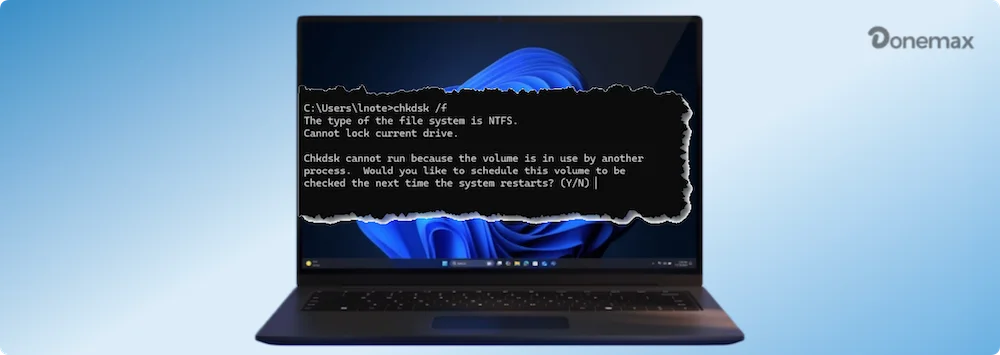
The primary function of the CHKDSK command is to check the integrity of the file system on the hard drive and make necessary repairs. This command can also repair bad sectors on the hard drive.
Bad sectors are further divided into "soft bad sectors" and "hard bad sectors."
"Soft bad sectors" are logical hard drive bad sectors that the CHKDSK command can quickly repair.
On the other hand, "hard bad sectors" occur due to physical damage to the Disk. While CHKDSK can't fix them, it can mark sectors to avoid data writing and prevent unexpected problems.
List of problems that the CHKDSK command can solve:
If you're not tech-savvy, Windows 11 gives you the option of CHKDSK to run a command from File Explorer without typing any command in the command prompt.
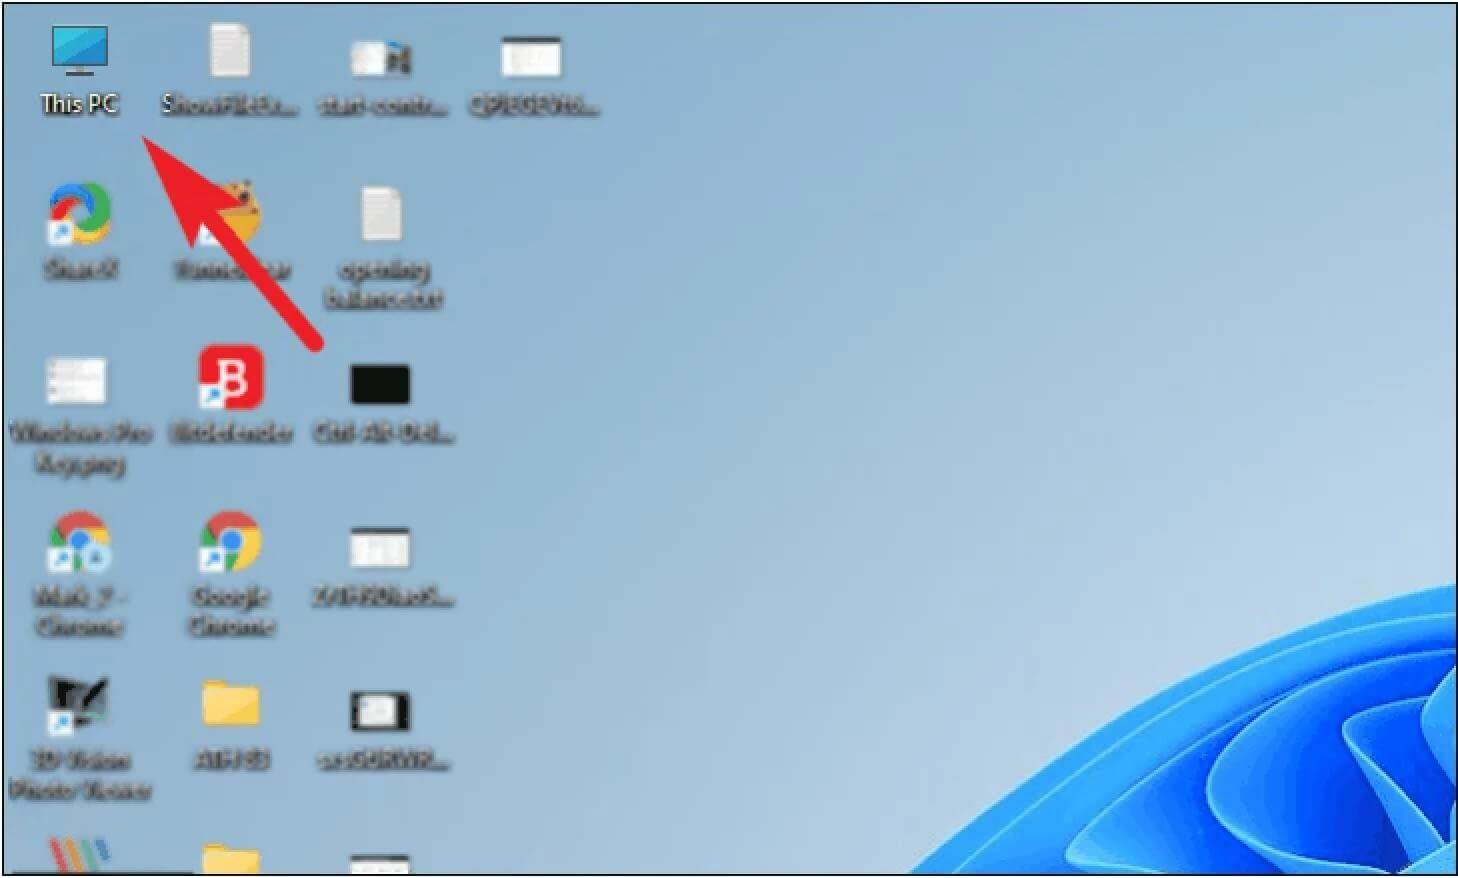
1. First, double-click the "This PC" icon on the desktop. Alternatively, you can also press the Windows+E shortcut on your keyboard to open it.
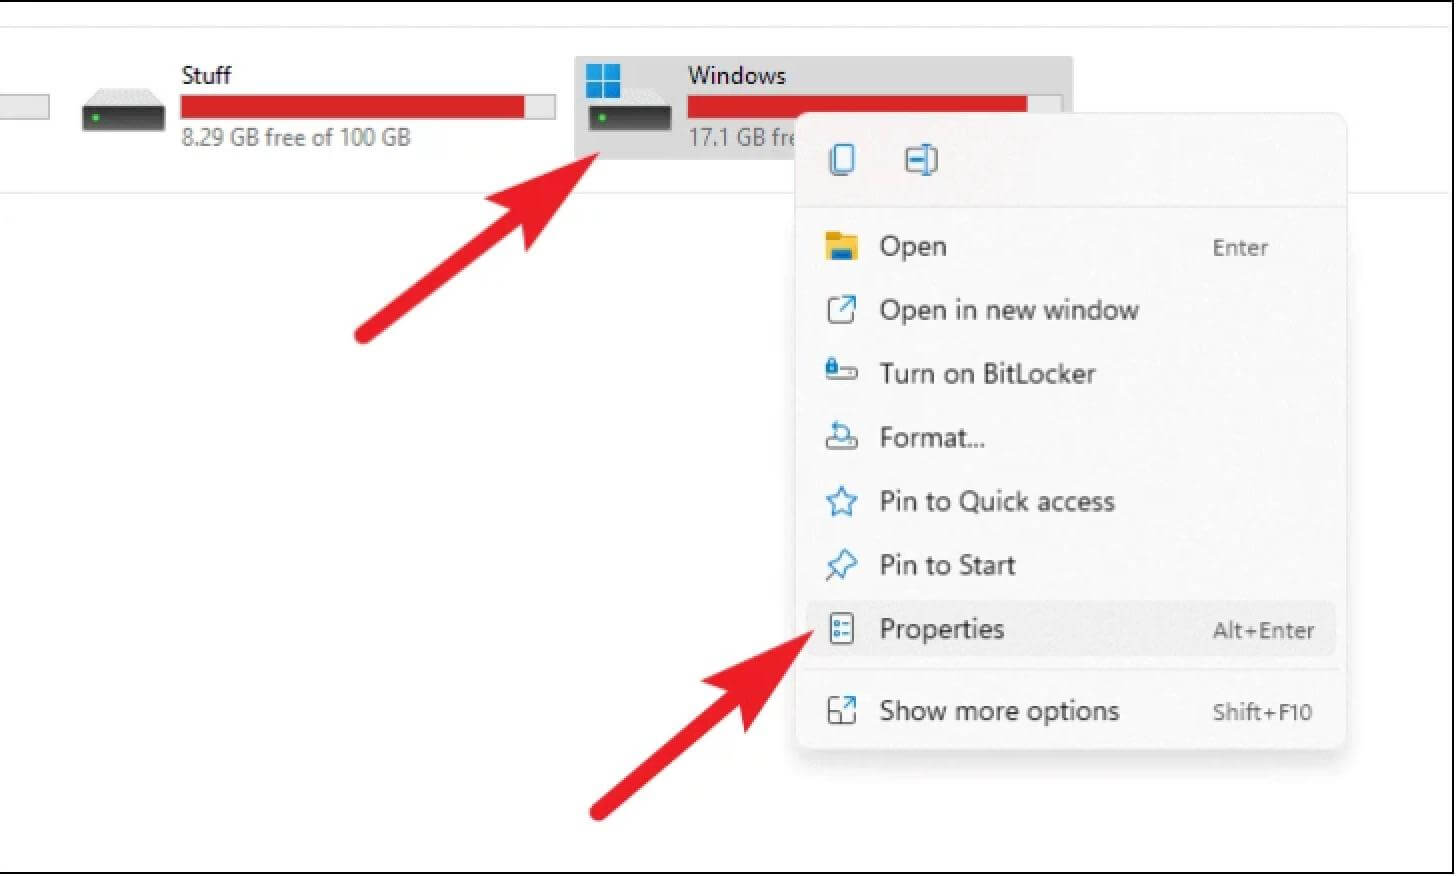
2. Right-click on the drive that you want to check and select the Properties option from the drop-down menu.
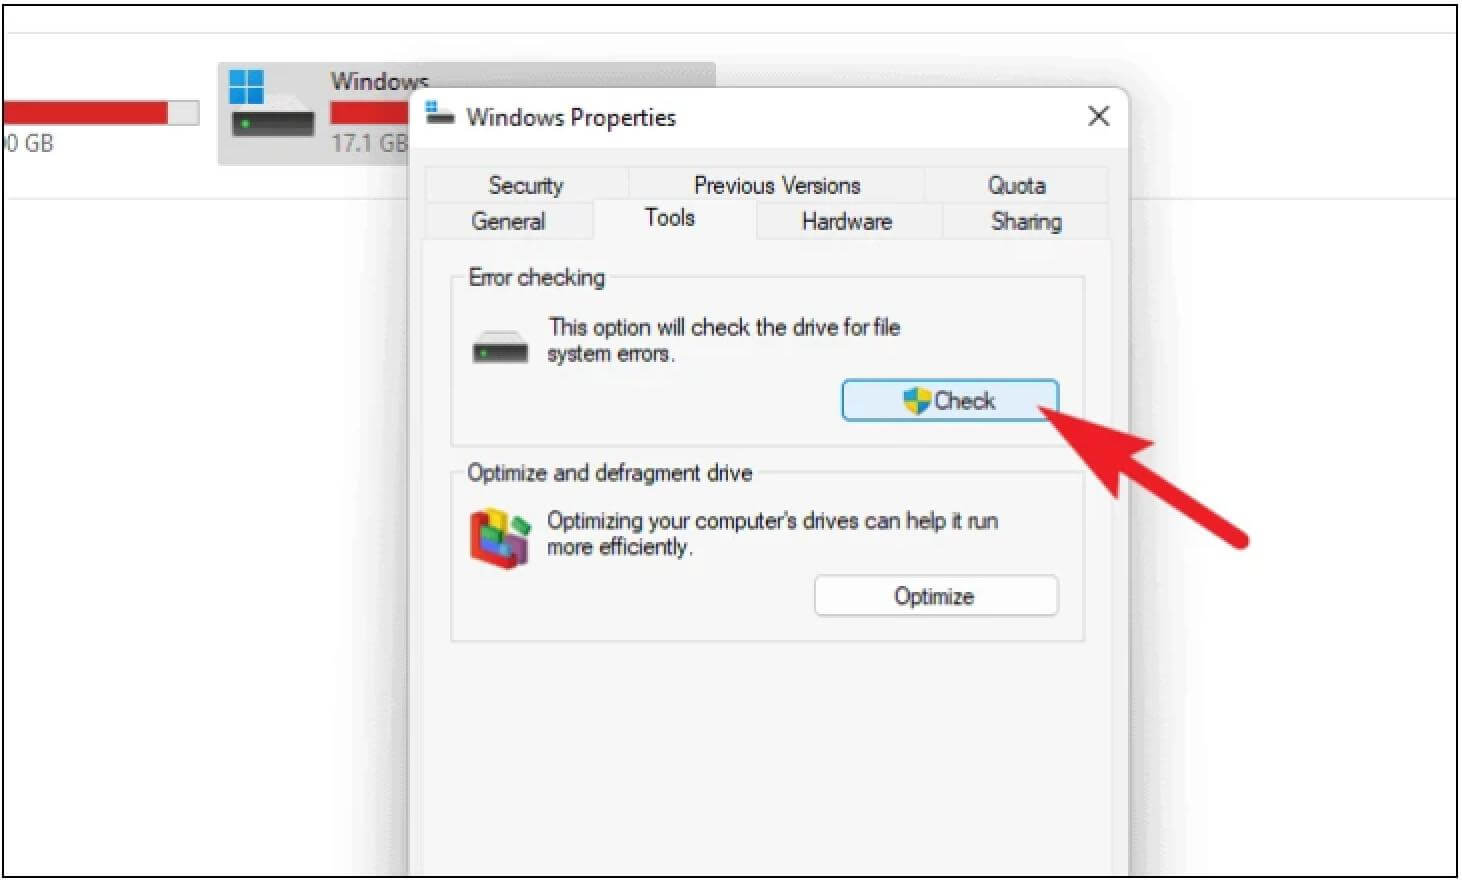
3. Click the Tools tab in the Windows Properties window, and then click the Check button in the Error Checking section.
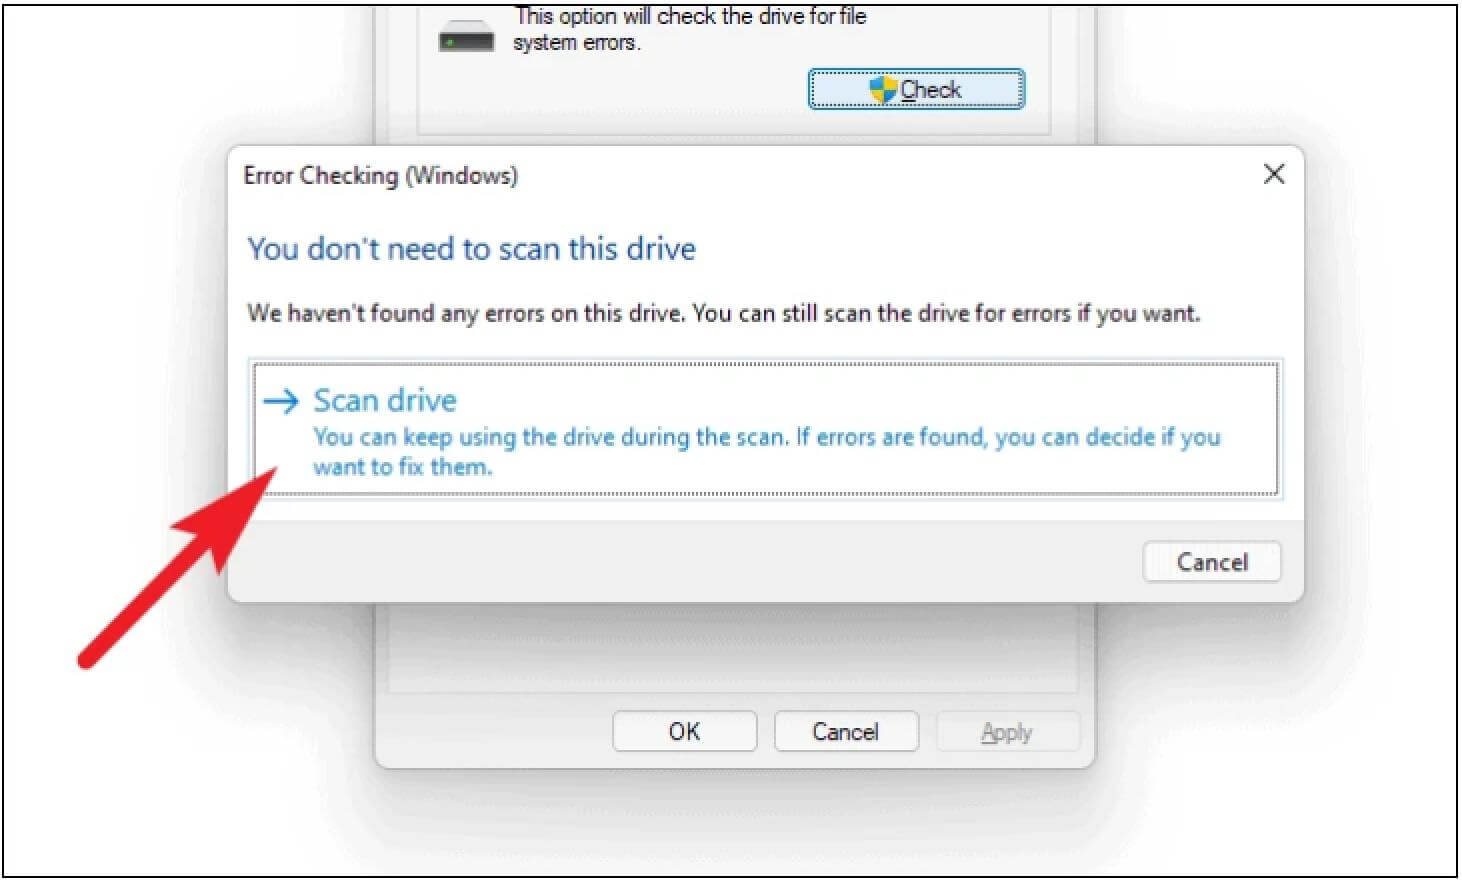
4. If there are no errors on the drive, you may be prompted with instructions from the system. If you still wish to continue scanning, click the "Scan Drive" option in the prompt. If not, click "Cancel"
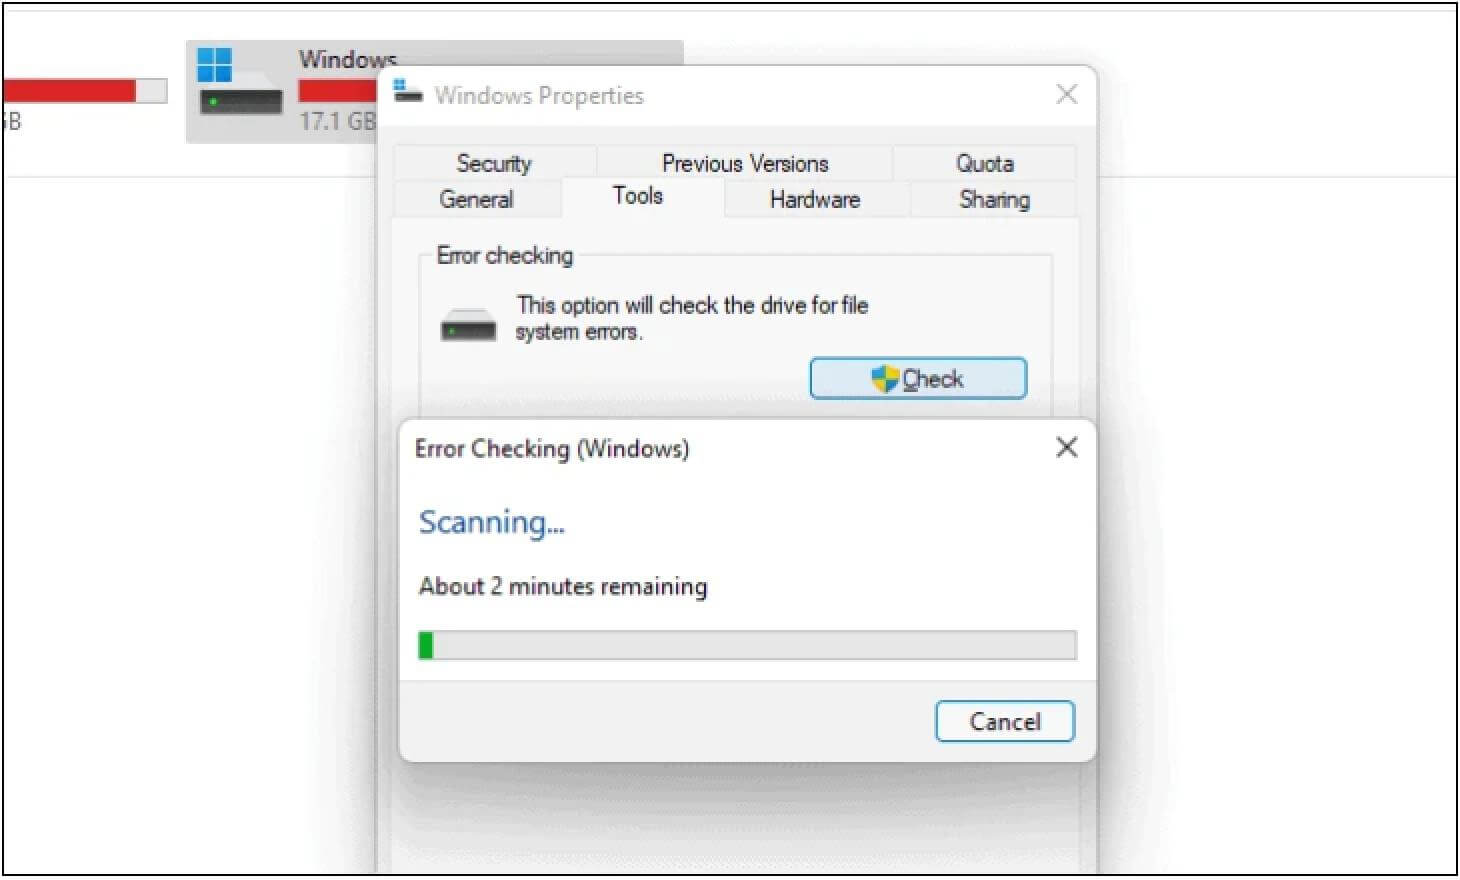
5. The scanning may take a while. Be patient while the process is running in the background
Although this method does not provide the convenience of GUI, it can use more commands with the help of parameters and make the operation more flexible.
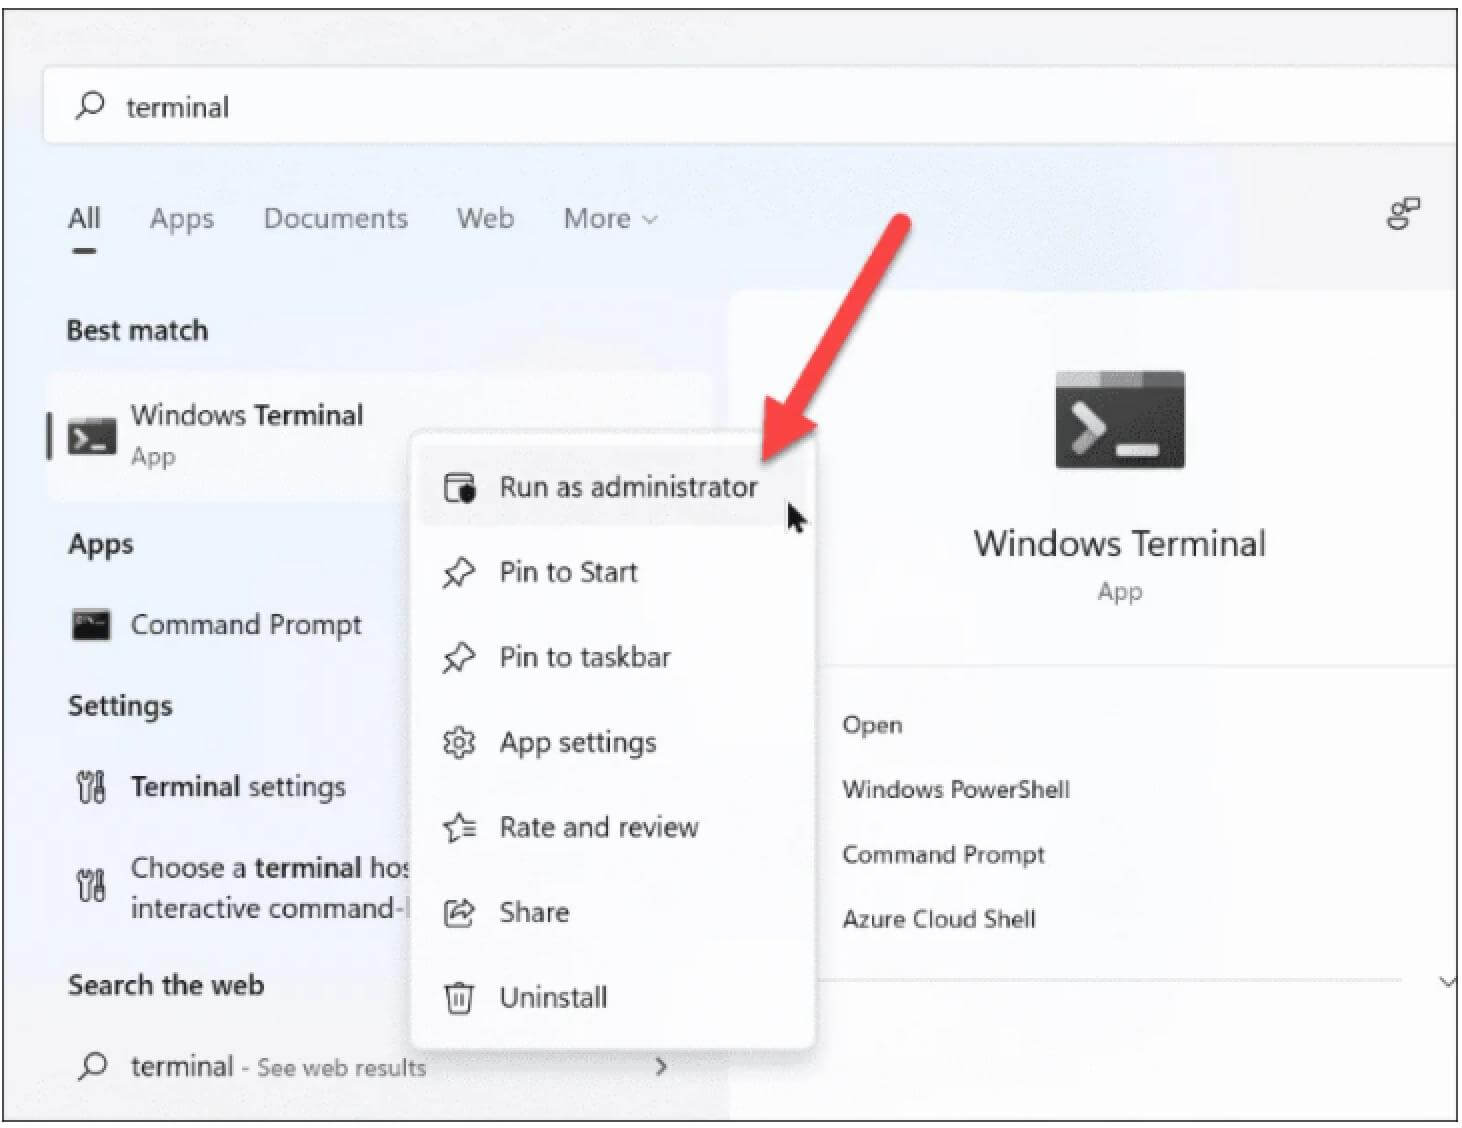
1. Open Windows Terminal as administrator on your PC. Search for "Terminal" in the start menu, then right-click the "Windows Terminal" application from the results and select the "Run as administrator" option from the context menu..
2. You will see a UAC (User Account Control) window. If you are not logged in with an administrator account, enter the credentials required to log in as an administrator. Otherwise, click the "Yes" button to launch an elevated window of the Windows Terminal.
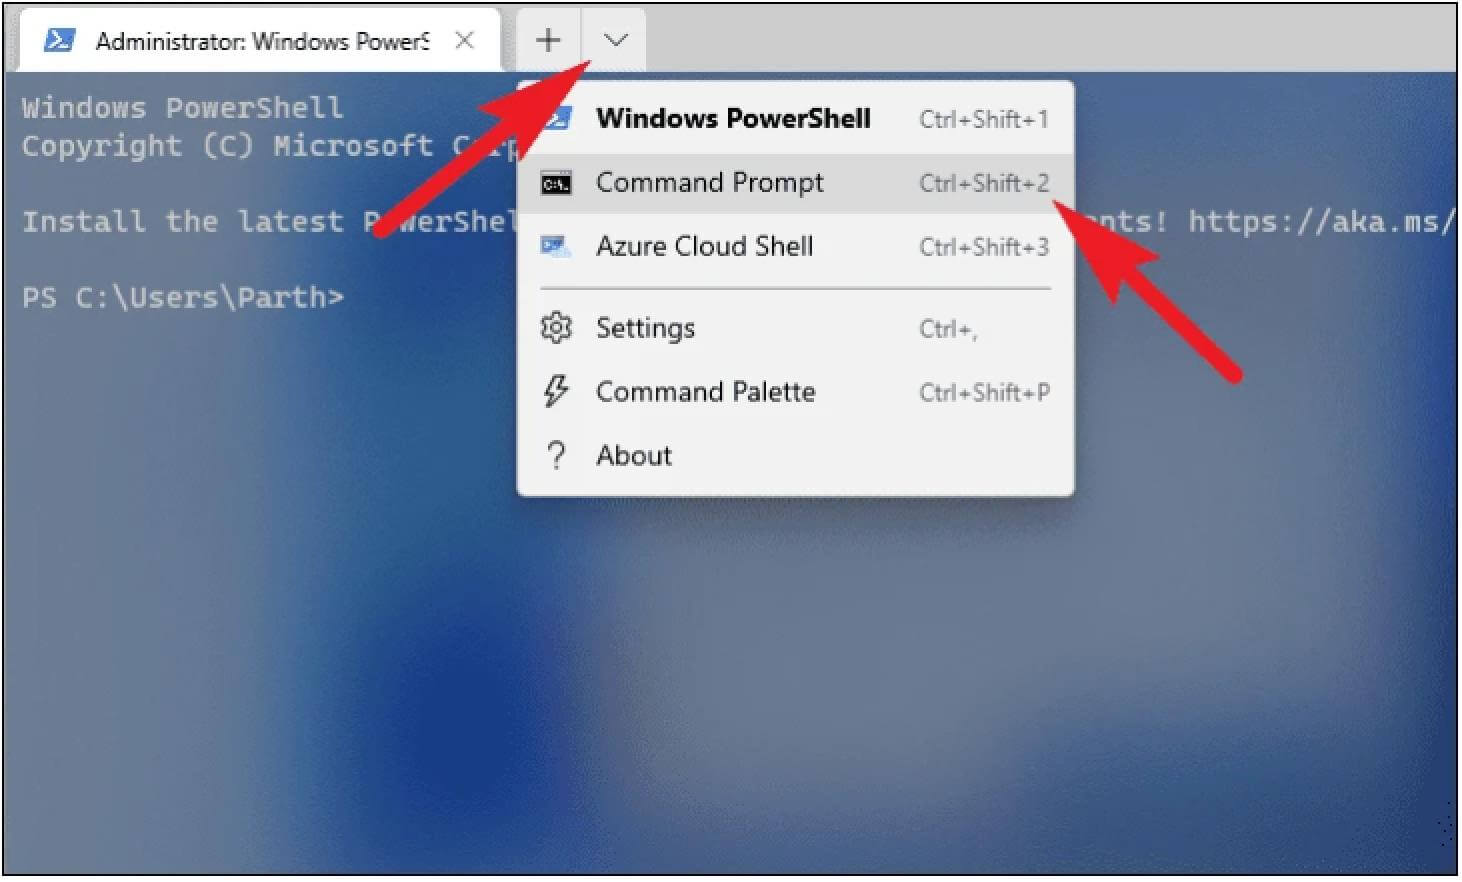
3. Click the carat icon (down arrow) on the terminal window. Then, select the Command Prompt option from the overflow menu. You can also access it by pressing Ctrl++Shift 2
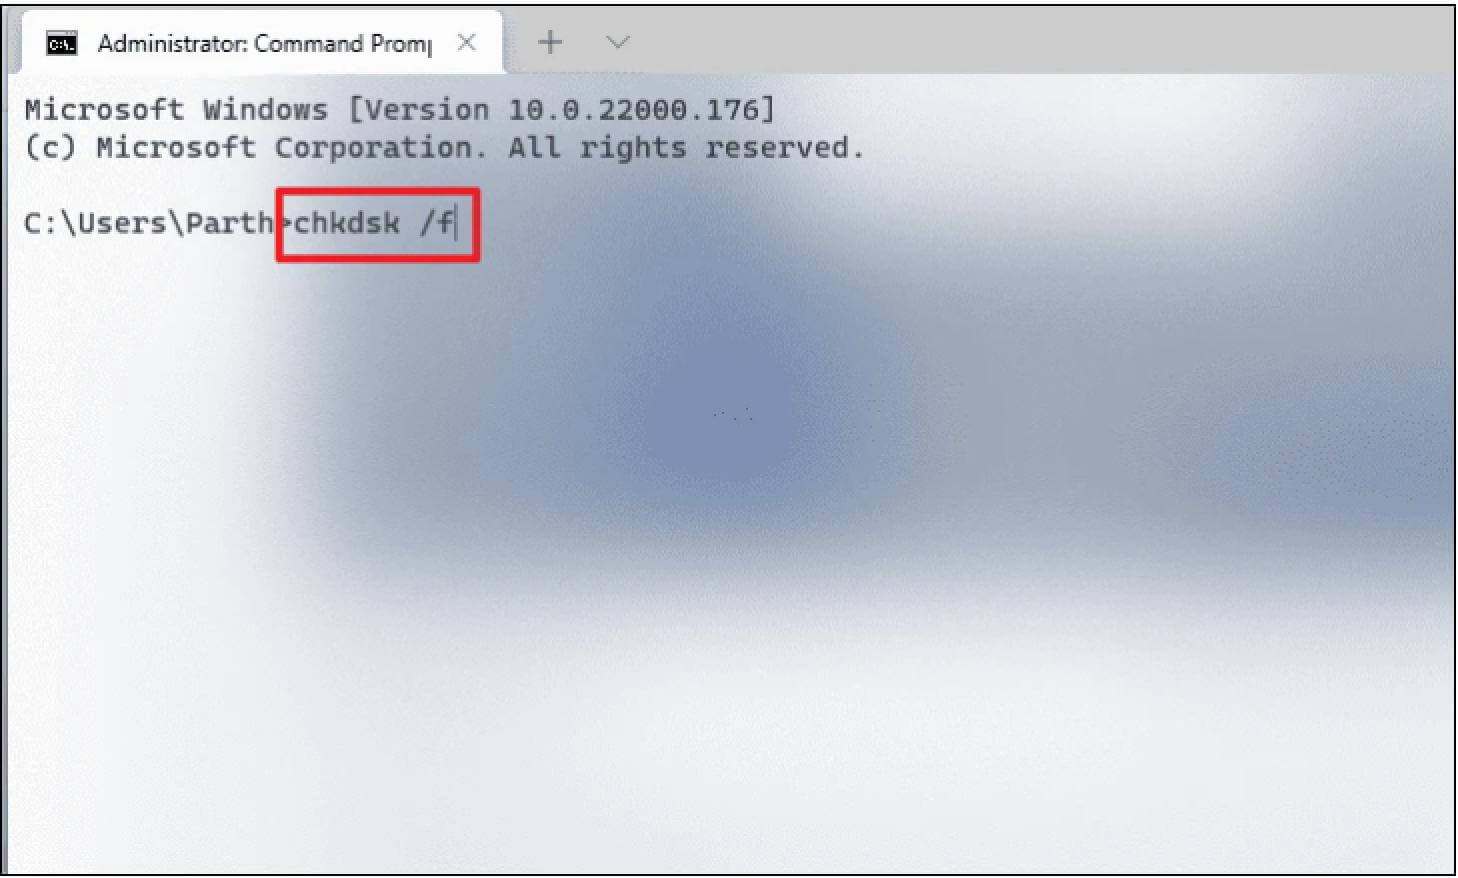
4. Type or copy/paste the following command in the Command Prompt window and press Enter chkdsk /f
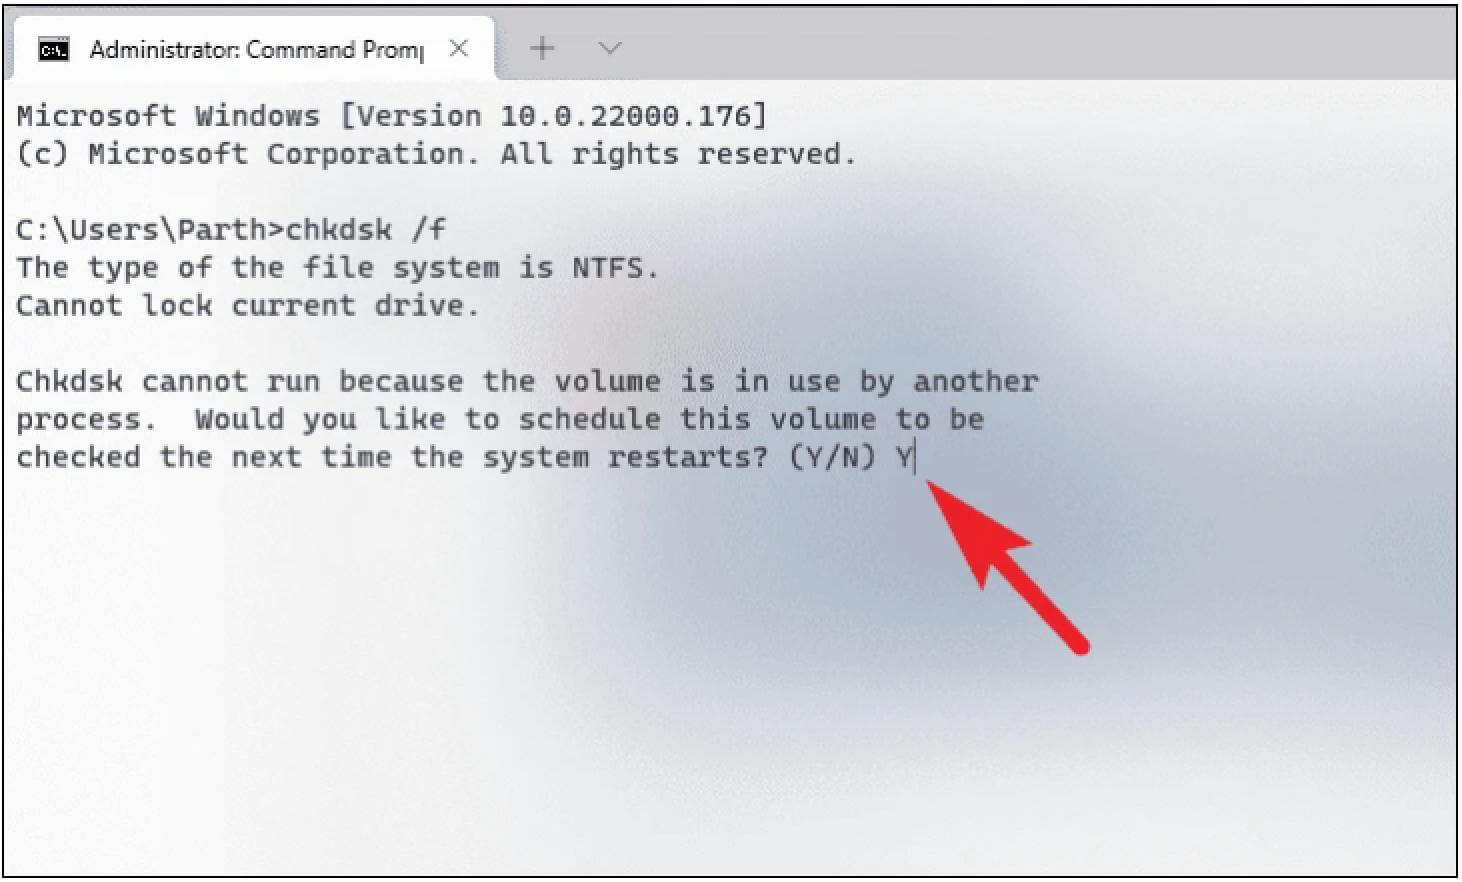
NOTE: You may be prompted to schedule the chkdsk process the next time you start your computer, as the drive is unavailable while the tool is running. Arrange to press Y on your keyboard. If not, press N.
Parameters for the CHKDSK command
chkdsk is a very general command and thus supports a variety of parameters. The following are some important chkdsk command parameters and their effects:
| Command Parameter | Intended Result |
| /f | This command fixes any errors found with the disk |
| /scan | This runs an online scan (volume doesn't need to dismount) but does not repair the volume. |
| /r | This tells chkdsk to look for bad sectors and retrieve readable information from them. If /scan is not specified, /f is implied |
| /x | Implies /f and will force dismount the volume if required. |
| /perf | Allows chkdsk to use more system resources and run the scan faster (requires the /scan command). |
| /spotfix | Dismounts the volume briefly to fix issues that were sent to the log file. |
| /? | Provides help with chkdsk commands (those listed above and various others). |
In addition to these standard command parameters, chkdsk supports many other commands. For a complete list, check out this Microsoft documentation:
📎 Read More: Windows 11 Configuration Requirements
When the disk is damaged or has bad sectors, it is necessary to restore the data on the disk partition. At this time, Donemax Data Recovery Software can be used to achieve this function.
Step 1. Choose a location and start scanning
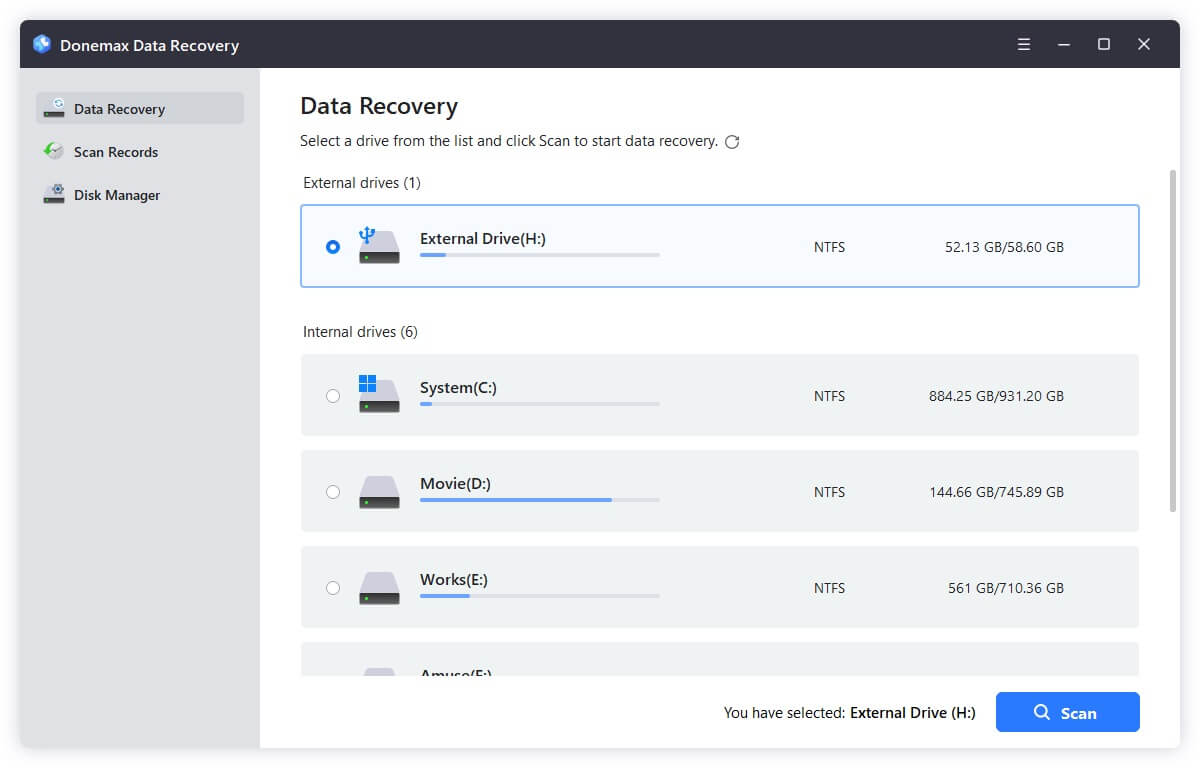
Launch Donemax Data Recovery Wizard and select the partition from which you lost data. Then, click Scan.
Step 2. Find the file you need.
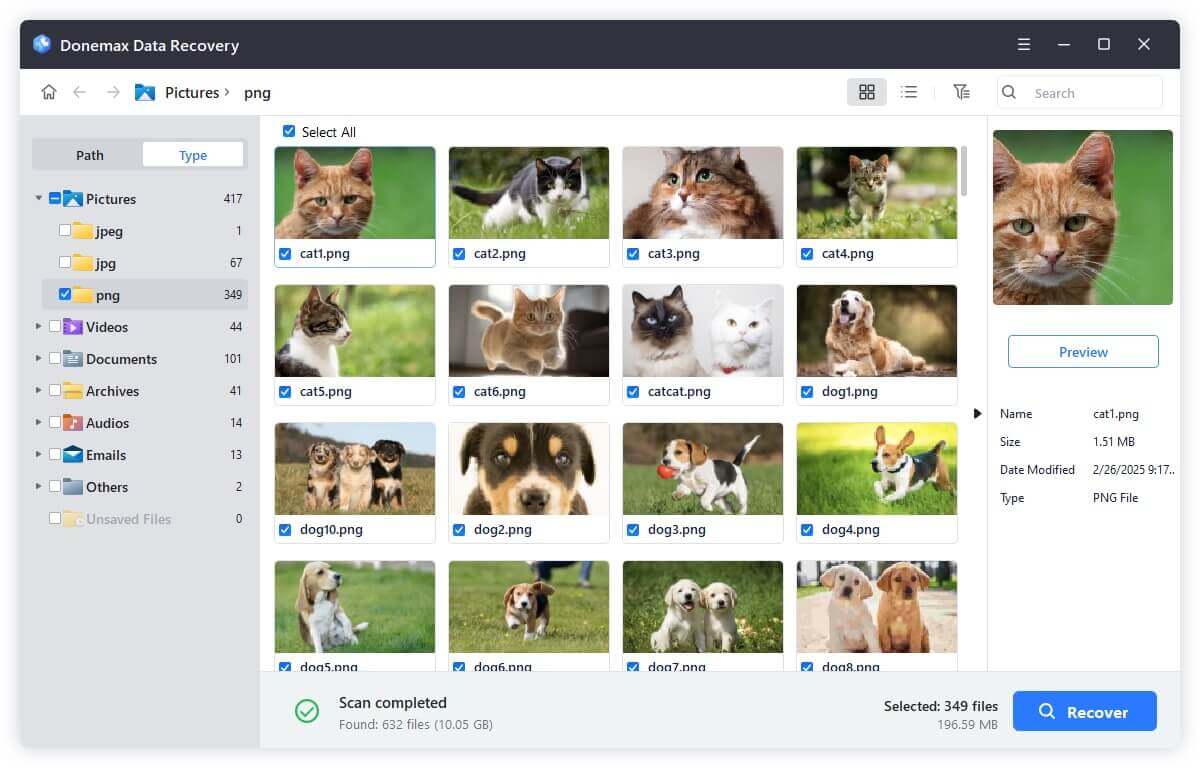
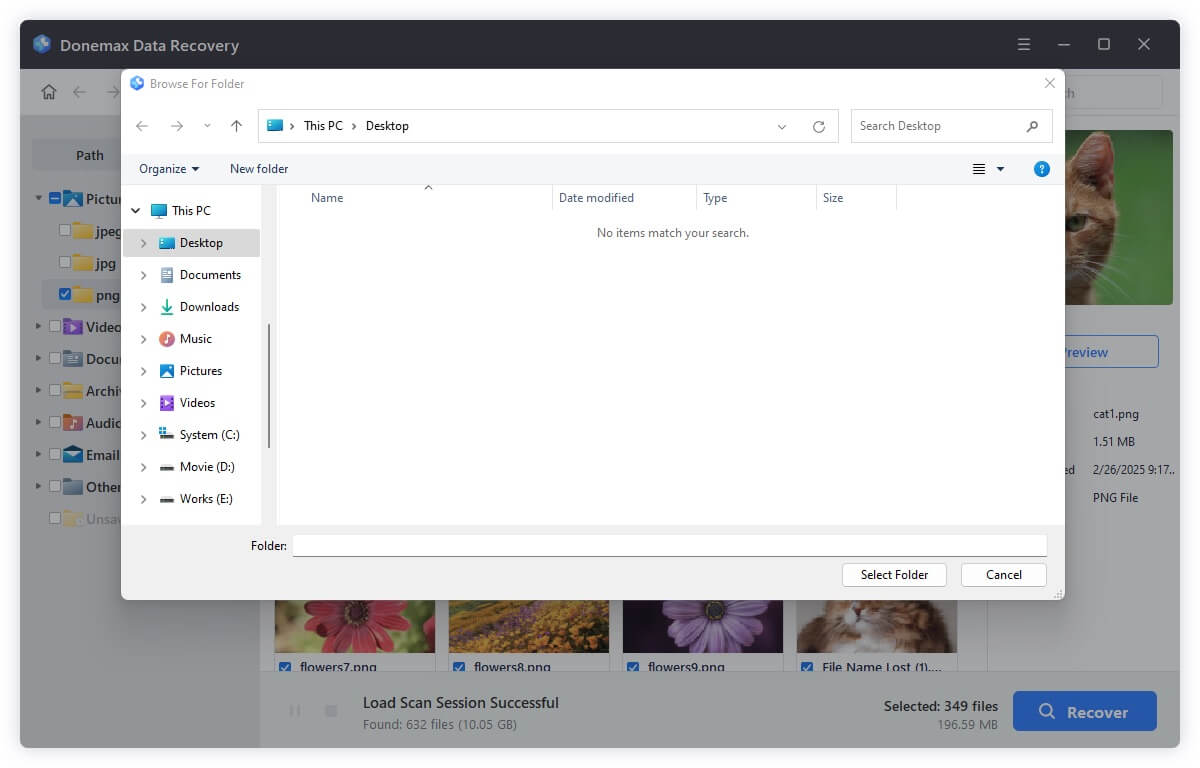
Step 3. Select the file and click Restore to restore the file to a safe place.
Keeping your storage healthy is essential to maintaining top-tier performance on your PC. Windows 11 makes monitoring your drive simple, offering a beginner-friendly graphic interface through File Explorer as well as advanced, customizable command lines via the Windows Terminal. By running CHKDSK regularly, you can intercept file system glitches before they turn into major system crashes or data loss events.
However, if your drive is already throwing critical errors or suffering from bad sectors, remember that hardware fixes are only half the battle. Prioritize your digital safety by using a dedicated tool like Donemax Data Recovery to safeguard your files first, ensuring your photos, documents, and system data remain secure no matter what state your drive is in.
Donemax Data Recovery
Powerful, safe & easy-to-use data recovery software. Easily and completely recover deleted, formatted, or other lost data. The tool supports PC, Mac, HDD, SSD, USB drive, camera, SD card, RAID and other storage devices.
Maria
Maria is one of the senior writers & editors of Donemax who lives and works in Sydney, Australia. She loves PC, Mac and Internet Technology. She has 6 years of writing articles about data recovery on PC/Mac, disk cloning solution, data eraser and computer OS optimization, etc. She is also interested in testing various software and digital products.
Gerhard Chou
In order to effectively solve the problems for our customers, every article and troubleshooting solution published on our website has been strictly tested and practiced. Our editors love researching and using computers and testing software, and are willing to help computer users with their problems
Clone hard drive with advanced clone technology or create bootable clone for Windows/Mac OS.
Completely and easily recover deleted, formatted, hidden or lost files from hard drive and external storage device.
Certified data erasure software - permanently erase data before selling or donating your disk or any digital device.