
Powerful, safe and easy-to-use disk cloning software for disk clone, partition clone and digital device clone.
By default, Windows 11 continues to download and install various updates automatically. You probably won't notice this happening until you shut down your device, and most updates require a reboot to apply. And automatically downloaded updates also take up some disk space, so some users who have Windows Automatic Updates turned on want to block that feature to free up Windows 11 disk space. Want more control over which updates are installed on your PC and when they are downloaded. Whether you need to stop updates temporarily or something more permanent, here are four ways to turn off automatic updates in Windows 11.
Solution 1. Temporarily Stop Windows 11 Automatic Updates in Settings
1. Open Settings.
2. Select Windows Update from the left pane - it's usually at the bottom of the list.
3. Under "More Updates," you'll find the "Pause Updates" option. Click on the button labeled "Pause for one week," after which automatic updates will resume again
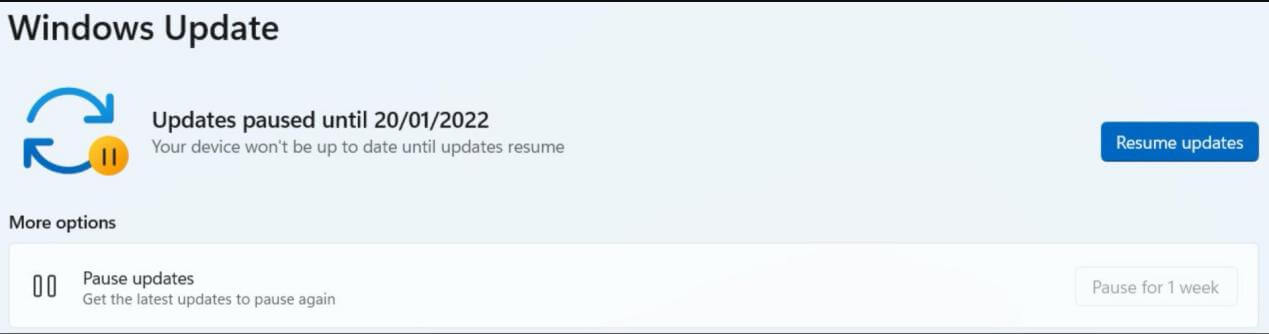
Note: However, this setting disables the update entirely for 7 days, or until you resume the update
Solution 2. Disable Windows 11 Automatic Updates through Windows Services
1. Press Windows key + R to bring up the Run window
2. Type "services. msc" in the box and press Enter
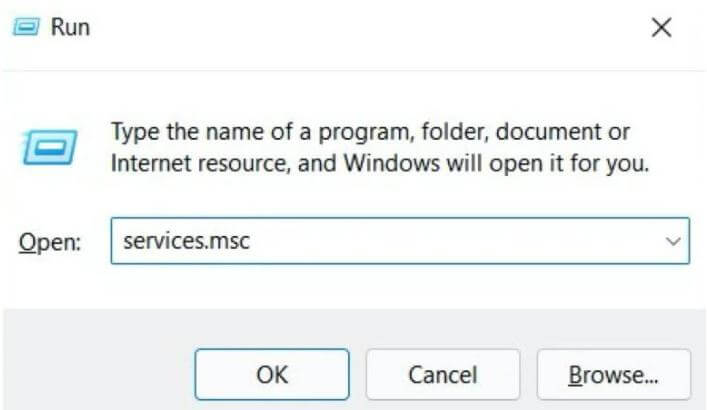
3. In "Services (Local)", scroll the list until you find "Windows Update" and double-click it.

4. In the properties window that opens, under the General tab, click the drop-down menu next to Startup Type and select Disabled
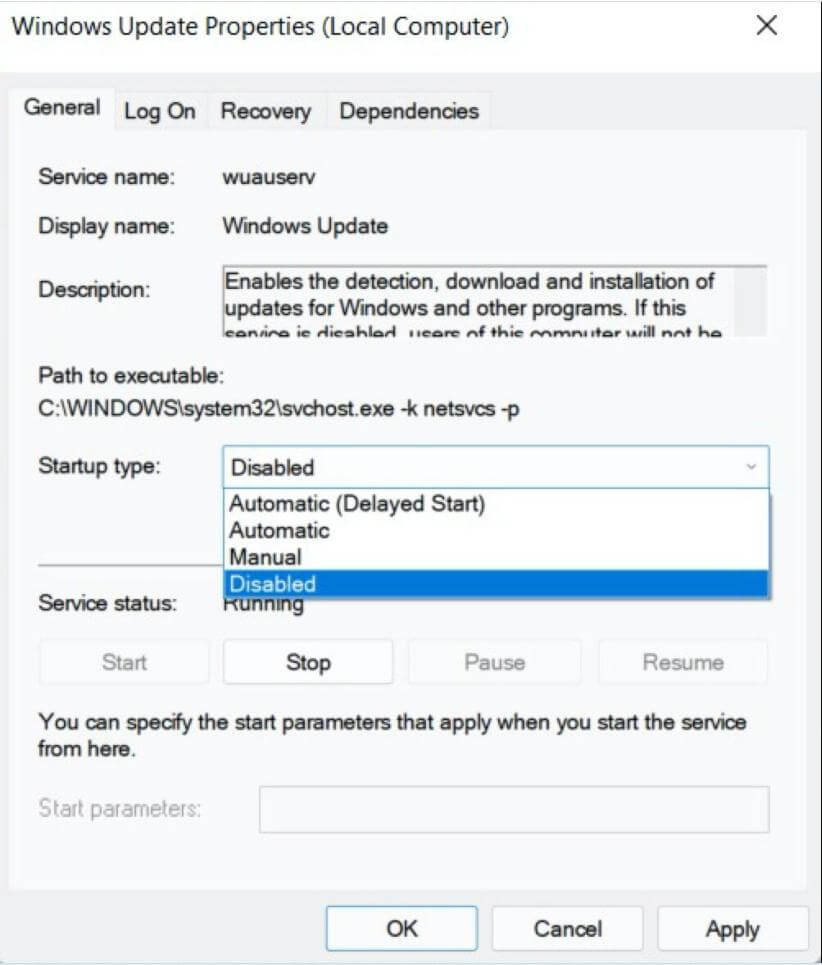
5. Click Apply, then OK to save the changes
Solution 3. Turn off Windows 11 Automatic Updates by Editing the Registry
1. Press Windows key + R to bring up the Run window.
2. Type "regedit.exe" in the box and press Enter.
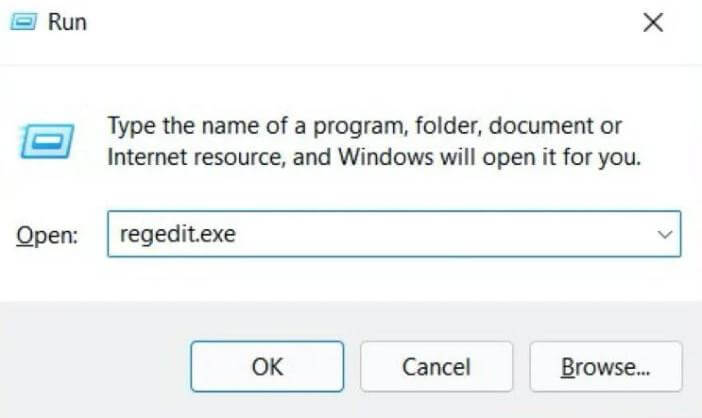
3. In the pop-up that appears, click Yes to confirm that you allow changes to be made.
4. Above all folders, you will find an address bar. Delete everything you see there and replace it with "HKEY_LOCAL_MACHINE\SOFTWARE\Policies\Microsoft\Windows\WindowsUpdate\AU" and press Enter again.
5.Right-click any empty space on the right half of the screen and select New > DWORD (32-bit) Value
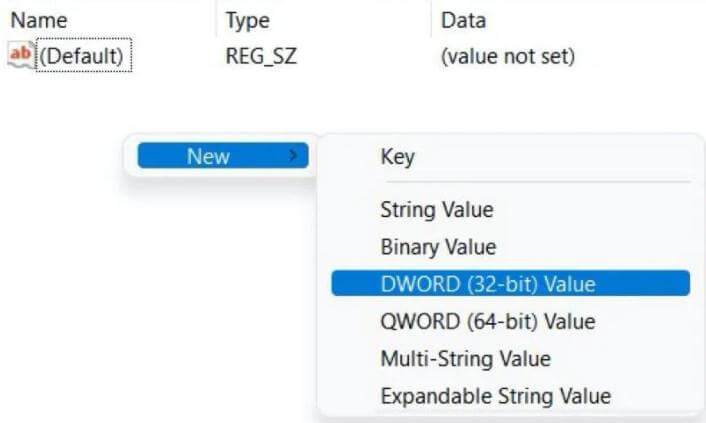
6. Name it "NoAutoUpdate" and press Enter
7. Now, double click on this new value and set its Value Data to 1
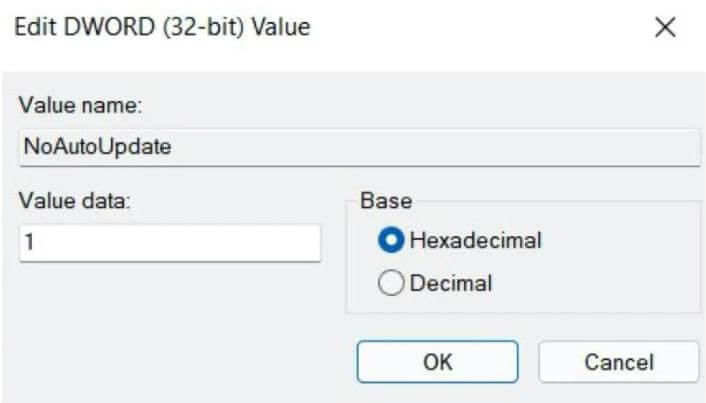
8. Click OK to confirm and restart your device to apply the changes
Solution 4. Use Group Policy Editor to Block Windows 11 Updates
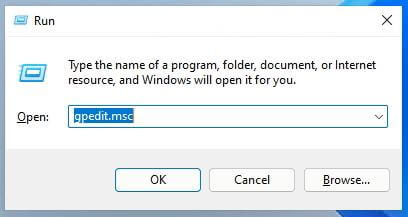
1.Press Win + R. Type gpedit.msc to load the Group Policy Editor.
2. Navigate to Local Computer Policy > Computer Configuration > Administrative Templates > Windows Components > Windows Update > Windows Update for Business.
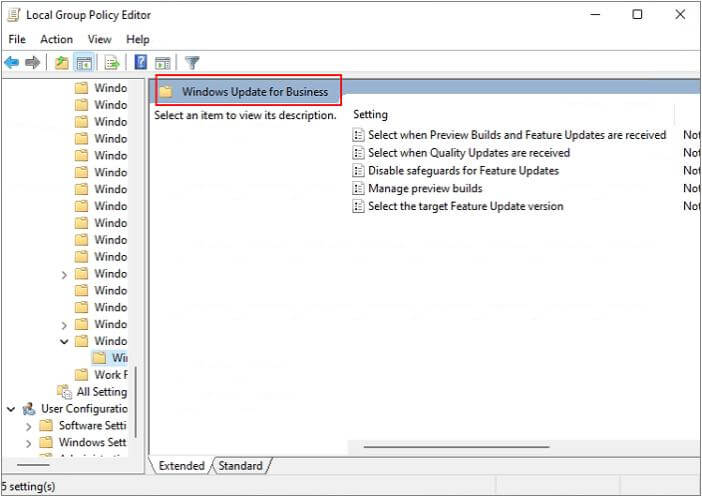
3. Double-click Select Target Feature Update Version.
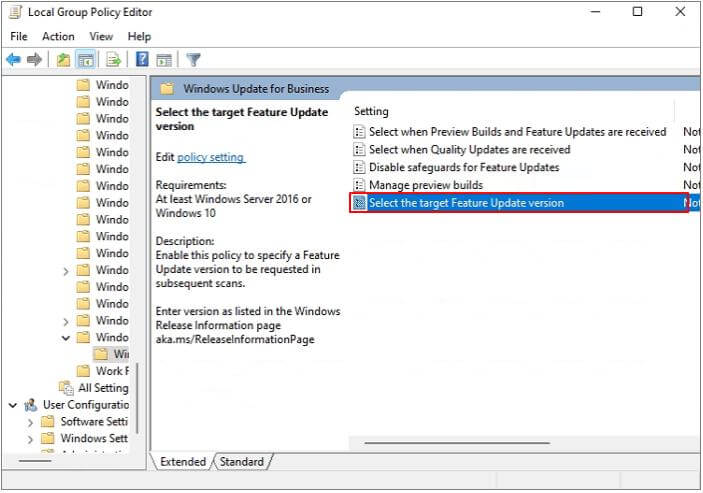
4. Set the policy to Enabled, type 21H1 in the field, and close the Group Policy Editor.
Additional Help - How to Recover Data Lost by Windows 11 Updates.
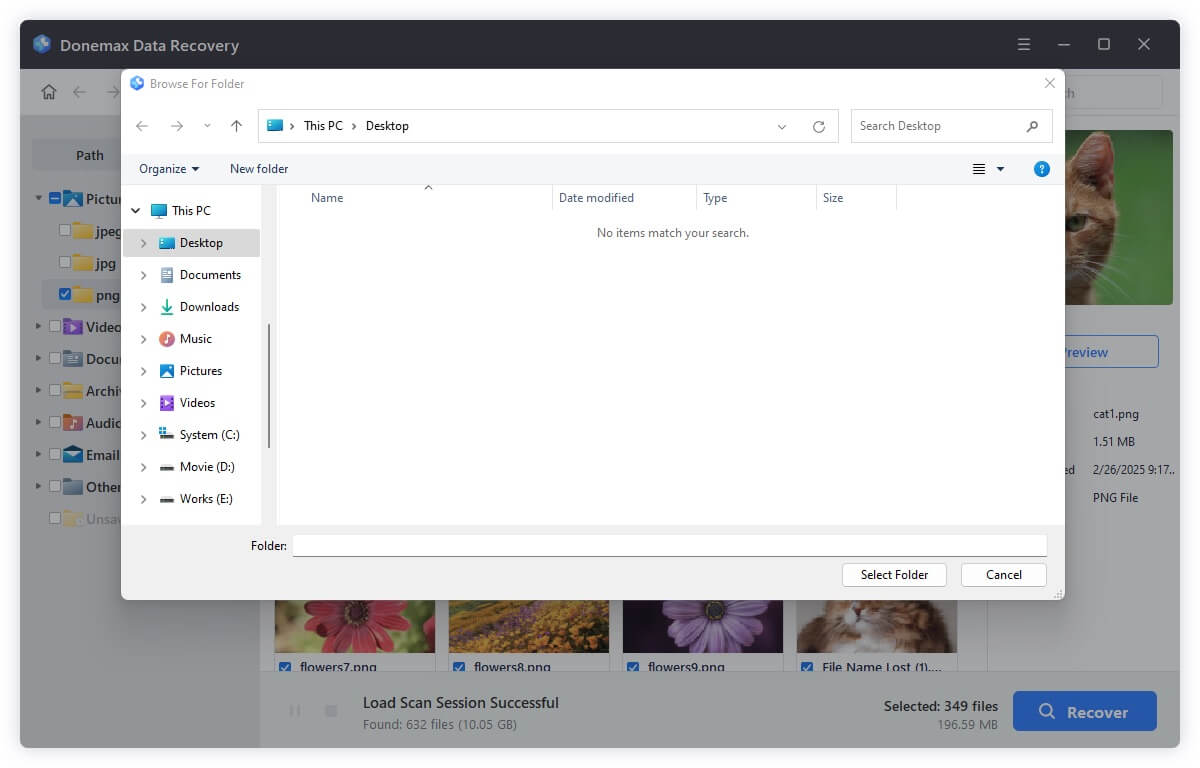
As mentioned above, you can recover deleted files using Donemax data recovery software. It works great to get back lost/deleted files on Windows or Mac PC. Here are the steps to recover data on Windows 11 PC.
Step 1. Choose a location and start scanning
Launch Donemax Data Recovery Wizard and select the partition from which you lost data. Then, click Scan.

Step 2. Find the file you need.

Step 3. Select the file and click Restore to restore the file to a safe place.
Conclusion:
I like to keep all my devices up to date and activate Windows 11 to enjoy the latest Windows 11 features. But sometimes, Windows Update can be useless. Keep an eye on what you download and install on your PC. If you want to disable automatic updates, you can try these solutions above.
DMclone
Hot Articles
- How to Install Windows 11 on Unsupported CPU(See What We Do)
- Everything About the EFI System Partition on Windows 11
- Guides on Windows 11 Checker, How to Use it
- What Should I Prepare for the Windows 11 Upgrade
- How to Enable Secure Boot for Windows 11(Complete Guide)
- How to Install Windows 11 from USB
- How to Improve Windows 11 Performance?
- How to Remove Password in Windows 11
- The Difference between Windows 11 and Windows 10| Windows 11 VS Windows 10
- Should You Upgrade to Windows 11? What Benefits of Windows 11?