
Powerful, safe and easy-to-use disk cloning software for disk clone, partition clone and digital device clone.
Since Microsoft officially released Windows 11 on October 5, 2021, many users have upgraded from Windows 10 to Windows 11. However, some users have installed Windows 11 on computers with unsupported configurations. So you may experience some issues after the upgrade, such as freezes, lags, crashes, or other problems that affect Windows 11 performance.
To optimize Windows 11 and improve its performance, you can try uninstalling uncommon software to free up space. If the problem is still not solved, you can try to solve it one by one according to the solutions given below.
Method 1. Turn off Visual Effects
Turning on visual effects provides a better experience, but it takes more graphics processor load. If your computer has older hardware, it will reduce performance. Therefore, disabling high visual effects can help improve Windows 11 performance.
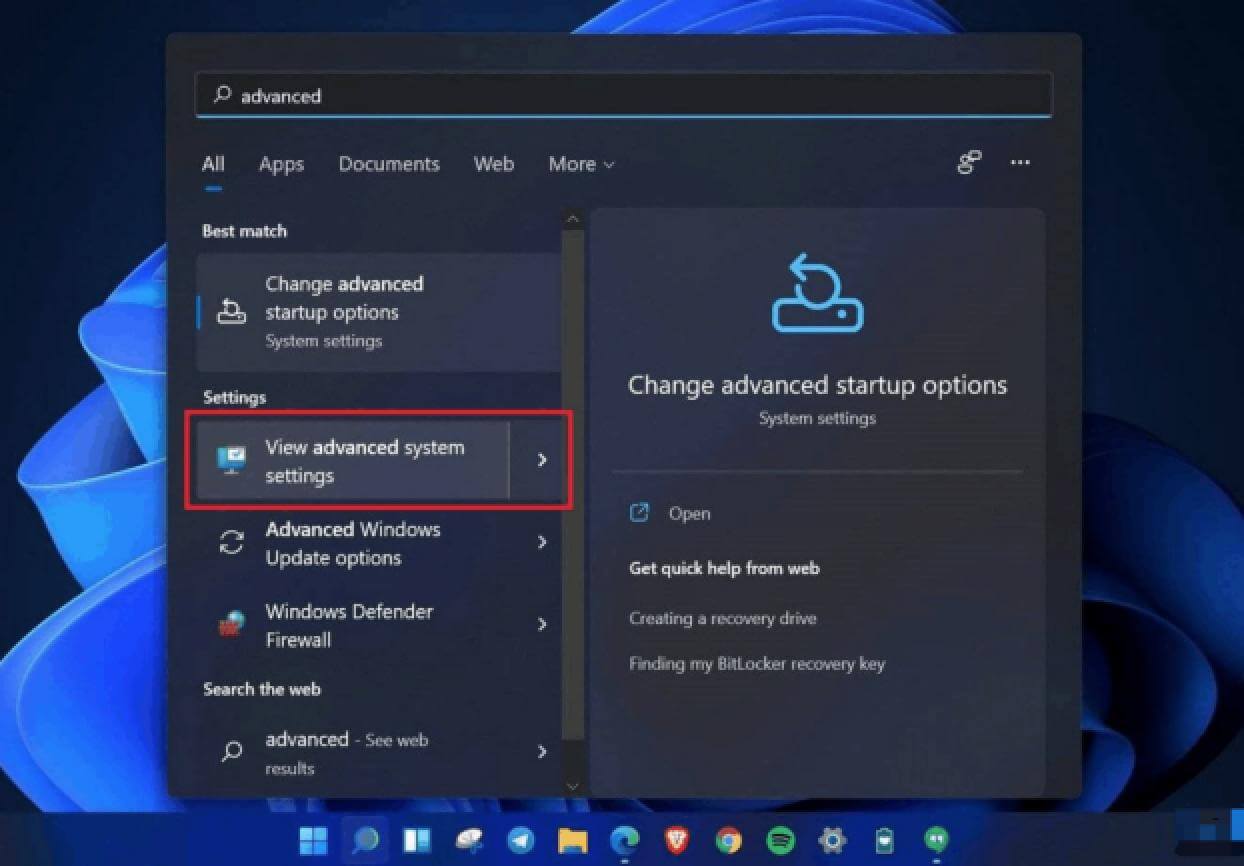
1. Click the Windows icon on the desktop, select View advanced system settings, and open it.
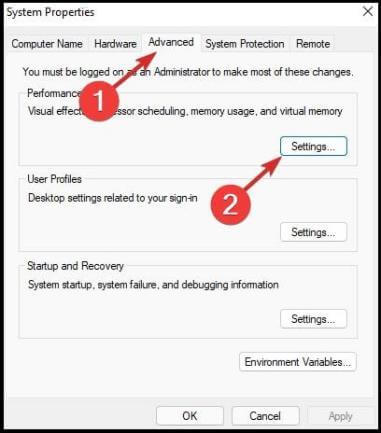
2. Click Advanced, and then select Performance Settings.
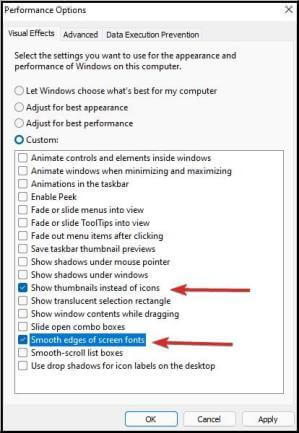
3. Check the Adjust for best performance option.
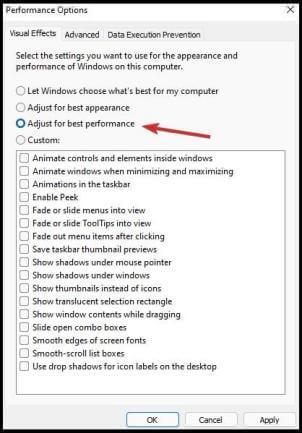
4. From the Custom Display list, check the following options: Show Thumbnails instead of Icons and Smooth Edges for Screen Fonts. Then select "Apply" and "OK".
Method 2. Disable Auto-start Programs
Some unnecessary programs will start automatically when you start, and they will always run in the background. In this case, they will consume storage and memory. You can prevent startup programs from starting automatically at boot by disabling them.
1. Right-click the search icon on the desktop and select Task Manager.

2. Click the Startup tab.
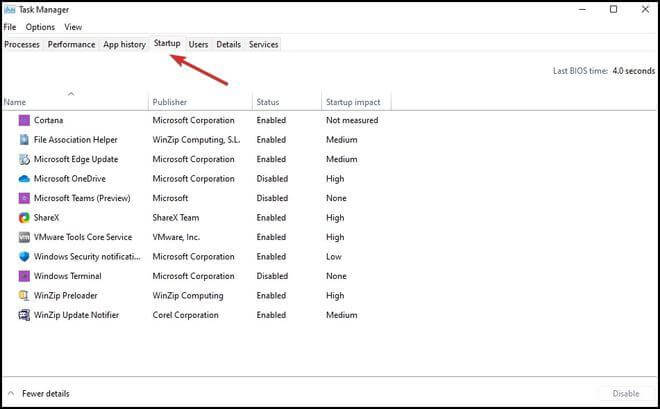
3. Right-click any program you don't want to load at startup, and select Disable.
Method 3. Open Storage Sense
Windows 11 still has the Windows 10 Storage Sense feature. Its primary function is to manage your computer's storage and free up space by deleting temporary system files, items in the Recycle Bin, etc., when needed, to improve Windows 11 performance.
1. Click the search icon on the desktop and select Settings.
2. Click "Storage" and then "Storage Sense."
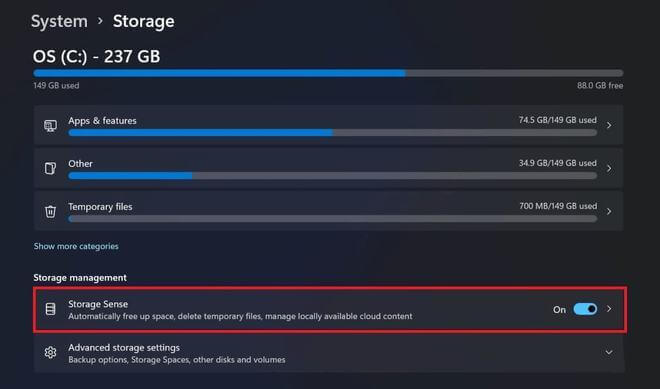
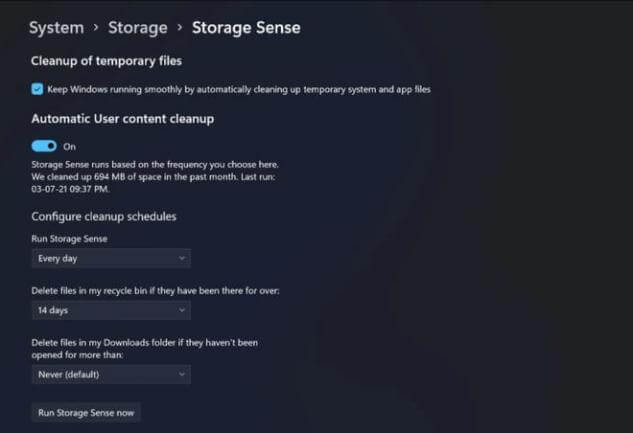
3.Turn on the "Storage Sense" function. Select the desired automatic cleaning schedule.
Method 4. Switch to A Performance Power Plan
A power plan mixes system and hardware settings that manage device power consumption. It is set to balanced mode. If you don't consider power life and want to maximize performance, you can set it to high-performance mode.
1. Open the menu and search for "Power Plan."
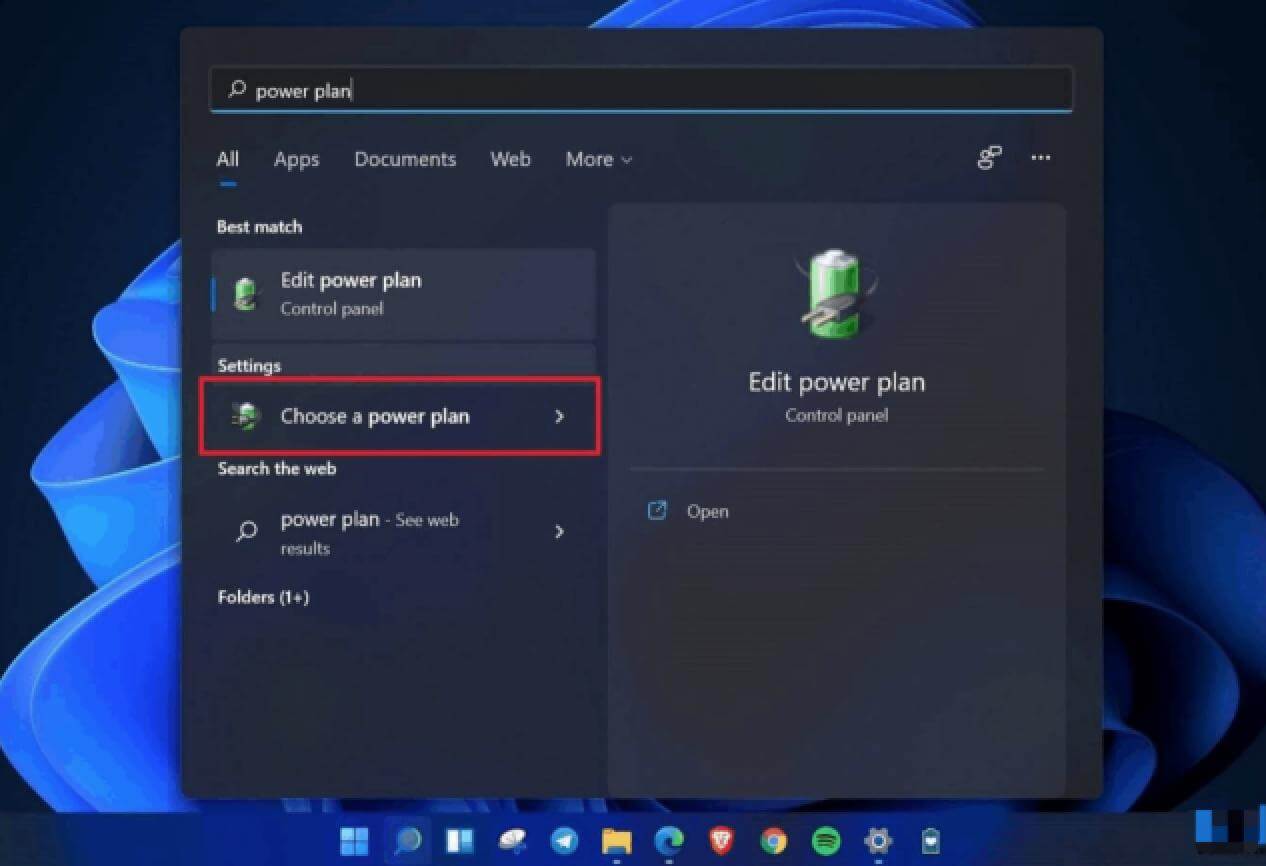
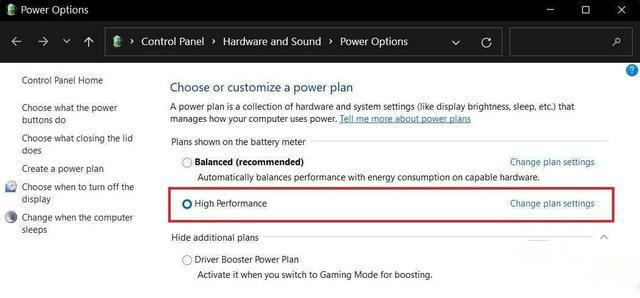
2. Find the high performance plan and choose it, you also choose the Driver Booster Power Plan for gaming.
Tip: If you can't find high performance? Select Create Power Plan in the sidebar, select High Performance, and follow the on-screen instructions to add it manually.
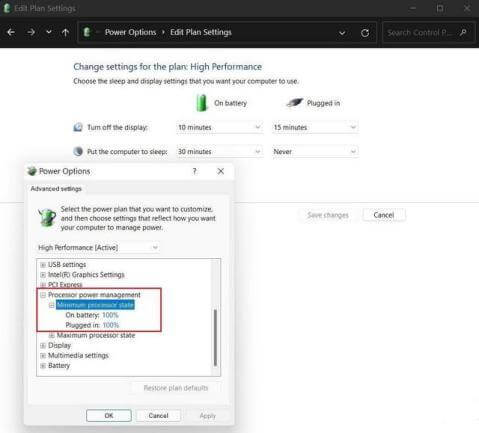
Now, click Change plan settings > Change advanced power settings. Go to Processor Power Management and make sure the min and max processor states are at 100%.
Method 5. Turn Off Notifications
Constant notifications can bog down your computer. Fortunately, Windows 11 allows you to turn off notifications, just like previous versions.
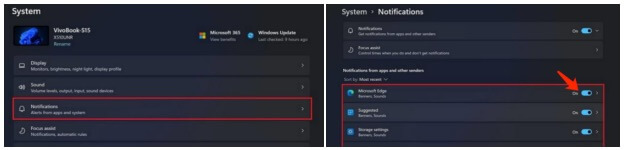
1. Open Settings on your computer.
2. On the System tab, select Notifications to view and disable notifications for unwanted apps.
Method 6: Turn off VBS (Virtualization-based Security)
Disable Virtualization Based Security (VBS) from Settings
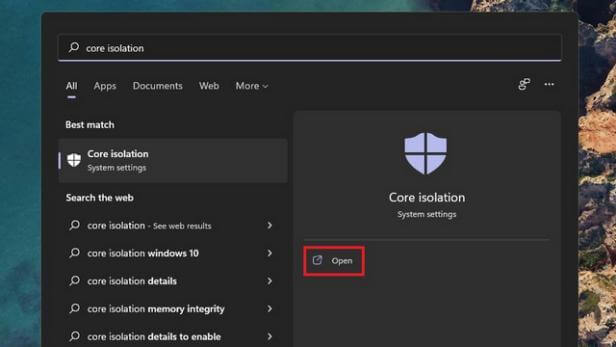
1. Press the Win key to open Windows Search, enter "core isolation", and click Open.
2. Check if the "Memory Integrity" toggle is enabled by default. If it is, all you have to do is turn off the "Memory Integrity" toggle to disable VBS on your Windows 11 PC.
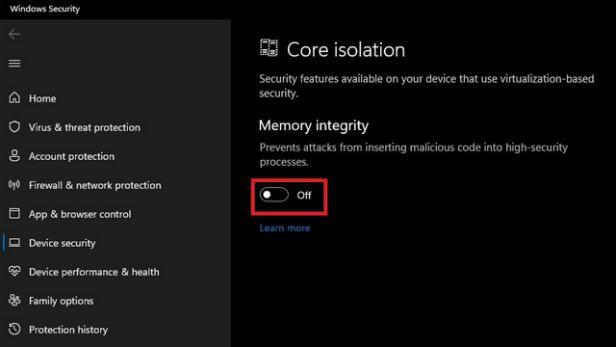
3. Windows Security will prompt you to restart your PC. Click Restart from the notification that appears now (if you haven't disabled all Windows 11 notifications).
Method 7. Upgrade the Hard Drive
The read and write speed of SSD is faster than that of HDD. So, when Windows 11 is running slow on HDD, you can try to install Windows 11 on SSD. This can significantly reduce startup times, file access times, and overall responsiveness. Increasing the memory capacity can also increase the speed of the computer.
Donemax disk cloning software can help you to move Windows 11 from the old drive to a new and fast SSD. Follow the guides below and transfer Windows os to the new hard drive.
Then you can run it to help you clone the data. If you want to clone an entire disk on Windows, follow these steps:
Step 1. Open DMclone on your Windows PC and select Disk Clone Mode - Disk Clone.
Step 2. Select the source and destination disks. DMclone clones the source disk to the target disk. Click Next.

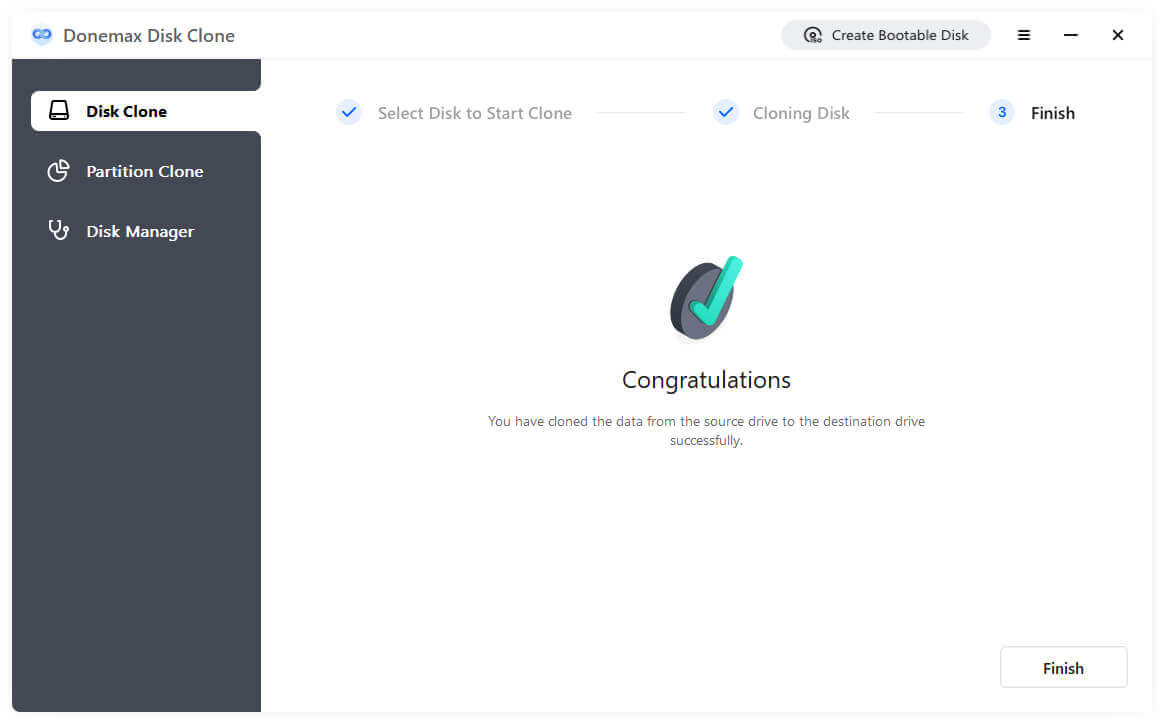
Step 3. You can edit the layout and click the clone button.

DMclone will quickly clone data from the source disk to the target disk.
DMclone
Hot Articles
- How to Enable Secure Boot for Windows 11(Complete Guide)
- How to Install Windows 11 from USB
- How to Improve Windows 11 Performance?
- How to Remove Password in Windows 11
- The Difference between Windows 11 and Windows 10| Windows 11 VS Windows 10
- Should You Upgrade to Windows 11? What Benefits of Windows 11?
- TPM for Windows 11 Update | Windows 11 Download Without TPM 2.0
- Windows 11 Home VS Professional: The Differences and Similarities
- What to Do When Windows 11 Not Booting|Fixes to Get Your PC Running
- How to Enable TMP 2.0 for Windows 11 Upgrade